Are you struggling with a low vanity cabinet that makes your bathroom feel cramped or hard to use? Raising your vanity cabinet can change the whole look and feel of your space, making it more comfortable and stylish.
Imagine having extra storage, easier access, and a fresh, modern vibe—all by simply adjusting the height of your cabinet. You’ll discover easy, practical steps to raise your low vanity cabinet without the hassle or costly renovations. Keep reading to transform your bathroom and enjoy a more functional, beautiful space every day.
Tools And Materials Needed
Raising a low vanity cabinet needs the right tools and materials. Having these ready helps the task go smoothly. It also keeps the cabinet stable and level after the raise.
Gather all tools before starting. This saves time and avoids interruptions. Below are the essential tools and materials you will need.
Measuring Tape And Level
Measuring tape ensures exact height adjustments. Measure the cabinet and the desired height carefully. A level checks if the cabinet sits straight. This prevents uneven surfaces and future problems.
Shims And Wood Blocks
Shims fill small gaps between the cabinet and floor. They help balance and support the cabinet. Wood blocks provide extra height if needed. Both materials keep the cabinet steady and safe.
Screwdriver And Drill
A screwdriver tightens or loosens screws during the raise. A drill makes the work faster and easier. It also helps attach wood blocks securely under the cabinet. Both tools are important for a firm setup.
Safety Gear
Safety gear protects you during the work. Wear gloves to avoid splinters and cuts. Safety glasses protect eyes from dust and debris. Use knee pads if you work on the floor a lot.
Credit: thenester.com
Preparing The Area
Preparing the area is the first step in raising a low vanity cabinet. This step ensures a smooth and safe process. A clean and ready workspace helps avoid mistakes and accidents. Take time to set up everything before starting the work.
Clearing The Workspace
Remove all items around the vanity. Clear personal care products, towels, and mats. Make space to move freely and work comfortably. Protect the floor with a drop cloth or old towels. This prevents damage from tools or debris.
Removing The Old Vanity
Turn off the water supply to avoid leaks. Disconnect plumbing fixtures carefully. Unscrew the vanity from the wall. Lift the cabinet out slowly to prevent damage. Keep tools and screws in a safe place for reuse or disposal.
Inspecting The Floor And Walls
Check the floor for water damage or rot. Look for mold or soft spots near the vanity area. Examine the walls for holes or cracks. Repair any damage before installing the new vanity. A solid base keeps the cabinet stable and secure.
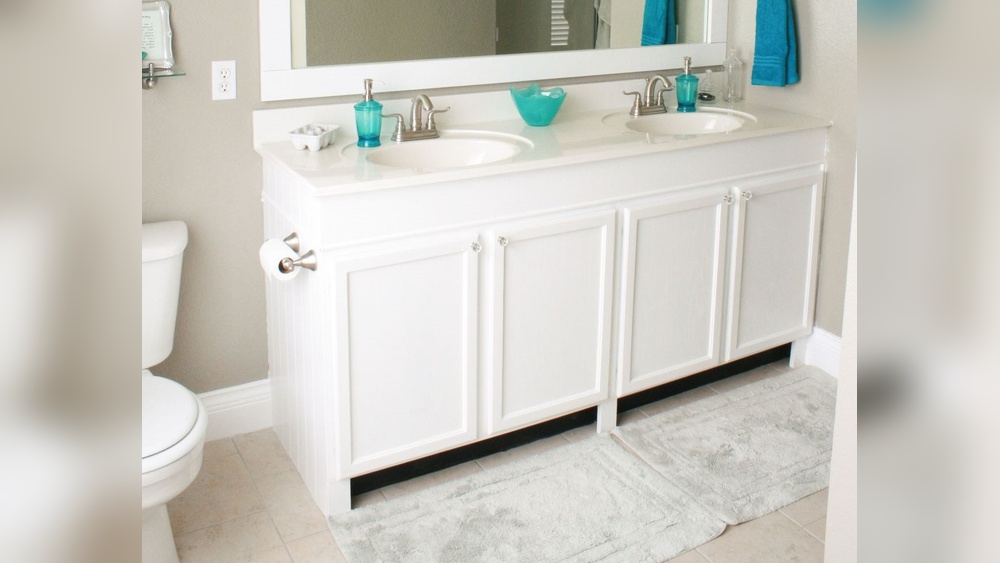
Measuring The Current Vanity Height
Measuring the current vanity height is the first step in raising a low vanity cabinet. This helps you understand the exact size you are working with. It also makes sure the new height fits your needs perfectly. Accurate measurements prevent mistakes and extra work later.
Checking The Existing Height
Start by using a tape measure. Measure from the floor to the top of the vanity surface. Take note of this number. Repeat the measurement a few times for accuracy. Check for any uneven floors that might affect the height. Write down the exact height in inches or centimeters.
Determining Desired Height
Think about how high you want the vanity to be. Consider your comfort and daily use. A standard vanity height is usually 32 to 36 inches. Taller people may want a higher surface. Mark your ideal height clearly. Compare it with the current height to know how much to raise the cabinet.

Credit: fixmycabinet.com
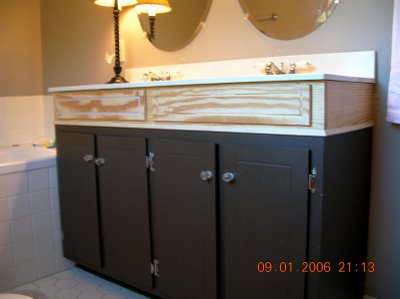
Raising The Vanity Cabinet
Raising a low vanity cabinet can improve both comfort and style in your bathroom. It makes washing hands and brushing teeth easier. This simple change also updates the look of your space. The process involves adjusting the cabinet height carefully. It requires the right tools and some patience. Follow these steps to raise your vanity cabinet safely and correctly.
Using Shims To Adjust Height
Shims are thin wedges used to raise or level furniture. Place shims under the cabinet base to lift it. Insert them evenly to avoid tilting. Use wood or plastic shims for better support. Push shims gently until the cabinet reaches the desired height. Trim any excess shim material for a clean look. Shims help fine-tune the height without major changes.
Securing The Cabinet In Place
After raising, the cabinet must stay firmly in place. Use screws or brackets to fix it to the wall. Check studs behind the wall for strong support. Attach the cabinet securely to avoid movement. Tighten all fasteners but avoid over-screwing. A stable cabinet prevents accidents and damage. Secure installation ensures long-lasting results.
Ensuring Level Alignment
Check the cabinet with a level tool. Place the level on top and sides of the cabinet. Adjust shims if the cabinet tilts or leans. Even alignment improves function and appearance. Double-check all sides before finalizing the installation. A level cabinet prevents water pooling and door issues. Accurate alignment helps keep the bathroom neat and safe.
Adjusting Plumbing Connections
Raising a low vanity cabinet requires careful attention to plumbing connections. The pipes and fittings must align with the new cabinet height. Adjusting these connections ensures water flows properly without leaks or damage. This process may involve measuring, cutting, and extending pipes.
Assessing Pipe Lengths
Start by checking the current pipe lengths under the vanity. Measure how much extra length you need for the raised cabinet. Some pipes may be too short and need extension. Note the type of pipes—PVC, copper, or PEX—to match materials later.
Extending Drain And Supply Lines
Use appropriate fittings and pipe sections to extend drain and supply lines. Cut pipes cleanly with a pipe cutter or saw. Attach new sections securely using glue for PVC or compression fittings for copper. Keep connections tight to avoid leaks.
Testing For Leaks
Turn on the water supply and check all new connections carefully. Look for any drips or moisture around joints. Tighten fittings if needed. Run water for a few minutes to confirm no leaks appear. Proper testing prevents water damage later.
Finishing Touches
Finishing touches make your raised vanity cabinet look complete and neat. These final steps add durability and style. Take time to do them carefully for the best results.
Installing The Countertop
Place the countertop carefully on the raised cabinet. Check that it fits well without gaps. Use strong adhesive to fix it in place. Press down evenly to avoid movement. Let the glue dry fully before use.
Sealing Gaps And Edges
Seal all gaps between the countertop and walls. Use waterproof caulk for a clean, sealed edge. Smooth the caulk line with a wet finger or tool. This step prevents water damage and mold growth. Wait for the sealant to dry before touching it.
Cleaning The Area
Remove dust and debris from the cabinet and floor. Use a damp cloth to wipe surfaces gently. Clean excess glue or caulk while still wet. A tidy space helps your bathroom feel fresh and ready.
Common Mistakes To Avoid
Raising a low vanity cabinet can improve bathroom comfort and style. Avoiding common mistakes helps ensure a smooth project. Small errors may cause big problems later. Pay attention to these key points for best results.
Ignoring Level Checks
Always check the cabinet level before and after raising it. An uneven cabinet leads to doors and drawers that don’t close properly. Use a spirit level or laser level for accuracy. Adjust as needed to keep the cabinet perfectly horizontal.
Overlooking Plumbing Adjustments
Raising the cabinet changes the sink height and plumbing connections. Forgetting to adjust pipes can cause leaks or blockages. Make sure water supply and drain lines are long enough and properly aligned. Call a plumber if unsure about the plumbing work.
Using Inadequate Support
New supports must hold the cabinet’s weight securely. Weak or unstable supports risk cabinet damage or injury. Use strong brackets or a sturdy frame to raise the cabinet. Check that all fasteners are tight and solid before finishing.
:strip_icc()/7005828_AA_2722_preview-32238b892c2b40c0be4ee99201c4ab72.jpg)
Credit: www.bhg.com
Frequently Asked Questions
How Do You Raise A Low Vanity Cabinet Safely?
Use sturdy wooden blocks or cabinet risers to raise the vanity. Secure them properly to avoid instability and ensure even height adjustment.
What Tools Are Needed To Raise A Vanity Cabinet?
You need a screwdriver, level, measuring tape, and wood shims or risers. These tools help adjust and secure the cabinet safely.
Can Raising A Vanity Cabinet Improve Bathroom Ergonomics?
Yes, raising the cabinet can reduce back strain and improve comfort. It adjusts the sink height for better posture during use.
How Much Should You Raise A Low Vanity Cabinet?
Raise the cabinet 3 to 6 inches for optimal comfort. Adjust height based on your and your family’s needs.
Conclusion
Raising a low vanity cabinet improves comfort and style. It makes daily tasks easier and reduces back strain. You can use simple tools and materials to lift it. Always measure carefully before making changes to avoid mistakes. A raised cabinet fits better with your bathroom layout.
Small changes create big improvements in your space. Take your time and enjoy the process. Your bathroom will look fresh and feel more functional. Try these tips to enhance your vanity today.