Looking for a simple way to organize your space while adding a touch of style? Making your own wall hanging coat rack is easier than you think.
Imagine having a unique, functional piece that keeps your coats, hats, and bags neatly in place. In this guide, you’ll discover step-by-step how to create a coat rack that fits perfectly in your home and matches your personal taste. Ready to transform your entryway with a project you’ll be proud of?
Let’s get started!
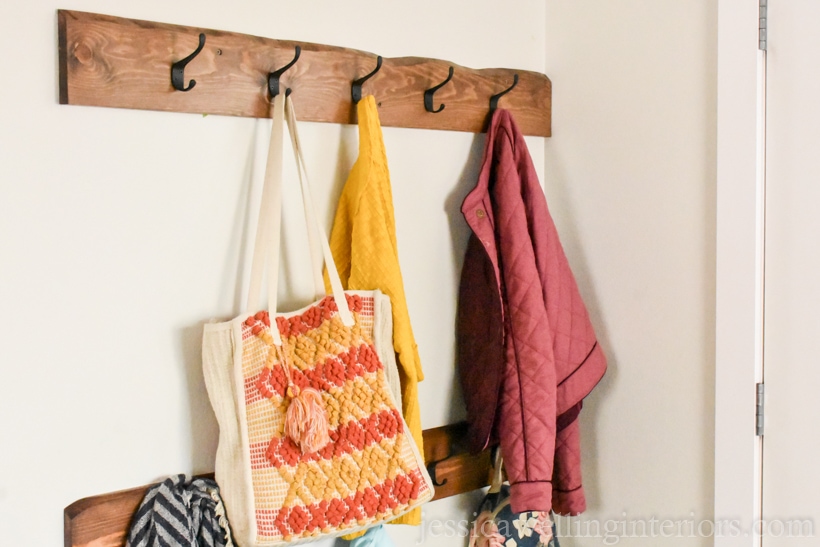
Credit: jessicawellinginteriors.com
Materials Needed
Gathering the right materials is the first step to making a wall hanging coat rack. Having quality supplies makes the project easier and the final product strong and beautiful. This section breaks down the materials into clear groups.
Wood Selection
Choose wood that is strong and looks good. Pine, oak, or cedar work well. Pine is soft and easy to cut. Oak is harder and lasts longer. Cedar resists moisture and smells nice. Pick a size that fits your space. A board about 24 inches long and 4 to 6 inches wide is common.
Hardware And Tools
You need hooks to hang coats. Metal hooks with screws work best. Pick five to seven hooks depending on space. Use screws that fit the hooks. Tools include a drill, screwdriver, measuring tape, and pencil. A saw is needed if you cut wood to size. Sandpaper smooths rough edges.
Finishing Supplies
Finish the wood for protection and style. Use wood stain or paint for color. Apply a clear sealant to protect from water and dirt. Brushes or rags help apply finishes evenly. Let each coat dry before adding another. This keeps the wood looking good for years.
Choosing The Design
Choosing the design for your wall hanging coat rack sets the tone for the whole project. It shapes how your rack will look and work in your space. Thoughtful design makes your rack both useful and stylish. Think about the style of your room and what fits best there. Consider how many coats or items you want to hang. Your design should balance beauty and function for daily use.
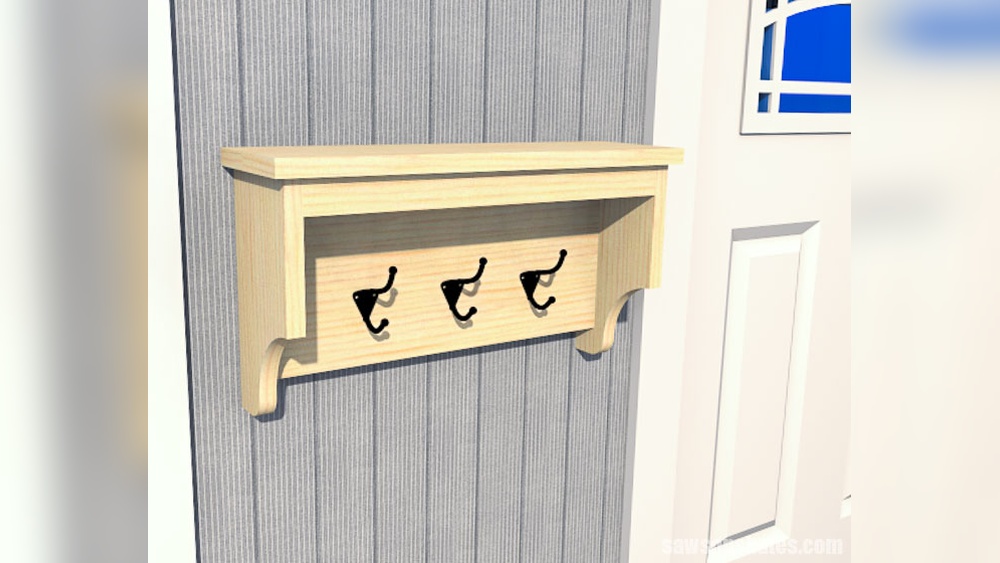
Simple Vs Decorative Styles
Simple designs focus on clean lines and basic shapes. They blend well with many room styles. Simple racks are easier to build and often cost less. Decorative styles add extra flair with patterns, colors, or carved details. These racks stand out and can become a room’s centerpiece. Choose simple if you want a classic look. Pick decorative for a unique and eye-catching rack.
Size And Hook Placement
Size matters for both space and storage needs. Measure your wall space before starting. Make sure the rack fits without crowding the room. Hook placement affects how many items you can hang. Space hooks evenly to avoid overcrowding. Place hooks at different heights for varied items. This makes your rack more versatile and easy to use.
Preparing The Wood
Preparing the wood is the first step to making a strong and attractive wall hanging coat rack. The wood must be ready to hold hooks and support weight. Good preparation also helps the finish look smooth and neat.
Start with clean, dry wood. This makes cutting and sanding easier. The right preparation saves time and effort in later steps.
Measuring And Cutting
Measure the wood to fit the space where the rack will hang. Use a tape measure to get exact numbers. Mark the wood with a pencil.
Cut the wood using a saw. A handsaw or power saw works well. Cut straight lines for a neat look. Check the size after cutting to confirm it matches your plan.
Sanding And Smoothing
Sand the wood to remove rough spots and splinters. Use medium-grit sandpaper first. Then switch to fine-grit for a smooth finish. Sand along the grain for best results.
Check the edges and corners. Make sure they are round and smooth. This step helps avoid scratches and gives a clean look. Wipe the wood with a damp cloth to remove dust before painting or staining.
Attaching The Hooks
Attaching the hooks is a key step in making a wall hanging coat rack. Hooks hold your coats and bags, so they must be placed carefully. Proper attachment ensures strength and durability. Follow simple steps to mark and secure the hooks correctly. This way, your coat rack will be both practical and sturdy.
Marking Hook Positions
Start by deciding how many hooks you want. Space them evenly along the wood board. Use a measuring tape to find equal distances. Mark each spot lightly with a pencil. Double-check the marks to keep hooks straight. This helps the rack look neat and balanced on your wall.
Securing Hooks Properly
Choose screws that fit your hooks well. Hold the hook at the marked spot. Use a drill or screwdriver to attach the hook tightly. Make sure the screws go deep into the wood. This prevents the hooks from coming loose. Test each hook by gently pulling it before hanging anything.
Applying Finish
Applying finish is an important step in making a wall hanging coat rack. It protects the wood and enhances its look. A good finish can make your rack last longer and look great in your home.
Staining Or Painting
Staining adds color while showing the wood grain. Choose a stain that fits your room style. Apply with a brush or cloth in smooth strokes. Let the stain dry fully before the next step.
Painting covers the wood completely. Pick a paint color that matches your decor. Use a brush or roller for even coats. Allow the paint to dry well before sealing.
Sealing For Durability
Sealing locks in the stain or paint and protects the wood. Use a clear sealer like polyurethane or varnish. Apply thin layers with a clean brush. Let each layer dry before adding another.
Sealing helps prevent scratches and water damage. It keeps the coat rack looking new for years. Take your time and seal carefully for best results.
Mounting The Rack
Mounting the wall hanging coat rack properly ensures it stays secure and looks great. This step requires attention to detail and the right tools. A well-mounted rack can hold coats, bags, and hats without wobbling or falling. Follow these simple steps to mount your rack safely and level on the wall.
Choosing Wall Anchors
Pick wall anchors based on your wall type. Drywall needs plastic or metal anchors for strong support. Use toggle bolts for heavier racks or load. Brick or concrete walls require masonry anchors or screws. Always match anchor size to screw size. This prevents the rack from loosening or pulling out.
Leveling And Installing
Mark the rack position on the wall first. Use a level tool to ensure it is straight. Mark the screw holes clearly. Drill pilot holes for the anchors at the marks. Insert anchors firmly into the holes. Align the rack with the anchors and screw it in. Tighten screws until the rack is snug and stable. Double-check with the level tool after installation.
Creative Variations
Creative variations make your wall hanging coat rack more useful and unique. You can change the design to fit your space and style. Small tweaks can add more storage or make the rack stand out. Here are some ideas to inspire you.
Adding Shelves Or Baskets
Adding shelves to your coat rack gives you extra space for hats and gloves. Shelves can hold keys, mail, or small bags too. Baskets add a cozy look and keep things tidy. Attach baskets below the hooks for shoes or scarves. Use wood or metal shelves for a sturdy feel. This simple change turns a basic rack into a full organizer.
Using Recycled Materials
Using recycled materials saves money and helps the environment. Old wood, pallets, or even branches work well for coat racks. Paint or stain recycled wood to match your room. Metal pipes or hooks from old furniture add character. Recycled materials create a unique and personal piece. Your rack tells a story and adds charm to your wall.

Credit: www.amazon.com
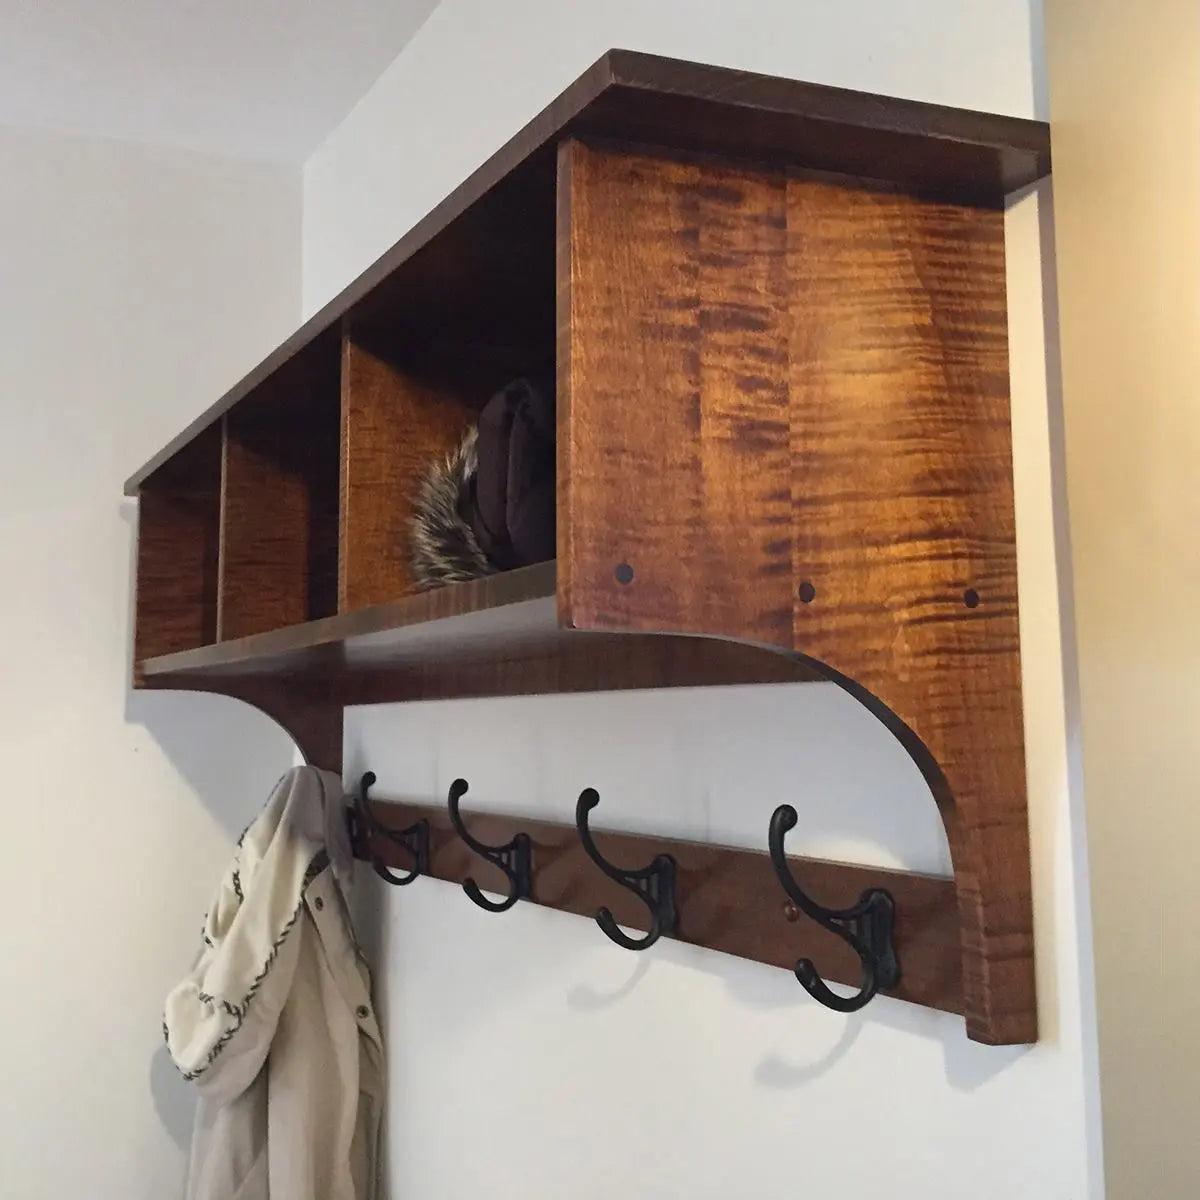
Credit: rusticreddoor.com
Frequently Asked Questions
What Materials Are Needed For A Wall Hanging Coat Rack?
You need wood planks, hooks, screws, anchors, a drill, a measuring tape, and paint or stain. These materials are easy to find and affordable. Choose hooks based on your style and coat weight. Proper tools ensure a sturdy rack.
How Do I Mount A Wall Hanging Coat Rack Securely?
Locate wall studs using a stud finder for strong support. Use screws and anchors suitable for your wall type. Drill pilot holes to prevent wood splitting. Ensure the rack is level before tightening all screws.
Can I Customize The Design Of My Coat Rack?
Yes, you can customize by choosing different wood types, colors, and hook styles. Add decorative elements like stencils or carvings. Customize size to fit your space. Personalization makes your rack unique and matches your decor.
How Much Time Does It Take To Make A Coat Rack?
Typically, it takes 1 to 3 hours depending on design complexity. Simple racks take less time; intricate designs need more. Allow extra time for drying paint or stain. Planning and preparation speed up the process.
Conclusion
Making a wall hanging coat rack is a simple and fun project. It saves space and keeps your home neat. You only need a few tools and materials to start. Personalize it to match your style and needs. Hang your coats, hats, and bags with ease.
This DIY project adds charm and function to any room. Try it today and enjoy a tidy, organized space. Small efforts bring big changes. Why wait?

