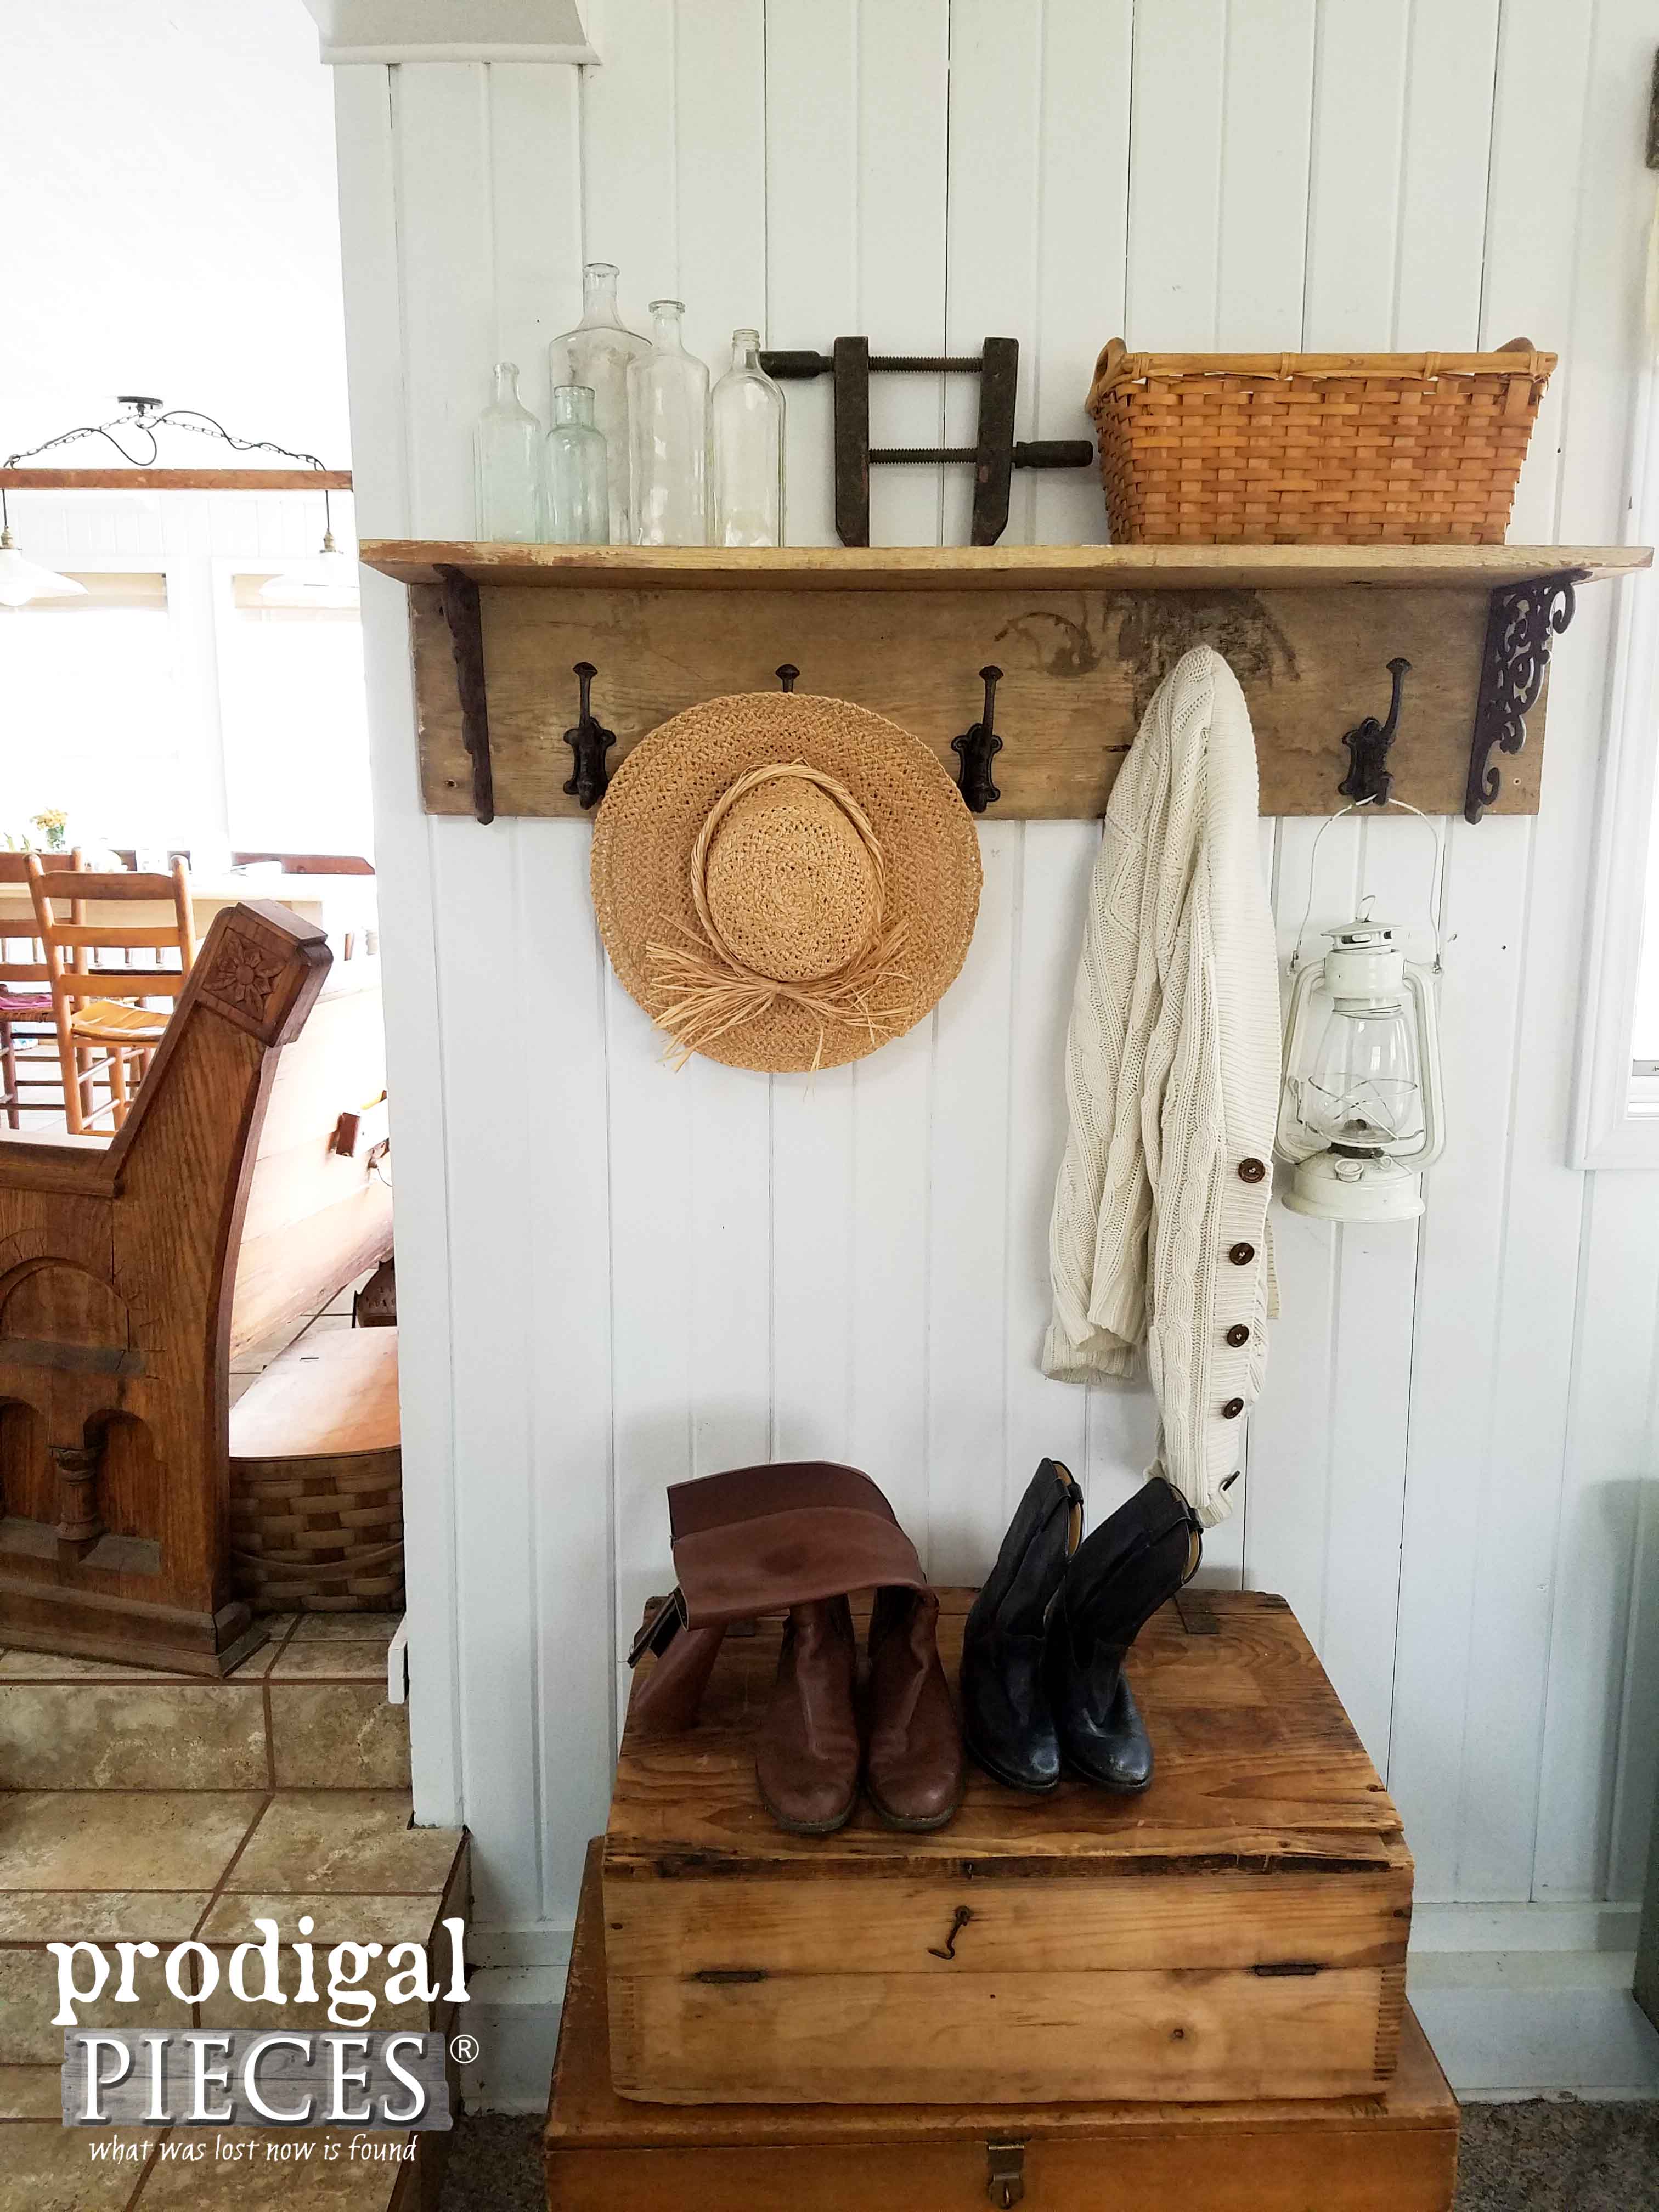
Are you tired of cluttered entryways and searching for a stylish yet practical solution? A country coat rack could be just what your home needs.
Imagine a piece that not only keeps your coats, hats, and scarves organized but also adds a warm, rustic charm to your space. In this guide, you’ll discover simple steps to create your own country coat rack, even if you’re new to DIY projects.
By the end, you’ll have a unique, handcrafted addition that welcomes you and your guests every time you walk through the door. Ready to transform your home with a touch of country style? Let’s get started!

Credit: www.amazon.com
Materials Needed
Gathering the right materials is the first step to making a country coat rack. Good materials ensure the rack looks great and lasts long. This section covers the wood, tools, hardware, and finishing supplies you need.
Wood Selection
Choose wood that fits the country style. Pine and oak are popular choices. Pine is soft and easy to work with. Oak is strong and has a nice grain. Pick wood that is smooth and free of large knots. This makes the rack sturdy and neat.
Hardware And Tools
You need hooks to hang coats. Metal hooks with a rustic look match the country style well. Use screws to attach hooks and wood pieces. A drill, screwdriver, and saw are essential tools. Sandpaper helps smooth edges and surfaces. A measuring tape and pencil make marking easy.
Finishing Supplies
Finish the wood to protect it and show its natural beauty. Use wood stain or paint in soft, warm colors. A clear sealant adds shine and shields from wear. Brushes or rags help apply finishes evenly. Let each coat dry well before adding another.
Credit: theiideacompany.com
Choosing The Right Wood
Choosing the right wood is key to making a country coat rack. Wood sets the style and strength of your project. It also affects the final look and feel. Rustic wood adds charm and warmth. The right size and thickness ensure your rack holds coats well. Think about the wood’s texture and color too. These details make your rack stand out.
Types Of Wood For Rustic Look
Rustic wood has a natural, rough look. Pine is soft and easy to work with. It has light color and visible knots. Cedar resists moisture and smells nice. It has a reddish tone that fits country style. Oak is harder and lasts long. It has a strong grain pattern. Reclaimed wood offers an old, weathered appearance. It adds history and character to your rack.
Wood Size And Thickness
Choose wood thick enough to hold weight. A thickness of 1 to 1.5 inches works well. Width depends on your design and space. Wider boards create a solid look. Narrower boards feel lighter and less bulky. Make sure the wood pieces fit together tightly. Proper size keeps your coat rack steady and safe.
Cutting And Preparing Wood
Cutting and preparing wood is an important step in making a country coat rack. It shapes the wood pieces to fit your design. Proper preparation ensures the rack looks good and lasts long. Careful measuring, cutting, and smoothing make the wood ready for assembly.
Measuring And Marking
Start by measuring the wood pieces with a tape measure. Mark each piece clearly using a pencil. Double-check the measurements to avoid mistakes. Mark straight lines to guide your cuts. Accurate marking saves time and wood.
Cutting Techniques
Use a handsaw or power saw to cut the wood. Follow the pencil lines carefully. Cut slowly to keep the edges clean. Support the wood firmly to avoid splintering. Make straight cuts for a neat finish.
Sanding And Smoothing
Sand the cut edges with medium-grit sandpaper. Remove rough spots and splinters. Use fine-grit sandpaper for a smooth surface. Sand along the wood grain for best results. Smooth wood looks better and feels safer to touch.

Credit: www.ebay.com
Assembling The Coat Rack
Assembling the coat rack is the step where your project starts to take shape. This part requires attention to detail and patience. Each piece must fit perfectly to create a sturdy and attractive rack. Follow the steps carefully to build a country-style coat rack that lasts.
Arranging The Pieces
Begin by laying out all wooden parts on a flat surface. Arrange the base, vertical supports, and horizontal bars in their correct order. Check the alignment of each piece before joining. Make sure the wood grain faces the right direction for a natural look. This step ensures easy assembly later.
Attaching Hooks
Select hooks that match your country style. Mark hook positions evenly along the horizontal bar. Use a pencil to make small guide marks. Screw each hook into place with a screwdriver. Tighten screws firmly but avoid splitting the wood. Hooks should hold coats firmly without wobbling.
Securing The Structure
Join the vertical supports to the base using wood screws. Drill pilot holes to prevent wood from cracking. Attach the horizontal bar at the top securely. Use clamps to hold pieces while fastening. Check the rack’s stability by gently shaking it. Add extra screws if needed for strength.
Adding Rustic Finishes
Adding rustic finishes brings charm and warmth to your country coat rack. These finishes make the wood look natural and cozy. They help the rack blend well with farmhouse or country-style homes. Using simple techniques, you can create a worn and aged look. This adds character without needing expensive tools.
Staining And Painting
Choose stains that highlight the wood grain. Dark stains like walnut or chestnut give a rich, classic look. Use a brush or cloth to apply the stain evenly. Let the stain soak in for a few minutes. Wipe off any extra with a clean cloth for a smooth finish.
For paint, select soft colors like cream, light gray, or sage green. These colors fit the country style well. Apply paint in thin layers to avoid drips. Use a dry brush technique for a subtle, rustic look.
Distressing Techniques
Distressing makes the rack look old and used. Start by lightly sanding edges and corners with fine-grit sandpaper. You can also use a hammer or chain to create small dents. Scrape some paint off with a flat tool for a worn effect. Focus on areas that would naturally get more wear.
Keep the distressing random. Avoid overdoing it to maintain a natural appearance. This technique adds personality and a sense of history to your coat rack.
Sealing For Durability
Seal your finished coat rack to protect it. Use a clear matte or satin polyurethane for a soft finish. Apply thin coats with a brush and let each dry fully. Sand lightly between coats for a smooth surface.
Sealing guards against scratches, dirt, and moisture. It keeps your rustic finish looking fresh for years. A well-sealed rack is both beautiful and long-lasting.
Mounting The Coat Rack
Mounting the coat rack is an important step in your project. It makes your country coat rack functional and sturdy. Proper mounting ensures the rack holds coats and bags without falling.
Take time to mount it correctly. The right spot and method keep your rack safe and useful for years.
Choosing The Location
Pick a place near your door or hallway. It should be easy to reach when you enter. Look for a wall space free of switches or outlets. Measure the area to fit your coat rack size. Choose a height that is easy for all family members to use.
Wall Mounting Tips
Use a stud finder to locate strong wall studs. Mount the rack on studs to hold heavy coats. If no studs are available, use wall anchors for support. Mark the screw spots carefully before drilling. Drill pilot holes to avoid splitting the wood. Tighten screws firmly but do not over-tighten. Check the rack’s stability before hanging anything.
Safety Considerations
Ensure screws and anchors fit your wall type. Avoid mounting on weak drywall without anchors. Keep the rack away from sharp corners or edges. Make sure it is secure to prevent accidents. Check regularly for loose screws or damage. Repair or remount if the rack feels wobbly. Safety is key for a functional coat rack.
Creative Customizations
Creative customizations make your country coat rack unique and useful. They help the rack reflect your style and needs. Small changes can turn a simple rack into a special piece. These ideas fit well in homes with a country or rustic theme. Try these easy ways to add personality and function.
Personalizing With Decorations
Decorations add charm to your coat rack. Paint it in soft, warm colors for a cozy look. Use stencils to add patterns or shapes. Attach small wooden signs with family names or welcome messages. Hang small wreaths or dried flowers on the hooks. These touches make the rack feel like part of your home.
Incorporating Additional Storage
Add shelves above or below the hooks for extra space. Use baskets on the shelves to keep hats and gloves neat. Install small drawers for keys and small items. Hooks can hold bags or scarves too. This makes your coat rack more than a place for coats. It becomes a helpful organizer for daily items.
Seasonal Themes
Change your coat rack’s look with the seasons. Use light colors and seashell decorations in summer. Add pine cones and berries for a winter touch. Use autumn leaves or small pumpkins in fall. Spring can have fresh flowers or pastel ribbons. These changes keep your home feeling fresh and festive all year.
Frequently Asked Questions
What Materials Are Needed For A Country Coat Rack?
You need wood planks, hooks, screws, sandpaper, and wood stain. Choose sturdy, rustic wood for an authentic country look. Hooks should be strong enough to hold heavy coats.
How Do I Assemble A Country Coat Rack?
Start by sanding the wood for smoothness. Attach hooks evenly along the plank. Secure the plank to a wall or stand. Finish with wood stain for durability and style.
Can I Customize The Coat Rack Design?
Yes, customize with paint, wood type, and hook styles. Add decorative elements like carvings or stencils for a personal touch. Tailor size and number of hooks to your needs.
How Do I Maintain A Country Coat Rack?
Wipe it regularly with a dry cloth to remove dust. Reapply wood stain or varnish annually to protect the wood. Tighten hooks if they become loose over time.
Conclusion
Building a country coat rack is simple and fun. Choose wood that feels strong and looks nice. Measure and cut carefully for a perfect fit. Use nails or screws to hold parts together. Paint or stain the rack to match your style.
This project adds charm to any home space. Enjoy hanging coats, hats, or bags neatly. Try making one yourself and see the difference. A handmade rack brings warmth and order to your entryway. Give it a try—you’ll feel proud of your work.