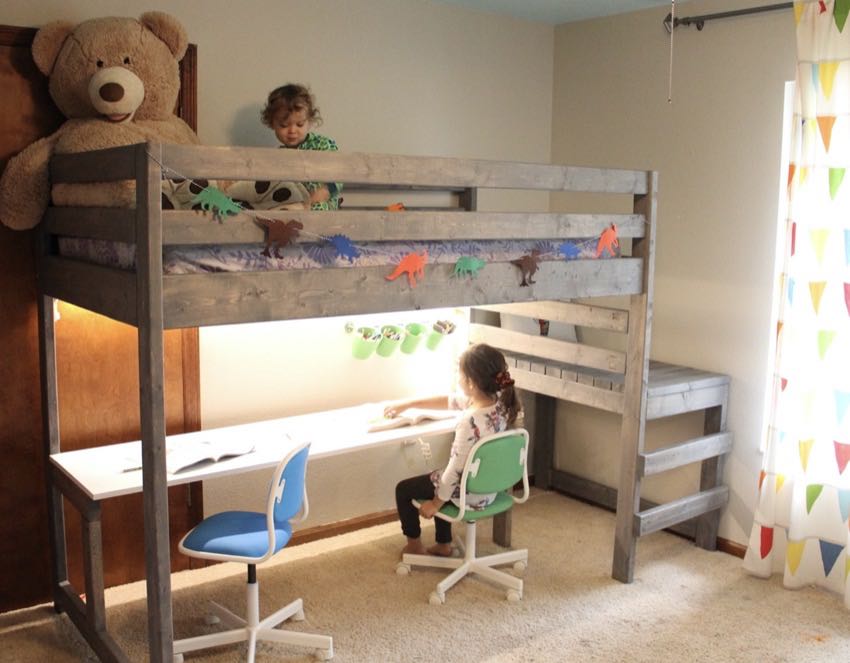
Are you looking for a smart way to save space and create a stylish, functional bedroom? Building a bunk bed with a desk underneath could be the perfect solution.
Imagine having a cozy sleeping spot above and a dedicated workspace right below—ideal for studying, working, or hobbies. In this guide, you’ll learn simple, step-by-step instructions to build your own bunk bed with a desk. Whether you’re short on room or want to make the most of your space, this project will help you create a practical and cool setup that fits your needs perfectly.
Ready to transform your room? Let’s dive in!

Credit: astinsdesigns.com
Choosing The Right Materials
Choosing the right materials is key to building a strong bunk bed with a desk underneath. The materials affect safety, durability, and look of the final product. Picking good wood, tools, and hardware helps you create a sturdy and lasting piece. This guide breaks down what you need to know about materials before starting your project.
Types Of Wood
Wood choice matters for strength and style. Pine is a softwood that is easy to cut and affordable. It works well for beginners. Oak and maple are hardwoods. They are stronger but cost more and need better tools. Plywood is another option for desk surfaces. It is stable and smooth but less strong for bed frames. Choose wood that fits your budget and skill level.
Essential Tools
Having the right tools makes building easier and safer. A saw is needed to cut wood to size. A drill helps make holes and drive screws quickly. Sandpaper or a sander smooths rough edges. A tape measure and pencil are important for accurate marks. Clamps keep pieces steady while you work. Collect tools before starting to save time.
Hardware And Fasteners
Strong hardware holds your bunk bed and desk firmly. Use wood screws instead of nails for better grip. Corner brackets add extra support to joints. Lag bolts are good for heavy parts like bed posts. Make sure screws and bolts are the right length to avoid splitting wood. Choose hardware with a rust-resistant finish for long life.
Planning Your Design
Planning your design is the first step in building a bunk bed with a desk underneath. It helps you organize the space well. Careful planning avoids mistakes and saves time. This section covers important points for a smart design. Follow these tips to create a functional and safe bunk bed with a desk.
Measuring Space
Start by measuring the room where you want the bunk bed. Measure the length, width, and height of the area. Check for doors, windows, and other obstacles. Note the available floor space for the desk. Allow space for a chair and movement around the bed. Accurate measurements prevent fitting problems later.
Designing The Desk Area
Decide the size of the desk under the bunk bed. Choose a desk height that suits comfort and use. Plan for storage like drawers or shelves if needed. Consider lighting for the desk area. Make sure the desk does not block access to the bed. A well-designed desk boosts study and work efficiency.
Safety Considerations
Safety is key in bunk bed design. Ensure the bed has strong guardrails on all sides. Check that the ladder is sturdy and easy to climb. Use smooth materials to avoid splinters and injuries. Leave enough headroom between the bed and desk. Secure all parts firmly to prevent wobbling or collapse.
Cutting And Preparing Wood
Cutting and preparing wood is a key step in building a bunk bed with a desk underneath. It shapes the wood pieces to fit perfectly. Proper cutting ensures safety and stability. Taking time now saves problems later. Let’s explore how to measure, cut, and finish the wood.
Measuring And Marking
Measure each wood piece carefully. Use a tape measure for accuracy. Mark the wood with a pencil. Draw clear lines where cuts will go. Double-check all measurements. Precise marking avoids mistakes. Mark both sides of the wood for even cuts.
Cutting Techniques
Choose the right saw for your cuts. A circular saw works well for straight lines. Use a jigsaw for curved or angled cuts. Cut slowly and steadily. Follow your pencil lines closely. Keep your hands safe and away from the blade. Use clamps to hold wood steady.
Sanding And Finishing
Sand all cut edges smooth. Use medium-grit sandpaper first. Then, switch to fine-grit for a soft finish. Sanding removes splinters and sharp edges. Clean dust from the wood before finishing. Apply a wood finish or paint to protect it. Let each coat dry fully before the next.
Building The Bed Frame
Building the bed frame is the first step in creating a bunk bed with a desk underneath. This part provides the base for the entire structure. A strong and stable frame keeps the bed safe and long-lasting. Follow each step carefully to make sure the frame fits well and holds weight properly.
Constructing Side Rails
Start by cutting the side rails to the right length. These rails form the sides of the bed frame. Use sturdy wood like pine or oak for strength. Attach the rails to the headboard and footboard with screws or bolts. Make sure the rails are level and straight. This ensures the mattress will sit evenly.
Assembling Bed Slats
Bed slats support the mattress and add stability. Cut slats to fit between the side rails. Space them evenly, about 2 to 3 inches apart. Secure each slat with screws to prevent movement. Proper slats help the mattress last longer and keep sleepers comfortable. Check that all slats are firmly attached before moving on.
Installing Support Beams
Support beams give extra strength to the bed frame. Place them under the bed slats along the center. Use thick wood beams for better support. Attach the beams securely to the side rails. This step prevents the bed from sagging over time. Double-check all connections to ensure the frame is solid and safe.
Creating The Desk Space
Creating the desk space under a bunk bed makes the room more useful. It offers a cozy place to study or work without needing extra furniture. Planning this area carefully ensures it fits well and stays sturdy.
Focus on building a solid desk surface first. Then add shelves for extra storage. Finally, secure the desk to the bunk bed frame for safety.
Building The Desk Surface
Choose a strong wood board for the desk surface. The size depends on the space under the bed and your needs. Sand the edges smooth to avoid splinters. Paint or stain the wood for a clean finish. Make sure the surface is flat and steady.
Adding Shelves And Storage
Use small shelves or cubbies to keep books and supplies. Attach shelves to the side walls or under the desk. Keep the storage within easy reach. Use simple brackets or wooden supports for shelves. Shelves help keep the desk tidy and organized.
Attaching Desk To Frame
Secure the desk surface to the bunk bed frame firmly. Use metal brackets or screws for strong support. Check that the desk does not wobble or shift. Attach shelves carefully to avoid damage. A well-attached desk stays safe and lasts longer.

Credit: www.youtube.com
Assembling And Securing
Assembling and securing your bunk bed with a desk underneath is a critical step. It ensures the bed is stable and safe to use. Careful assembly helps avoid accidents and keeps the furniture sturdy for years. Follow each step closely for the best results.
Joining Bed And Desk Components
Start by aligning the bed frame parts with the desk pieces. Use screws and bolts provided in the kit to join them firmly. Tighten each connection but avoid over-tightening, which can damage the wood. Check that the desk fits snugly under the bed without gaps. Make sure all parts sit flat and even before moving on.
Stabilizing The Structure
Add support brackets between the bed and desk for extra strength. Secure them with screws to prevent wobbling. Use corner braces on each joint to keep the frame rigid. If possible, attach the frame to the wall using anchors. This adds safety and reduces movement during use.
Final Safety Checks
Inspect all screws and bolts to ensure they are tight. Test the bed by applying gentle pressure to different areas. Check that the desk does not shift or tilt. Look for rough edges or splinters and sand them smooth. Confirm the ladder is firmly attached and safe to climb.
Finishing Touches
Finishing touches bring your bunk bed with desk to life. These small steps improve both look and function. They make the furniture feel complete and personal. Pay close attention to details for the best results.
Painting And Staining
Choose paint or stain that matches the room’s style. Use light colors to make the space feel larger. Dark colors add warmth and coziness. Apply two coats for a smooth finish. Let each coat dry fully before applying the next. Use non-toxic paints to keep the area safe for children.
Adding Accessories
Add shelves or hooks to keep the desk tidy. Use a small lamp for focused lighting. Add a comfortable chair that fits the desk height. Place a rug under the desk area for comfort. Use storage boxes or baskets to organize books and toys. Personal items make the space feel inviting.
Maintenance Tips
Check screws and bolts regularly for safety. Clean the surfaces with a soft cloth and mild soap. Avoid using harsh chemicals that damage paint or wood. Tighten loose parts to keep the bed sturdy. Repair scratches or dents quickly to prevent damage. Keep the desk clutter-free to extend its life.
Credit: www.protoolreviews.com
Frequently Asked Questions
How Much Space Is Needed For A Bunk Bed With Desk?
You need at least 7 feet in height and 6 feet in length. Allow extra room for desk chair movement. Measure your room carefully before building to ensure a comfortable fit.
What Materials Are Best For Building A Bunk Bed Desk?
Use solid wood like pine or oak for durability and stability. Plywood works well for desk surfaces. Choose quality screws and brackets for strong joints.
How Do I Ensure Safety In My Bunk Bed Design?
Install guardrails on the top bunk to prevent falls. Use sturdy ladders securely fixed to the frame. Check all joints regularly for tightness and stability.
Can I Customize Desk Size Under The Bunk Bed?
Yes, customize desk width and depth based on room space and needs. Measure carefully and plan for comfortable legroom and chair clearance.
Conclusion
Building a bunk bed with a desk underneath saves space and adds function. Careful planning makes the project easier and safer. Using the right tools helps you work faster and better. Taking your time avoids mistakes and keeps the bed strong.
You can create a cozy spot for sleep and study. This project fits well in small rooms or shared spaces. Try to enjoy the process and learn new skills. A bunk bed with a desk brings comfort and style together.
Start today and make your room more useful.
