Are you ready to give your bookshelf a professional, polished look? Attaching a face frame might seem tricky, but with the right steps, you can do it yourself and transform your furniture.
In this guide, you’ll discover simple, clear instructions to help you attach a face frame securely and neatly. Whether you’re a beginner or just need a quick refresher, you’ll find tips that save time and avoid common mistakes. Keep reading, and you’ll soon see how easy it is to upgrade your bookshelf’s style and strength.

Credit: www.reddit.com
Tools And Materials Needed
Preparing the bookshelf is a key step before attaching the face frame. It helps to ensure a strong bond and a clean finish. Taking time to prepare saves effort later and improves the overall look.
Measuring And Marking
Start by measuring the bookshelf edges carefully. Use a tape measure and mark the exact spots for the face frame. Make clear, straight lines with a pencil. Double-check your measurements to avoid mistakes. Accurate marks guide proper placement and alignment.
Sanding And Cleaning Surfaces
Sand the edges where the face frame will attach. Use fine-grit sandpaper to smooth the surface. Remove any rough spots or old paint. Clean the dust with a soft cloth. A clean, smooth surface helps glue and nails hold better.
Preparing The Bookshelf
Cutting the face frame pieces is a crucial step in attaching a face frame to a bookshelf. Accurate cuts ensure the frame fits perfectly and looks professional. Take your time measuring and cutting to avoid mistakes. Precision here saves effort later.
Measuring For Accurate Cuts
Start by measuring the bookshelf opening carefully. Measure the height and width twice to confirm. Mark the wood pieces clearly with a pencil. Use a square tool to draw straight cut lines. Correct measurements prevent gaps and uneven edges.
Using A Miter Saw For Precision
A miter saw helps make clean, straight cuts. Set the saw to the right angle before cutting. Hold the wood firmly against the saw fence. Cut slowly and steadily to avoid splintering. Sharp blades improve cut quality and safety.
Cutting The Face Frame Pieces
Assembling the face frame is a key step in attaching it to your bookshelf. This process ensures the frame fits well and holds firmly. Take your time to get a clean, tight assembly. A strong frame improves the bookshelf’s look and durability.
Start by arranging the pieces carefully. Check the corners and edges. Make sure everything lines up before moving on.
Dry Fitting The Frame
Dry fitting means placing the frame parts together without glue. This step lets you see if all pieces fit correctly. Align the corners and check for gaps. Adjust the pieces if needed. A perfect dry fit saves trouble later.
Applying Wood Glue
Apply wood glue evenly on the edges that join. Use a small brush or stick for even spread. Avoid too much glue to prevent mess. Glue helps hold the frame parts tightly together. Spread it on both surfaces for strong bonding.
Using Clamps For Stability
Use clamps to hold the frame while the glue dries. Clamps keep parts from moving and keep pressure on joints. Place clamps evenly around the frame. Tighten them just enough to hold firmly. Leave the clamps on until glue is fully dry.
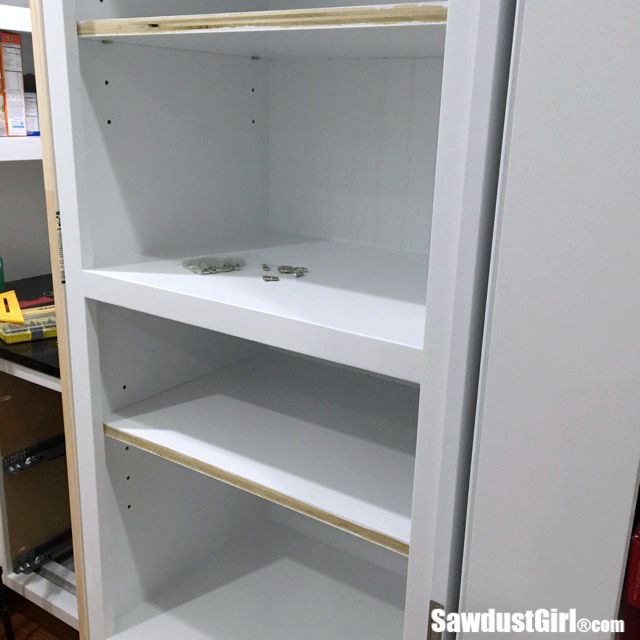
Credit: sawdustgirl.com
Assembling The Face Frame
Attaching the face frame to the bookshelf is an important step. It gives the bookshelf a clean, finished look and adds strength. Taking care during this process ensures the frame sits flush and stays secure for years.
Start by preparing the frame and bookshelf. Make sure both are clean and dry. A well-attached frame improves the shelf’s durability and appearance.
Aligning The Frame Properly
Place the frame against the bookshelf edges. Check that the corners meet evenly. Use clamps to hold the frame steady. The frame should sit flush without gaps. Double-check the alignment before moving on.
Securing With Nails Or Screws
Use small nails or screws to fix the frame. Nails work well for a smooth finish. Screws offer extra strength if needed. Drive fasteners carefully to avoid splitting the wood. Space them evenly along the frame for strong support.
Checking For Gaps And Adjustments
Look closely for any gaps between frame and shelf. Use wood filler to close small gaps if necessary. Sand lightly after the filler dries. Adjust the frame if it feels loose or uneven. A tight fit keeps the frame stable and neat.
Attaching The Frame To The Bookshelf
Finishing touches bring your bookshelf face frame to life. They hide small flaws and make the project look polished. Taking time with these steps improves the durability and beauty of your work. Follow each step carefully to get the best results.
Filling Nail Holes And Seams
Small holes from nails and gaps in seams need filling. Use wood filler that matches your wood color. Apply it with a putty knife and press it into holes. Let the filler dry completely before moving on. This step hides imperfections for a clean look.
Sanding For Smoothness
Sand the entire frame to smooth out rough spots. Use fine-grit sandpaper for a gentle finish. Sand along the grain to avoid scratches. Wipe away dust with a damp cloth after sanding. This step prepares the surface for paint or stain.
Painting Or Staining The Frame
Choose paint or stain that fits your style and wood type. Apply thin, even coats using a brush or cloth. Let each coat dry before applying the next one. Paint gives a solid color, while stain shows the wood grain. Finish with a clear sealant for protection.
Finishing Touches
Attaching a face frame to a bookshelf can change its look completely. A professional finish makes your bookshelf stand out. Small details matter a lot. They give the piece a clean, polished appearance. Follow these tips for a smooth, neat result.
Choosing The Right Finish
Select a finish that matches your room style. Matte finishes hide small scratches well. Glossy finishes add shine but show marks easily. Use a finish that protects wood from dust and moisture. Test the finish on a small wood piece first. Let it dry fully before attaching the frame. This helps avoid smudges and uneven spots.
Maintaining The Bookshelf Frame
Keep the frame clean for a fresh look. Dust it regularly with a soft cloth. Avoid using harsh chemicals that can damage the wood. Fix any loose nails or screws quickly. A sturdy frame lasts longer and looks better. Check for scratches and touch up with matching paint or stain. This keeps your bookshelf looking new over time.

Credit: shelfhelpnow.com
Frequently Asked Questions
What Tools Are Needed To Attach A Face Frame To A Bookshelf?
You need a drill, screws, clamps, wood glue, a square, and a tape measure. These tools ensure proper alignment and secure attachment of the face frame to the bookshelf.
How Do You Align The Face Frame Correctly On A Bookshelf?
Align the face frame flush with the bookshelf edges. Use clamps and a square to maintain a perfect right angle before attaching it with screws and glue.
Can I Attach A Face Frame Without Nails Or Screws?
Yes, using strong wood glue and clamps can hold the face frame temporarily. However, screws provide long-term stability and prevent the frame from shifting over time.
How Long Should The Glue Dry Before Removing Clamps?
Allow the wood glue to dry for at least 30 minutes before removing clamps. Full curing may take up to 24 hours for maximum strength and durability.
Conclusion
Attaching a face frame to a bookshelf is simple with the right steps. Take your time to measure and align carefully. Use the proper tools to secure the frame tightly. This will make your bookshelf look neat and strong. Small details matter in woodworking projects like this.
Keep practicing, and your skills will improve fast. Enjoy building your own furniture with confidence and pride.