Are you ready to add a unique, practical piece to your home that combines style and function? Building a bookshelf ladder might be just what you need.
Imagine having a ladder that not only helps you reach your highest shelves but also serves as a charming centerpiece in your room. In this guide, you’ll discover simple steps to create your very own bookshelf ladder, even if you have little to no experience with tools.
By the end, you’ll have a project that boosts your space and your confidence. Let’s dive in and make your bookshelf ladder a reality!
Materials And Tools Needed
Building a bookshelf ladder requires the right materials and tools. These help ensure your project is safe and looks great. Using quality supplies makes the process smoother. You will need wood, screws, and finishing items. Tools like saws and drills are also important.
Having everything ready before you start saves time. It also helps you avoid mistakes. The list below covers all essentials for building a sturdy bookshelf ladder.
Wood Materials
Choose strong wood like pine, oak, or maple. These woods hold weight well. You will need boards for the ladder sides and shelves. Smooth wood helps make the ladder safe and nice to touch.
Fasteners And Hardware
Use wood screws to join parts tightly. Pick screws that fit your wood thickness. Include metal brackets for extra support. Sandpaper or wood filler helps fix small rough spots.
Power Tools
A power saw cuts wood to size quickly. A drill makes holes and drives screws fast. A sander smooths edges and surfaces. These tools make your work clean and easy.
Measuring And Marking Tools
A tape measure ensures exact cuts. A pencil marks where to saw and drill. A square tool keeps your lines straight and corners right. These tools help keep your ladder balanced.
Finishing Supplies
Paint or wood stain adds color and protects wood. Brushes or rags apply finishes evenly. Clear varnish gives a shiny and strong coat. Finishing makes your ladder look professional and last longer.

Credit: makingitwithabby.com
Choosing The Right Wood
Choosing the right wood is key to building a strong bookshelf ladder. Wood affects how the ladder looks and lasts. Picking good wood helps the ladder hold weight and stay safe. It also makes your project easier and more enjoyable.
Types Of Wood For Bookshelf Ladders
Hardwood and softwood are common choices. Hardwood like oak and maple is tough and lasts long. Softwood like pine is lighter and easier to cut. Each type has its own price and look.
Strength And Durability
Strong wood keeps the ladder safe. Check the wood’s hardness and grain. Tight grains mean strong wood. Avoid wood with many knots or cracks. These can weaken the ladder.
Appearance And Finish
Wood color and texture change how the ladder looks. Some wood has a smooth, clean finish. Others have more natural patterns. Choose wood that fits your room’s style. Sand and finish wood to protect it.
Cost And Availability
Wood price varies a lot. Some woods are expensive and hard to find. Others are cheap and easy to buy. Pick wood that fits your budget. Also, check what wood is available near you.
Planning Your Bookshelf Ladder
Planning your bookshelf ladder is the first step to a strong and safe project. Careful planning saves time and materials. It also helps you build a ladder that fits perfectly in your space. This section covers how to measure your space and design the ladder dimensions.
Measuring Your Space
Start by measuring the height of the bookshelf or wall. Measure from the floor to the top shelf or ceiling, depending on your ladder’s reach. Then, measure the width available for the ladder. Consider any furniture or obstacles near the bookshelf. Write down all measurements clearly.
Check the floor space in front of the bookshelf. Make sure there is enough room to pull out and use the ladder safely. Mark these measurements on paper to use as a guide. Accurate measuring prevents mistakes later.
Designing The Ladder Dimensions
Decide on the ladder’s height based on your measurements. The ladder should reach the top shelf comfortably without being too tall. Plan the angle of the ladder; about 70 degrees is safe and easy to climb.
Choose the width of the ladder steps to match your comfort. Steps usually range from 12 to 16 inches wide. Step spacing should be even, about 10 to 12 inches apart. Think about the thickness of the wood. Thicker wood makes the ladder stronger but heavier.
Cutting The Wood Pieces
Cutting the wood pieces is an important step in building your bookshelf ladder. Precise cuts ensure the ladder is strong and looks good. Use sharp tools and measure twice before cutting. Safety matters, so wear protective gear and work carefully.
Cutting The Side Rails
Start by measuring the length of the side rails. These are the long pieces that hold the ladder together. Mark the wood clearly with a pencil. Use a saw to cut straight lines. Sand the edges to remove splinters and make them smooth. Check the pieces match in size before moving on.
Cutting The Steps
Next, measure the width and depth of each step. The steps must fit well between the side rails. Mark each step piece on the wood carefully. Cut each step accurately with a saw. Sand the surfaces and edges for a clean finish. Consistent step size helps keep the ladder balanced.
Assembling The Ladder Frame
Assembling the ladder frame is a key step in building your bookshelf ladder. This stage sets the foundation for a strong and safe structure. Take your time and follow each step carefully. Use quality wood pieces and check your measurements twice. A well-built frame ensures your ladder lasts long and holds weight securely.
Attaching The Steps To The Rails
Start by placing the ladder rails flat on the ground. Mark the spots where the steps will go. Use a pencil and measuring tape for accuracy. Drill pilot holes to avoid wood splitting. Attach the steps to the rails using screws. Make sure each step is flush and sits evenly. Tighten screws firmly but do not overdrive them.
Ensuring Stability And Alignment
Check the ladder frame for straightness and balance. Use a carpenter’s square to confirm right angles. Adjust any misaligned parts before final tightening. The ladder should stand evenly without wobbling. Add clamps if necessary to hold pieces steady. Stability is crucial for safety and durability. Double-check all connections before moving on.
Sanding And Finishing
Sanding and finishing are key steps in building a bookshelf ladder. They make the wood smooth and protect it from damage. These steps also give your ladder a nice look. Taking time to sand and finish well will improve your project’s quality and safety.
Sanding For Smooth Edges
Start by sanding the wood with medium-grit sandpaper. This removes rough spots and splinters. Sand all surfaces, including edges and corners. Use fine-grit sandpaper afterward for a smooth finish. Sand in the direction of the wood grain to avoid scratches. Wipe the dust away with a clean cloth before moving on.
Applying Paint Or Stain
Choose paint or stain based on your style preference. Stain shows the wood’s natural beauty. Paint offers a colorful, protective layer. Apply a thin coat with a brush or cloth. Let it dry fully between coats. Two or three coats give the best coverage. Seal the finish with clear varnish for extra protection.
Adding Shelves For Books
Adding shelves to your bookshelf ladder is a key step. It turns a simple ladder into a useful book storage. Shelves hold your books and keep them organized. Proper shelves make your ladder strong and practical. Let’s explore how to choose and fix shelves well.
Choosing Shelf Types
Pick shelves that fit your ladder size. Wood shelves are common and sturdy. Plywood or solid wood both work well. Consider shelf thickness for strength. Thicker shelves hold heavier books without bending. Also, think about shelf depth. Deep shelves fit large books easily. Narrow shelves suit smaller books and save space. Match shelf style with your room’s look. Smooth edges prevent book damage. Choose shelves that balance style and function.
Securing Shelves To The Ladder
Secure shelves tightly to avoid wobbling. Use screws or brackets for strong attachment. Pre-drill holes to prevent wood splitting. Attach brackets under shelves for good support. Check shelf level before fixing them. Use a level tool for accuracy. Tighten screws firmly but avoid over-tightening. Add wood glue for extra hold if needed. Test shelves by placing books gradually. A secure shelf keeps books safe and ladder steady.

Credit: www.youtube.com
Safety Tips And Maintenance
Safety and maintenance keep your bookshelf ladder strong and reliable. A well-maintained ladder lasts longer and stays safe to use. Check it often for any damage or loose parts. Clean it regularly to avoid dust buildup. Small steps make a big difference in safety and durability.
Inspect Joints And Screws Regularly
Look at all joints and screws every week. Tighten any loose screws to keep the ladder stable. Loose parts cause wobbling and can lead to accidents. Use the right screwdriver for each screw. Replace any broken or rusted screws immediately.
Keep The Ladder Clean And Dry
Wipe the ladder with a dry cloth after use. Avoid using water or harsh chemicals. Moisture can damage wood and cause slipping. Dust buildup can hide cracks or weak spots. A clean ladder looks good and stays safe.
Store The Ladder Properly
Keep the ladder in a dry, cool place. Avoid leaving it outside where rain or sun can harm it. Store it flat or hang it on strong hooks. Proper storage stops warping and cracking. A well-stored ladder lasts many years.
Check Weight Limits Before Use
Know the weight limit of your ladder. Do not carry heavy loads while climbing. Overloading can break the ladder or cause falls. Use the ladder only for its intended purpose. Safety starts with respecting the ladder’s limits.
Styling Your Bookshelf Ladder
Styling your bookshelf ladder brings personality and charm to your space. It transforms a simple ladder into a functional decor piece. Thoughtful styling makes your bookshelf ladder stand out and fit your room’s mood. Small changes can brighten the whole area and make it feel welcoming.
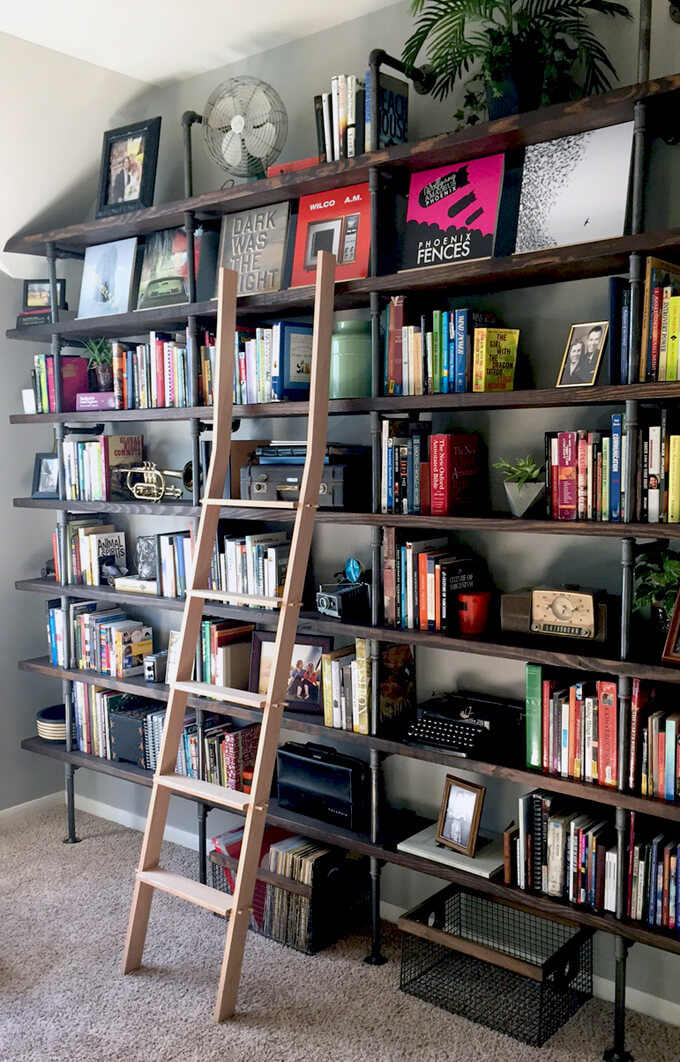
Placement Ideas
Place your bookshelf ladder near a reading nook for easy book access. Lean it against an empty wall to save floor space. Position it beside a sofa or chair to keep favorite books close. Use it as a divider in a large room to create cozy corners. Near a window, it can hold plants and add natural light.
Decorative Touches
Add small plants on some steps for a fresh, green look. Use decorative baskets to store magazines or small items. Hang fairy lights or string lights around the ladder for soft, warm lighting. Place a few art books with colorful covers for visual interest. Mix books with personal items like photos or souvenirs.
Credit: grayhousestudio.com
Frequently Asked Questions
What Materials Are Needed To Build A Bookshelf Ladder?
You need wood planks, screws, brackets, sandpaper, wood glue, paint or stain, and a drill. Choose strong, durable wood for safety and longevity. Measure carefully to fit your space and desired ladder size.
How Long Does It Take To Build A Bookshelf Ladder?
Building a bookshelf ladder typically takes 4 to 6 hours. This depends on your skill level and tool availability. Allow extra time for drying paint or stain if you choose to finish the wood.
Can I Customize The Bookshelf Ladder Size?
Yes, you can customize the ladder height, width, and shelf spacing. Measure your wall space first. Adjust dimensions to fit your books and room aesthetics perfectly.
Is It Safe To Use A Bookshelf Ladder?
Yes, if built correctly with sturdy materials and proper assembly. Secure the ladder to the wall for stability. Regularly check for loose screws or damage for safety.
Conclusion
Building a bookshelf ladder is a fun and useful project. It adds style and storage to any room. Follow each step carefully for the best results. Use safe tools and take your time. You will feel proud of your work.
Enjoy your new ladder and the books it holds. Try customizing it to fit your space. This project makes a great way to learn and create. Start building today and see how easy it can be!