Are you ready to build your own bookshelf speaker boxes that not only look great but also deliver amazing sound? Imagine having speakers tailored exactly to your space and style, crafted by your own hands.
In this guide, you’ll discover simple steps to create sturdy, stylish speaker boxes that make your music come alive. Whether you’re a beginner or have some DIY experience, you’ll find easy-to-follow tips that save you time and money. Keep reading, and by the end, you’ll have everything you need to bring your perfect bookshelf speakers to life.
Choosing The Right Materials
Choosing the right materials is key to building strong bookshelf speaker boxes. The materials affect sound quality, durability, and appearance. Good materials help the speakers deliver clear sound without vibrations. Poor materials can cause noise and damage over time. Picking suitable wood and tools makes the building process easier and more enjoyable.
Wood Types For Speaker Boxes
Medium Density Fiberboard (MDF) is a popular choice. It is dense, smooth, and affordable. MDF reduces sound vibrations well, making it great for speaker boxes.
Plywood is another option. It is lighter than MDF and more resistant to moisture. Choose high-quality plywood with many layers for the best sound.
Solid wood looks nice but may cause unwanted vibrations. It can warp with humidity changes. Avoid softwoods like pine for speaker boxes.
Each wood type has pros and cons. MDF offers good sound control. Plywood is strong and stable. Pick wood that fits your budget and needs.
Essential Tools And Supplies
Start with a good saw for accurate cuts. A circular saw or table saw works well for wood panels.
Use clamps to hold pieces tightly while gluing or screwing. This keeps the box square and strong.
Wood glue and screws join the panels securely. Choose screws that won’t split the wood.
Sandpaper smooths edges and surfaces. Fine grit sandpaper gives a clean finish.
Sealants or paint protect the wood and improve appearance. Use non-toxic products for safety.
Having the right tools and supplies speeds up your work. It helps you create neat, durable speaker boxes.
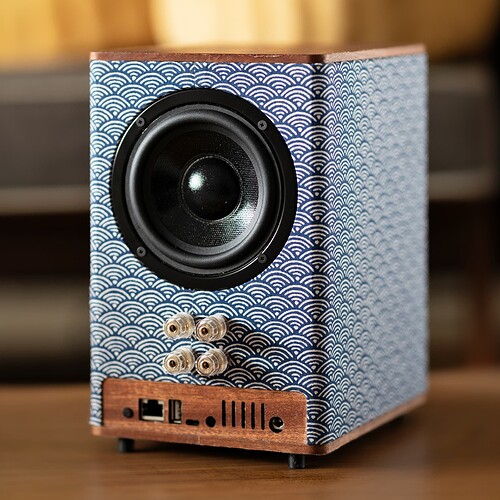
Credit: www.arylic.com
Designing Your Speaker Box
Designing your bookshelf speaker box is a key step in building quality sound. The box shape and size affect the speaker’s performance. A well-designed box delivers clear, rich audio. Start with planning the size and style of your box. Think about the space you have and the sound you want. This helps make the best speaker box for your needs.
Calculating Box Dimensions
Measure your speaker driver first. Note its diameter and depth. Use these numbers to find the right box size. The box must fit the driver snugly. Also, allow space inside for sound waves to move. Use online calculators or formulas for precise volume. The volume affects bass and overall sound quality. A box too small or large changes the speaker’s tone. Keep your measurements accurate for best results.
Selecting Port Or Sealed Design
Choose between a ported or sealed box design. A sealed box is airtight and simple. It gives tight, clear bass but less volume. A ported box has a hole or tube. This port boosts bass and makes sound louder. Ports need careful tuning to avoid noise. Pick the design based on your sound preference. Sealed boxes suit small rooms and tight sound. Ported boxes work well for louder, deeper bass.
Cutting And Preparing Wood Panels
Cutting and preparing wood panels is a vital step in building bookshelf speaker boxes. The accuracy of this step affects the final fit and finish. It ensures the panels align perfectly and the box is sturdy.
Proper preparation also helps avoid mistakes that waste wood. It sets the foundation for smooth assembly and a professional look.
Measuring And Marking
Start by measuring the wood panels carefully. Use a tape measure to get exact dimensions. Double-check each measurement before marking.
Mark the cut lines clearly with a pencil. Use a square or ruler to draw straight lines. Clear marks guide your cuts and keep edges neat.
Safe Cutting Techniques
Wear safety glasses and gloves before cutting the wood. Use a sharp saw blade for clean cuts. A dull blade can cause rough edges and accidents.
Cut slowly and steadily, following the marked lines. Secure the wood firmly with clamps or a workbench. This prevents slipping and keeps cuts accurate.
Assembling The Speaker Box
Assembling the bookshelf speaker box is a key step to build a strong and clear sound system. Careful assembly helps the speaker work well and last longer. This part focuses on how to join the panels and seal gaps properly.
Joining Panels Securely
Start by aligning the panels carefully. Use clamps to hold pieces in place. Apply wood glue along the edges before joining. Press panels together firmly for a tight bond. Screw the panels with small wood screws. Check that corners form perfect right angles. Secure joints prevent air leaks and improve sound quality.
Sealing Gaps And Joints
Look for small gaps after joining panels. Use wood filler or silicone sealant to fill these gaps. Sealant stops air from escaping the box. Smooth the sealant with a putty knife for neat edges. Let the sealant dry completely before moving ahead. Proper sealing makes the speaker box airtight and better sounding.
Finishing Touches
The finishing touches make your bookshelf speaker boxes look great and last longer. These final steps protect the wood and give a smooth, clean surface. Proper finishing also improves sound quality by sealing the box well.
Sanding And Smoothing
Start by sanding the entire surface with medium-grit sandpaper. This removes rough spots and sharp edges. Next, use fine-grit sandpaper to smooth the wood for a soft feel. Sand in the direction of the wood grain. Wipe off dust with a dry cloth before moving on. Take your time to get the surface even and smooth. This step is key for a nice finish.
Painting And Veneering
Choose paint or veneer based on the style you want. Use a primer before painting to help the paint stick better. Apply thin, even coats of paint and let each dry fully. Veneers add a natural wood look and come in many types. Glue the veneer carefully and press it down firmly. Trim extra veneer for a perfect fit. Both paint and veneer protect the wood and improve the speaker’s look.
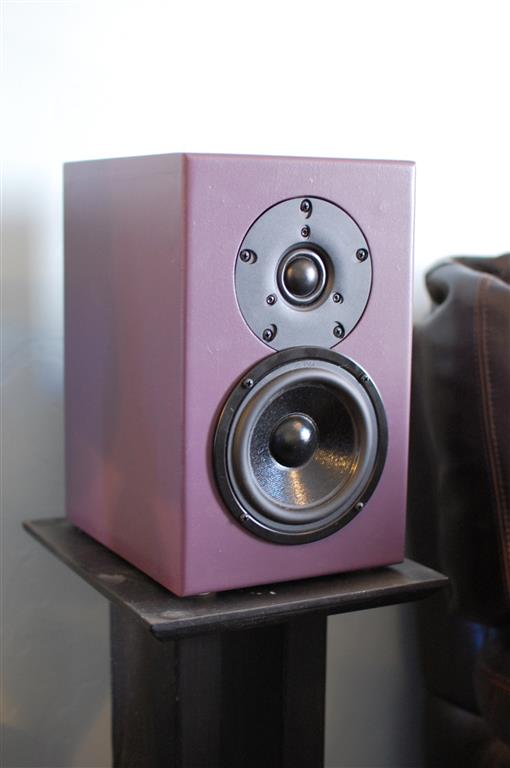
Credit: projectgallery.parts-express.com
Installing Speaker Components
Installing speaker components is a key step in building bookshelf speaker boxes. This process shapes the final sound quality. Careful handling of parts ensures the speaker works well. The drivers and ports must fit tightly to avoid air leaks. Proper wiring connects the parts and delivers the audio signal clearly. Follow these steps to install your speaker parts correctly.
Mounting Drivers And Ports
Start by placing the drivers into the cutouts on the speaker box. Use screws to secure them firmly. Avoid over-tightening to prevent damage. The drivers should sit flush with the box surface. Next, install the ports. Ports help improve bass response. Insert them into their holes and fasten them securely. Check for any gaps around the ports and seal if needed. A tight fit prevents unwanted noise and air leaks.
Wiring And Connections
Begin wiring by attaching speaker wires to the driver terminals. Match positive and negative terminals correctly. Use a soldering iron or push connectors for strong connections. Keep wires neat and avoid crossing them. Connect wires to the crossover inside the box if present. The crossover sends the right frequencies to each driver. Finally, attach the input terminals on the outside of the box. Double-check all connections for stability before closing the box.
Testing And Tuning Sound
Testing and tuning the sound of your bookshelf speaker boxes is a key step. It helps you hear the true quality of your work. This process ensures clear, balanced audio that fits your room. Taking time to test and adjust improves your listening experience greatly.
Initial Sound Check
Start by playing a variety of music or sound clips. Choose tracks with clear vocals, deep bass, and mid-range tones. Listen carefully for any buzzing, rattling, or distortion. Check if all speaker drivers produce sound evenly. Use a quiet room to avoid outside noise interference. This first test reveals basic issues to fix before fine tuning.
Adjusting For Optimal Audio
Move the speakers slightly to find the best position. Small changes in placement affect sound clarity and bass response. Adjust the speaker box’s internal damping material if needed. Adding or removing foam can change sound warmth and reduce echoes. Fine-tune the crossover settings if your speakers have them. Keep testing until the sound feels balanced and natural in your space.

Credit: everestkitchennc.com
Frequently Asked Questions
What Materials Are Needed For Bookshelf Speaker Boxes?
You need MDF or plywood, wood glue, screws, speaker drivers, acoustic foam, and paint. These materials ensure durability and sound quality.
How Do I Measure The Size For Speaker Boxes?
Measure your speaker drivers and add space for internal components. Proper dimensions optimize sound performance and fit your space.
What Is The Best Wood For Speaker Boxes?
MDF is ideal due to its density and acoustic properties. It reduces vibrations and delivers clearer sound compared to plywood.
How To Seal Bookshelf Speaker Boxes Effectively?
Use wood glue and seal all joints tightly. Applying silicone sealant inside prevents air leaks and improves sound quality.
Conclusion
Building bookshelf speaker boxes can be simple and fun. Choose the right materials and measure carefully. Cut and assemble the wood with patience. Add speakers and wiring to fit well. Test sound quality and make small fixes. Enjoy your custom speakers at home.
This project saves money and teaches new skills. Give it a try and hear the difference. Your space will sound better with your own handmade boxes.