Are you looking for a stylish and practical way to organize your books and display your favorite items? Building a cube bookshelf might be exactly what you need.
It’s a simple project that can transform any room, giving you extra storage and a modern look. In this guide, you’ll learn easy steps to create your own cube bookshelf, even if you’re new to woodworking. By the end, you’ll have a personalized piece that fits your space perfectly and shows off your creativity.
Ready to get started? Let’s dive in!

Credit: www.instructables.com
Materials And Tools
Building a cube bookshelf needs the right materials and tools. Choosing good wood and having proper tools makes the project easier. Safety gear protects you during work. This section covers all these important points.
Wood Types And Sizes
Pick wood that is strong and smooth. Pine, plywood, or MDF are good choices. Pine is easy to cut and light. Plywood is sturdy and looks nice. MDF is smooth but heavier. Use wood boards about 3/4 inch thick for strength. Cut pieces to the size of your cubes, usually 12 inches by 12 inches. This size fits most books and small items well.
Essential Tools Needed
Gather these tools before starting your build. A saw is needed to cut wood pieces. A circular saw or handsaw works fine. Use a drill to make holes for screws. Screwdriver or drill bit helps drive screws in place. A tape measure ensures exact cuts and proper size. Sandpaper smooths rough edges for a clean finish. A carpenter’s square helps keep corners straight and square.
Safety Gear
Protect yourself with proper safety gear. Wear safety glasses to guard your eyes from dust and wood chips. Use gloves to protect your hands while cutting and sanding. Ear protection helps reduce noise from power tools. A dust mask prevents breathing sawdust. Always wear closed shoes to keep feet safe. Safety gear keeps you safe and comfortable while building.
Design And Planning
Design and planning are the first steps to building a cube bookshelf. They help save time and avoid mistakes. A clear plan gives you a strong base for your project. It keeps the work smooth and organized.
Careful design makes sure your bookshelf fits your space and needs. Planning helps you know the materials and tools required. It also helps you control the budget and effort needed.
Choosing The Right Dimensions
Start by measuring the space for your bookshelf. Think about height, width, and depth. Pick dimensions that fit well in the room. Make sure the size works with your books and items.
Standard cube shelves usually measure about 12 to 15 inches per side. Adjust this size to fit your needs. Keep the bookshelf balanced and stable by choosing proper dimensions.
Sketching Your Bookshelf
Draw a simple sketch of your bookshelf design. Include all parts like cubes and shelves. Mark the dimensions clearly on the sketch. This helps to visualize the final product.
Use graph paper or digital tools for accuracy. A good sketch guides you during cutting and assembly. It reduces errors and saves material waste.
Calculating Material Quantity
List all parts needed for your bookshelf. Count the number of cubes and shelves. Calculate the total wood or board length and width.
Don’t forget extra pieces for supports and back panels. Add about 10% more material to cover mistakes. Knowing the quantity helps avoid multiple trips to the store.
Cutting The Wood
Cutting the wood is the first step in building a cube bookshelf. Accurate cuts ensure the pieces fit well. This step needs focus and care. Follow the right process to avoid mistakes and wasted wood.
Measuring And Marking
Start by measuring the wood carefully. Use a tape measure for exact lengths. Mark the wood with a pencil where to cut. Double-check your marks before sawing. Clear marks help you cut straight lines.
Sawing Techniques
Use a saw suitable for your wood type. Keep the saw steady and follow your marks. Cut slowly for clean edges and less splintering. Support the wood firmly to avoid movement. A smooth cut makes assembly easier.
Sanding Edges
After cutting, sand the edges smooth. Use medium-grit sandpaper to remove rough spots. Sand in one direction to keep the wood smooth. Clean the dust before assembling the pieces. Smooth edges prevent splinters and improve look.

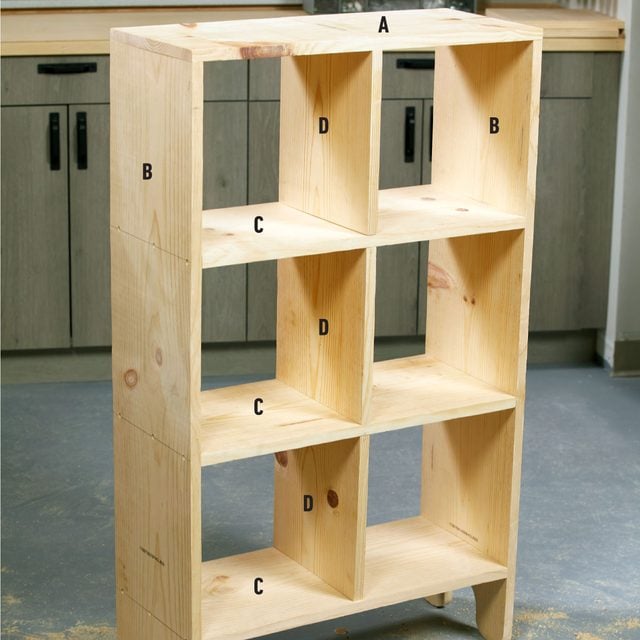
Credit: gosforthhandyman.com
Assembling The Frame
Assembling the frame is the first big step in building your cube bookshelf. This part creates the basic shape and strength of the bookshelf. A solid frame keeps the cubes square and stable. Take your time to make sure each piece fits well. Use the right tools and materials for a durable frame.
Follow these steps carefully to join the panels, apply glue and screws, and check the frame’s squareness. These simple tips help you build a strong and neat frame.
Joining The Panels
Start by lining up the panels on a flat surface. Make sure the edges match perfectly. Use clamps to hold the panels together firmly. This keeps the panels from moving while you work. Join side panels to top and bottom panels first. Then add the middle dividers. Check each joint for gaps. Tight joints make the frame stronger.
Using Wood Glue And Screws
Apply wood glue along the edges before joining panels. Spread glue evenly for a strong bond. After gluing, press the panels together. Secure the joints with screws for extra support. Use a drill to make pilot holes. This prevents the wood from splitting. Drive screws in slowly and straight. Wipe off any extra glue before it dries.
Ensuring Squareness
Check the frame’s corners to keep it square. Use a carpenter’s square or measure diagonals. Both diagonals should be equal. Adjust the panels if needed before the glue dries. A square frame ensures the bookshelf will stand straight. It also helps the cubes fit properly. Take your time to get this right.
Adding Shelves And Dividers
Adding shelves and dividers is a key step in building your cube bookshelf. These parts create sections for storing books and items. Proper installation ensures the bookshelf is strong and looks neat. This section explains how to position supports, secure shelves, and choose between adjustable and fixed shelves.
Positioning Shelf Supports
Start by marking where the shelves will go on the inside walls. Use a pencil and measuring tape to keep spacing even. Place shelf supports at the marked points. Supports can be small metal pins or wooden cleats. Make sure they are level and aligned on both sides. Incorrect placement can cause shelves to tilt or fall.
Securing Shelves
Once supports are in place, slide or place the shelves on them. Check that each shelf fits well and is steady. To secure shelves, use screws or nails through the sides into the shelf edges. This stops shelves from moving or tipping. For extra strength, add wood glue at the joints. Always clamp and let glue dry before adding weight.
Adjustable Vs Fixed Shelves
Decide if shelves should be adjustable or fixed. Adjustable shelves use pins or brackets that fit into holes. This allows moving shelves up or down as needed. Fixed shelves are attached permanently with screws or glue. They offer more stability but no flexibility. Choose adjustable for variety and fixed for heavy items. Each type suits different storage needs.
Finishing Touches
Finishing touches make your cube bookshelf look complete and neat. They protect the wood and improve its appearance. Taking time on these steps gives a polished, professional look to your project.
Filling Gaps And Holes
Use wood filler to cover small gaps and holes. Apply it with a putty knife and smooth the surface. Let it dry fully before sanding it down. Sanding makes the surface even and ready for painting or staining.
Painting Or Staining
Choose paint or stain based on your style preference. Paint offers bright, solid color and hides wood grain. Stain enhances natural wood patterns and adds warmth. Apply evenly with a brush or cloth. Allow each coat to dry before adding another.
Applying Protective Coating
Protective coating guards against scratches and moisture. Use clear polyurethane or varnish for best results. Apply thin layers and let each dry well. This step extends the life of your bookshelf and keeps it looking fresh.
Installation And Maintenance
Installing and maintaining your cube bookshelf ensures it stays safe and looks great. Proper setup prevents accidents and keeps your books organized. Regular care helps the shelf last longer and stay clean. Follow these simple steps to secure, organize, and care for your bookshelf.
Securing Bookshelf To Wall
Attach the bookshelf firmly to the wall to avoid tipping. Use brackets or straps designed for furniture safety. Find wall studs with a stud finder for strong support. Secure screws tightly but avoid splitting the wood. This step is crucial, especially in homes with children or pets.
Organizing Your Books
Sort books by size, genre, or color for easy access. Place heavier books on lower cubes to keep balance. Use decorative boxes or baskets in some cubes for small items. Leave some empty space to avoid overcrowding. This method keeps the shelf neat and visually pleasing.
Cleaning And Care Tips
Dust your bookshelf weekly with a soft cloth or duster. Wipe spills immediately with a damp cloth to prevent stains. Avoid using harsh chemicals that can damage the finish. Check screws and brackets every few months for tightness. Regular care keeps your bookshelf sturdy and attractive.
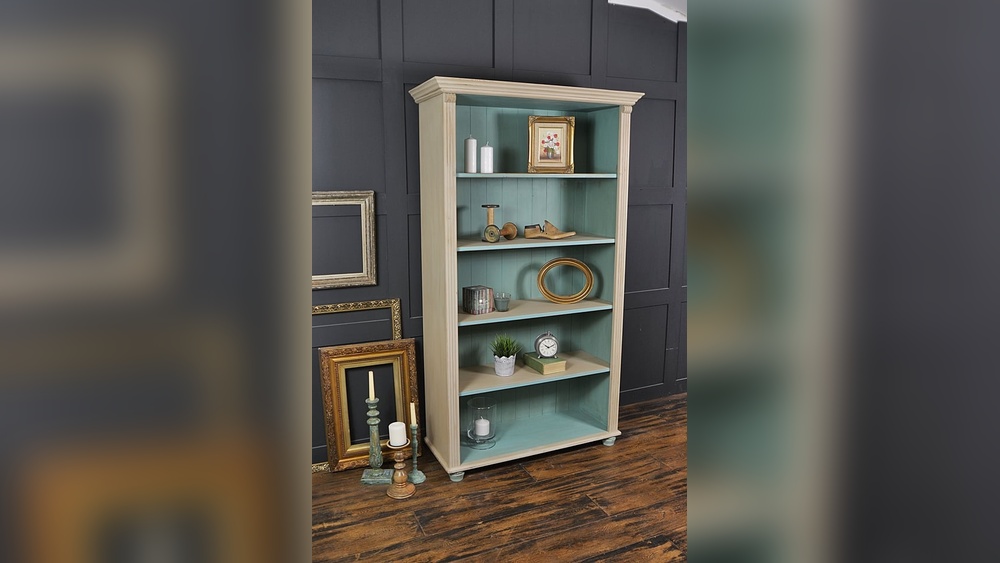
Credit: www.familyhandyman.com
Frequently Asked Questions
What Materials Do I Need To Build A Cube Bookshelf?
You need plywood or MDF boards, wood glue, screws, a drill, sandpaper, paint or stain, and a measuring tape. These materials ensure a sturdy and attractive cube bookshelf.
How Long Does It Take To Build A Cube Bookshelf?
Building a cube bookshelf typically takes 3 to 6 hours, depending on your skills and tools. Preparation and drying time for paint may add extra hours.
Can I Customize The Size Of My Cube Bookshelf?
Yes, you can customize the height, width, and depth of each cube to fit your space and storage needs. Adjust measurements carefully before cutting materials.
What Tools Are Essential For Building A Cube Bookshelf?
Essential tools include a saw, drill, screwdriver, measuring tape, level, clamps, and sandpaper. These tools help ensure precise cuts and strong assembly.
Conclusion
Building a cube bookshelf is simple and rewarding. You can organize your books and display items neatly. With basic tools and steps, anyone can create one. It saves money and adds a personal touch to your space. Try customizing colors or sizes to fit your style.
Enjoy the process and the final result. Your new bookshelf will brighten any room and keep things tidy. Start building today and see how easy it is!