
Are you ready to give your wood bookshelf a fresh, beautiful look? Staining your bookshelf can bring out the natural beauty of the wood and make your space feel warm and inviting.
But if you’re worried about making mistakes or don’t know where to start, you’re not alone. This guide will walk you through simple, clear steps to stain your wood bookshelf like a pro. By the end, you’ll have a stunning piece that you’ll be proud to show off.
Let’s get started and transform your bookshelf together!
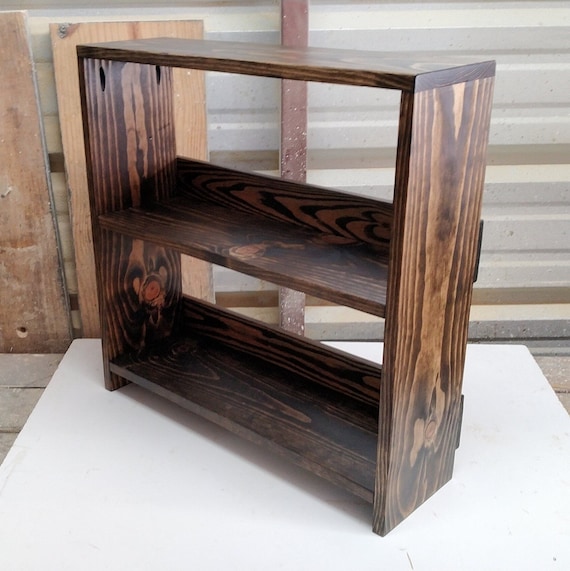
Credit: www.etsy.com
Choosing The Right Stain
Choosing the right stain for your wood bookshelf is important. It changes the look and feel of the wood. The right stain brings out the beauty of the wood grain. It also protects the wood from damage. This section helps you pick the best stain for your project.
Types Of Wood Stains
Wood stains come in many types. Oil-based stains soak deep into the wood. They last long and give rich colors. Water-based stains dry faster and clean up easily. Gel stains sit on top of the wood. They work well on smooth or rough surfaces. Each type offers a different finish and ease of use.
Matching Stain To Wood Type
Different woods absorb stain differently. Pine and maple are light woods and soak stain quickly. Oak and walnut have strong grains that show well with stain. Test the stain on a hidden spot first. This helps you see how the color looks on your wood. Matching stain and wood type keeps the look natural and even.
Considering Finish And Color
Stain color changes the style of your bookshelf. Dark stains add elegance and hide marks. Light stains show more wood details and brighten the room. Think about the finish too. Matte finishes look soft and natural. Glossy finishes shine and highlight the wood grain. Choose a finish that fits your room and personal taste.

Credit: www.youtube.com
Preparing The Bookshelf
Preparing your wood bookshelf before staining is a key step. Proper preparation helps the stain stick well and look even. It also removes dirt, old finishes, and protects areas around the shelf. This section explains how to clean, sand, remove old finish, and protect the space.
Cleaning And Sanding
Start by wiping the bookshelf with a damp cloth. This removes dust and dirt. Let it dry fully. Use medium-grit sandpaper to smooth the surface. Sand lightly in the direction of the wood grain. This opens the wood pores for better stain absorption. After sanding, wipe away dust with a clean cloth.
Removing Old Finish
Check if the bookshelf has old varnish or paint. Use a chemical stripper or sand it off carefully. Follow the product instructions if using a stripper. Remove all old finish to avoid uneven stain color. Be gentle to avoid damaging the wood surface.
Protecting Surrounding Areas
Cover your workspace with a drop cloth or newspaper. Use painter’s tape to protect edges and nearby walls. This stops stain from spilling or splashing on unwanted spots. Wear gloves to keep your hands clean and safe during the process.
Applying The Stain
Applying the stain is the most important part of finishing your wood bookshelf. It changes the color and highlights the wood’s natural beauty. Proper application helps the stain soak evenly into the wood. This step requires care and the right tools to get a smooth, rich finish.
Take your time and work in a clean, dust-free area. Prepare the wood surface by sanding it smooth before staining. This ensures the stain will absorb evenly and look professional.
Tools Needed For Staining
Gather the right tools before you start. Use a clean cloth or a foam brush to apply the stain. These tools help spread the stain evenly without streaks. Have a small container to pour the stain into for easier control. Keep some paper towels nearby to wipe off excess stain. Gloves protect your hands from stains and chemicals.
Techniques For Even Application
Apply the stain in thin, even coats. Dip your brush or cloth in the stain and wipe it on gently. Work in small sections to avoid the stain drying unevenly. Let the stain sit for a few minutes. Then wipe off extra stain with a clean cloth. This step prevents blotches and dark spots. Check your work under good light to spot uneven areas.
Working With Grain Direction
Always apply the stain following the wood grain. Move your brush or cloth in the same direction as the grain lines. This helps the stain absorb better and look natural. Staining against the grain can cause streaks and rough texture. Follow the grain on all sides of the bookshelf for a consistent look. This technique enhances the wood’s texture and color.
Drying And Additional Coats
Drying and adding more coats are key steps in staining a wood bookshelf. These steps help the color look even and last longer. Patience during drying and careful application make a big difference.
Drying Time Between Coats
Let the stain dry fully before the next coat. Drying usually takes 4 to 6 hours. Check the label on your stain for exact time. Rushing can cause the stain to peel or look patchy.
Dry air and warm temperature speed up drying. Avoid applying new coats in cold or humid places. Wait until the surface feels dry and not sticky to touch.
Applying Multiple Layers
Apply thin, even coats for the best results. Use a clean brush or cloth for each layer. More layers deepen the color and protect the wood.
Don’t overload the brush. Thin coats dry faster and avoid drips. Lightly sand between coats with fine sandpaper to smooth the surface. Wipe away dust before the next coat.
Avoiding Streaks And Blotches
Work with the wood grain for a natural look. Apply stain in long, even strokes. Blend each section while the stain is wet to prevent marks.
Use a clean cloth to wipe off extra stain quickly. Uneven wiping causes blotches. Practice on scrap wood if unsure.
Sealing And Finishing Touches
Sealing and finishing your stained wood bookshelf protects it from damage. It also enhances the color and texture of the wood. This step ensures your bookshelf lasts longer and looks great. Proper finishing adds a smooth and polished feel to the surface. Let’s explore how to choose the right finish and apply it carefully.
Choosing A Protective Finish
Pick a finish that suits your bookshelf use. Polyurethane offers strong protection against scratches and spills. It works well for busy rooms. Oil-based finishes bring out rich wood colors. Water-based finishes dry faster and have less odor. Consider how shiny you want the surface. Satin finishes give a soft glow. Gloss finishes look shiny and bright.
Applying Sealant
Use a clean brush or foam applicator for even coating. Apply thin, smooth layers along the wood grain. Avoid thick coats that can drip or bubble. Let each layer dry fully before adding more. Lightly sand between layers with fine sandpaper. This step removes bumps and improves adhesion. Usually, two to three layers give good protection.
Final Inspection And Cleanup
Check the surface for rough spots or missed areas. Fix any imperfections with light sanding and another coat. Clean brushes with the right solvent right after use. Remove dust and debris from your workspace. Allow the bookshelf to cure for several days before use. This keeps the finish hard and durable. Your bookshelf is now ready to hold your favorite books safely.
Maintaining Your Stained Bookshelf
Maintaining your stained bookshelf keeps it looking fresh and beautiful for years. Wood needs care to stay strong and rich in color. A little effort regularly prevents wear and damage. Follow simple steps to protect your investment and enjoy your bookshelf longer.
Regular Cleaning Tips
Dust your bookshelf often with a soft cloth. Avoid using wet or harsh cleaners that can damage the stain. Use a dry microfiber cloth or a gentle brush. Clean spills quickly to stop stains from setting. Keep dirt and grime away to preserve the wood’s finish.
Touching Up Scratches
Minor scratches can happen over time. Use a matching wood stain marker or crayon to fill small scratches. Apply the stain gently and wipe off extra with a cloth. For deeper scratches, use fine sandpaper and restain the area carefully. This keeps your bookshelf looking smooth and new.
Preventing Damage
Place your bookshelf away from direct sunlight. Sunlight can fade the stain and dry out the wood. Avoid placing hot or wet items directly on the surface. Use coasters or mats to protect the finish. Keep the room humidity stable to stop wood from cracking or swelling.

Credit: ourhumbleabodeblog.com
Frequently Asked Questions
How Do I Prepare Wood For Staining A Bookshelf?
Start by sanding the wood smoothly with fine-grit sandpaper. Clean the dust using a tack cloth. Ensure the surface is dry and free of dirt before staining for even absorption.
What Type Of Stain Is Best For Wood Bookshelves?
Oil-based stains penetrate deeply and provide rich color. Water-based stains dry faster and have less odor. Choose based on your desired finish and ventilation in your workspace.
How Long Should I Wait Between Stain Coats?
Wait about 24 hours between coats for proper drying. This prevents tackiness and ensures even color. Follow the stain manufacturer’s instructions for best results.
Can I Use Polyurethane After Staining Wood?
Yes, apply polyurethane to protect the stained wood. It enhances durability and adds a smooth finish. Allow the stain to dry completely before applying polyurethane.
Conclusion
Staining a wood bookshelf can change its look quickly. Choose the right stain and apply it evenly. Let each coat dry well before adding the next. Sand lightly between coats for a smooth finish. Take your time and enjoy the process.
A well-stained bookshelf adds warmth to any room. Now, your bookshelf looks fresh and inviting. Try this simple project to improve your space.