Are you looking for a simple, affordable way to add a unique touch to your home? Building a bookshelf from pallet wood might be exactly what you need.
Imagine creating a sturdy, stylish piece that holds your favorite books and looks great in any room — all while using recycled materials. In this guide, you’ll discover easy steps to turn old pallets into a beautiful bookshelf. Whether you’re new to DIY or have some experience, this project will save you money and give you a sense of pride every time you see your handiwork.
Ready to get started? Let’s dive in!
Choosing The Right Pallets
Choosing the right pallets is the first step to building a sturdy bookshelf. Not all pallets are the same. Some wood types are better for furniture. Safety is important too. Old pallets may have chemicals or bugs. Finding good pallets helps make your project easier and safer.
Types Of Pallet Wood
Pallets come in many wood types. Pine and oak are common choices. Pine is soft and easy to cut. Oak is harder and lasts longer. Some pallets use mixed wood, which may be less reliable. Choose pallets with solid, smooth wood for a neat finish.
Checking Pallet Safety
Not all pallets are safe to use. Avoid pallets marked with “MB,” meaning they were treated with methyl bromide. Look for “HT” stamps, which means heat treated and safer. Check for signs of mold, chemicals, or bugs. Always clean pallets before using them.
Where To Find Pallets
Pallets can be found in many places. Local stores, warehouses, and factories often give them away. Look for pallets that are dry and not broken. Ask permission before taking pallets from businesses. Online marketplaces also list pallets for sale or free pickup.
Credit: jenwoodhouse.com
Gathering Tools And Materials
Before building a bookshelf from pallet wood, gather all the tools and materials. Having everything ready saves time and keeps the process smooth. Preparing well helps you avoid interruptions during the project.
Essential Tools
You need a saw to cut the pallet wood into pieces. A drill will help to make holes and fix screws. Sandpaper or an electric sander smooths rough edges. A hammer is useful to remove nails from the pallets. A tape measure ensures accurate cuts and proper shelf size. Clamps hold wood pieces in place while you work. Safety gear like gloves and goggles protects your hands and eyes.
Additional Supplies
Wood screws are necessary to join the wood parts firmly. Wood glue adds extra strength to the joints. Paint or wood stain improves the shelf’s look and protects the wood. Brushes or rags apply the paint or stain evenly. Wood filler fills small holes or cracks in the pallets. A level ensures your bookshelf is straight and balanced. Small pieces of scrap wood help to support shelves if needed.
Preparing The Pallet Wood
Preparing the pallet wood is an important step to create a strong and beautiful bookshelf. Pallets often have dirt, nails, and rough edges. These need to be removed before building. Taking time to prepare the wood makes the whole project easier and safer.
Cleaning And Sanding
Start by removing all nails and staples from the pallet wood. Use a hammer or pry bar carefully to avoid splitting the wood. Next, clean the wood with a brush to remove dirt and dust. Wash the wood with soapy water if needed, then let it dry completely.
After cleaning, sand the wood to smooth rough surfaces. Use medium-grit sandpaper first, then switch to fine-grit for a soft finish. Sanding helps the wood look better and prevents splinters. It also makes painting or staining easier.
Cutting To Size
Measure the wood pieces based on your bookshelf design. Mark the cutting lines clearly with a pencil. Use a saw to cut the wood along these lines. Cut slowly and carefully to get straight edges.
Cut all pieces to the correct size before starting to assemble. This step saves time and avoids mistakes. Check each piece after cutting to make sure it fits your plan.
Credit: jennaburger.com
Designing Your Bookshelf
Designing your bookshelf is the first step to a great project. A clear plan saves time and avoids mistakes. It helps you use pallet wood wisely. Think about how many shelves you want. Also, consider the space where the shelf will stand. This part is important for a sturdy, useful bookshelf.
Basic Shelf Layout
Start by drawing a simple sketch. Decide the number of shelves and their spacing. Shelves should hold books without bending. Standard shelves are 10 to 12 inches deep. Space between shelves depends on book size. Leave enough height for tall books. Keep the shelf width balanced for stability. A wider shelf may need more support.
Customizing Dimensions
Measure the space where the bookshelf will fit. Adjust width and height to match your room. Small spaces need narrow shelves. Large spaces allow bigger designs. Pallet wood size can limit shelf size. Cut planks to fit your needs. Make shelves strong by adding extra boards. Remember, thicker shelves hold more weight. Personalize the shelf with paint or stain.
Assembling The Bookshelf
Assembling the bookshelf is the step where your pallet wood starts to take shape. This part needs patience and care to ensure the structure is strong and looks good. Start by preparing all your pieces and tools. A clean workspace helps a lot.
Building The Frame
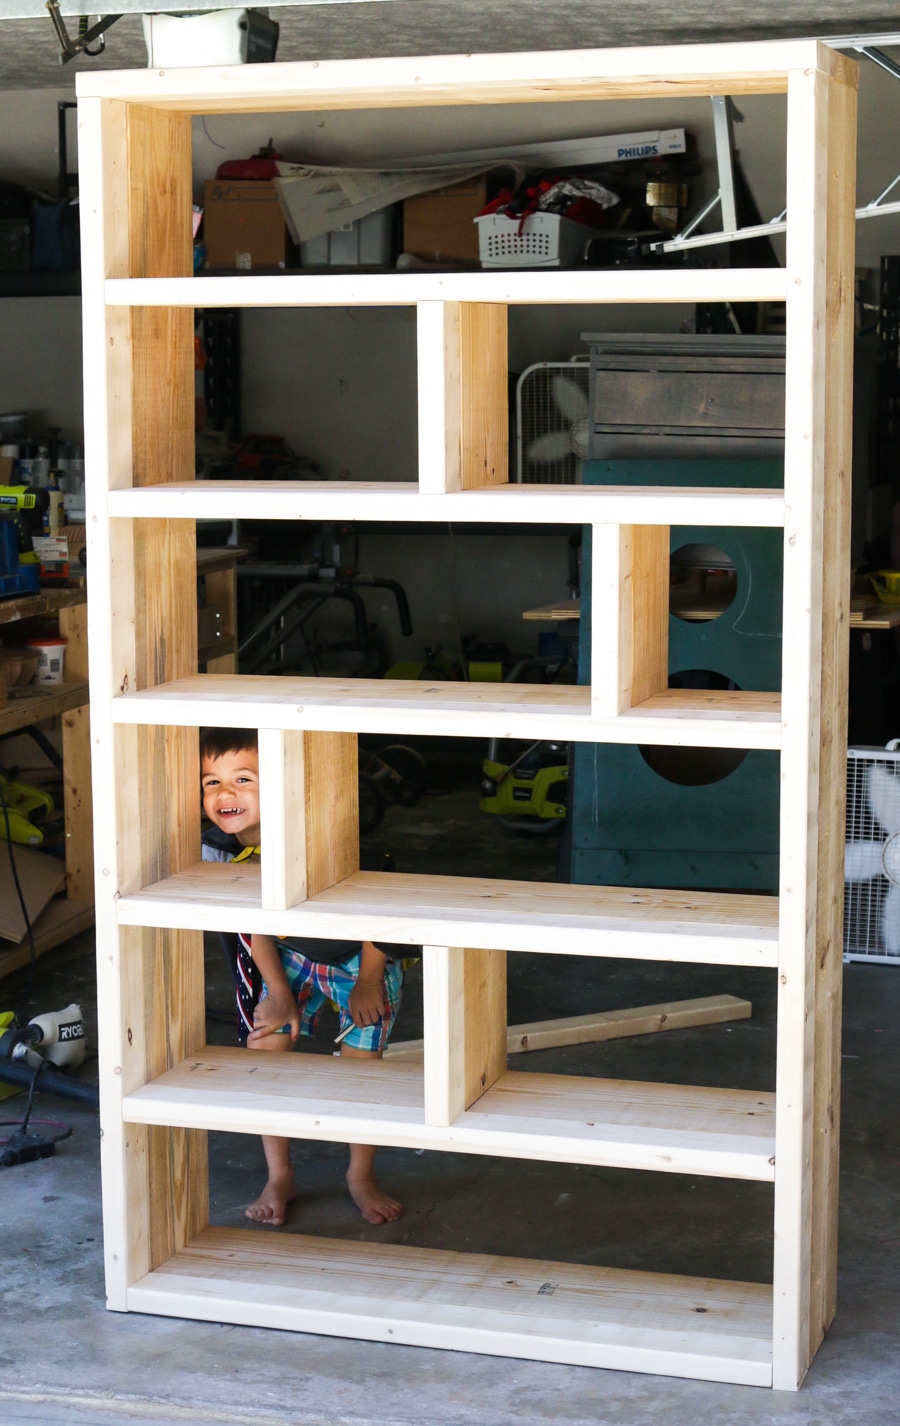
Begin with the frame of the bookshelf. Use the longest pallet wood pieces for the sides. Attach two vertical pieces by connecting them with horizontal pieces at the top and bottom.
Make sure the corners are square. Use a carpenter’s square to check the angles. Secure the wood with screws or nails. This frame forms the skeleton of your bookshelf.
Attaching Shelves
Next, add the shelves inside the frame. Measure the distance between shelves evenly for a balanced look. Cut the pallet wood to fit the width of the frame.
Fix each shelf by screwing it to the side frames. Check that each shelf is level before tightening the screws. This step gives your bookshelf the ability to hold books safely.
Finishing Touches
Finishing touches make your pallet wood bookshelf look great and last longer. These steps protect the wood and give it a smooth, clean surface. Take your time to finish well. Your bookshelf will feel more polished and strong.
Sanding And Smoothing
Start by sanding the entire bookshelf with medium-grit sandpaper. This removes rough spots and splinters. Next, use fine-grit sandpaper for a smooth finish. Sand in the direction of the wood grain. Wipe away dust with a dry cloth before moving to the next step.
Painting And Staining
Choose paint or stain based on your style. Paint covers the wood fully and adds color. Stain shows the wood’s natural texture and grain. Apply evenly with a brush or cloth. Let it dry completely. Use multiple coats for stronger color or deeper stain.
Sealing For Durability
Seal the wood to protect it from moisture and wear. Use clear polyurethane, varnish, or wax. Apply a thin, even coat with a brush. Let it dry and sand lightly between coats. Two to three coats keep your bookshelf safe and durable.
Safety Tips And Maintenance
Building a bookshelf from pallet wood is rewarding and fun. Safety and maintenance are key to a good project. Careful handling of tools keeps you safe. Proper care of the bookshelf extends its life and beauty.
Handling Tools Safely
Always wear safety goggles to protect your eyes. Use gloves to avoid splinters and cuts. Keep your workspace clean and organized. Check tools before use to ensure they work well. Use tools as the instructions say. Never rush while cutting or hammering. Keep fingers away from sharp edges and moving parts. Store tools safely after use to avoid accidents.
Caring For Your Bookshelf
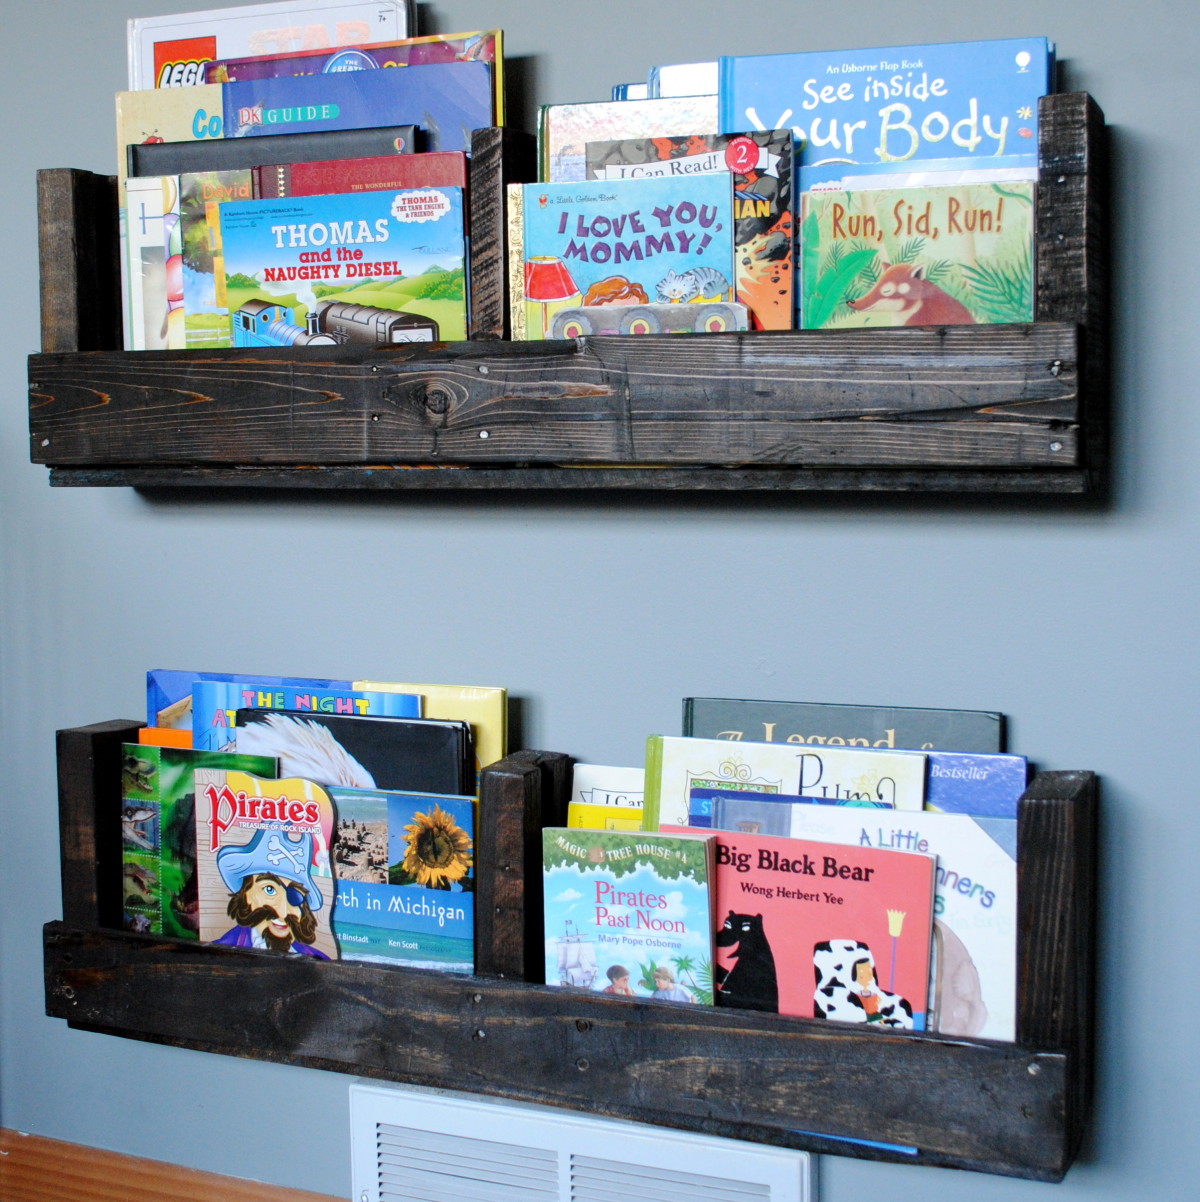
Dust your bookshelf regularly with a soft cloth. Avoid using harsh chemicals that can damage the wood. Use wood polish or oil to keep the wood smooth. Check for loose nails or screws and tighten them. Keep the shelf away from direct sunlight to prevent fading. Avoid placing very heavy items that may cause damage. Repair scratches and dents early to keep the shelf looking good.

Credit: notinggrace.com
Frequently Asked Questions
What Tools Are Needed To Build A Pallet Wood Bookshelf?
You need a saw, hammer, drill, measuring tape, sandpaper, nails, screws, and wood glue. Safety gear like gloves and goggles is essential.
How Do You Prepare Pallet Wood For Shelving?
Disassemble pallets carefully, remove nails, sand the wood smooth, and treat it with a sealant to prevent splinters and damage.
What Type Of Wood Pallets Are Best For Bookshelves?
Choose heat-treated pallets marked “HT” for safety. Avoid chemically treated or stained pallets, as they may release toxins.
How Long Does It Take To Build A Pallet Bookshelf?
Building a basic pallet bookshelf usually takes 4 to 6 hours, depending on skill level and design complexity.
Conclusion
Building a bookshelf from pallet wood is simple and fun. You can create a unique piece for your home. It saves money and helps the environment. Just follow the steps carefully and take your time. Small tools and patience make a big difference.
Enjoy the process and feel proud of your work. This project suits beginners and experts alike. Start today and bring new life to old wood. Your new bookshelf will hold your favorite books and memories. Give it a try—you won’t regret it.