Imagine turning an ordinary bookshelf into a magical Barbie house that sparks creativity and endless fun. You don’t need to buy expensive toys or complicated kits.
With just a few simple steps, you can transform your bookshelf into a stunning play space that your child will love. Ready to discover how you can make this dream come true with materials you already have? Keep reading, and you’ll find easy tips and tricks to create a Barbie house that’s both beautiful and budget-friendly.
Your next favorite project is just a few clicks away!
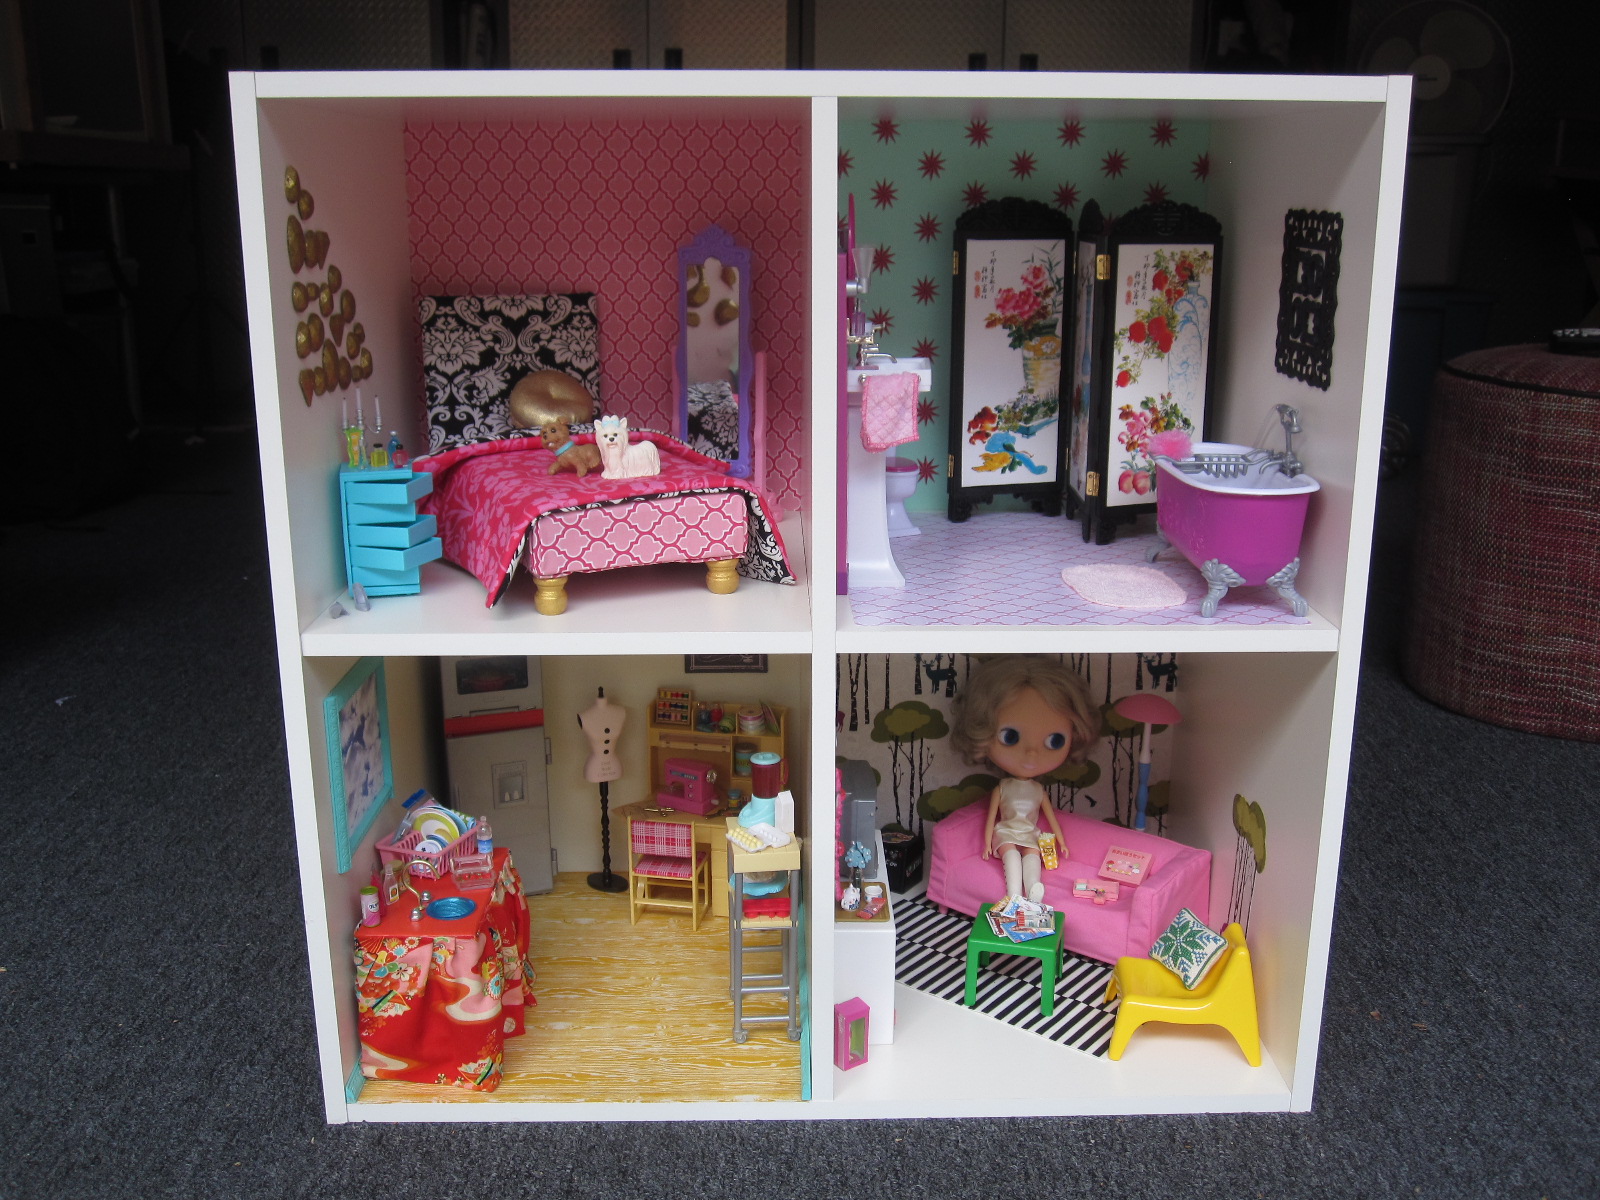
Credit: tamaracentral.com
Choosing The Right Bookshelf
Choosing the right bookshelf is the first step in making a Barbie house. It sets the base for your project. The shelf must fit the space and the style of the dollhouse you want. Size, shape, and material matter a lot. These details affect how easy it will be to build and decorate.
Size And Shape
Pick a bookshelf that matches the size of your Barbie dolls. Each shelf can become a different room. Tall shelves give more floors, but wide shelves offer bigger rooms. Think about the space you have. Small bookshelves work well for tight spaces. Large ones give more room to play and decorate.
Look for shelves with open sides or back. This makes it easier to add doors, windows, and furniture. Square or rectangular shapes fit most dollhouse designs. Avoid odd shapes that can make decorating hard. Balance height and width for the best look and use.
Material Considerations
Wood bookshelves are strong and easy to paint. They hold nails and screws well. MDF or particleboard shelves cost less but may not last long. They can also be harder to decorate. Avoid plastic shelves. They are lightweight but hard to change or paint.
Check for smooth surfaces. Rough or chipped shelves need extra work. A sturdy shelf keeps the Barbie house safe during play. Consider the weight too. Heavy shelves stay put but can be hard to move. Lighter ones are easy to move but may tip over.
Gathering Materials And Tools
Creating a Barbie house from a bookshelf is a fun and creative project. Before starting, gather all materials and tools. This step makes building easier and faster. Organizing supplies helps keep the workspace neat and safe. Below are the key items needed to transform a bookshelf into a Barbie dream home.
Essential Supplies
- A sturdy bookshelf with open shelves
- Paint in bright and pastel colors
- Paintbrushes of various sizes
- Strong glue or a hot glue gun
- Scissors and a craft knife
- Sandpaper to smooth rough edges
- Cardboard or foam board for walls and floors
- Ruler and pencil for measuring and marking
- Decorative paper or fabric for wallpaper
Optional Decorative Items
- Miniature furniture and dolls
- Stickers and decals for extra detail
- Small LED lights for illumination
- Colored tape for borders and accents
- Artificial flowers or plants
- Buttons, beads, or small craft gems
- Ribbon and lace for curtains
- Mini rugs or carpets made from felt
Preparing The Bookshelf
Preparing the bookshelf is the first step to creating a beautiful Barbie house. It makes sure the house looks neat and lasts long. A clean and smooth surface helps paint stick better. This section explains how to clean, sand, prime, and paint your bookshelf.
Cleaning And Sanding
Start by removing all dust and dirt from the bookshelf. Use a damp cloth to wipe the shelves and corners. Let the bookshelf dry completely before the next step.
Next, sand the bookshelf lightly with fine-grit sandpaper. This removes rough spots and old paint or varnish. Sanding creates a smooth surface for painting. Wipe off the dust after sanding with a clean cloth.
Priming And Painting
Apply a coat of primer to the bookshelf. Primer helps paint stick better and last longer. Use a brush or roller and cover all surfaces evenly. Let the primer dry fully before painting.
Choose a paint color that fits your Barbie house theme. Use a water-based acrylic paint for easy clean-up and good coverage. Apply the paint in thin, even layers. Let each layer dry before adding the next.
Painting the bookshelf makes it colorful and fun. This step brings your Barbie house to life.
Designing The Layout
Designing the layout is the key step for turning a bookshelf into a Barbie house. It sets the stage for how each room will look and feel. Careful planning makes the house cozy and fun. A clear layout helps you use space smartly.
Think about how many rooms you want and how they will connect. The layout should match the size of the bookshelf. Planning before building saves time and makes decorating easier.
Room Divisions
Start by deciding how to divide the bookshelf into rooms. Use cardboard or thin wood to create walls. Make sure the walls fit well and stand firm. Each shelf can be a separate room or split into smaller spaces. Keep some open areas for a living room or play space. Room divisions help organize the house and make it look real.
Furniture Placement
Place furniture where it fits best in each room. Keep walkways clear for Barbie to move around. Use small furniture that matches the room size. Group chairs near tables and beds in bedroom corners. Furniture placement adds life and comfort to the house. Arrange pieces to make the rooms look inviting and practical.
Building And Adding Furniture
Building and adding furniture brings your Barbie house to life. It makes the space cozy and fun. Small details create a big impact. You can use simple materials to craft furniture. This part lets your creativity shine. The furniture also fits perfectly inside the bookshelf rooms.
Diy Mini Furniture
Making your own mini furniture is easy and fun. Use cardboard, paper, or popsicle sticks. Cut pieces to size for chairs and tables. Paint them with bright colors or patterns. Glue parts together carefully for strength. Use fabric scraps to make tiny cushions or rugs. These mini pieces fit perfectly in your Barbie house. It gives a personal touch and saves money.
Repurposing Household Items
Look around for small things to reuse as furniture. Bottle caps can become stools or tables. Matchboxes work great for drawers or beds. Old buttons turn into clocks or decorations. Use small jars as lamps or vases. This saves waste and adds unique style. Repurposed items make your Barbie house special. Mix and match different objects for fun designs.
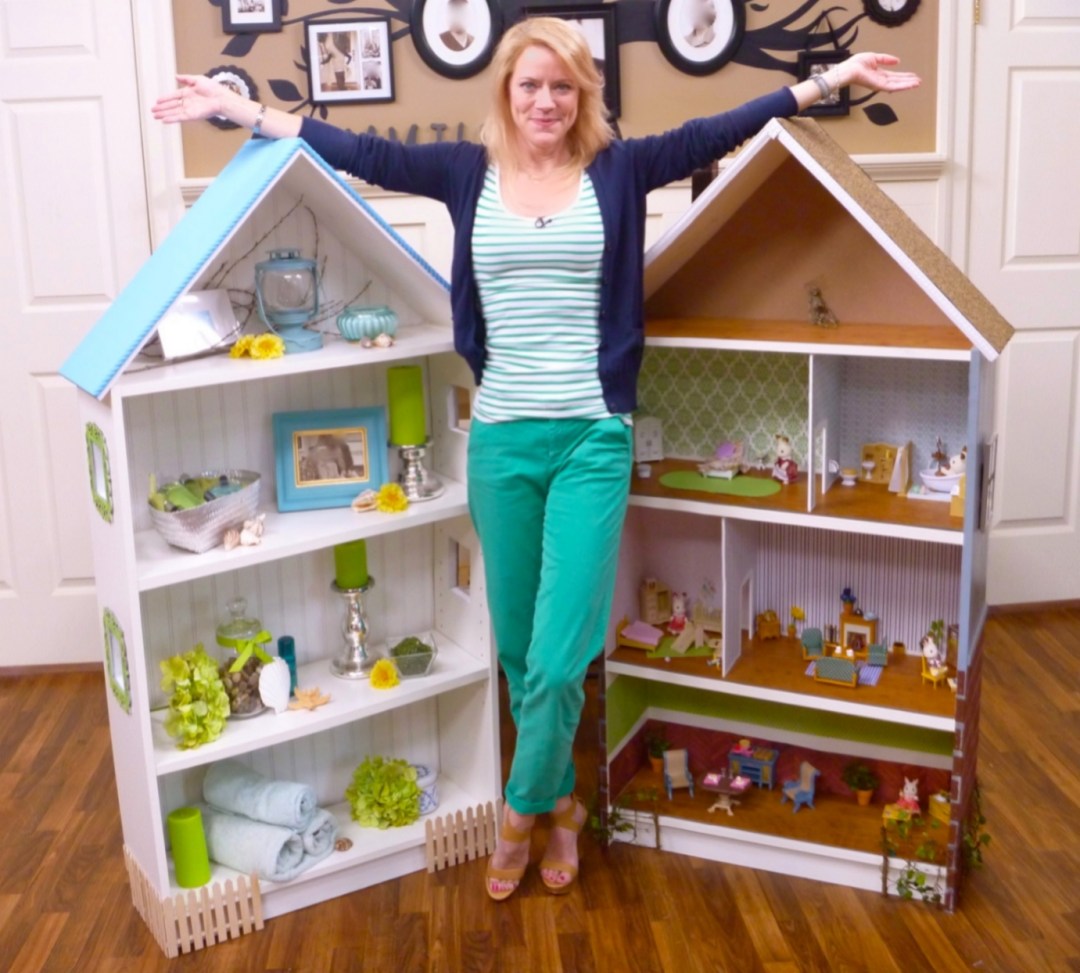
Credit: www.cathiefilian.com
Decorating Walls And Floors
Decorating the walls and floors of your Barbie house makes it feel cozy and real. Small details bring charm and personality to the space. Choose colors and patterns that match the style you want. Simple touches can change the whole look quickly.
Wallpaper And Paint Ideas
Use colorful wallpaper to brighten the walls. Look for small patterns like flowers or stripes. Peel-and-stick wallpaper works well and is easy to apply. Paint is a great choice for a smooth, clean look. Soft pastels create a calm atmosphere. Bright colors add energy and fun. Mix paint and wallpaper on different shelves for variety.
Floor Coverings And Rugs
Floor coverings make the rooms feel warm and inviting. Use felt or fabric pieces as rugs. Cut them to fit each shelf perfectly. Choose patterns that match the walls or furniture. Soft textures add comfort for Barbie’s feet. Layering rugs can add a cozy touch. Try using craft foam for a smooth, easy-to-clean floor. Rugs and floor mats bring the Barbie house to life.
Adding Lighting And Accessories
Adding lighting and accessories brings your Barbie house to life. It makes the space cozy and fun. Small lights and cute details create a magical feel.
Think about safe light choices. Add little decorations that match the room style. These touches make the Barbie house more special and realistic.
Safe Lighting Options
Use battery-powered LED lights. They are cool to touch and do not get hot. Stick-on LED strips work well inside shelves.
Fairy lights add a soft glow. Choose ones with a timer to save battery. Avoid real candles or plugs that can cause accidents.
Decorative Details
Add small rugs, pillows, and tiny picture frames. Use dollhouse furniture or make your own from paper and fabric.
Place miniature plants or flowers for a fresh look. Use colorful stickers or washi tape to create wallpaper. Little curtains or blankets add warmth and charm.
Finishing Touches
The finishing touches make your Barbie house unique and lively. This step adds charm and personality to your project. Small details transform a simple bookshelf into a fun play space.
Personalizing The Space
Choose colors and patterns your child loves. Use small rugs, curtains, or wallpaper to decorate. Add miniature furniture and tiny toys for realism. Display little photos or drawings to create a homey feel. Personal touches make the Barbie house special and inviting.
Maintenance Tips
Keep the Barbie house clean and dust-free. Wipe surfaces gently with a soft cloth. Check for loose parts and fix them quickly. Store small pieces carefully to avoid losing them. Regular care keeps the bookshelf house looking fresh and ready for play.
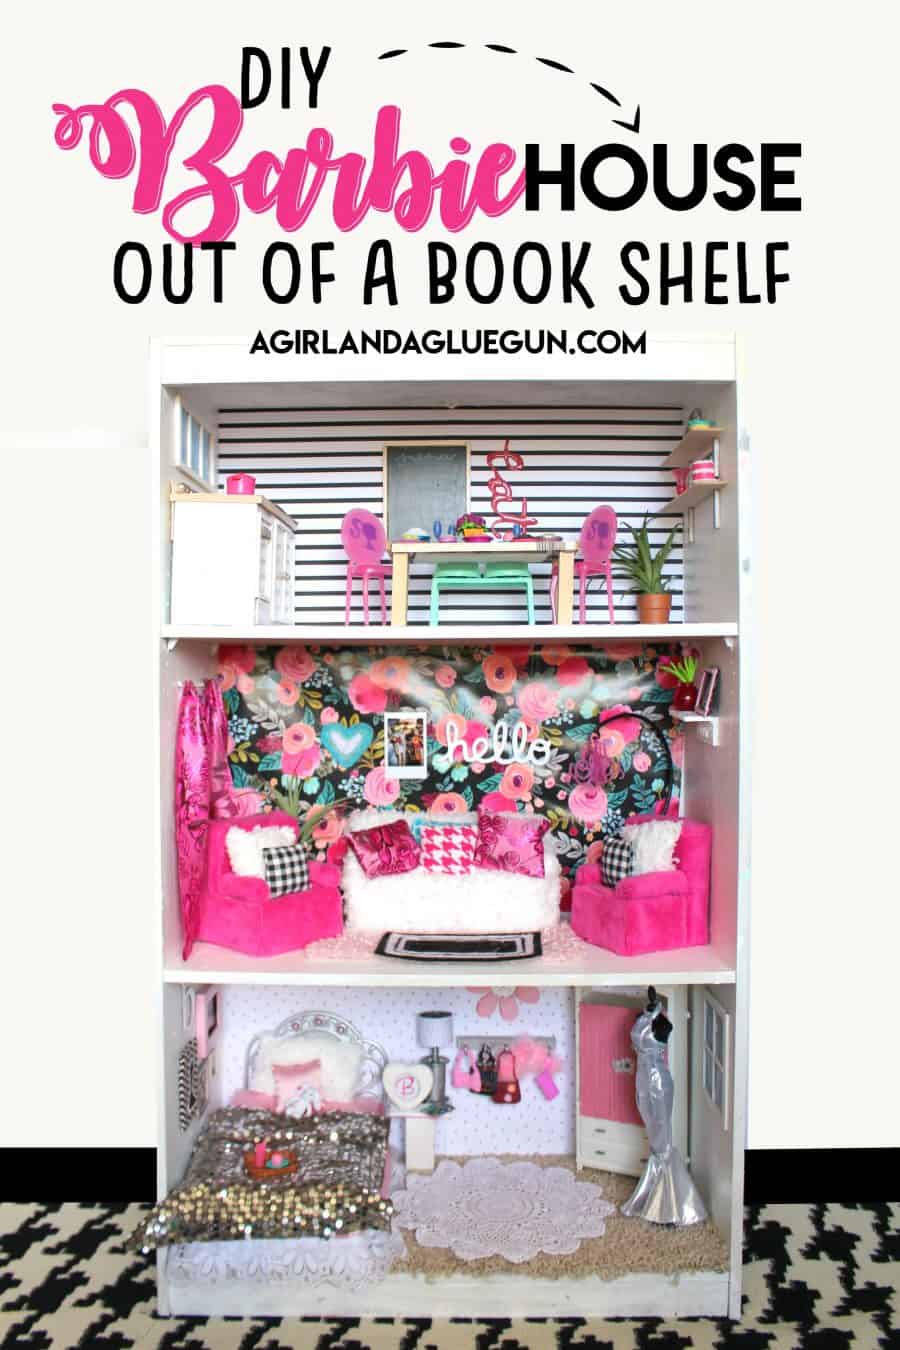
Credit: www.agirlandagluegun.com
Frequently Asked Questions
How Do I Choose The Right Bookshelf For A Barbie House?
Select a bookshelf with multiple compartments and sturdy shelves. Ensure it is the right size for Barbie dolls and easy to decorate.
What Materials Are Needed To Decorate A Barbie Bookshelf House?
Use paint, fabric, wallpaper, miniature furniture, and craft supplies. These enhance the look and make the house realistic and fun.
How Can I Safely Modify The Bookshelf For Barbie Play?
Use child-safe tools and avoid sharp edges. Securely attach decorations and check stability to prevent accidents during play.
Can I Add Lighting To My Barbie Bookshelf House?
Yes, use battery-operated LED lights for safety. They add a cozy and realistic effect without electrical hazards.
Conclusion
Creating a Barbie house from a bookshelf is fun and simple. It gives old furniture new life. Kids enjoy playing in their own special space. You can add colors, decorations, and tiny furniture. This project saves money and sparks creativity.
It also makes a great gift idea. Try this craft to bring joy and imagination. Everyone can make a beautiful Barbie house with just a few steps. Start today and watch your bookshelf transform!