Have you ever wanted to turn your bookshelf into a mini world full of stories and creativity? Making a bookshelf diorama is a fun and simple way to bring your favorite books to life right on your shelf.
Imagine opening your book and seeing a tiny scene that matches the story inside. It’s not just decoration—it’s a way to connect with your books on a whole new level. In this guide, you’ll learn easy steps and clever tips to create your own bookshelf diorama, even if you’ve never done a craft project before.
Ready to transform your bookshelf into something magical? Let’s get started!
Choosing Your Theme
Choosing a theme is the first step in making a bookshelf diorama. It sets the mood and guides your design choices. A clear theme makes your project more interesting and personal.
Think about what you enjoy or what fits your space. Your theme can be simple or detailed. It helps focus your materials and colors.
Popular Diorama Ideas
Nature scenes are popular, like forests, beaches, or gardens. Miniature cities or famous landmarks create a unique look. Fantasy themes with dragons, castles, or space scenes inspire creativity. Seasonal themes, such as winter or autumn, add a cozy feeling. Choose a theme that excites you and fits your bookshelf size.
Matching Decor Styles
Match your diorama with your room’s style for a balanced look. A modern room suits clean, simple dioramas. Rustic rooms work well with natural themes and earthy tones. Vintage spaces pair nicely with antique or historical scenes. Matching styles help your diorama blend with other decor. Keep colors and shapes in mind to create harmony.
Credit: discover.hubpages.com
Gathering Materials
Gathering materials is the first step to create a bookshelf diorama. Having the right supplies makes the project easier and more fun. Prepare everything before you start building.
Essential Supplies
Get a small bookshelf or a wooden box as the base. Choose lightweight wood or cardboard for easy cutting. Grab glue that works well with wood or paper. Use scissors or a craft knife to shape parts. Paints and brushes help add color and details. Collect small items like paper, fabric, or plastic for creating objects inside the diorama. A ruler and pencil help measure and mark pieces accurately.
Optional Decorative Items
Think about tiny lights to brighten your scene. Miniature figures or animals add life to the diorama. Use fake plants or moss for a natural look. Small stickers or decals can decorate walls or floors. Glitter or beads give a sparkling effect. Use different textures like sand or cotton for variety. These extras make your bookshelf diorama unique and interesting.
Planning Your Design
Planning your design is the first step in creating a bookshelf diorama. It helps you organize ideas and visualize the final look. A good plan saves time and avoids mistakes. Take time to decide the size, theme, and style of your diorama. Think about the items you want to include and how they will fit on the shelf.
Sketching The Layout
Start by drawing a rough sketch of your bookshelf diorama. Use simple shapes to mark where each item will go. This helps you see the balance and spacing. Sketching lets you try different arrangements quickly. It also helps to plan the depth and height of each section. You can use pencil and paper or a digital tool for your sketch.
Selecting Color Schemes
Choose colors that match your theme and style. Pick two or three main colors for a clean look. Use lighter colors to make small spaces feel bigger. Dark colors add depth and focus to parts of the diorama. Think about how colors work together on the shelf. Avoid too many bright colors to keep the design calm and attractive.
Building The Base
Building the base is the first step to a sturdy bookshelf diorama. The base supports the entire structure and holds all your creative elements. A strong base keeps the diorama stable and balanced. It also sets the size and shape of your project. Start with clear measurements and proper materials. Take your time to build a solid foundation.
Cutting The Frame
Begin by measuring the wood or cardboard for the frame. Use a ruler and pencil to mark the pieces. Cut straight lines with a saw or craft knife. Make sure all pieces are the same length and width. Smooth the edges with sandpaper to avoid splinters. Precise cuts ensure a neat and strong frame. Double-check measurements before cutting to save time.
Assembling The Structure
Lay out the cut pieces in the shape of your base. Join the corners using wood glue or strong tape. Use clamps or heavy objects to hold the pieces together. Let the glue dry fully for a firm bond. Add small nails or screws for extra support if needed. Check the base for stability before moving on. A well-assembled base makes the next steps easier.
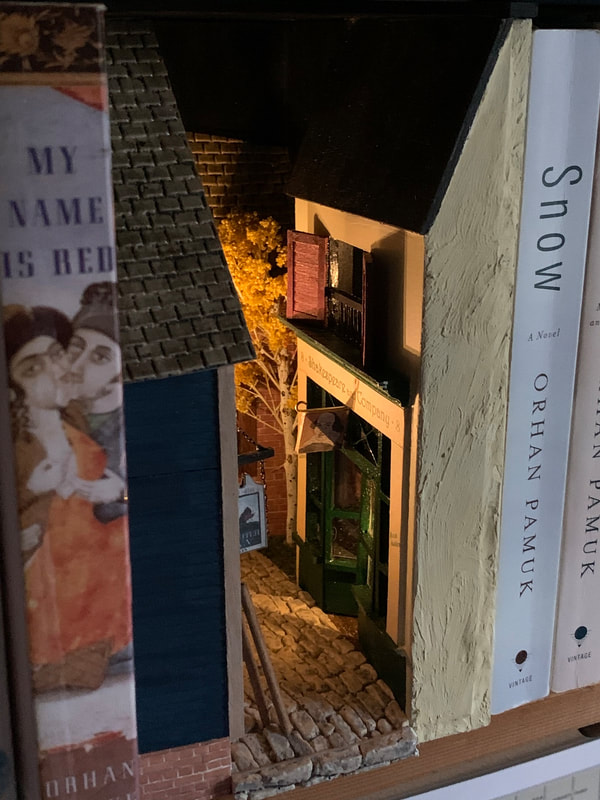
Creating Background Elements
Creating background elements is a vital step in making a bookshelf diorama. These elements set the scene and add depth to your miniature world. A well-designed background makes your diorama feel alive and complete. Focus on simple techniques that bring life without overwhelming the small space.
Painting Techniques
Start with a base coat of paint on your background surface. Use light colors to create a sense of space and air. Blend colors softly to mimic sky or distant landscapes. Use a small brush for details like clouds, trees, or buildings. Layer paint gently to avoid harsh lines. Dry brushing can add highlights and texture. Let each layer dry before adding the next for best results.
Adding Textures
Textures make your background more interesting and real. Use materials like sand, tissue paper, or fabric scraps to add depth. Glue these materials onto the background carefully. Paint over textures to blend them into the scene. Use sponges or brushes to create rough or smooth effects. Small pieces of moss or foam can mimic plants or rocks. Textured backgrounds help your diorama feel three-dimensional and natural.
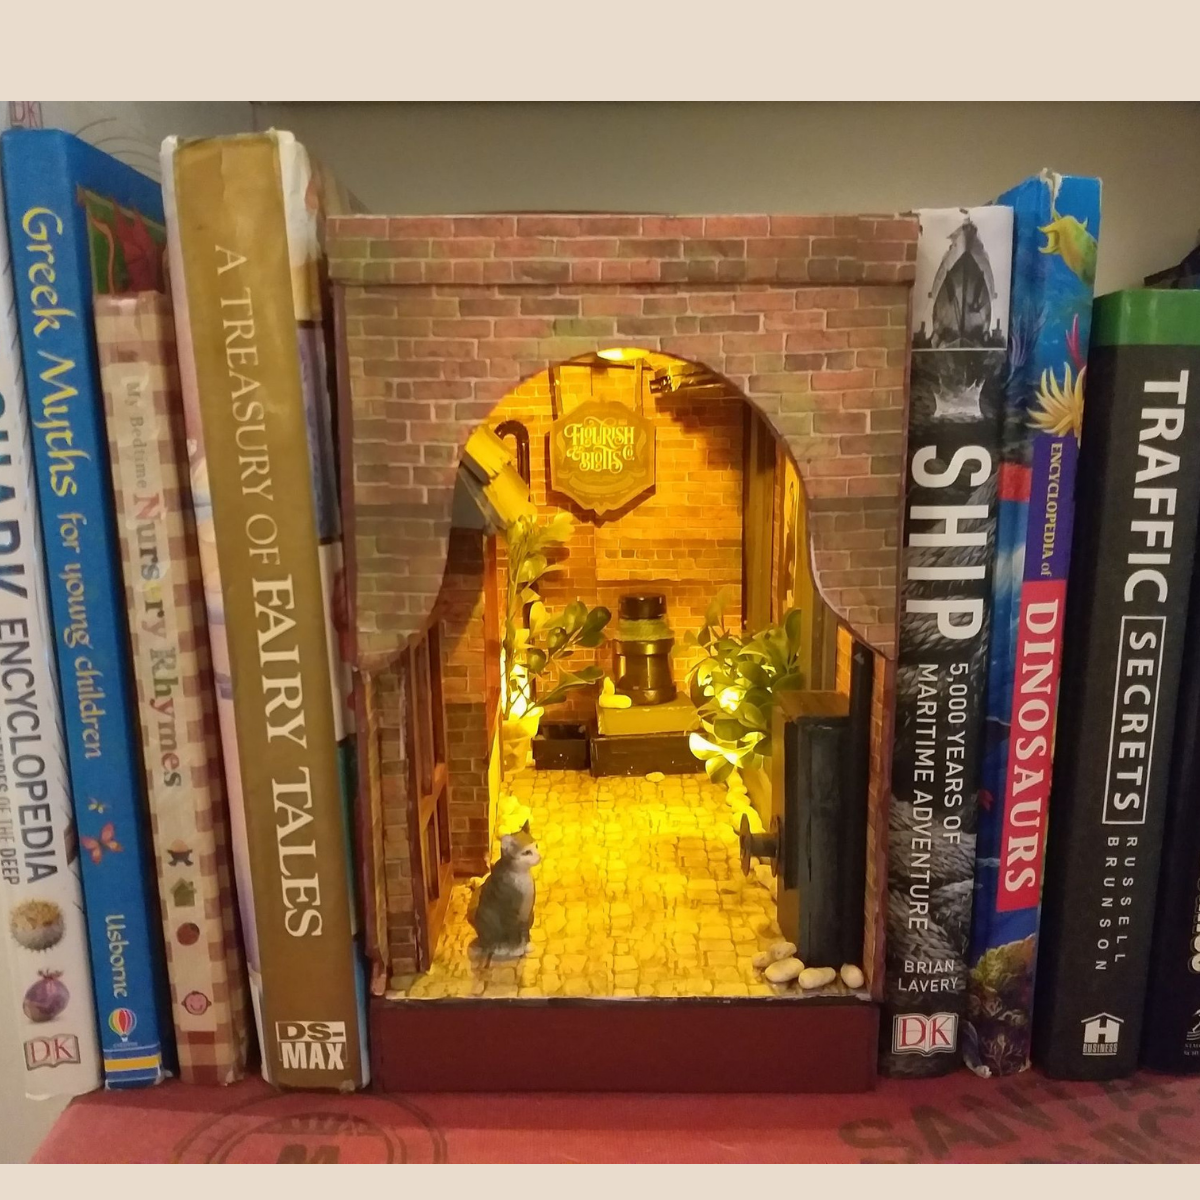
Adding Miniature Details
Adding miniature details brings your bookshelf diorama to life. Small touches make your scene feel real and inviting. These details create depth and interest. They invite viewers to explore every corner. Focus on props and lighting to enhance your diorama.
Using Small Props
Small props add personality to your diorama. Tiny books, plants, or furniture work well. Use items that match your theme and size. Arrange props carefully for a natural look. Avoid overcrowding to keep balance and clarity. Handmade or store-bought miniatures both work fine. Paint or decorate plain pieces for a custom touch.
Incorporating Lighting
Lighting highlights your diorama’s best features. Use LED lights for a soft, warm glow. Place lights where shadows create depth and mood. Battery-powered lights avoid messy wires. Experiment with colors to change the scene’s feel. Small lamps or fairy lights add charm. Proper lighting makes your diorama more engaging and vivid.
Final Touches
After building your bookshelf diorama, the final steps bring it to life. These finishing touches protect your work and display it well. Small details make a big difference in the overall look and durability.
Let’s explore how to seal your diorama and arrange it on your bookshelf for the best effect.
Sealing And Protecting
Use a clear spray sealant to protect your diorama. It keeps dust and moisture away from delicate parts. Choose a matte or satin finish to avoid shine. Spray lightly and evenly over the whole surface. Let it dry completely before handling. This step helps your diorama last longer and stay vibrant.
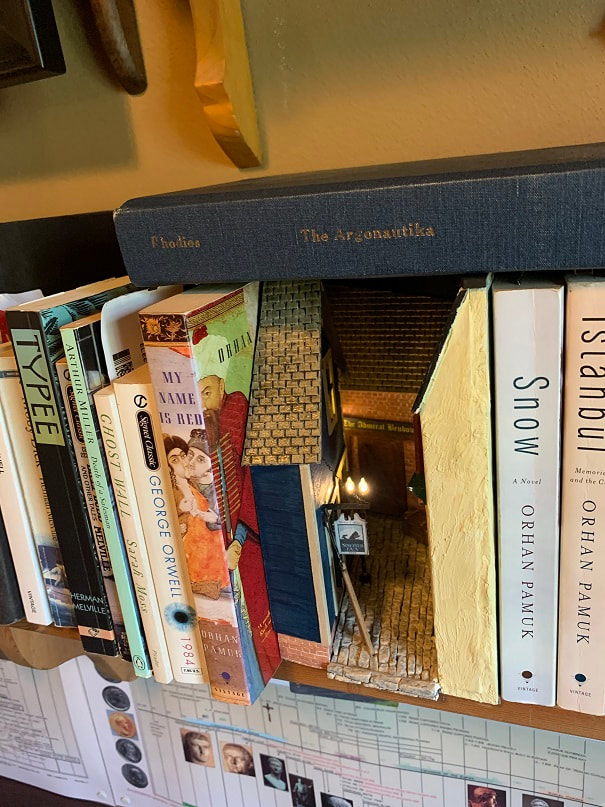
Arranging On The Bookshelf
Place your diorama where it stands out. Avoid crowded spots that hide its details. Position it at eye level for easy viewing. Group it with related books or items to create a theme. Keep it away from direct sunlight to prevent fading. This careful placement makes your diorama a charming part of your room.
Credit: www.argobuilder.com
Credit: www.argobuilder.com
Frequently Asked Questions
What Materials Do I Need For A Bookshelf Diorama?
You need a small bookshelf or shadow box, miniature items, glue, paint, scissors, and decorative paper. These materials help create a detailed, themed scene inside the bookshelf.
How Do I Create A Realistic Background For My Diorama?
Use painted cardboard or printed images for the backdrop. Adding texture or layering elements enhances depth and realism in your bookshelf diorama.
What Are Easy Themes For A Beginner Bookshelf Diorama?
Start with simple themes like a cozy reading nook, a garden scene, or a miniature library. These ideas are easy and fun for beginners to craft.
How Long Does It Take To Make A Bookshelf Diorama?
Creating a basic bookshelf diorama usually takes 2 to 5 hours. Time varies based on complexity and detail level chosen by the maker.
Conclusion
Creating a bookshelf diorama is fun and simple. You can use basic materials found at home. Personalize your diorama with colors and small decorations. It makes your bookshelves more interesting and unique. Try different themes to express your style. This project helps you enjoy crafting and organizing together.
Start small and build your skills step by step. Enjoy the process and show off your creative space.