Are you looking to add a splash of color and creativity to your room? A rainbow bookshelf is the perfect way to brighten up your space while keeping your books organized.
Imagine a shelf that not only holds your favorite reads but also brings joy every time you see it. In this guide, you’ll learn simple, step-by-step instructions to build your own vibrant rainbow bookshelf. Whether you’re a beginner or just want a fun weekend project, this article will help you create something unique and eye-catching.
Ready to turn your bookshelf into a colorful masterpiece? Let’s get started!

Credit: www.reddit.com
Materials And Tools
Gathering the right materials and tools sets the foundation for your rainbow bookshelf project. Choosing quality supplies ensures the final product looks great and lasts long. Preparation makes the building process smooth and enjoyable.
Wood Selection
Opt for sturdy wood like pine or plywood. These types are easy to cut and shape. Pine has a smooth surface, perfect for painting. Plywood offers strength and stability for shelves. Avoid soft woods that may warp or crack.
Paint Choices
Pick bright, vibrant colors to create a rainbow effect. Use water-based acrylic paints for easy cleanup and quick drying. Choose non-toxic paint to keep your space safe. Matte or satin finishes work well for bookshelves. Prepare a primer to help paint stick better.
Essential Tools
Have a saw ready for cutting wood pieces to size. A drill helps make holes for screws and assembly. Sandpaper smooths rough edges and surfaces. Use a paintbrush or roller for even paint application. A measuring tape and pencil keep your cuts accurate.
Design Planning
Design planning is the first step to creating a rainbow bookshelf. It sets the foundation for your entire project. Good planning saves time and avoids mistakes later. It helps you visualize the final look and make smart choices.
Choosing Shelf Dimensions
Decide how big your bookshelf should be. Think about the space where you will place it. Measure the height, width, and depth carefully. Choose shelf sizes that fit your books well. Keep some extra space for future books. Balance between tall and short shelves for variety.
Sketching The Layout
Draw a simple plan on paper or digitally. Mark the number of shelves and their positions. Sketching helps you see the structure clearly. Adjust spacing and shelf height as needed. Plan for stability by noting support points. A clear layout guides you during building.
Color Arrangement Tips
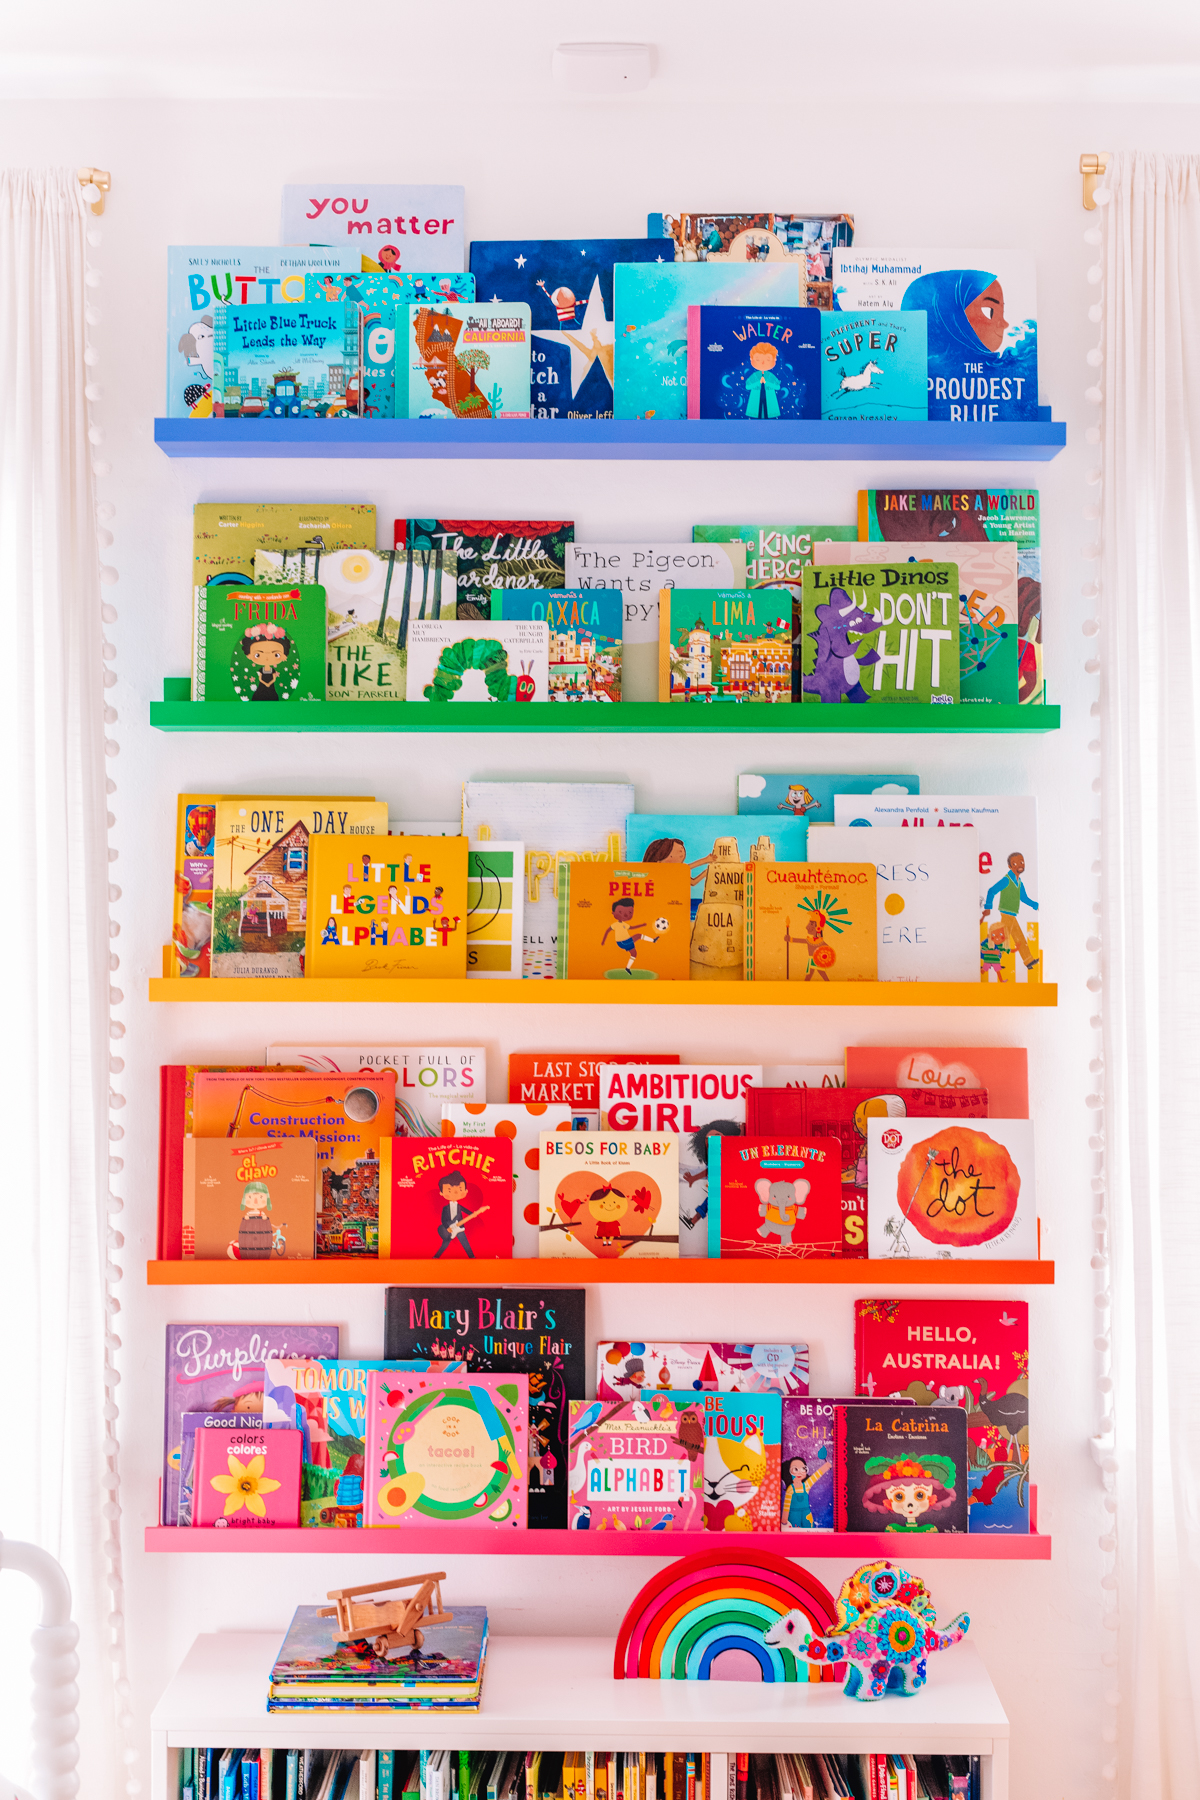
Pick colors that match the rainbow order: red, orange, yellow, green, blue, indigo, violet. Use bright, vivid paint for a cheerful look. Paint each shelf separately before assembly. Consider fading colors from top to bottom for style. Avoid random color placement to keep harmony. A well-planned color scheme makes your bookshelf pop.
Cutting The Wood
Cutting the wood is an important step in making your rainbow bookshelf. It shapes the wood pieces that will form the shelves. Accurate cuts help the bookshelf look neat and fit well together.
Take your time with this step to get good results. Use the right tools and follow safety rules. This ensures your cuts are clean and your work area stays safe.
Measuring And Marking
Start by measuring the wood pieces you need. Use a tape measure for accuracy. Mark the cutting lines clearly with a pencil. Double-check your marks before cutting. This avoids mistakes and wasted wood.
Mark both sides of the wood if possible. It helps guide your cut straight. Use a ruler or square to keep lines straight. Clear marks make cutting easier and more precise.
Safe Cutting Techniques
Always wear safety glasses and gloves. Protect your eyes from dust and splinters. Keep your hands away from the blade. Use clamps to hold wood steady during cutting. This prevents slips and accidents.
Cut slowly and follow your marked lines. Do not rush. Use a saw that suits your wood type and thickness. Clean the saw blade regularly for smooth cuts. Stop and check your progress often.
Credit: studiodiy.com
Assembling The Frame
Assembling the frame is the first key step in building your rainbow bookshelf. This part creates the basic shape and structure. A strong frame keeps the whole bookshelf steady and safe for your books.
Take your time to align the pieces correctly. The frame must be square and tight. This ensures the shelves will fit well and hold weight evenly.
Joining The Pieces
Start by arranging the wood pieces on a flat surface. Match the sides and ends carefully. Use clamps to hold the corners together. Check that all angles are right and edges meet flush. This helps the frame stay balanced and neat.
Securing With Screws And Glue
Apply wood glue to the joining edges. This adds strength and stops movement. Next, drill pilot holes for screws to avoid wood splitting. Insert screws evenly spaced along each joint. Tighten them firmly but do not overdrive. This secures the frame tightly for lasting support.
Sanding And Preparing Surfaces
Preparing the wood surface is a key step in building a rainbow bookshelf. Sanding helps remove rough spots and old paint. It also makes the surface smooth for new paint. A well-prepared surface improves paint adhesion. This leads to a cleaner, more vibrant finish that lasts longer.
Sanding Tips For Smooth Finish
Start sanding with medium-grit sandpaper. This removes rough areas and splinters. Sand along the grain of the wood. Avoid sanding in circles to prevent scratches. After the first pass, use fine-grit sandpaper. This smooths the surface for painting. Check for any uneven spots and sand again if needed. Wear a mask to avoid breathing dust.
Cleaning Before Painting
After sanding, clean the wood surface well. Use a damp cloth to remove dust and debris. Let the surface dry completely before painting. Dust or dirt can ruin the paint finish. A clean surface helps the paint stick better. Use a tack cloth for a final wipe if available. This step ensures a bright, smooth rainbow finish.
Painting The Bookshelf
Painting the bookshelf brings the rainbow idea to life. This step needs care and patience. The colors must be bright and neat for a stunning look. Follow these steps to make each color band perfect and smooth.
Applying Primer
Start with a clean, dry bookshelf. Use a brush or roller to apply primer evenly. Primer helps paint stick better and last longer. Let the primer dry fully before painting. This step prevents paint from peeling or chipping.
Painting Each Color Band
Plan the colors in rainbow order. Use painter’s tape to mark each color band. Paint one color at a time for neat edges. Use thin, even coats to avoid drips. Wait for each coat to dry before applying the next. This keeps colors bright and clear.
Drying And Touch-ups
Allow all paint to dry completely. Check for uneven spots or missed areas. Use a small brush for touch-ups. Fix any smudges or streaks carefully. Proper drying and touch-ups make the bookshelf look polished and vibrant.
Final Assembly
The final assembly is the most exciting part of building your rainbow bookshelf. This is where all parts come together to create a sturdy and colorful piece. Careful steps ensure your shelf holds up well and looks great.
Take your time and follow the instructions closely. A well-assembled bookshelf will last longer and keep your books safe.
Attaching Shelves
Start by placing the shelves in their slots. Make sure each shelf fits snugly. Use screws to secure the shelves firmly. Check that each shelf is level before tightening screws. This prevents wobbling and keeps your books safe.
Work from the bottom shelf up. This helps keep the structure balanced. Double-check all screws are tight but avoid over-tightening. Over-tightening can damage the wood or paint.
Adding Wall Mounts For Stability
Wall mounts add extra safety, especially for tall shelves. Attach the brackets to the top back of the bookshelf. Use a drill to fix them securely. Then, find studs in the wall to attach the other side of the mounts.
Use a level to keep the bookshelf straight. Secure the mounts tightly to avoid any movement. Wall mounts prevent the shelf from tipping forward. This is important in homes with kids or pets.

Credit: mymindspeaksaloud.wordpress.com
Styling Your Rainbow Bookshelf
Styling your rainbow bookshelf brings charm and order to your space. A well-styled shelf shows off your personality. It creates a cheerful and inviting atmosphere. Small details make a big difference in how the shelf looks.
Organizing Books By Color
Sort your books by the colors of their spines. Arrange them in the order of the rainbow: red, orange, yellow, green, blue, indigo, and violet. This method creates a smooth flow of colors. It makes your bookshelf visually pleasing and easy to browse.
Mix tall and short books for variety. Stand some books upright and stack others horizontally. This break in pattern adds interest and depth. Keep similar colors together to maintain the rainbow theme.
Decorative Accents Ideas
Add small decorative items to your shelf for extra charm. Use items that match the color sections of your bookshelf. For example, place a red vase in the red section. This ties the decorations to the color scheme.
Include plants, framed photos, or small sculptures. These items bring texture and personality. Avoid crowding the shelf. Leave space to keep the look clean and fresh. Balance books and decor to create harmony.
Frequently Asked Questions
What Materials Are Needed For A Rainbow Bookshelf?
You need wood boards, paint in rainbow colors, sandpaper, screws, a drill, and paintbrushes. These materials ensure sturdy construction and vibrant colors for your bookshelf.
How Long Does It Take To Make A Rainbow Bookshelf?
It typically takes 4 to 6 hours, including drying time for paint. Preparation, assembly, and painting each shelf carefully are key steps in the process.
Can I Customize The Size Of The Rainbow Bookshelf?
Yes, you can adjust the shelf dimensions to fit your space. Just measure your area and cut the wood boards accordingly before assembling.
What Type Of Paint Works Best For This Project?
Use acrylic or latex paint for durability and bright colors. These paints dry quickly and provide a smooth finish ideal for bookshelves.
Conclusion
Creating a rainbow bookshelf adds color and joy to any room. You only need simple steps and basic tools. This project brings fun and creativity together. It makes organizing books easier and more exciting. Try making your own rainbow bookshelf soon.
Enjoy the bright and cheerful look it gives. A small project with a big impact. Let your space shine with colors today.