Are you looking for a fun and creative project that will make your 18-inch dolls even happier? Making an 18-inch doll bunk bed is easier than you think, and it adds a special touch to your doll’s room.
Imagine your dolls having a cozy place to sleep, just like real kids! In this guide, you’ll find simple steps and handy tips to build a sturdy, charming bunk bed that your dolls—and you—will love. Ready to get started and create something amazing with your own hands?
Let’s dive in!
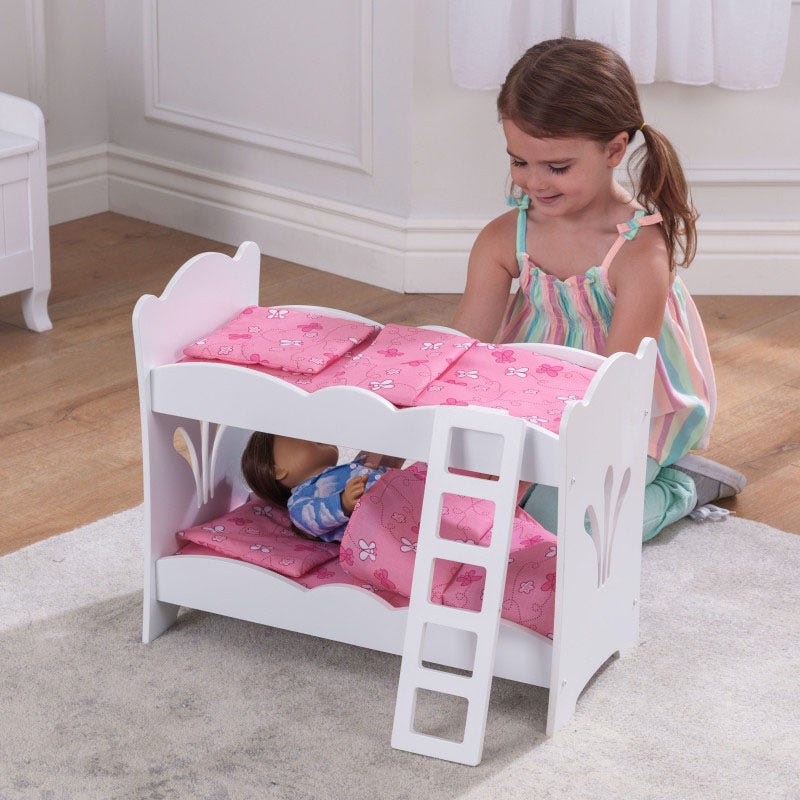
Credit: www.kidkraft.com
Materials Needed
Gathering the right materials is the first step to build an 18 inch doll bunk bed. Using proper supplies ensures your bed is strong and looks great. This list covers all basics for a smooth project.
Wood Pieces
Choose smooth, lightweight wood for easy handling. Common options include pine or plywood. Cut pieces to fit the bed’s frame, ladder, and slats.
Wood Glue
Wood glue helps hold parts tightly together. Pick a strong adhesive for lasting bonds. Apply glue at joints before screwing pieces.
Screws And Nails
Use small screws and nails for secure assembly. Choose sizes that fit wood thickness. Keep extra screws for adjustments.
Sandpaper
Sandpaper smooths rough edges and surfaces. Use fine grit for a polished finish. This step prevents splinters on the doll bed.
Paint Or Wood Stain
Pick non-toxic paint or stain for a safe finish. Choose colors that match your doll’s style. Let each coat dry fully before next step.
Brushes And Cloth
Use brushes to apply paint or stain evenly. A soft cloth helps wipe excess stain smoothly. Clean tools after use for best results.
Measuring Tape And Pencil
Measure wood pieces accurately with a tape measure. Mark cutting lines clearly using a pencil. Precision helps parts fit perfectly.
Safety Gear
Wear safety glasses and gloves during cutting and sanding. Protect your eyes and hands from injury. Keep your workspace clean for safety.
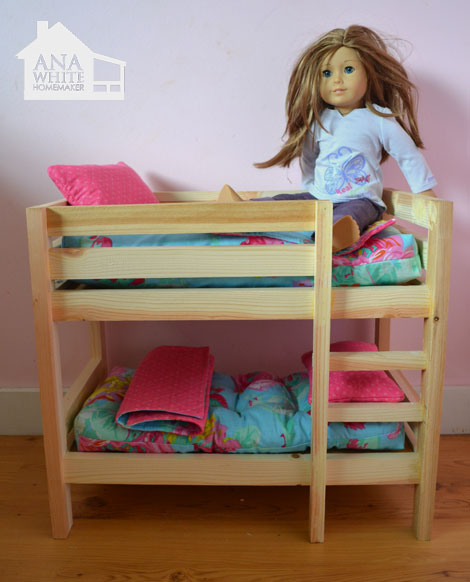
Credit: www.ana-white.com
Tools Required
Building an 18 inch doll bunk bed requires specific tools. These tools help make the work easier and the bed sturdy. Using the right tools saves time and improves safety. Below are the essential tools needed to start your project.
Measuring Tape
A measuring tape ensures all parts are cut accurately. Precise measurements keep the bed balanced and stable. Choose a tape that is easy to read and handle.
Hand Saw
A hand saw cuts the wood pieces to the right size. It is simple to use and perfect for small projects. Make sure the blade is sharp for clean cuts.
Sandpaper
Sandpaper smooths the edges and surfaces of wood. It helps prevent splinters and gives a nice finish. Use fine-grit sandpaper for best results.
Wood Glue
Wood glue holds parts together firmly. It adds strength to the joints and keeps the bed sturdy. Apply glue evenly for a strong bond.
Clamps
Clamps hold wood pieces in place while glue dries. They keep parts aligned and prevent shifting. Choose clamps that are easy to adjust.
Screwdriver
A screwdriver tightens screws that secure the bed parts. It is important for making the bed solid and safe. Use the right size screwdriver for your screws.
Measuring And Cutting Wood
Measuring and cutting wood is the first step in building an 18 inch doll bunk bed. Accurate cuts ensure the bed is sturdy and fits together well. Take your time measuring each piece carefully before cutting. Use a pencil to mark the wood clearly. Safety matters, so wear goggles and use a stable surface for cutting.
Cutting Side Rails
Start with the side rails. These hold the mattress and connect the bed frame. Measure two pieces of wood to the length of the bed, about 18 inches. Mark the wood and cut straight lines using a saw. Sand the edges smooth to avoid splinters.
Cutting Bed Slats
Bed slats support the doll mattress. Measure several pieces about 12 inches long. Cut each piece carefully, keeping them the same size. Sand all edges to keep them safe and smooth. Even slats make the bed strong and stable.
Cutting Legs And Ladder
Legs raise the bed off the ground. Cut four pieces about 8 inches long for legs. The ladder needs two longer side pieces and short steps. Measure and cut the ladder steps evenly. Smooth all edges with sandpaper before assembly.
Assembling The Frame
Building the frame is the first big step in making the 18 inch doll bunk bed. It forms the base and holds everything together. A strong frame keeps the bed steady and safe for play. Follow each step carefully to avoid mistakes. Take your time and check each part before moving on.
Attaching Side Rails To Legs
Start by placing the legs upright on a flat surface. Take one side rail and align it with the holes on the legs. Use screws to fix the rail tightly to the legs. Repeat this for the other side rail. Make sure both rails are level and secure. Tight connections stop the bed from wobbling. Use a screwdriver or drill for better grip.
Securing Bed Slats
Lay the frame flat to add the bed slats. Space the slats evenly across the side rails. Attach each slat with small screws or nails. Check that each slat is flush and does not stick out. These slats hold the doll mattress and support weight. Strong slats prevent sagging and keep the bed stable. Double-check all screws before finishing.
Building The Ladder
Creating an 18-inch doll bunk bed is fun and simple. Start by cutting wood pieces to size and assembling the frame carefully. Add a small ladder to complete the cozy bed for your dolls.
Cutting Ladder Steps
Start by measuring the length of the ladder sides. Cut two long wooden pieces for the sides of the ladder. Next, cut several short pieces for the steps. Make sure all step pieces are the same length. Sand each piece to smooth rough edges. This helps prevent splinters and creates a safe ladder for the doll.
Attaching Ladder To Frame
Place the ladder sides next to the bunk bed frame. Position the steps evenly between the two side pieces. Use wood glue on each step end before attaching. Secure the steps with small nails or screws for strength. Check the ladder’s angle; it should lean safely against the bed. Allow the glue to dry fully before use.
Sanding And Smoothing
Sanding and smoothing are key steps in making a doll bunk bed. They prepare the wood for painting or staining. These steps remove rough edges and splinters. They help the bed look neat and feel safe for dolls.
Careful sanding ensures the wood surface is even. A smooth surface makes the final product stronger. It also helps the paint or finish stick better. Sanding takes time but it is worth the effort.
Sanding Tools You Need
Use fine-grit sandpaper for best results. A sanding block can help keep the surface flat. You may also use an electric sander for faster work. Always start with a rougher grit, then use finer grit paper.
How To Sand The Wood
Sand along the grain, not against it. Move the sandpaper in long strokes. Check the wood often to avoid sanding too much. Smooth out all edges, corners, and flat surfaces. Take care around small or detailed parts.
Finishing Touches For Smoothness
After sanding, wipe the dust with a damp cloth. Let the wood dry fully before the next step. Run your hand over the surface to check for rough spots. Sand again if you find any bumps or splinters. Repeat until the wood feels perfectly smooth.
Painting And Finishing
Painting and finishing your 18 inch doll bunk bed is a fun step. It makes the bed look nice and protects the wood. A good paint job can make the bunk bed last longer and look great in your doll’s room.
Choosing Paint Colors
Pick colors that match your doll’s style or room. Bright colors like red or blue are cheerful. Soft pastels create a calm, pretty look. Use non-toxic, child-safe paint for safety. Test a small spot first to see how it looks.
Applying Paint
Use a small brush for detailed areas. Paint in thin, even coats to avoid drips. Let each coat dry before adding the next. Light sanding between coats helps the paint stick better. Cover all surfaces, including edges and corners.
Adding Protective Coat
Apply a clear sealant to protect the paint. Choose a water-based polyurethane for a smooth finish. Use a brush to spread it evenly. Let it dry fully before use. The coat makes the bed strong and easy to clean.
Adding Accessories
Adding accessories brings life to your 18 inch doll bunk bed. Accessories make the bed cozy and fun. They also add a personal touch.
Small details create a complete and inviting look. Accessories are easy to make and customize. Let’s explore simple ways to enhance the bunk bed.
Making Bedding
Start with soft bedding to fit the bunk bed size. Use cotton fabric or felt for comfort. Cut fabric pieces to cover the mattress area.
Sew or glue the edges to avoid fraying. Add small pillows using scraps of fabric and stuffing. Create tiny blankets by folding fabric squares.
Choose colors and patterns your doll would like. Bedding makes the bunk bed look ready for rest.
Decorating The Bunk Bed
Use paint or markers to add color to the frame. Stick small decals or washi tape for fun designs. Attach tiny hooks or shelves for doll accessories.
Hang mini curtains for privacy and style. Add a small rug under the bed for extra charm. These decorations make the bunk bed unique and playful.
Safety Tips
Building an 18 inch doll bunk bed is fun and rewarding. Safety is important to keep your doll and play area secure. Follow these safety tips to create a strong and safe bunk bed.
Use Smooth And Sanded Wood
Choose wood that is smooth and free of splinters. Sand all edges carefully. This prevents scratches and cuts on your doll and hands.
Secure All Joints Firmly
Make sure all parts fit tightly. Use glue and small nails or screws. Loose joints can cause the bed to fall apart.
Avoid Sharp Or Small Parts
Do not use nails or screws that stick out. Avoid small parts that can come off easily. These can be dangerous for children and dolls.
Check Weight Limits
Test the bed to hold the weight of your doll safely. Avoid placing heavy objects on the bed. This keeps it stable and prevents breaks.
Keep The Bed Stable
Ensure the bunk bed stands firmly on a flat surface. Add small rubber pads under legs for extra grip. This stops the bed from tipping over.

Credit: www.bybrittanygoldwyn.com
Frequently Asked Questions
What Materials Are Needed For An 18 Inch Doll Bunk Bed?
You need wood, screws, sandpaper, wood glue, paint, and safety tools. Choose sturdy wood like pine for durability. These materials ensure a strong, safe, and visually appealing bunk bed for 18 inch dolls.
How Long Does It Take To Build The Doll Bunk Bed?
Building the bunk bed usually takes 3 to 5 hours. Time varies based on your skill level and tools. Planning and careful assembly can speed up the process without compromising quality.
Can I Customize The Bunk Bed Design Easily?
Yes, you can customize the design by adjusting dimensions or adding features. Personalize paint colors, bed rails, or ladders. Customization makes the doll bunk bed unique and matches your style or doll collection.
Is This Bunk Bed Safe For Children’s Play?
Yes, if built with smooth edges and secured joints. Sand all surfaces and avoid small detachable parts. Following safety tips ensures the doll bunk bed is safe for kids to play with.
Conclusion
Building an 18-inch doll bunk bed can be fun and simple. Follow the steps carefully to create a sturdy bed. Use the right materials for safety and durability. Your doll will love this cozy new space. Enjoy the process and add your own style.
This project helps develop skills and creativity too. Try making more doll furniture for extra fun. Keep practicing to improve your crafting skills. Small projects like this bring big smiles. Start today and see what you can build!