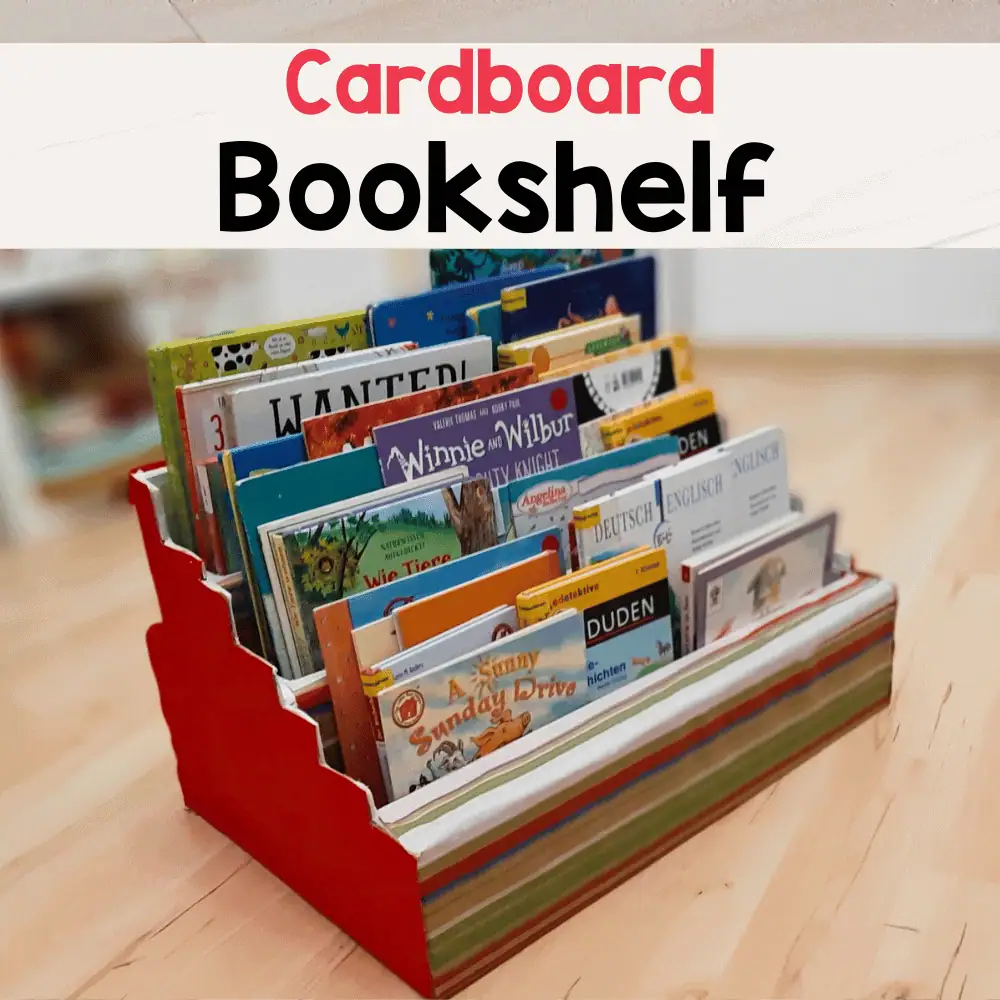
Are you looking for a simple and affordable way to organize your books? Imagine creating a stylish bookshelf right at home using just cardboard.
Yes, cardboard! It’s easy to find, lightweight, and surprisingly strong when put together the right way. In this guide, you’ll learn step-by-step how to build your own bookshelf that fits your space and style. By the end, you’ll have a unique piece that not only holds your favorite reads but also adds a personal touch to your room.
Ready to turn plain cardboard into something amazing? Let’s get started!

Credit: upcyclemystuff.com
Materials Needed
Creating a bookshelf at home with cardboard is simple and fun. The right materials make the process easier and the final product strong. Knowing what you need helps you prepare well and avoid interruptions. Below are the key materials required for this project.
Choosing The Right Cardboard
Select thick, sturdy cardboard for durability. Look for double-wall or triple-wall cardboard sheets. Avoid thin or damaged pieces that bend easily. Large, flat sheets work best for cutting shelves and sides. Reuse boxes from appliances or furniture for strong cardboard. Test the cardboard by folding it; it should resist bending.
Additional Tools And Supplies
You need a sharp box cutter or utility knife for clean cuts. A metal ruler helps make straight lines on cardboard. Use a pencil to mark measurements before cutting. Strong glue or hot glue sticks hold parts together firmly. Tape supports joints during assembly. Sandpaper smooths rough edges for a neat finish. A cutting mat protects surfaces during cutting.
Preparing The Cardboard
Preparing the cardboard is the first step in making a sturdy bookshelf at home. This step ensures your bookshelf will have the right shape and size. Taking time now will save effort later. Start by choosing strong, thick cardboard sheets. Thin cardboard may bend or break easily.
Clear your workspace. Make sure you have enough room to work safely. Gather a ruler, pencil, and a sharp cutting tool. These tools help you measure and cut the cardboard accurately.
Measuring And Marking
Measure each piece carefully. Use a ruler or measuring tape for accuracy. Mark the length and width clearly with a pencil. Double-check all measurements before cutting. Mistakes here can cause the bookshelf to be uneven.
Draw straight lines for cutting guides. Use a ruler to keep lines straight. Mark all parts you need to cut, like shelves and sides. Clear markings help you cut with confidence and reduce errors.
Cutting Techniques
Use a sharp craft knife or box cutter. Dull blades make cutting harder and cause rough edges. Cut on a flat surface to avoid damage. Score the cardboard lightly first, then cut deeper with repeated passes.
Cut slowly and steadily. Rushing can cause mistakes or injury. Follow your pencil lines closely. Keep your fingers away from the blade path. Smooth cuts make assembly easier and the final bookshelf stronger.
Building The Frame
Building the frame is the first step to create a sturdy cardboard bookshelf. It forms the base and walls that hold everything together. Focus on making it strong and balanced.
Use thick cardboard pieces for better support. Measure carefully before cutting. Keep everything neat and even to avoid a shaky shelf.
Assembling The Base
Start by cutting a large rectangle for the base. It should be wide enough to hold your books safely. Use two or three layers of cardboard glued together. This makes the base strong and stable.
Let the glue dry well before moving to the next step. A firm base stops the shelf from bending or falling over.
Constructing The Sides And Shelves
Cut two tall rectangles for the sides. Match the height to your base width. Attach them vertically to the base edges using glue and tape.
For shelves, cut smaller rectangles to fit inside the sides. Place them evenly spaced. Secure each shelf with glue and support with small cardboard strips underneath.
Check that all parts are straight and hold tightly. This frame will keep your bookshelf solid and ready to hold books.

Credit: www.youtube.com
Reinforcing The Structure
Reinforcing the structure of your cardboard bookshelf is key to making it strong and durable. Cardboard alone can bend or collapse under weight. Strengthening the frame helps it hold books safely. It also keeps the shelves from sagging over time.
Focus on adding extra support to the main parts. Use materials and techniques that hold the pieces together tightly. This makes the whole bookshelf stable and long-lasting.
Adding Support Beams
Support beams are pieces of cardboard placed inside the shelves. They act like bones, giving strength and shape. Cut strips of cardboard to fit inside the shelves. Place them horizontally or vertically where the most weight will sit.
Double or triple layers work best. Glue or tape these strips firmly. This reduces bending and helps the shelves carry heavy books. Add beams to the back and sides for extra support.
Using Glue And Tape Effectively
Strong glue and tape keep your bookshelf pieces together. Use a thick craft glue that dries hard. Apply glue evenly on edges before joining parts. Press firmly until the glue sets.
Reinforce all joints with wide tape. Choose packing tape or duct tape for strength. Wrap tape around corners and seams to stop them from coming apart. Avoid loose ends or gaps in tape.
Glue and tape work best combined. Glue holds the cardboard tight and tape adds extra security. This combination makes your bookshelf sturdy and reliable.
Finishing Touches
Finishing touches give your cardboard bookshelf a neat and polished look. They help protect edges and improve durability. These steps make the shelf safe and attractive for daily use.
Sanding And Smoothing Edges
Cardboard edges can feel rough or sharp. Use fine sandpaper to smooth all edges carefully. Sanding removes bumps and makes surfaces even. Take time to check each corner and side. Smooth edges prevent paper cuts and improve the shelf’s look.
Painting And Decorating Ideas
Painting adds color and personality to your bookshelf. Use acrylic or water-based paint for best results. Apply one or two thin coats for a smooth finish. Let each coat dry before adding the next.
Try simple patterns like stripes or dots with a small brush. Use stencils for neat shapes or letters. You can also cover the shelf with decorative paper or fabric. Seal decorations with clear glue or varnish to protect them.
Tips For Durability
Making a bookshelf from cardboard is fun and eco-friendly. To keep it strong and lasting, you need some smart tips. These tips help your shelf hold books well without bending or breaking. Durability means your shelf stays good for a long time.
Protecting Against Moisture
Cardboard can get soft when wet. To stop this, use a clear waterproof spray. Spray all sides of the cardboard before building. Let it dry fully. Avoid placing your shelf near water sources or damp walls. Use a plastic cover if you expect spills or humidity. This keeps the cardboard dry and firm.
Weight Distribution Tips
Place heavy books at the bottom shelves only. Light books or items go on top shelves. This stops the shelf from tipping or bending. Add extra cardboard layers on shelves that hold heavy books. Use strong glue to join pieces tightly. Even weight helps the shelf last longer and stay safe.
Common Mistakes To Avoid
Building a bookshelf from cardboard is a fun project. Many people make mistakes that weaken their shelves. Avoiding common errors helps create a strong and neat bookshelf. This section explains key mistakes to watch out for during the process.
Using Thin Or Weak Cardboard
Thin cardboard cannot hold much weight. It bends easily and breaks fast. Choose thick and sturdy cardboard for better support. Check the cardboard’s layers before starting your bookshelf.
Skipping Proper Measurements
Incorrect measurements cause uneven shelves. This leads to a crooked or unstable bookshelf. Measure twice and cut once. Use a ruler and pencil to mark clear lines.
Ignoring Reinforcement Needs
Cardboard alone may not hold heavy books. Reinforce shelves with extra layers or tape. Add supports at the back and sides. This keeps the bookshelf steady and durable.
Using Weak Glue Or Tape
Weak glue or tape can fail quickly. Choose strong adhesive made for cardboard. Apply glue evenly and press pieces firmly. Let glue dry completely before using the shelf.
Not Allowing Drying Time
Rushing the drying process weakens the structure. Wait the recommended time for glue or paint to dry. This ensures a solid and lasting bookshelf.
Credit: www.littleladoo.com
Frequently Asked Questions
How Durable Is A Cardboard Bookshelf At Home?
A cardboard bookshelf can be durable if made with thick, reinforced cardboard. Proper layering and gluing increase its strength. Avoid placing heavy items to maintain stability. It’s ideal for lightweight books and decorative items, making it a practical, eco-friendly option for temporary or light use.
What Tools Do I Need To Build A Cardboard Bookshelf?
You need a utility knife, ruler, pencil, glue gun, and strong adhesive tape. Optionally, use a cutting mat for safety. These tools help cut, measure, and assemble cardboard pieces precisely, ensuring a sturdy and well-aligned bookshelf for home use.
How Much Cardboard Is Required For One Bookshelf?
The amount depends on the bookshelf size, but typically 5-7 large cardboard sheets suffice. Use thick, double-walled cardboard for better support. Planning your design and measurements beforehand helps optimize cardboard use and reduces waste while creating a functional bookshelf.
Can I Customize The Design Of My Cardboard Bookshelf?
Yes, cardboard is highly customizable. You can cut different shapes, add shelves, or paint it. Decorating with wallpaper or fabric enhances appearance. Custom designs allow you to match your home decor and create unique, functional furniture at a low cost.
Conclusion
Building a bookshelf with cardboard saves money and uses simple materials. You can create a sturdy shelf with basic tools and some effort. This project suits beginners and helps recycle old cardboard boxes. It adds a personal touch to your room and organizes your books neatly.
Try this easy craft and enjoy the satisfaction of making something useful yourself. Give it a go today and see how fun and practical it can be!