Are you looking to add a stylish and practical piece to your home? A fliptop console table might be exactly what you need.
It’s perfect for saving space while giving you extra surface area whenever you want. Imagine having a table that folds up neatly when not in use, yet opens up to hold your keys, drinks, or even a laptop. In this guide, you’ll discover simple steps to build your own fliptop console table, even if you’ve never done a project like this before.
Keep reading, and soon you’ll have a unique, functional table that impresses both your guests and yourself.
Materials And Tools Needed
Building a fliptop console table needs the right materials and tools. Choosing quality items makes the project easier and the table stronger. Prepare all supplies before starting to save time and avoid problems.
Wood Selection
Pick wood that fits your style and budget. Pine is soft, easy to work with, and affordable. Oak or maple are harder woods with a nice finish. Consider wood that resists scratches and dents. Make sure the wood is straight and free of cracks.
Essential Tools
Basic tools include a saw, drill, and screwdriver. A measuring tape and square help keep cuts accurate. Sandpaper or a sander smooths rough edges. A clamp holds pieces while gluing. A hammer or nail gun helps fasten parts quickly.
Hardware And Finishes
Use strong hinges for the fliptop mechanism. Choose screws that fit your wood thickness. Wood glue adds extra strength to joints. Pick a finish that protects and beautifies the wood. Options include paint, stain, or clear varnish.
Preparing The Wood Pieces
Preparing the wood pieces is the first step in building your fliptop console table. This stage sets the foundation for a sturdy and beautiful piece of furniture. Taking time to measure, cut, and smooth the wood ensures the parts fit well together. Good preparation saves effort later and improves the final look.
Measuring And Marking
Measure each wood piece carefully using a tape measure. Mark the cut lines clearly with a pencil. Double-check the measurements before cutting. Accurate marking helps avoid mistakes and wasted wood. Use a square tool to keep lines straight and precise.
Cutting Techniques
Use a saw that matches your skill level and the wood type. Cut slowly and follow the marked lines exactly. Keep the blade steady to get clean edges. For curved or detailed cuts, consider a jigsaw. Always wear safety gear to protect your eyes and hands.
Sanding For Smoothness
Sand all cut edges with sandpaper or a sanding block. Start with coarse grit and move to finer grits for a smooth finish. Sanding removes splinters and rough spots. Smooth wood helps paint or stain stick better. It also makes the table safer to handle.
Constructing The Table Frame
Constructing the table frame is the key step in building your fliptop console table. The frame holds the entire structure together. It must be sturdy and well balanced. You will start by assembling the legs, then build the support structure, and finally attach all the frame components. This process ensures your table stands strong and lasts long.
Assembling The Legs
Begin by preparing the four table legs. Cut each leg to the correct length. Sand the edges smooth to avoid splinters. Drill pilot holes to prevent the wood from splitting. Attach any needed brackets or reinforcements. Make sure all legs are identical for a level table.
Building The Support Structure
Next, create the support structure that connects the legs. Use sturdy wood pieces for the aprons and stretchers. Cut these to fit between the legs precisely. Attach them using wood glue and screws. This frame inside keeps the legs from wobbling. Check for square corners with a carpenter’s square.
Attaching The Frame Components
Finally, join the legs and support structure to form the full frame. Align all parts carefully before securing. Use clamps to hold pieces tight while screwing them together. Double-check the frame for stability and evenness. This solid frame is ready to hold the fliptop mechanism and tabletop.
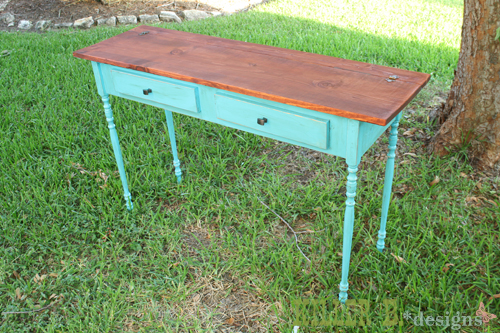
Credit: www.ana-white.com
Creating The Fliptop Mechanism
Creating the fliptop mechanism is an important step in building your console table. This part lets the tabletop flip up and down smoothly. It needs careful work to avoid problems later.
Focus on choosing the right hinges first. Then, install them correctly. Finally, check that the movement is smooth and easy.
Choosing The Right Hinges
Select hinges made for fliptop tables or cabinets. They must be strong enough to hold the tabletop weight. Look for hinges with a wide opening angle. This helps the tabletop flip fully upright. Choose metal hinges for durability and stability. Avoid cheap or thin hinges that bend or break easily.
Installing The Hinges
Mark hinge positions on both the tabletop and base. Use a pencil and ruler for accuracy. Pre-drill holes to avoid wood splitting. Attach hinges with screws that fit tightly. Make sure hinges align perfectly to avoid uneven movement. Tighten screws firmly, but don’t over-tighten them. Test the hinge fit by flipping the top gently.
Ensuring Smooth Movement
Check the fliptop motion several times after installation. The top should move up and down without sticking. Use lubricant like silicone spray on hinge joints if needed. Avoid oil-based lubricants that attract dust. Adjust screws slightly if the top feels loose or tight. Keep movement smooth to prevent damage and make it easy to use.
Attaching The Tabletop
Attaching the tabletop is a key step in building your fliptop console table. This process ensures the tabletop moves smoothly and stays secure. Taking time here will make the table durable and easy to use.
Follow the steps carefully to align, secure, and support the tabletop correctly.
Aligning The Fliptop
Place the tabletop on the base. Make sure it fits evenly on all sides. Check the edges to avoid gaps. The tabletop should sit flat without wobbling. Adjust it until perfectly centered. This helps the fliptop open and close smoothly.
Securing The Tabletop
Use screws or bolts to attach the tabletop. Start with one corner to hold it in place. Tighten screws just enough to allow some movement. Avoid over-tightening, which can crack the wood. Check that the tabletop flips up easily. Add more screws evenly along the edges. This keeps the tabletop steady and safe.
Adding Support Brackets
Support brackets strengthen the fliptop mechanism. Attach brackets under the tabletop where it flips. Use metal or wooden brackets for extra support. Secure them with screws for a firm hold. Test the fliptop after adding brackets. It should open smoothly and stay stable when flipped.
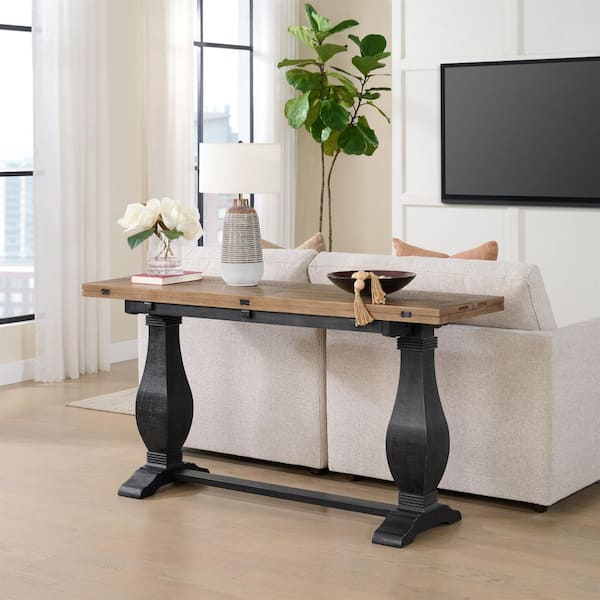
Credit: www.homedepot.com
Finishing Touches
Finishing touches bring your fliptop console table to life. They protect the wood and improve the look. This step makes your table last longer and look great in any room.
Applying Stain Or Paint
Choose a stain or paint color that fits your style. Stain shows the wood grain and adds warmth. Paint offers bright colors and full coverage. Use a brush or cloth to apply evenly. Allow it to dry completely before the next step.
Protective Coating Options
Protect your table with a clear finish. Polyurethane is strong and water-resistant. It works well for tables that get use often. Wax gives a soft shine but needs more care. Choose a finish based on how you will use the table.
Final Assembly Check
Check all screws and joints for tightness. Test the fliptop to make sure it moves smoothly. Sand any rough edges or spots if needed. Clean off dust and debris before use. Your table is now ready for your home.
Tips For Maintenance And Care
Maintaining your fliptop console table keeps it looking good and working well. Proper care helps avoid damage and wear over time. Small steps make a big difference in preserving its beauty.
Cleaning Recommendations
Use a soft cloth to wipe dust regularly. Avoid harsh chemicals; they can harm the finish. Mild soap mixed with water works well for stains. Dry the surface fully to stop water marks. Clean spills quickly to prevent stains or damage.
Repairing Minor Damages
Small scratches can be fixed with furniture markers or wax sticks. For loose hinges, tighten screws carefully. Wood filler repairs small dents before sanding. Light sanding smooths rough spots gently. Reapply finish or paint after repairs to blend well.
Extending Table Longevity
Keep the table away from direct sunlight to avoid fading. Use coasters to protect from heat and water rings. Avoid placing heavy items that may cause dents. Regularly check the fliptop mechanism for smooth operation. Store in a dry place to prevent warping or swelling.
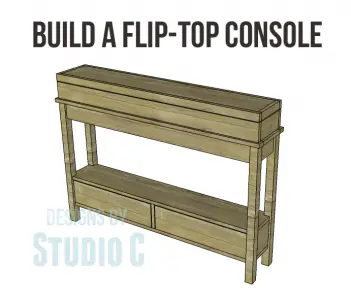
Credit: designsbystudioc.com
Frequently Asked Questions
What Materials Are Needed To Build A Fliptop Console Table?
You need wood panels, hinges, screws, wood glue, sandpaper, paint or stain, and finishing nails. Choose durable wood like oak or pine for strength. Proper tools include a saw, drill, screwdriver, and measuring tape.
How Do I Install The Fliptop Mechanism Properly?
Attach sturdy hinges to connect the fliptop securely. Align the top and base precisely for smooth movement. Use screws and wood glue for extra stability. Test the flip action before final assembly.
What Is The Best Wood Type For A Fliptop Console Table?
Hardwoods like oak, maple, or walnut offer durability and a beautiful finish. Softwoods like pine are budget-friendly but less durable. Choose based on your budget, style, and intended use of the table.
How Can I Finish My Fliptop Console Table Professionally?
Sand the wood thoroughly for a smooth surface. Apply primer if painting or use wood conditioner for staining. Use multiple thin coats of paint or stain and seal with polyurethane for protection.
Conclusion
Building a fliptop console table is a fun and useful project. You can create a stylish piece for your home. Follow the steps carefully to get the best results. Use the right tools and materials for safety. Take your time and enjoy the process.
This table saves space and adds charm to any room. Try customizing it with your favorite colors or finishes. A handmade table like this shows your creativity and effort. Start building today and see how rewarding it feels. Simple projects like this make your home unique and cozy.

