Looking to add a rustic touch to your bunk bed while keeping it safe and sturdy? Building a barn wood ladder for your bunk bed is a smart way to do just that.
You don’t need to be a woodworking expert to create something strong, stylish, and unique. In this guide, you’ll discover simple steps and tips that make the project manageable and even fun. Ready to transform your bunk bed with a charming, handcrafted ladder?
Let’s get started!
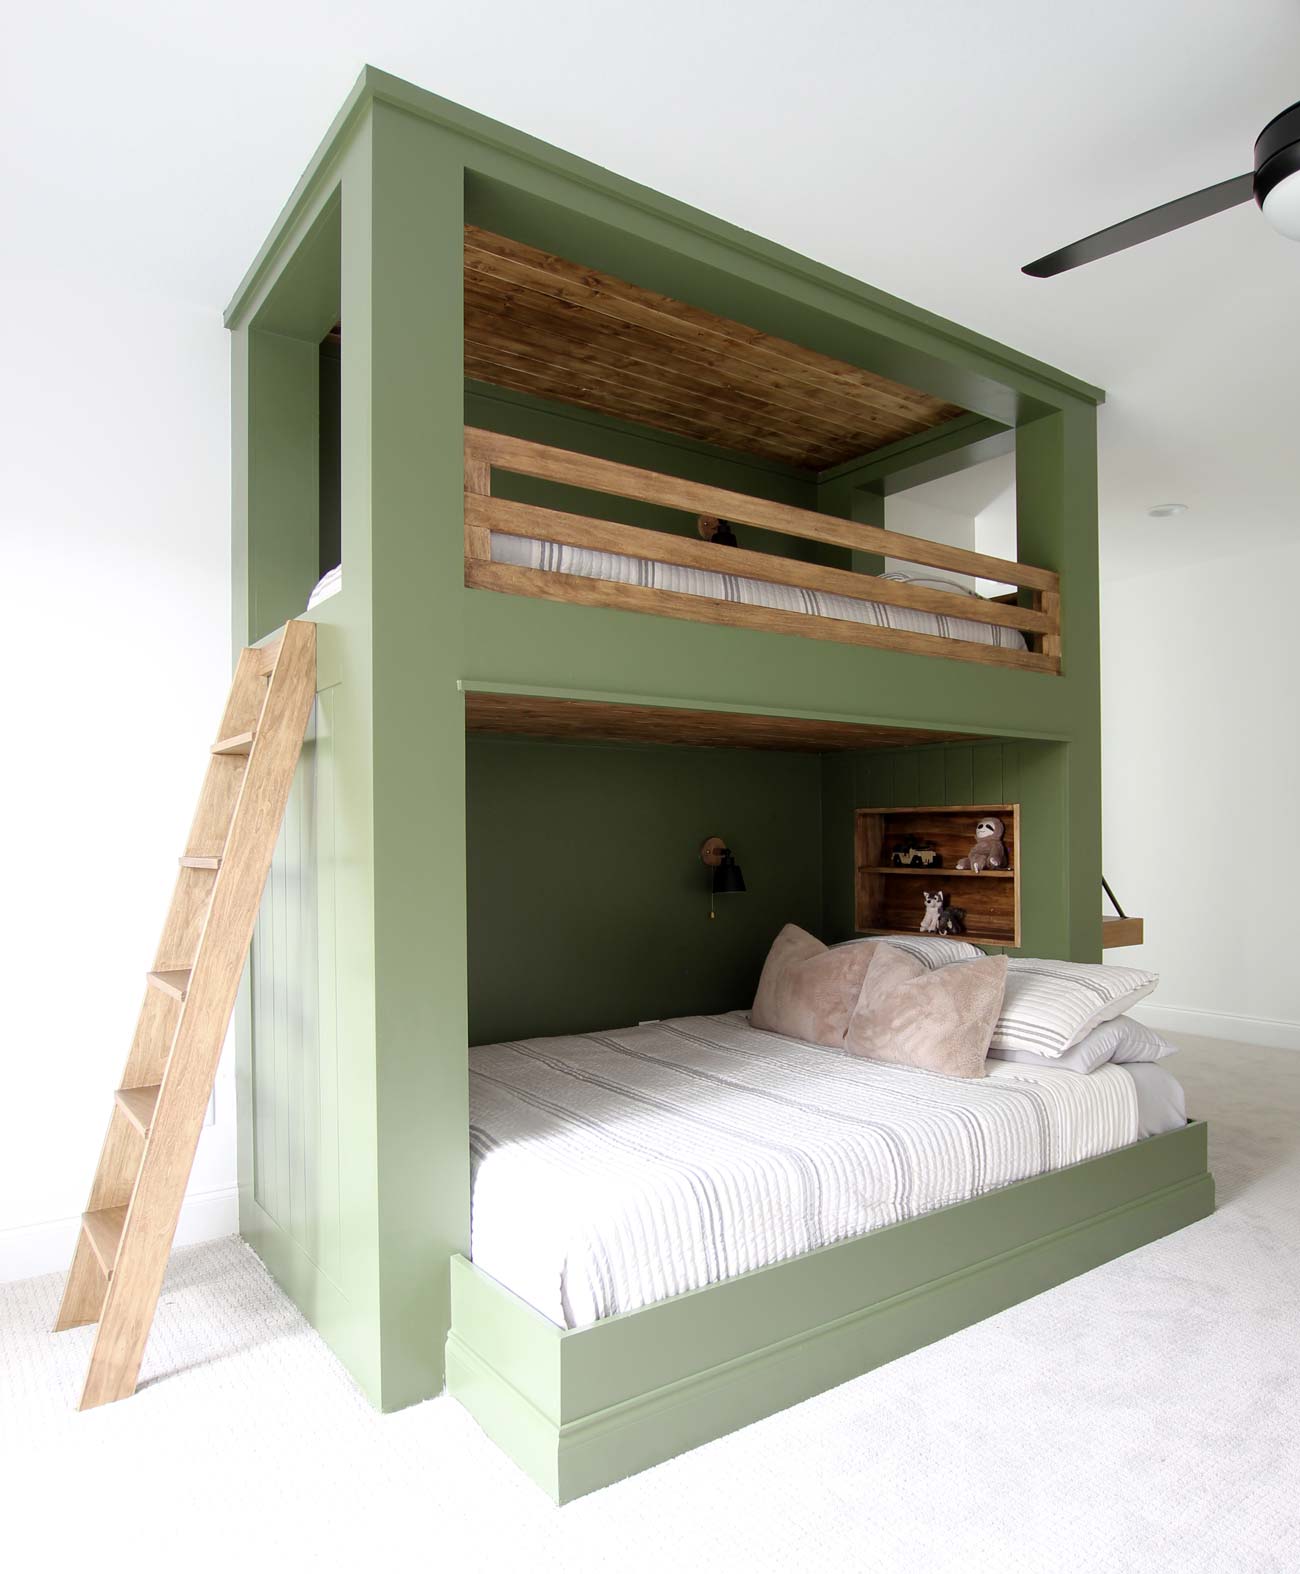
Credit: plankandpillow.com
Choosing Barn Wood For Your Ladder
Choosing the right barn wood for your bunk bed ladder is important. The wood affects the ladder’s strength, look, and safety. Barn wood adds a rustic charm that fits many bedroom styles. It also offers solid durability needed for daily use.
Picking the best barn wood means understanding its benefits, types, and where to find quality pieces. This guide helps you select wood that makes your ladder strong and stylish.
Benefits Of Barn Wood
Barn wood is strong and lasts a long time. Its natural weathering gives each piece a unique look. This wood often has tight grains that make it sturdy and reliable. It resists wear and tear better than new softwood. Barn wood also has a warm, natural color that brightens any room. Using reclaimed wood is eco-friendly. It recycles old material instead of cutting new trees.
Types Of Barn Wood Suitable For Ladders
Oak is a popular choice for bunk bed ladders. It is hard, heavy, and very durable. Pine is softer but works well if properly treated. It is lighter and easier to work with. Cedar offers natural resistance to insects and decay. It also smells good and looks attractive. Avoid wood with many cracks or rot. Choose pieces that are straight and free of large knots. This ensures your ladder will be safe and last long.
Where To Source Quality Barn Wood
Start by checking local barn restorations or demolition sites. Often, old barns are being taken down and the wood is available. Online markets and specialty reclaimed wood stores offer many options. Ask sellers about the wood’s history and condition. Visit in person if possible. Inspect the wood carefully for signs of damage or pests. Buying from trusted sources guarantees better quality wood for your ladder project.
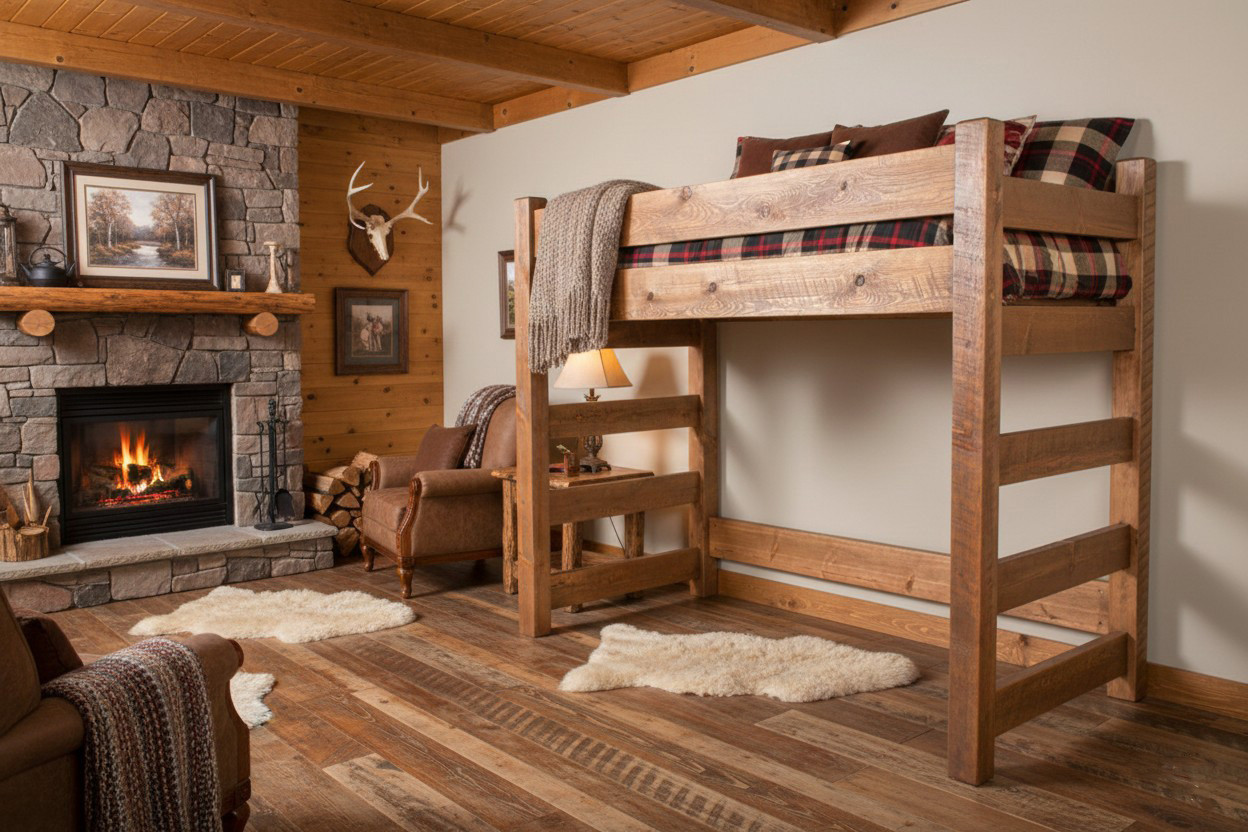
Credit: www.justbunkbeds.com
Tools And Materials Needed
Building a bunk bed ladder from barn wood needs the right tools and materials. This ensures a strong, safe ladder. Gathering everything before starting saves time and effort. Below, find the must-have tools, materials, and safety gear.
Essential Tools
- Measuring tape for accurate cuts
- Circular saw or handsaw to cut wood
- Drill with drill bits for screws
- Screwdriver or power driver
- Sandpaper or electric sander for smooth edges
- Clamps to hold wood in place
- Carpenter’s square for right angles
- Pencil for marking measurements
Required Materials
- Barn wood planks, dry and sturdy
- Wood screws, rust-resistant
- Wood glue for extra strength
- Wood finish or sealant to protect wood
- Wood filler to cover holes or cracks
Safety Gear
- Safety glasses to protect eyes
- Work gloves to protect hands
- Dust mask to avoid breathing sawdust
- Ear protection if using loud tools
Designing Your Bunk Bed Ladder
Designing your bunk bed ladder is an important step in building a safe and sturdy ladder. A well-planned design ensures the ladder fits perfectly and supports weight properly. This part focuses on measuring the space, deciding ladder size, and drawing your ladder plan.
Measuring The Space
Start by measuring the height from the floor to the top bunk. Measure the width where the ladder will attach. Check for any obstacles like bed rails or walls. Write down all measurements carefully. Accurate measurements help avoid mistakes later.
Determining Ladder Dimensions
Decide how wide and tall the ladder should be. The width should allow comfortable foot placement. The height must match the bunk bed height exactly. Plan the distance between each step. Steps should be close enough to climb easily but not too close.
Sketching Your Ladder Plan
Draw a simple sketch of your ladder with measurements. Include step positions and side rails. Use a ruler or graph paper for neat lines. Label all parts clearly. This sketch guides you during cutting and assembly.
Preparing The Barn Wood
Preparing barn wood is a key step before building a bunk bed ladder. The wood needs to be clean, smooth, and cut to the right size. Proper preparation makes the ladder strong and safe for use. It also helps the wood look great and last longer. Follow these steps carefully to prepare your barn wood.
Cleaning And Sanding
Start by removing dirt and old nails from the wood. Use a stiff brush to clean the surface well. Wash the wood with water if needed, but let it dry completely. Sand the wood to remove rough spots and splinters. Use medium-grit sandpaper first, then finish with fine-grit for smoothness. Sanding also helps the wood absorb finish better.
Cutting To Size
Measure the ladder parts carefully before cutting. Mark the barn wood with a pencil at the correct lengths. Use a saw to cut the wood along the marks. Keep cuts straight and clean for a good fit. Double-check each piece after cutting to avoid mistakes. Properly sized pieces make assembly faster and easier.
Treating And Finishing Wood
Treat barn wood to protect it from damage and wear. Apply a wood preservative to stop rot and insects. Let the treatment dry fully before moving on. Use wood stain or paint to give color and extra protection. Finish with a clear sealant for durability. This step improves the wood’s look and helps the ladder last longer.
Assembling The Ladder Frame
Assembling the ladder frame is the next step in building your barn wood bunk bed ladder. This part creates the main structure that holds the rungs and supports weight. A strong frame means a safe, sturdy ladder.
Start by preparing all the wood pieces. Check each for smooth edges and correct length. This helps the assembly go smoothly and ensures a neat finish.
Joining Side Rails
Lay the two side rails flat on a workspace. These long pieces form the sides of the ladder. Align them parallel and measure the distance for the rungs. Use wood glue on the ends to help hold parts together. Then, drill pilot holes to avoid splitting the wood. Screw the rails together at both ends for a tight fit.
Attaching Rungs
Mark the rung positions evenly between the side rails. Place each rung flat between the rails. Use wood glue on the ends before attaching. Drill pilot holes through the side rails into the rungs. Secure each rung with screws. Make sure the rungs are level and evenly spaced for safety and comfort.
Reinforcing Joints
Strengthen the ladder frame by adding corner braces or metal brackets. Attach them where the rungs meet the side rails. Use screws to secure the braces tightly. This step prevents wobbling and adds stability. Double-check all screws are tight and joints are firm before moving on.
Installing The Ladder On The Bunk Bed
Installing the ladder on your barn wood bunk bed is a key step. It ensures easy and safe access to the top bunk. Follow these simple steps carefully to get the ladder in the right place and secure it firmly. A well-installed ladder adds both function and style to your bunk bed.
Positioning The Ladder
First, decide where the ladder fits best on the bed frame. Usually, ladders go on the side or at the foot of the bed. Check the space around the bed to allow easy climbing. Make sure the ladder angle is comfortable, about 75 degrees. Mark the spots on the bed frame where the ladder will attach.
Securing The Ladder Safely
Use strong screws and brackets made for wood. Attach the ladder to the bed frame at the marks. Tighten screws firmly to avoid any wobble. Check that the ladder does not move or shake. Safety is important to prevent accidents and keep the ladder steady.
Final Adjustments
Test the ladder by climbing up and down slowly. Look for any loose parts or sharp edges. Sand any rough areas on the wood. Adjust the screws if the ladder feels unstable. Clean the ladder and surrounding area before use. Your barn wood bunk bed ladder is now ready to use safely.
Maintaining Your Barn Wood Ladder
Maintaining your barn wood ladder keeps it strong and safe for years. Barn wood has a unique look but needs care to stay durable. Regular care stops damage and preserves its natural beauty. Follow simple steps to keep your ladder in top shape.
Regular Inspections
Check your ladder often for cracks or loose parts. Look at the rungs and sides carefully. Tighten any screws or nails that feel loose. Early fixes prevent accidents and long-term damage. Inspect before and after heavy use.
Cleaning Tips
Use a soft brush to remove dust and dirt. Wipe with a damp cloth, not soaking wet. Avoid harsh chemicals that can harm the wood. Dry the ladder fully to stop mold or rot. Clean regularly to keep the wood fresh.
Repairing Damages
Fix small cracks with wood filler or glue. Replace broken parts with similar barn wood pieces. Sand rough spots to avoid splinters. Use wood sealant to protect repaired areas. Prompt repairs extend the ladder’s life and safety.

Credit: www.decorpad.com
Frequently Asked Questions
What Materials Are Needed To Build A Barn Wood Ladder?
You need reclaimed barn wood, screws, wood glue, sandpaper, a saw, and a drill. Choose sturdy, dry wood for safety and durability.
How Do I Ensure The Ladder Is Safe For Bunk Beds?
Measure carefully, use strong joints, and secure the ladder firmly. Sand edges smooth to prevent splinters and test stability before use.
Can I Customize The Ladder Size For Different Bunk Beds?
Yes, measure your bunk bed height and width. Cut wood pieces accordingly for a perfect fit and safe climbing.
How Do I Finish Barn Wood For A Ladder?
Sand the wood thoroughly, then apply a clear sealant or wood finish. This protects the wood and enhances its rustic look.
Conclusion
Building a bunk bed ladder from barn wood is simple and rewarding. You get a sturdy, unique ladder that fits your style. Using barn wood adds charm and strength to the project. Follow the steps carefully and take your time.
Safety matters most, so check every part. This DIY project saves money and gives you pride. Enjoy your new ladder and the cozy bunk bed it serves. Try other wood projects next to keep learning and creating.