Are you looking to add a stylish and modern touch to your home without spending a fortune? Making a hairpin leg console table is easier than you might think.
With just a few tools and materials, you can create a unique piece that fits perfectly in your space. Imagine having a sleek table that not only looks great but also shows off your creativity. Keep reading, and you’ll discover simple steps to build your own hairpin leg console table, even if you’ve never tried woodworking before.
This project is perfect for you if you want something practical, trendy, and totally personalized.
Materials And Tools
Before building a hairpin leg console table, gather all materials and tools. This step ensures a smooth build process. Choosing the right supplies makes a big difference in the final look and durability.
Choosing The Right Wood
Select wood that fits your style and budget. Pine is affordable and easy to work with. Oak offers strength and a classic look. Maple gives a smooth finish and holds up well. Make sure the wood is dry and free of cracks. The size depends on your table’s dimensions. Smooth the wood with sandpaper for a clean surface.
Selecting Hairpin Legs
Hairpin legs come in different heights and finishes. Pick legs that match your table height. Steel legs add a modern, industrial feel. Black or brass finishes suit various decors. Check the weight capacity of the legs. Strong legs keep your table stable and safe. Choose legs with pre-drilled holes to ease installation.
Essential Tools Needed
Gather tools before you start building. A drill is needed to make holes and drive screws. Use a screwdriver or drill bit for screws. Sandpaper or a sander smooths the wood surface. A tape measure ensures accurate cuts and placement. Clamps hold pieces steady while assembling. A pencil helps mark measurements clearly. Safety glasses protect your eyes during work.

Credit: www.youtube.com
Design And Measurements
Design and measurements are the first steps in building a hairpin leg console table. These steps help ensure your table looks great and fits the space. Taking time here saves effort later. A good design matches your style and room size.
Determining Table Dimensions
Decide the table’s length, width, and height. Common console tables are about 30 to 36 inches tall. Length can range from 36 to 60 inches, depending on space. Width usually stays between 12 and 18 inches. Think about where you will place the table. Measure the wall or area carefully. Allow space for walking around the table. Write down your chosen dimensions.
Marking The Wood
Use a pencil and ruler to mark the wood. Draw lines for length and width clearly. Double-check measurements before cutting. Mark where legs will attach under the tabletop. Accurate marks make cutting and assembling easier. Use a square tool to keep lines straight. Clear marks help avoid mistakes during building.
Cutting And Preparing The Wood
Cutting and preparing the wood is the first important step in making a hairpin leg console table. This process helps you create the perfect size and smooth surface for the table. Taking time here ensures the table looks great and lasts long.
Cutting To Size
Start by measuring the wood according to your table design. Use a tape measure and pencil to mark the exact lengths. Cut the wood carefully using a saw. Make sure the cuts are straight and clean. Accurate cutting gives the table a strong and balanced frame.
Sanding The Surface
After cutting, sanding the wood makes it smooth and safe to touch. Use medium-grit sandpaper to remove rough edges and splinters. Then, switch to fine-grit sandpaper for a polished finish. Sanding helps the wood absorb paint or stain better. It also improves the table’s overall look and feel.
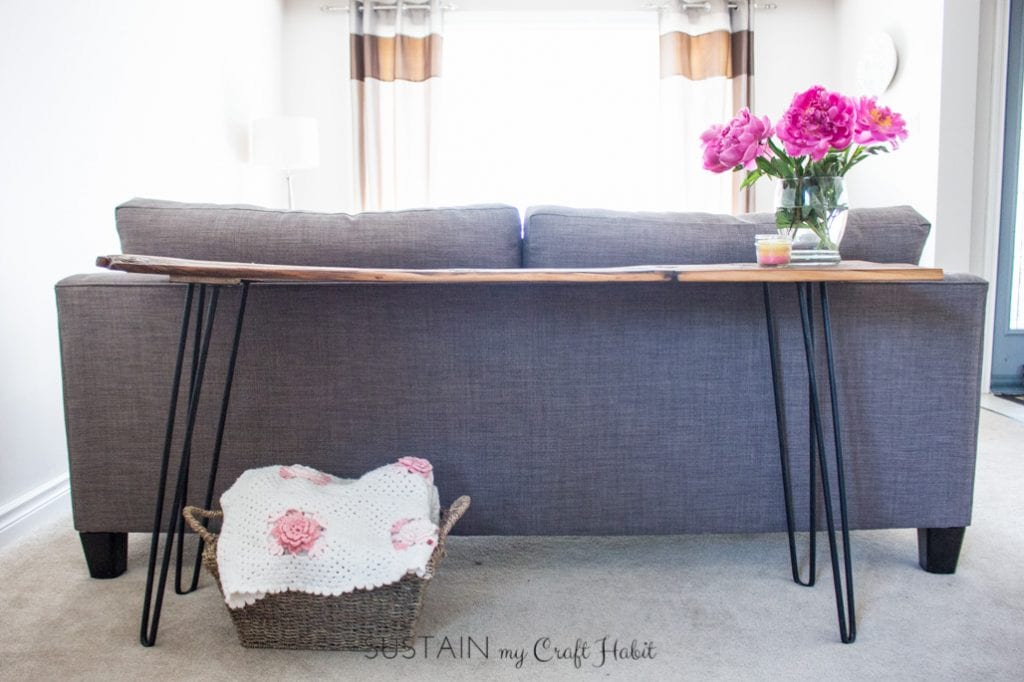
Credit: sustainmycrafthabit.com
Attaching The Hairpin Legs
Attaching the hairpin legs is a key step in building your console table. This process gives the table its strong base and stylish look. Proper placement and fastening ensure stability and durability. Follow each step carefully for the best results.
Positioning The Legs
Start by turning the tabletop upside down on a soft surface. This prevents scratches and damage. Place each hairpin leg near the corners, about one to two inches from the edges. Align the legs so they stand straight and even. Double-check the distance between legs for balance. Mark the screw holes lightly with a pencil. This helps keep the legs in the correct spots.
Securing With Screws
Use screws that fit the hairpin legs’ holes well. Drill pilot holes at the pencil marks to avoid wood splitting. Attach each leg by driving screws through the holes into the tabletop. Tighten screws firmly, but do not over-tighten to avoid damage. Check each leg for wobbling and adjust screws if needed. The legs should feel secure and support the table evenly.
Finishing Touches
Finishing touches bring your hairpin leg console table to life. They protect and highlight the wood’s natural beauty. These final steps create a lasting impression. Careful choices here ensure your table looks great for years.
Focus on color and protection. Choose options that suit your style and use. Let’s explore how to apply stain or paint and pick the right protective coating.
Applying Stain Or Paint
Start with a clean, sanded surface. Stain adds color while showing wood grain. Use a cloth or brush to apply stain evenly. Wipe off extra stain to avoid blotches. Let it dry fully before adding more coats.
Paint covers the wood completely. Choose a paint made for furniture. Apply thin, even coats with a brush or roller. Allow drying between coats for smooth results. Light sanding between coats gives a nice finish.
Protective Coating Options
Protect the wood from scratches and spills. Use clear polyurethane for strong protection. It comes in matte, satin, or glossy finishes. Apply thin coats with a brush. Lightly sand between coats for smoothness.
Wax offers a soft, natural finish. It needs more frequent reapplication. Oil finishes soak into wood, enhancing grain and color. They require regular maintenance but keep the wood looking fresh.
Maintenance Tips
Maintaining your hairpin leg console table keeps it sturdy and looking great. Small efforts regularly help the table last longer and stay safe to use. Follow simple steps to clean and check the table for damage. This care protects both the wood and metal parts.
Cleaning The Table
Use a soft cloth to wipe dust from the surface often. For sticky spots, dampen the cloth slightly with water. Avoid harsh chemicals that can damage the wood or metal finish. Dry the table well after cleaning to stop water marks. Clean the legs carefully to keep the metal shiny and rust-free.
Tightening Screws Regularly
Check the screws holding the legs and tabletop every few months. Loose screws can make the table wobbly and unsafe. Use a screwdriver to tighten any screws that feel loose. Do not overtighten, which can strip the screw holes. Regular tightening keeps the table firm and stable over time.
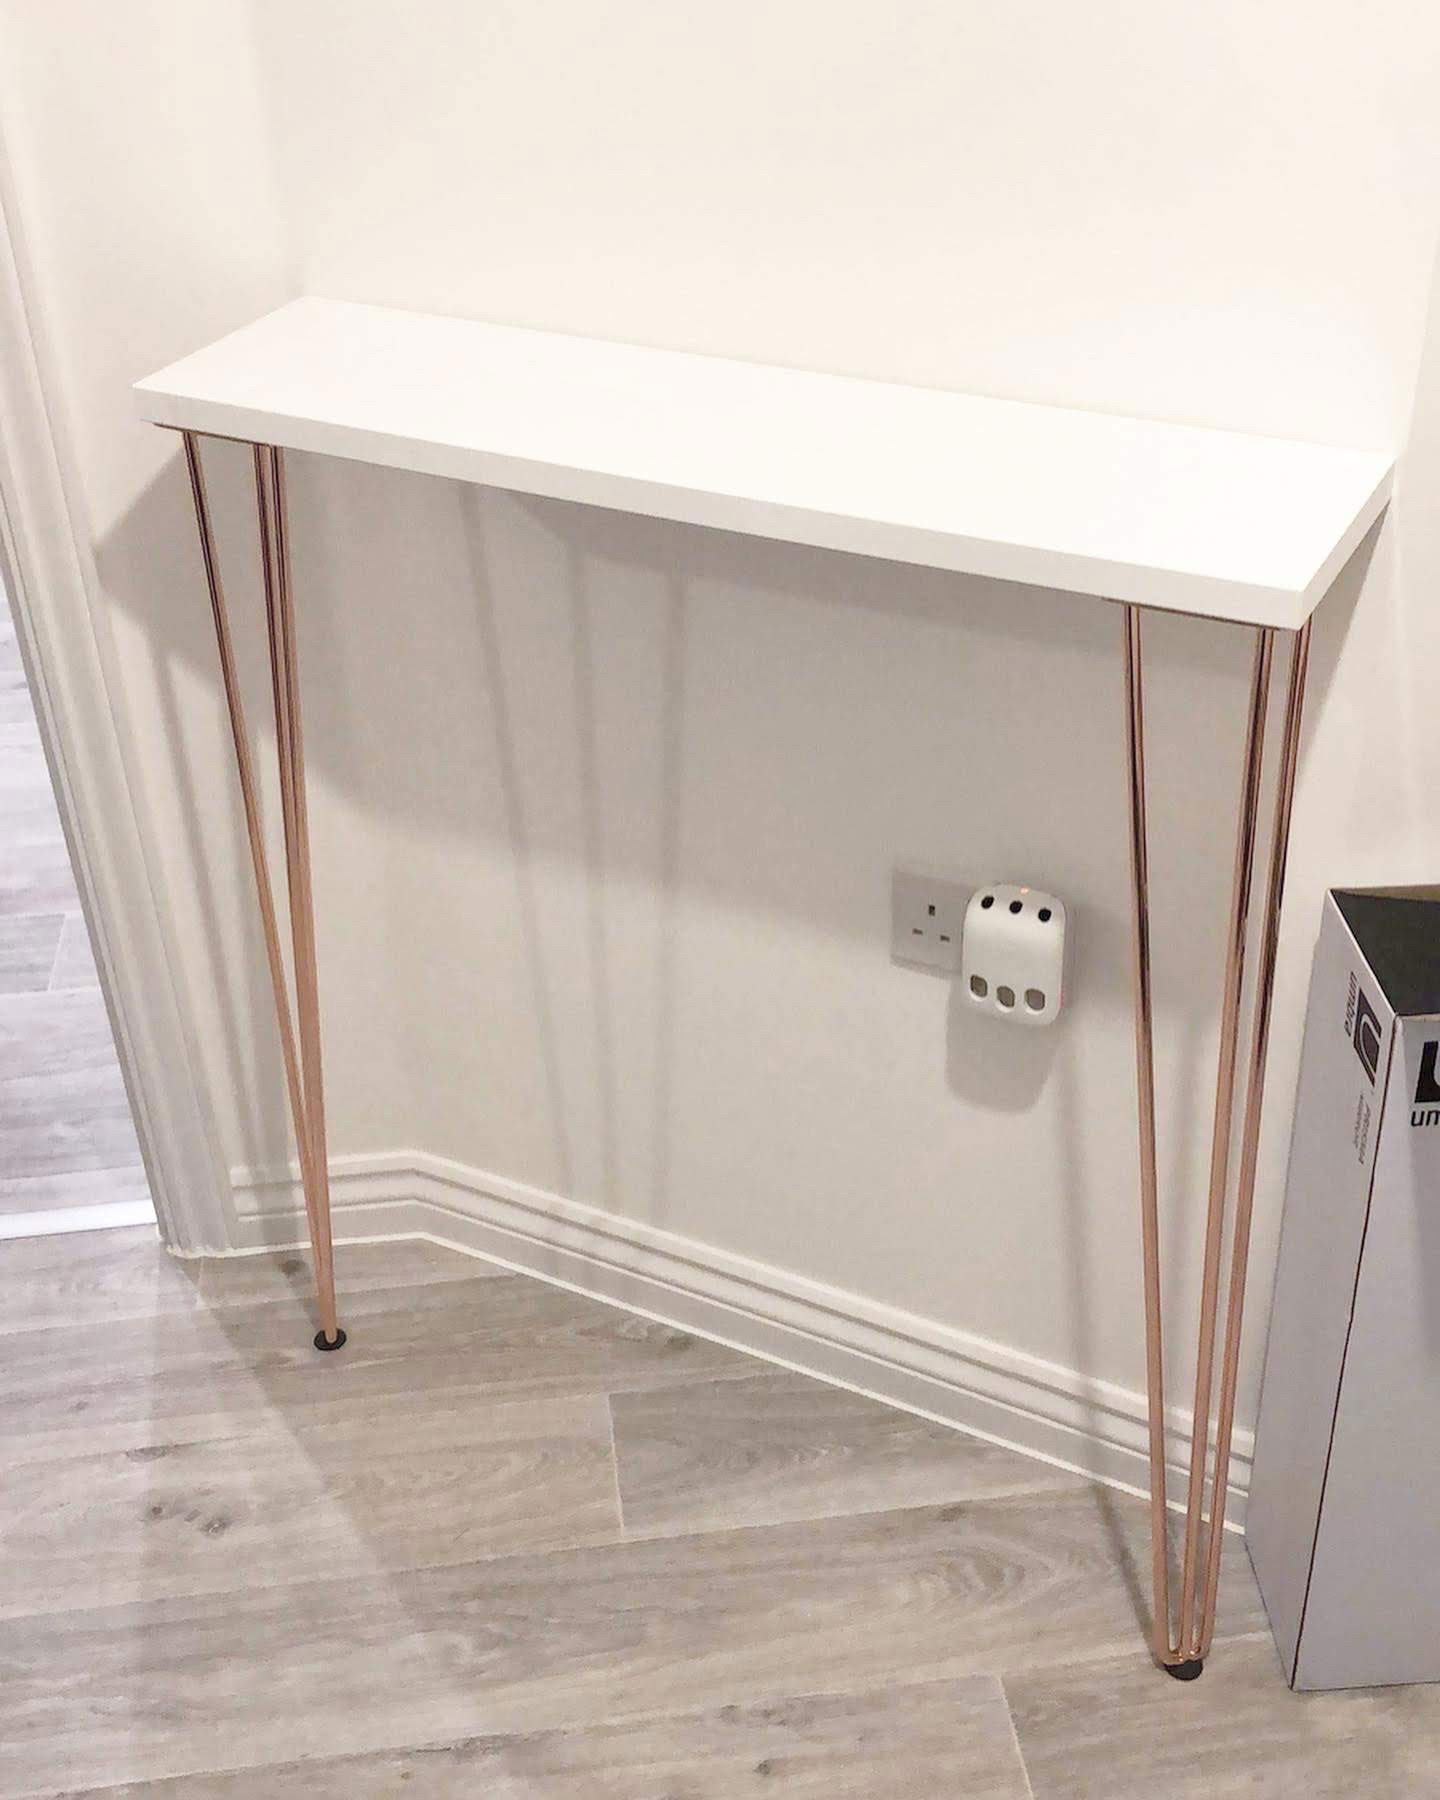
Credit: www.realhomes.com
Frequently Asked Questions
What Materials Are Needed For A Hairpin Leg Console Table?
You need wood for the tabletop, hairpin legs, screws, drill, measuring tape, and sandpaper. Choose sturdy wood for durability and smooth finish.
How Do You Attach Hairpin Legs To A Console Table?
Align legs at table corners, mark screw holes, drill pilot holes, then fasten legs securely with screws. Ensure legs are level for stability.
What Type Of Wood Is Best For The Tabletop?
Hardwoods like oak, walnut, or maple are ideal for strength and appearance. Softwoods can be used but may dent or scratch easily.
Can I Customize The Height Of A Hairpin Leg Table?
Yes, hairpin legs come in various heights. Select the height that suits your space and intended use for the console table.
Conclusion
Building a hairpin leg console table is simple and fun. You only need a few tools and materials. Follow each step carefully to get the best results. This project adds style and function to any room. It fits well in small or large spaces.
You can paint or stain the wood to match your decor. Enjoy making your own unique piece of furniture. Try this project to feel proud of your work. A beautiful table made by you will last for years.