Are you looking for a creative way to give your old dresser a new life? Imagine turning that bulky, unused piece of furniture into a stylish bookshelf that fits perfectly in your space.
It’s easier than you think, and you don’t need to be a DIY expert to do it. In this guide, you’ll discover simple steps to transform your old dresser into a functional and beautiful bookshelf. By the end, you’ll have a unique piece that not only saves money but also adds character to your home.
Ready to start? Let’s dive in!
Choose The Right Dresser
Choosing the right dresser is the first step in turning it into a bookshelf. This choice affects how your bookshelf will look and how well it will hold your books. Consider the dresser’s size, shape, strength, style, and material. These factors help ensure your project is both beautiful and practical.
Assess Size And Shape
Measure the dresser before starting. Height, width, and depth matter. A tall dresser with many drawers can become a tall bookshelf. A wide dresser can offer more shelf space. The shape affects how the shelves will fit your room. Choose a size that fits your space and meets your storage needs.
Check For Sturdiness
Test the dresser’s strength. It must hold the weight of many books. Press on the sides and shelves. Check for loose parts or damage. A sturdy dresser lasts longer and stays safe. Fix any weak spots before transforming it. A strong base is key for a reliable bookshelf.
Select Style And Material
Look at the dresser’s style and material. Wood dressers work best for bookshelves. They provide good support and look classic. Match the dresser’s style to your room decor. A modern dresser fits modern rooms. A vintage dresser adds charm. Choose a style you enjoy and a material that is solid.
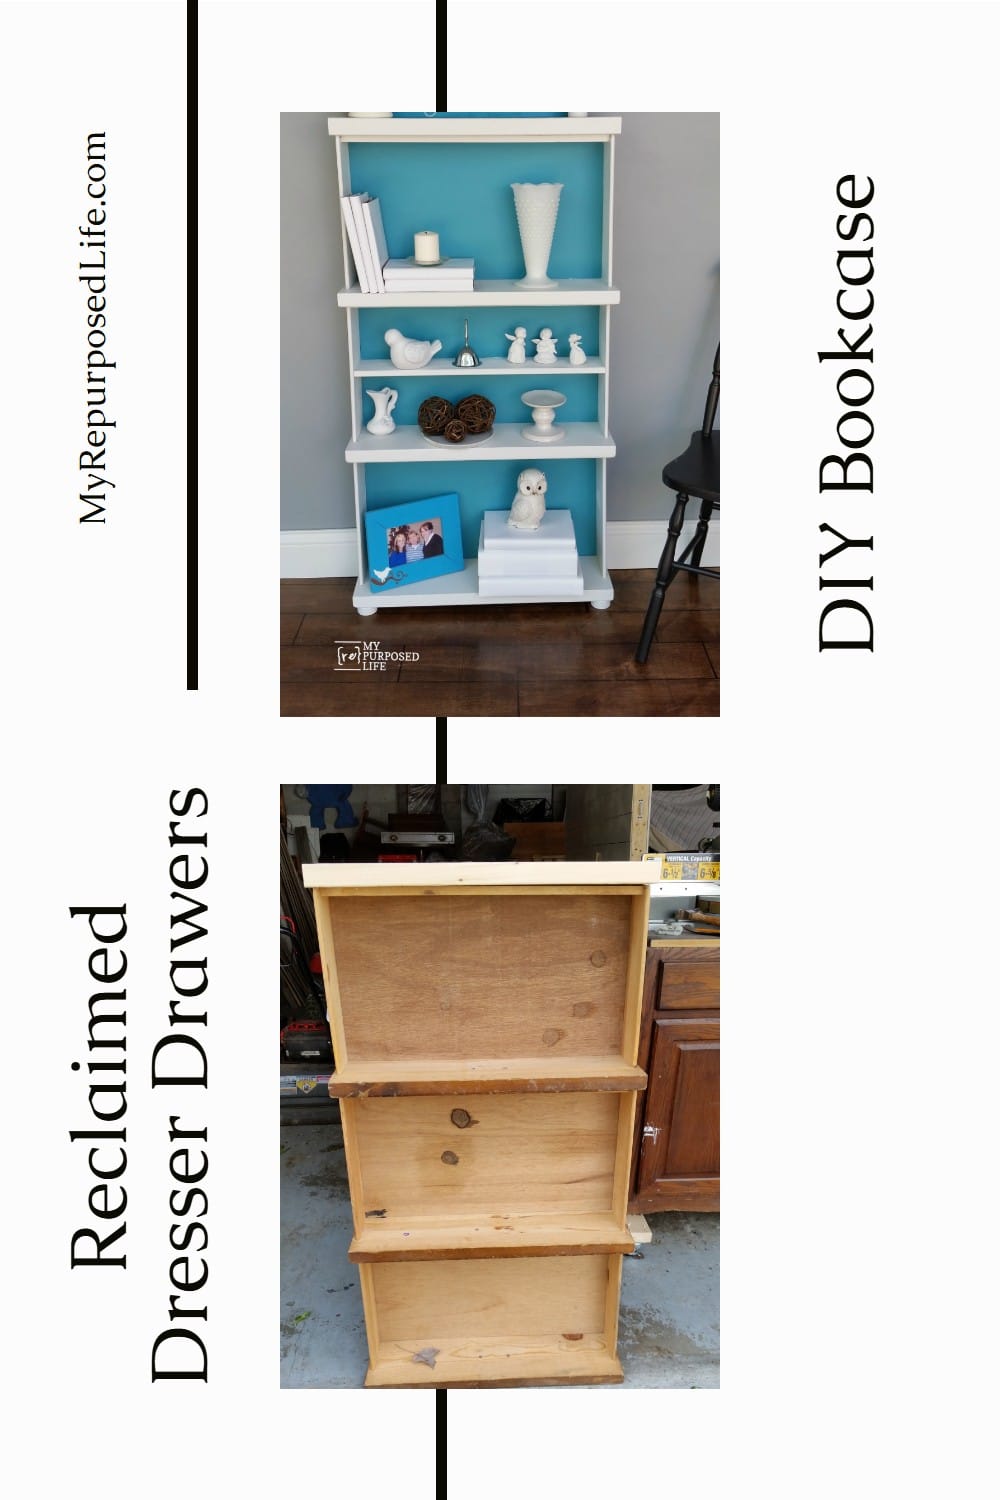
Credit: www.myrepurposedlife.com
Gather Necessary Tools And Materials
Gathering the right tools and materials is the first step in turning an old dresser into a beautiful bookshelf. Having everything ready helps the project go smoothly. It also saves time and avoids frustration.
Knowing what basic tools and extra supplies are needed makes the work easier. Safety gear is important to protect yourself during the process. Prepare all these items before starting the project.
Basic Tools Needed
- Screwdriver – to remove screws and hardware
- Hammer – for nails and small adjustments
- Measuring tape – to measure shelves and spaces
- Hand saw or jigsaw – to cut wood parts
- Sandpaper or electric sander – to smooth surfaces
- Drill – to make holes and fix screws
Additional Supplies
- Wood glue – to secure joints
- Wood filler – to fill holes or cracks
- Paint or wood stain – to finish the bookshelf
- Paintbrush or roller – to apply paint or stain
- New screws and nails – for assembly
- Wood boards or planks – for extra shelves if needed
Safety Gear
- Safety goggles – to protect your eyes
- Work gloves – to protect your hands
- Dust mask – to avoid breathing dust
- Ear protection – if using loud power tools
Prepare The Dresser
Preparing the dresser is the first step in turning it into a stylish bookshelf. This stage sets the base for a strong and smooth finish. Careful preparation ensures your project will last and look great.
Remove Drawers And Hardware
Start by taking out all the drawers from the dresser. This clears the space and makes the frame easier to work on. Next, remove all handles, knobs, and other hardware. Keep these parts safe if you want to reuse them later.
Clean And Sand Surfaces
Clean the dresser thoroughly to remove dust, dirt, and grease. Use a mild soap and water solution and dry it well. Sand all surfaces with medium-grit sandpaper to smooth rough spots. This step helps paint or stain stick better.
Repair Any Damage
Check for cracks, holes, or loose joints on the dresser. Fill small holes with wood filler and let it dry. Tighten screws or glue loose parts to make the dresser stable. Fixing damage now prevents bigger problems later.
Modify The Dresser Structure
Modifying the dresser’s structure is a key step in turning it into a bookshelf. This process helps create the right space for your books. It involves removing parts, adjusting shelves, and making open spaces. These changes make the dresser functional and stylish as a bookshelf.
Remove Drawer Dividers
Start by taking out the drawer dividers inside the dresser. These dividers block space and limit storage. Removing them creates one large area for books. Use a screwdriver or hammer to carefully pull out nails or screws. Keep the wood pieces if you want to reuse them later.
Adjust Shelves
Many dressers have fixed shelves. To fit books of different sizes, adjust these shelves. Some shelves can be moved by lifting them out of their slots. For fixed shelves, use a saw to cut them to a new height or remove them. Sand the edges smooth to avoid splinters. Adjustable shelves make the bookshelf more useful.
Create Open Spaces
Open spaces give the bookshelf a lighter look. Remove some drawers completely to create these spaces. This allows you to place larger books or decorations. Use wood filler to cover holes left by removed parts. Sand and paint the dresser for a clean finish. Open spaces add style and function to your bookshelf.
Paint Or Stain The Dresser
Painting or staining the old dresser transforms it into a beautiful bookshelf. This step protects the wood and enhances its look. Choose colors or tones that match your room’s style. The finish also helps the shelf last longer and resist wear. Take time to prepare and apply the finish carefully for the best results.
Choose Finish Type
Decide between paint or stain based on the look you want. Paint covers the wood completely and adds color. Stain shows the wood grain and gives a natural feel. Pick a finish that fits your room’s decor and your personal taste. Consider the dresser’s wood type to choose the best finish.
Apply Primer And Paint
Start with a primer to help paint stick better. Use a brush or roller for even coverage. Let the primer dry fully before painting. Apply thin, even coats of paint to avoid drips and brush marks. Multiple coats may be needed for full coverage. Allow each coat to dry before adding the next.
Add Protective Coat
Seal the finish with a clear protective coat. This coat guards against scratches and moisture. Use a matte or glossy finish based on your preference. Apply the protective coat evenly and let it dry completely. This step keeps your bookshelf looking fresh for years.
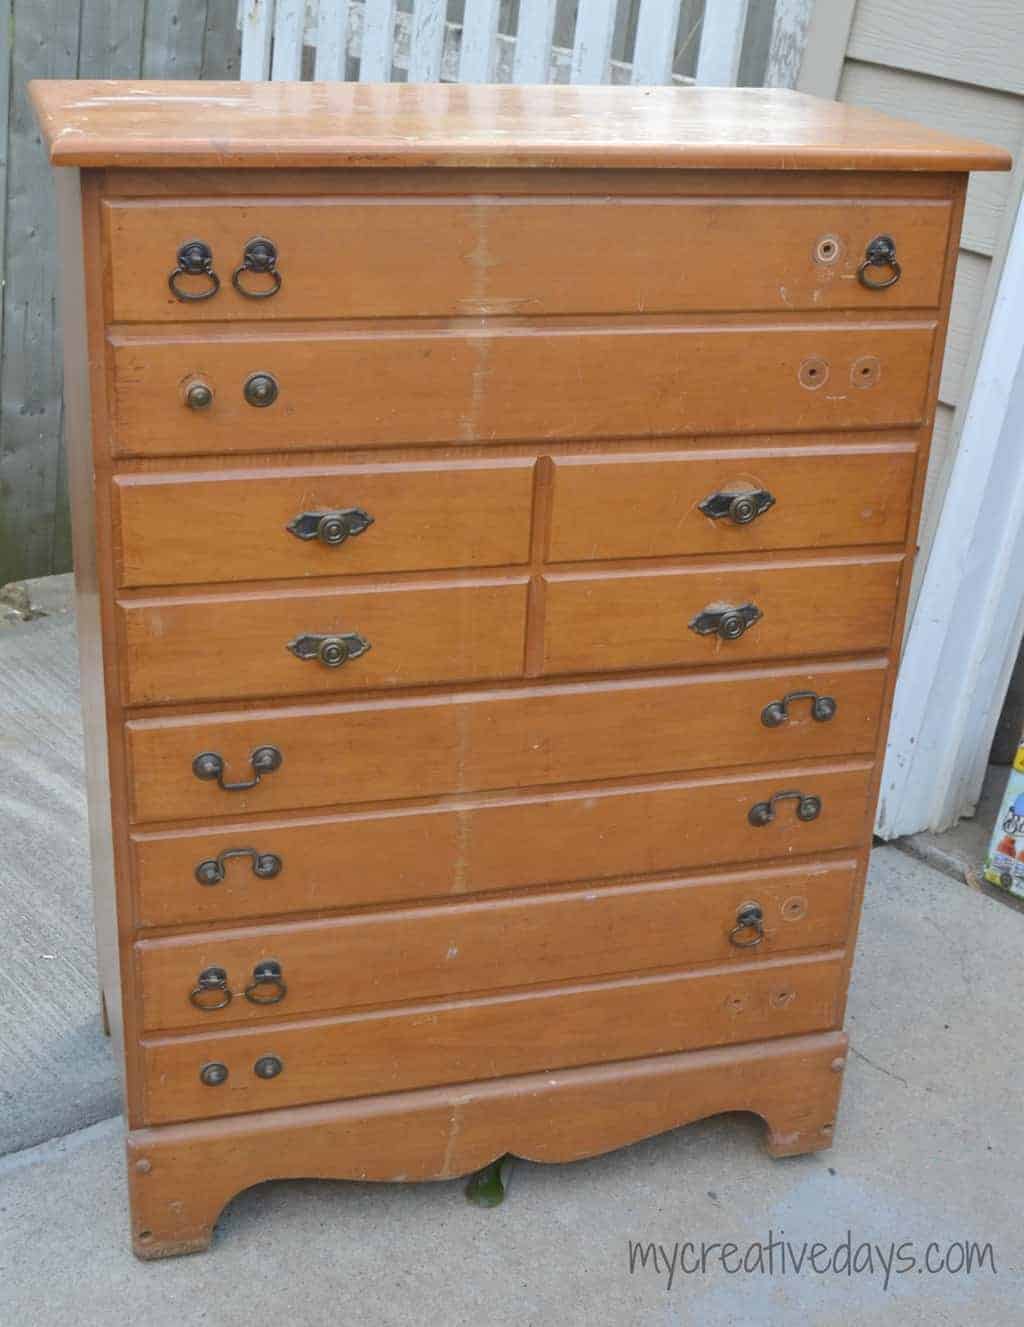
Credit: www.mycreativedays.com
Add Shelving And Storage Features
Adding shelving and storage features transforms your old dresser into a practical bookshelf. It creates space for books and displays. This step also improves organization and style. Simple changes make a big difference in function and look.
Install Additional Shelves
Measure the inside width and depth of the dresser. Cut wood boards to fit as new shelves. Use shelf brackets or supports to hold them in place. Space shelves evenly for balanced storage. Sand and paint shelves to match the dresser. Extra shelves help hold more books and items.
Use Drawer Fronts As Shelf Faces
Remove the drawer fronts carefully from the dresser. Attach them to the front edge of each shelf. This adds a neat, framed look to the shelves. You can keep the original knobs for a vintage feel. Drawer fronts also hide shelf edges for a clean finish. This small touch adds charm and character.
Incorporate Decorative Elements
Use molding or trim along the edges of shelves. Choose simple designs that suit your style. Paint or stain these details to match the dresser color. Add wallpaper or fabric to the back panel for texture. Decorative touches make the bookshelf inviting and unique. They also highlight the dresser’s original beauty.
Assemble And Position The Bookshelf
After transforming your old dresser into a bookshelf, it’s time to put everything together. This step ensures your new bookshelf is safe, sturdy, and ready to hold your favorite books and decorations.
Proper assembly and placement will make the bookshelf both functional and attractive. Follow these simple steps to finish your project with confidence.
Reattach Hardware
Start by putting back any hardware you removed. This includes handles, knobs, or hinges you want to keep. Use a screwdriver to secure each piece tightly. Check that all screws fit well and nothing is loose. This will keep your bookshelf looking neat and original.
Secure Bookshelf To Wall
Attach the bookshelf to the wall for safety. Use wall anchors and screws suitable for your wall type. This prevents the bookshelf from tipping over, especially if you have children or pets. Measure the height and mark spots on the wall before drilling. Secure the bookshelf firmly to keep it stable.
Arrange Books And Decor
Place your books neatly on the shelves. Organize by size, color, or genre to create a pleasing look. Add decor items like plants, photos, or small art pieces. Balance the arrangement to avoid clutter. This personal touch makes your bookshelf unique and inviting.
Maintenance Tips
Maintaining your bookshelf made from an old dresser keeps it looking fresh and sturdy. Regular care helps the wood and paint last longer. Simple steps make a big difference in its lifespan.
Regular Cleaning
Dust the bookshelf often with a soft cloth or duster. Avoid using water or harsh chemicals that can damage the wood. Clean spills right away to prevent stains. Keep the shelves clear of heavy dirt or debris.
Touch-up Paint
Check the paint for chips or scratches regularly. Use matching paint to cover small marks and keep the finish smooth. Light sanding before painting helps the new paint stick better. Touch-ups keep the bookshelf looking neat and new.
Check Stability Periodically
Test the bookshelf for wobbling or loose parts every few months. Tighten screws and bolts as needed. Make sure the dresser-turned-shelf sits flat on the floor. Stability keeps your bookshelf safe and strong.

Credit: www.recreateddesigns.com
Frequently Asked Questions
How Do I Convert An Old Dresser Into A Bookshelf?
To convert an old dresser, remove some drawers and adjust shelving. Sand and paint the structure for a fresh look. Secure shelves to hold books safely.
What Tools Are Needed To Make A Bookshelf From A Dresser?
You’ll need a screwdriver, saw, sandpaper, paintbrush, measuring tape, and wood glue. Optional tools include clamps and a drill for better assembly.
Can I Customize The Size Of The Bookshelf From A Dresser?
Yes, you can customize by removing or resizing drawers. Adjust shelf heights to fit different book sizes. Personalize with paint or decorative hardware.
Is It Cost-effective To Repurpose A Dresser Into A Bookshelf?
Repurposing saves money compared to buying new furniture. It also reduces waste and adds unique style. Costs mainly involve paint and minor repairs.
Conclusion
Transforming an old dresser into a bookshelf saves money and adds charm. It gives new life to furniture you already own. The steps are simple and fun to follow. You can customize it to fit your space and style. This project helps reduce waste and supports creativity.
Give it a try and enjoy a unique bookshelf. Your books will look great, and you will feel proud. A simple idea with a big impact.