Is your console table looking tired or outdated? You don’t have to buy a new one to give your space a fresh look.
Refurbishing your console table is easier than you think, and it can transform your room without breaking the bank. Imagine turning that old piece into something stylish and unique—something that truly fits your taste. In this guide, you’ll discover simple, step-by-step tips to breathe new life into your console table.
Ready to see your furniture in a whole new way? Let’s get started!
Gathering Materials
Gathering materials is the first step to refurbish a console table. Having the right items makes the work easier and faster. It also helps achieve a better finish. Before you start, collect everything you need. This saves time and avoids interruptions. Focus on the tools and supplies that suit your project.
Essential Tools
Start with basic tools like sandpaper and a paintbrush. Sandpaper smooths rough surfaces and removes old paint. A paintbrush applies paint evenly on wood. Add a screwdriver to remove screws or hardware. A putty knife helps fill cracks with wood filler. A clean cloth wipes dust from the table. Gloves protect your hands from paint and chemicals. These tools create a strong base for your work.
Choosing Paint And Finish
Select paint suitable for wood furniture. Chalk paint offers a matte look and dries fast. Latex paint is durable and easy to clean. Pick colors that match your room style. For the finish, choose between matte, satin, or glossy. Matte hides imperfections well. Satin adds a soft shine. Glossy creates a bright, reflective surface. A clear sealant protects the paint from damage. It also makes the table last longer.
Credit: salvagedinspirations.com
Preparing The Table
Preparing the table is the first step in refurbishing a console table. This stage sets the foundation for a smooth and lasting finish. Proper preparation helps the new paint or stain stick better. It also removes old dirt, grease, and rough patches. Taking time here saves effort later.
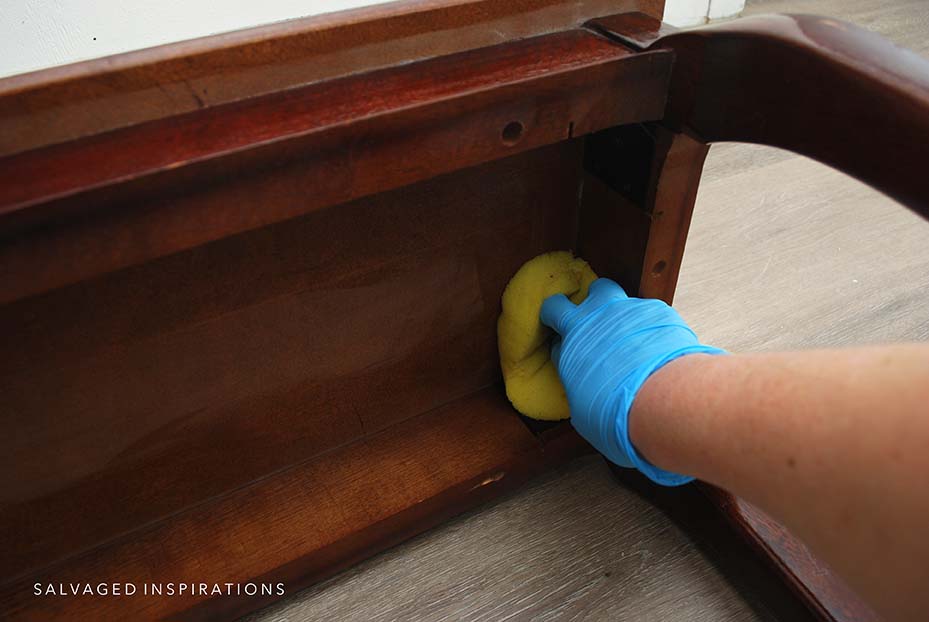
Cleaning The Surface
Start by wiping the table with a soft cloth. Use warm water mixed with mild soap. This removes dust, dirt, and oils. Avoid soaking the wood to prevent damage. For sticky spots, use a gentle scrub brush. Rinse lightly and dry completely with a clean cloth. A clean surface ensures better adhesion of paint or stain.
Sanding Techniques
Sanding smooths out rough areas and removes old finishes. Use medium-grit sandpaper to start, about 120 grit. Sand along the grain of the wood to avoid scratches. After the first sanding, wipe away dust with a damp cloth. Then, use finer grit sandpaper, around 220 grit, for a smooth finish. Always sand evenly to prevent uneven surfaces. Proper sanding helps the new finish look professional and last longer.
Repairing Damages
Repairing damages is a key step in refurbishing a console table. Small flaws like scratches or dents can make the table look old and worn out. Fixing these issues restores the table’s beauty and prepares it for finishing touches. Sometimes, old hardware no longer fits well or looks outdated. Replacing it can give the table a fresh, updated style.
Fixing Scratches And Dents
Start by cleaning the damaged area with a soft cloth. Use fine sandpaper to smooth rough spots gently. For shallow scratches, a wood filler or wax stick works well. Press the filler into the scratch and wipe away excess. Let it dry completely before sanding lightly for a smooth finish. For deeper dents, moisten the wood with a damp cloth. Place a hot iron over the cloth for a few seconds. The steam helps the wood swell and reduces the dent. Repeat if needed, then sand and fill any leftover gaps. Finish by wiping the surface clean.
Replacing Hardware
Check all knobs, handles, and hinges for wear or damage. Choose new hardware that fits the table’s style and size. Remove old screws carefully to avoid damaging the wood. Align new hardware in the same spots or drill new holes if needed. Tighten screws firmly but avoid over-tightening to prevent cracks. Clean the hardware with a soft cloth before installation. New hardware can change the table’s look and improve its function.

Credit: www.reddit.com
Painting And Staining
Painting and staining are key steps to refresh a console table. They change the look and protect the wood. The right finish can highlight the table’s beauty. Both methods need careful preparation and technique. This section guides you through primer, paint, and stain choices.
Applying Primer
Start with a clean, dry surface. Sand the table lightly to help primer stick. Use a brush or roller to apply an even coat. Let the primer dry fully before painting. Primer blocks stains and creates a smooth base. It improves paint adhesion and durability.
Painting Tips
Choose paint made for furniture. Use thin, even coats to avoid drips. Paint along the wood grain for a neat finish. Let each coat dry before adding the next. Use a fine brush for edges and corners. Light sanding between coats helps smooth the surface.
Staining Options
Stains come in many colors and tones. Pick a stain that matches your room style. Apply stain with a cloth or brush, wiping off the excess. Test stain on a small spot first to check color. Seal the stain with a clear finish for protection. Staining shows the wood grain beautifully.
Finishing Touches
The finishing touches bring your console table to life. They protect your work and add charm. These steps ensure your table looks great and lasts long.
Sealing The Surface
Sealing protects the table from scratches and spills. Choose a clear sealant like polyurethane or wax. Apply thin, even coats with a brush or cloth. Let each coat dry fully before adding the next. This step keeps your paint or stain safe and shiny.
Adding Decorative Elements
Decorative details give your table a unique look. Use knobs, handles, or stencils for style. Small plants or trays add character and function. Choose elements that match your room’s theme. These touches make your console table stand out beautifully.
Maintaining Your Refurbished Table
Maintaining your refurbished console table keeps it looking fresh and beautiful for years. Regular care protects your hard work and extends the table’s life. Small daily habits make a big difference in preserving the finish and overall condition.
Cleaning Tips
Dust the table often with a soft, dry cloth. Avoid rough fabrics that might scratch the surface. Use a damp cloth for sticky spots, but never soak the wood. Mild soap mixed with water works well for gentle cleaning. Always dry the table quickly to stop water damage.
Protecting The Finish
Place coasters or mats under drinks and hot items to avoid stains. Use felt pads under decorative objects to prevent scratches. Keep the table out of direct sunlight to stop fading. Apply a good quality furniture polish or wax every few months. This shields the finish and gives the wood a nice shine.

Credit: stencilstudios.com
Frequently Asked Questions
What Materials Are Needed To Refurbish A Console Table?
You need sandpaper, primer, paint or stain, brushes, and protective finish. Optional tools include a screwdriver and wood filler for repairs.
How Do I Prepare A Console Table For Refurbishing?
Clean the table thoroughly, remove hardware, and sand the surface to remove old finish. This ensures paint or stain adheres well.
What Type Of Paint Is Best For Console Tables?
Use durable, furniture-grade paint like acrylic or chalk paint. These provide a smooth finish and withstand daily use.
How Long Does It Take To Refurbish A Console Table?
Refurbishing takes about a day or two, including drying time. Complex repairs or multiple coats may extend the process.
Conclusion
Refurbishing a console table is a simple and fun project. It lets you add new life to old furniture. You can choose colors and styles that fit your home. With some basic tools and patience, you create something unique. Small steps, like sanding and painting, make a big difference.
This project saves money and helps reduce waste. Enjoy the process and the final result. Your console table will stand out and feel fresh. Try it yourself and see how easy it can be.