Are you ready to create a cozy and space-saving twin bunk bed that fits perfectly in your home? Building your own bunk bed might sound tricky, but with the right steps, you can do it yourself—even if you’re not a woodworking expert.
Imagine having a sturdy, custom-made bed that saves space and adds charm to your room. In this guide, you’ll find simple instructions, handy tips, and everything you need to make a twin bunk bed that’s safe, stylish, and built to last.
Keep reading, and by the end, you’ll have the confidence to start your project and transform your space!

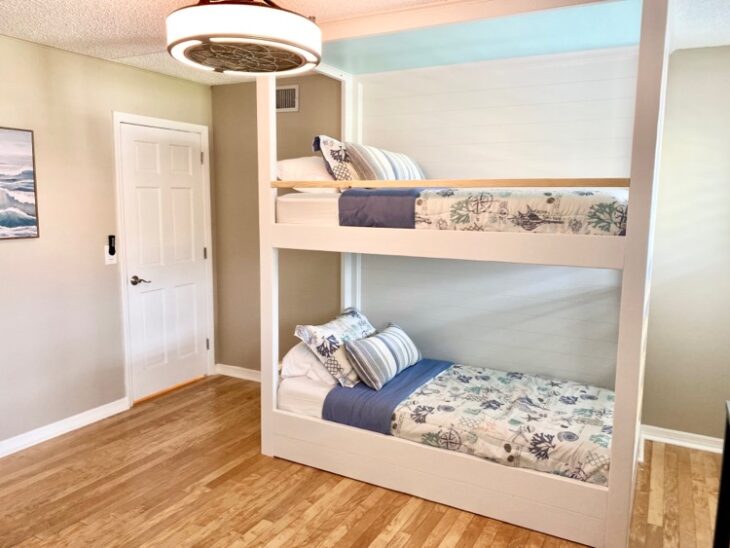
Credit: www.amazon.com
Materials And Tools Needed
Gathering the right materials and tools is the first step in building a twin bunk bed. This ensures safety and durability. Proper supplies make the process smoother and faster.
Wood quality matters. Choose sturdy, smooth boards that can hold weight. Avoid warped or cracked pieces to keep the bed stable and safe for sleeping.
Wood And Lumber
Use pine, oak, or maple wood for strong frames. Get 2x4s and 1x6s for the bed structure and slats. Make sure the wood is dry and free from knots.
Fasteners And Hardware
Buy wood screws, bolts, and washers for firm joints. Use brackets and corner braces for extra support. Include wood glue to strengthen connections.
Tools Required
Have a drill and screwdriver set for assembling parts. A saw is necessary to cut wood to size. Sandpaper or an electric sander smooths rough edges.
Measuring And Marking Tools
Use a tape measure to get accurate lengths. A carpenter’s square helps keep corners right-angled. Mark cuts with a pencil for precision.
Safety Gear
Wear safety goggles to protect your eyes. Use ear protection if loud tools are in use. Gloves keep your hands safe from splinters and cuts.
Choosing The Right Design
Choosing the right design for a twin bunk bed is very important. The design affects how the bed fits in the room. It also impacts comfort and safety. Think about the room size and who will use the bed. This helps pick the best style and layout. A good design saves space and looks nice.
Space Considerations
Measure the room where the bunk bed will go. Note the height, width, and length available. Allow space to move around the bed easily. Check the ceiling height to avoid hitting your head. Think about extra furniture in the room. Use a design that fits well without crowding the space. Consider beds with built-in storage to save more space. Make sure there is space for stairs or a ladder. Safety is key with enough room for safe climbing.
Style Options
Choose a style that matches the room’s look. Classic wooden frames give a warm, cozy feel. Metal frames offer a modern, sleek look. Some designs include desks or shelves under the bed. Pick colors that fit the room’s palette. Think about the kids’ tastes and preferences. A simple design often works best for small rooms. Rounded edges and sturdy rails improve safety. Style should blend comfort, safety, and room decor.
Preparing The Wood
Preparing the wood is the first step to build a strong twin bunk bed. It ensures all parts fit well and feel safe. Proper preparation helps avoid problems during assembly. It also makes the bed last longer and look better.
Measuring And Cutting
Start by measuring the wood pieces carefully. Measure twice to avoid mistakes. Use a tape measure and mark the wood with a pencil. Cut the wood using a saw along the marked lines. Make sure cuts are straight and smooth. Proper cutting makes assembly easier and safer.
Sanding And Smoothing
After cutting, sand each wood piece well. Use sandpaper or a power sander. Sand all edges and surfaces to remove rough spots. Smooth wood prevents splinters and improves paint or finish. Take your time to get a clean, even surface. Smooth wood looks nicer and feels better to touch.
Credit: rogueengineer.com
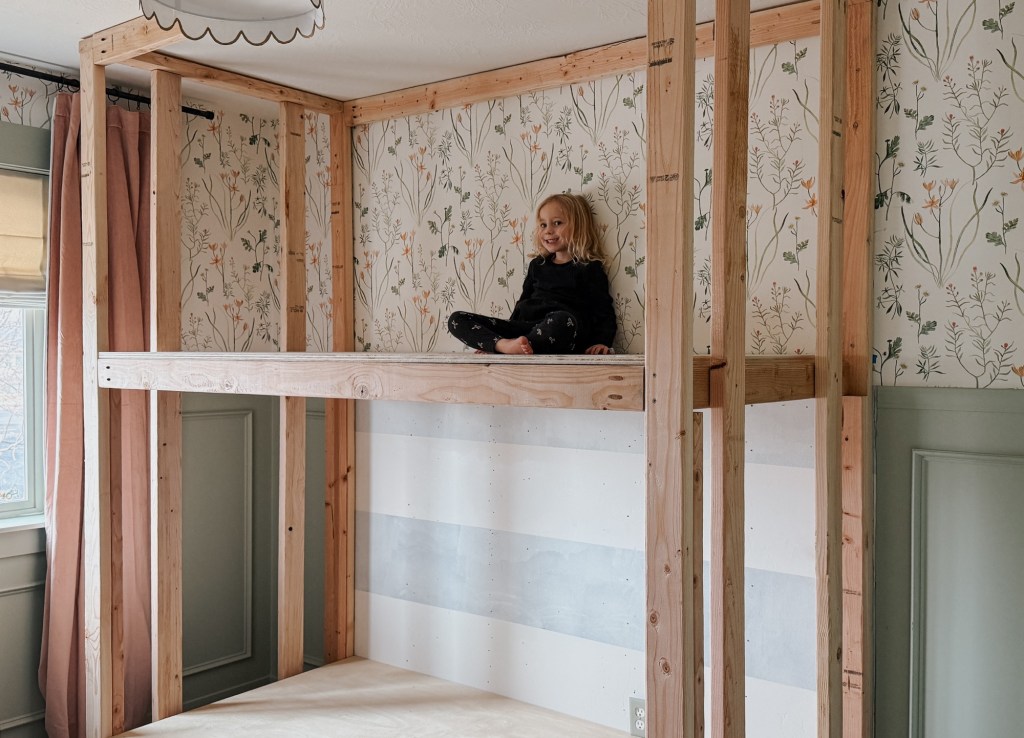
Building The Bed Frame
Building the bed frame is the first big step in making a twin bunk bed. A strong frame keeps the bed safe and steady. Focus on making a solid base and firm side rails. This gives the bunk bed support and shape.
Work carefully with each part. Measure twice to avoid mistakes. Use the right tools and wood for lasting strength. A good frame makes the rest of the project easier.
Assembling The Base
Start by cutting the wood pieces for the base. Use thick, sturdy planks that hold weight well. Arrange them in a rectangle that fits the mattress size. Join the planks with screws or wood glue. Check the corners with a square tool. This keeps the base straight and even.
Place support beams across the base for extra strength. Space them evenly to stop the mattress from sagging. Secure each beam tightly. The base must hold the mattress without bending or breaking.
Constructing The Side Rails
Next, cut two long side rails and two shorter end rails. These rails form the bed’s outer frame. Attach the side rails to the base corners firmly. Use strong brackets or screws to hold them in place.
Make sure the rails stand tall and straight. They should reach the mattress height for safety. Side rails keep the mattress from sliding off. They also support the upper bunk if you plan to build one.
Adding The Ladder And Guardrails
Adding the ladder and guardrails is a key step in building a twin bunk bed. These parts keep the bed safe and easy to use. The ladder lets kids climb up and down safely. Guardrails protect from falling during sleep. Follow clear steps to install them right.
Ladder Installation
Start by choosing a sturdy ladder that fits your bed frame. Position the ladder on the side of the top bunk. Use screws to attach the ladder firmly to the bed frame. Make sure the ladder is straight and tight. Check that each step is secure and stable. Test the ladder by climbing slowly to ensure safety.
Securing Guardrails
Guardrails go along the edges of the top bunk. Measure the length of the bed’s side to cut guardrails correctly. Attach the guardrails with screws or bolts to the bed frame. Tighten all fasteners to avoid movement or gaps. The rails should be high enough to prevent falls. Double-check the guardrails for strength and stability before use.
Finishing Touches
Finishing touches make your twin bunk bed look complete and safe. These final steps add charm and ensure the bed lasts long. A neat finish also protects the wood and gives a smooth feel. Focus on painting or staining and checking safety carefully.
Painting Or Staining
Choose paint or stain that suits your room style. Use non-toxic, child-safe products for a healthy space. Apply thin coats evenly for a smooth finish. Let each coat dry fully before the next one. Sand lightly between coats to remove rough spots. Paint adds color and hides marks. Stain shows natural wood grain and protects it. Seal the finish with a clear coat for strength. This step helps your bed resist scratches and spills.
Final Safety Checks
Check all screws and bolts are tight and secure. Look for sharp edges or splinters and smooth them. Make sure guardrails are sturdy and at the right height. Test the ladder for firm placement and easy grip. Confirm the bed does not wobble or creak. Verify there is enough space between the beds. Check the mattress fits snugly without gaps. These checks keep your children safe every night. Safety is key for a restful and worry-free sleep.
Tips For Maintaining Your Bunk Bed
Maintaining your twin bunk bed helps keep it safe and lasting longer. Small tasks done regularly protect your investment. Check the bed often for loose parts or damage. Tight screws and bolts prevent wobbling and accidents.
Cleaning the bunk bed removes dust and dirt that can wear down the material. Use a soft cloth and mild cleaner for wood or metal surfaces. Avoid harsh chemicals that can damage finishes or paint.
Check And Tighten Screws Regularly
Screws can loosen over time with use. Use a screwdriver to tighten all screws every few months. Focus on joints and connection points. Tight screws keep the bed stable and safe.
Inspect For Cracks Or Splinters
Look closely at wood parts for cracks or splinters. Sand down small rough spots to prevent injuries. Replace any wood pieces that show serious damage. Regular inspection stops bigger problems later.
Keep The Bed Clean
Dust collects in corners and under the bed. Clean these areas weekly with a soft cloth or vacuum. Clean surfaces prevent buildup that can cause wear. A clean bed feels fresh and inviting.
Use Proper Mattresses And Bedding
Choose mattresses that fit the bunk bed frame exactly. Too thick or too thin mattresses can cause safety risks. Use bedding that is light and easy to wash. Proper bedding helps keep the bed structure sound.
Teach Kids Safe Usage
Explain rules to kids about using the bunk bed carefully. No jumping or rough play on the bed. Safe habits reduce wear and tear on the bed. Safety first keeps your bunk bed lasting longer.
Credit: withlovemercedes.com
Frequently Asked Questions
What Materials Are Needed To Make A Twin Bunk Bed?
You need wood boards, screws, bolts, a drill, sandpaper, and paint or stain. Choose sturdy wood like pine or oak for durability. Safety hardware like guardrails and ladders are essential for secure assembly.
How Long Does It Take To Build A Twin Bunk Bed?
Building a twin bunk bed usually takes 8 to 12 hours. This depends on your woodworking skills and tools. Allow extra time for sanding and finishing for a professional look.
Is It Safe To Build Your Own Twin Bunk Bed?
Yes, if you follow safety guidelines and use quality materials. Ensure strong joints, guardrails, and secure ladders. Test stability before use. Proper planning and careful construction guarantee a safe bunk bed.
Can I Customize The Twin Bunk Bed Design?
Absolutely! You can customize size, paint color, and features. Add storage drawers or a built-in desk. Custom designs fit your space and style preferences perfectly.
Conclusion
Building a twin bunk bed can be simple and fun. Follow each step carefully for safety and strength. Use good materials and take your time. The result will save space and look great. Enjoy creating a cozy spot for kids or guests.
This project brings both comfort and style to your home. Keep tools ready and work with care. You will feel proud of your handiwork. Give your room a fresh, practical upgrade today.