Are your shoes scattered all over the floor, making it hard to find the pair you want? Imagine having a neat, stylish bookshelf designed just for your shoes—easy to build and perfect for organizing your collection.
In this guide, you’ll discover simple steps to create your own shoe bookshelf that fits your space and style. By the end, you’ll enjoy a clutter-free room and quick access to your favorite footwear every day. Ready to transform your shoe storage?
Let’s get started!
Choosing The Right Materials
Choosing the right materials is key to building a sturdy and attractive bookshelf for shoes. The materials affect how strong the shelf will be and how long it lasts. Picking the best wood, hardware, and finishing items helps create a shelf that fits your space and style perfectly.
Types Of Wood
Wood choice shapes the look and strength of your shoe shelf. Pine is cheap and easy to work with. It’s soft but still holds up well. Oak is harder and more durable but costs more. Birch is smooth and light-colored, giving a clean finish. Plywood is a good option for shelves because it resists warping. Choose wood that matches your budget and room style.
Hardware And Tools Needed
Basic hardware includes screws, nails, and brackets to hold parts together. Use wood screws for strong joints. Hinges can add doors if you want. Essential tools are a saw, drill, screwdriver, and measuring tape. Sandpaper smooths edges and surfaces. Having the right tools makes the building process easier and safer.
Finishing Materials
Finishing protects wood and improves the shelf’s look. Paint adds color and hides imperfections. Stain enhances natural wood grain. Use clear varnish or polyurethane for a tough surface. Apply a primer before painting for better results. Choose finishes that resist moisture and wear since shoes can bring dirt and dampness.
Credit: everestkitchennc.com
Designing Your Shoe Bookshelf
Designing your shoe bookshelf is the first step in creating a useful and neat storage space. A good design fits your room and holds all your shoes comfortably. Careful planning helps avoid mistakes and saves time and money. Think about your needs and the space available before starting.
Focus on making the shelf strong and easy to use. Choose a style that matches your room’s look. A well-designed bookshelf keeps shoes organized and easy to find.
Measuring Your Space
Measure the area where you want to place the bookshelf. Use a tape measure for length, width, and height. Write down the numbers to avoid forgetting. Check for any obstacles like doors or vents. Leave some space around the shelf for easy access and cleaning.
Determining Shelf Size
Think about the size of your shoes. Each shelf should be tall enough for the tallest pair. Make shelves wide enough for several shoes side by side. Keep some extra space to avoid crowding. This helps shoes stay in good shape and makes the shelf look tidy.
Incorporating Adjustable Shelves
Adjustable shelves add flexibility to your shoe storage. You can change shelf height for different shoe types. Use shelf pins or brackets that fit into holes on the side panels. This allows easy movement of shelves without tools. Adjustable shelves keep the bookshelf useful as your shoe collection grows.
Cutting And Preparing Wood
Cutting and preparing wood is the first step in building a sturdy bookshelf for shoes. It sets the foundation for the whole project. Accurate cuts and smooth surfaces make assembly easier and the final product look great. Take your time to measure and cut carefully. Safety is also very important during this phase. Proper sanding will help the wood feel smooth and prevent splinters.
Marking And Measuring Cuts
Start by measuring the wood pieces needed for shelves and sides. Use a tape measure and pencil to mark exact cut lines. Double-check all measurements before cutting. Mark each piece clearly to avoid confusion. Precise markings ensure the shelves fit well and stay strong.
Safe Cutting Techniques
Use a saw suitable for the wood type and thickness. Always wear safety goggles and gloves to protect your eyes and hands. Cut slowly and steadily along the marked lines. Keep your fingers away from the blade. Use clamps to hold the wood steady for safer cuts. Follow all safety instructions for your tools.
Sanding And Smoothing Surfaces
After cutting, sand all edges and surfaces with medium-grit sandpaper. This removes rough spots and splinters. Follow up with fine-grit sandpaper for a smooth finish. Sand in the direction of the wood grain. Clean dust off with a cloth before assembling. Smooth wood looks better and feels safe to touch.
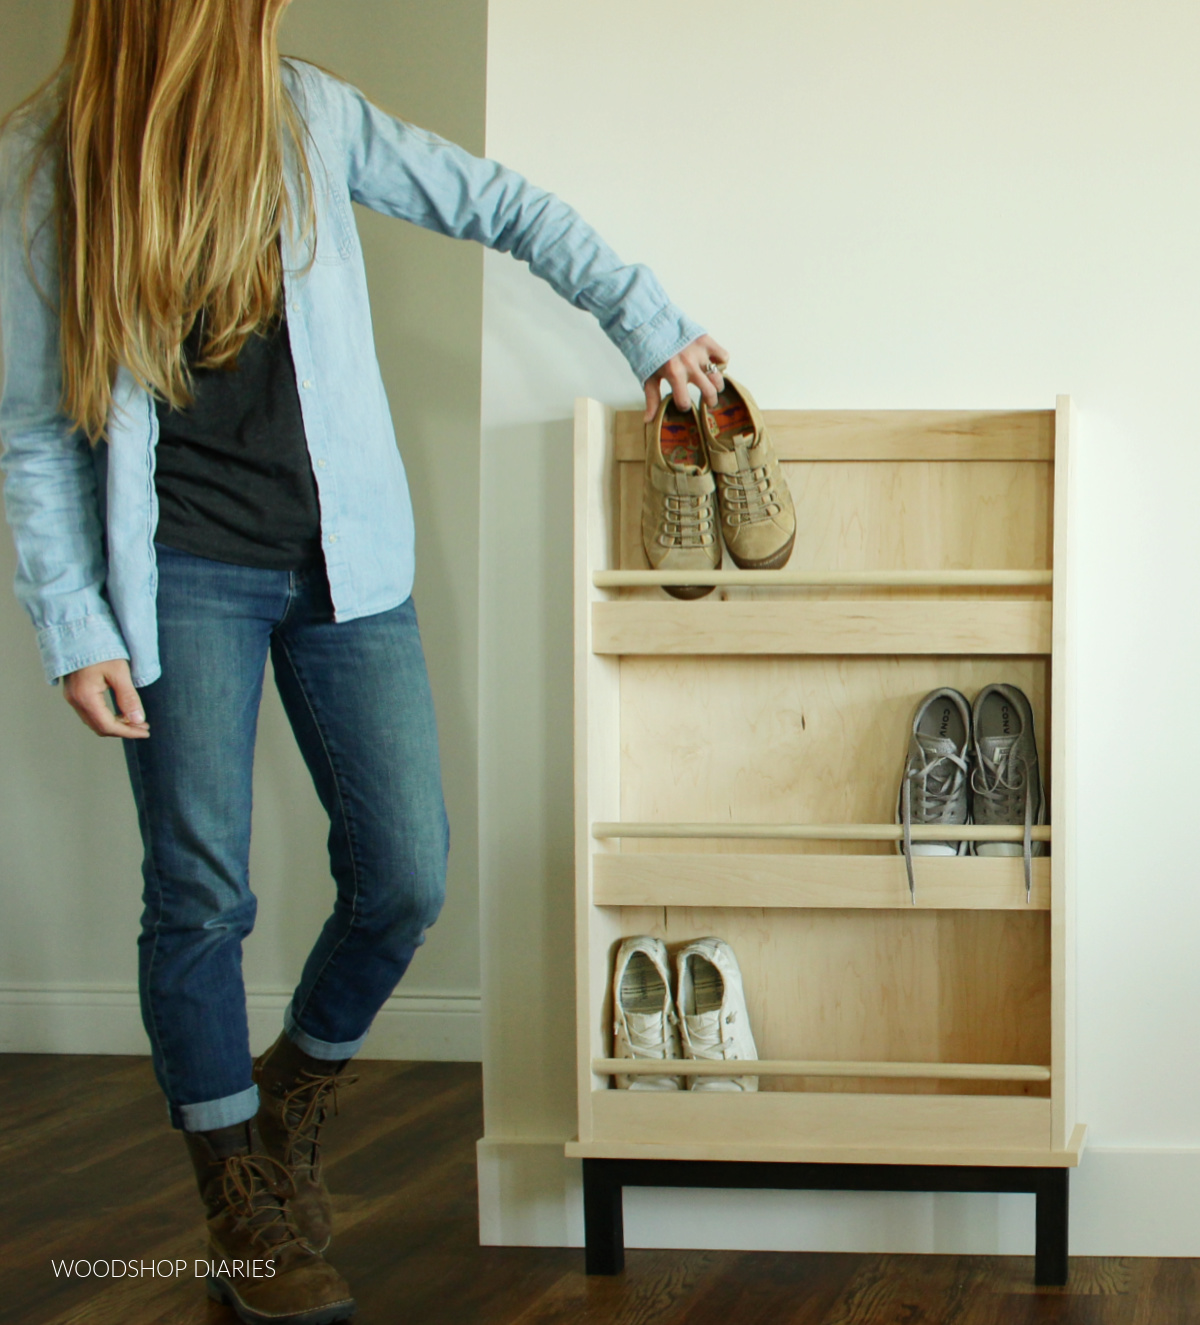
Credit: www.woodshopdiaries.com
Assembling The Bookshelf
Assembling the bookshelf is the most exciting part of the project. It brings all the pieces together. This step requires focus and patience. Follow the instructions carefully to create a sturdy shoe bookshelf. Each section builds on the last for a strong final product.
Building The Frame
Start by connecting the side panels to the top and bottom boards. Use screws or nails for a firm hold. Check that the frame is square by measuring the diagonals. Tighten all joints so the frame does not wobble. The frame forms the base shape of the bookshelf.
Attaching Shelves
Place the shelves inside the frame at equal spaces. Mark where each shelf will sit before attaching. Secure each shelf with screws or brackets. Make sure shelves are level to hold shoes properly. Even spacing helps store shoes neatly and keeps the structure balanced.
Reinforcing For Stability
Add support braces at the back of the bookshelf. Use corner brackets or wooden strips for reinforcement. This prevents the bookshelf from leaning forward or tipping over. Double-check all screws are tight and the frame feels solid. Stability is key for safety and durability of the shoe shelf.
Finishing Touches
Finishing touches give your shoe bookshelf a polished, complete look. They protect the wood and enhance its style. These final steps make your project last longer and look great in any room.
Painting Or Staining
Choose paint or stain to match your room’s decor. Paint adds color and hides wood grain. Stain highlights the natural beauty of the wood. Apply with a brush or cloth for even coverage. Let it dry fully before the next step.
Adding Protective Coating
Protective coating guards your bookshelf against scratches and spills. Use clear varnish, polyurethane, or wax. These coatings keep the surface smooth and durable. Apply thin layers and let each dry well. This step helps your shelf stay beautiful for years.
Installing Decorative Elements
Decorative elements add personality to your bookshelf. Consider knobs, trim, or small moldings. They can make your shelf unique and stylish. Attach them carefully using glue or small nails. This final detail brings charm and character to your shoe storage.
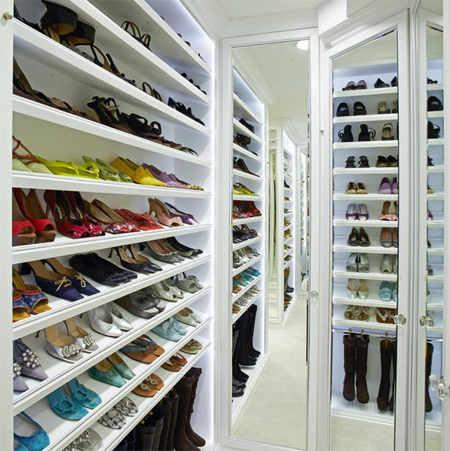
Organizing Shoes Effectively
Organizing shoes effectively helps keep your space neat and easy to use. A well-planned shoe bookshelf makes finding the right pair quick. It also protects shoes from damage and clutter. Simple methods can improve your shoe storage and display.
Categorizing By Type Or Frequency
Sort shoes by type like sneakers, boots, or sandals. Grouping similar shoes saves time when choosing. Another way is sorting by how often you wear them. Place daily shoes at eye level for easy reach. Special occasion shoes can go on higher shelves.
Maximizing Shelf Space
Use vertical space by adding extra shelves if possible. Arrange shoes side by side, not stacked. Store pairs with toes facing out to save room. Use clear boxes or baskets for smaller shoes. This keeps shelves tidy and uses space well.
Maintaining A Tidy Display
Keep shoes clean before placing them on the shelf. Regularly check and remove old or damaged shoes. Use labels or small signs to mark sections. This helps maintain order and reduces clutter. A tidy display makes your shoe shelf look inviting and organized.

Credit: thistlewoodfarms.com
Frequently Asked Questions
What Materials Are Needed To Build A Shoe Bookshelf?
To build a shoe bookshelf, you need wood boards, screws, nails, wood glue, sandpaper, paint or stain, and brackets. These materials provide sturdy support and a finished look. Choosing quality wood ensures durability and style for your shoe storage solution.
How Much Time Does It Take To Build A Shoe Bookshelf?
Building a shoe bookshelf typically takes 3 to 6 hours, depending on complexity. Simple designs require less time, while detailed shelves may take longer. Preparing materials and allowing drying time for paint or stain also affect the total duration.
What Are The Best Wood Types For Shoe Bookshelves?
Pine, oak, and plywood are popular for shoe bookshelves. Pine is affordable and easy to work with. Oak offers strength and a classic look. Plywood is versatile and budget-friendly, making it ideal for customized shelves.
How Can I Customize My Shoe Bookshelf Design?
You can customize by adjusting shelf height, adding drawers, or using different finishes. Consider your shoe collection size and style preferences. Adding decorative trims or labels enhances functionality and aesthetics, making the bookshelf uniquely yours.
Conclusion
Building a bookshelf for shoes is a smart way to organize space. It saves room and keeps shoes easy to find. You can choose the size and style that fits your needs. Using simple tools and materials makes the project affordable.
A sturdy shelf also protects your shoes from damage. Try this project to add order and style to your home. Enjoy the satisfaction of making something useful yourself. Start small and watch your space transform step by step.