Are you looking to add a unique touch to your home while organizing your favorite books? Building a bookshelf with open sides is a great way to do just that.
Not only does it create a modern, airy look, but it also makes your space feel bigger and brighter. Imagine having a custom piece that fits perfectly in your room and showcases your style. In this guide, you’ll discover simple steps and insider tips to build your own open-sided bookshelf, even if you’ve never worked with wood before.
Ready to transform your space and impress your friends? Let’s get started!

Credit: www.vecteezy.com
Materials And Tools Needed
Building a bookshelf with open sides is a fun project. It requires some basic materials and tools. Having the right supplies makes the process easier and the result stronger. This section covers what you need before starting your build.
Selecting The Right Wood
Choose wood that is sturdy and easy to work with. Pine and poplar are great choices for beginners. They are affordable and light. Oak and maple are stronger but harder to cut. Pick wood boards that are smooth and straight. Avoid wood with many knots or cracks. These can weaken your bookshelf.
Essential Tools List
You need a few basic tools to build the bookshelf. A saw helps cut the wood to size. A drill makes holes for screws and fasteners. Sandpaper smooths rough edges. A screwdriver or power drill drives screws. A measuring tape ensures accurate cuts. A square tool helps keep corners straight. Clamps hold pieces together while gluing or screwing.
Optional Supplies For Finishing
To give your bookshelf a nice look, use finishing supplies. Wood stain or paint adds color and protects wood. A brush or cloth applies stain or paint evenly. Wood filler hides holes or cracks. Clear varnish or sealant gives a shiny, protective surface. Felt pads on the bottom protect floors from scratches.
Planning Your Bookshelf
Planning your bookshelf is the first step to a successful build. It helps you avoid mistakes and saves time. A clear plan guides you through the process smoothly. You will know what materials and tools you need. It also ensures the bookshelf fits your space perfectly.
Choosing Dimensions And Design
Decide how tall and wide your bookshelf should be. Think about the space where you want to place it. Consider the size of your books and items. Choose a design that suits your room style. Open sides create a light and modern look. Make sure the shelves are strong enough to hold weight.
Sketching A Simple Blueprint
Draw a basic plan on paper. Include all parts of the bookshelf. Show the height, width, and depth clearly. Mark the number of shelves and their distance. A simple sketch helps you visualize the final product. It also guides you while cutting and assembling the wood.
Measuring And Marking Wood
Measure your wood pieces carefully. Double-check every measurement before cutting. Use a pencil to mark the wood where you will cut. Accurate marks make the cuts clean and precise. Take your time with this step. It ensures the bookshelf fits together well.
Cutting The Wood Pieces
Cutting the wood pieces is a key step in building a bookshelf with open sides. Precise cuts make sure the pieces fit well together. This step sets the stage for a strong and neat bookshelf. Take your time and measure twice before cutting. A clean cut helps the bookshelf look professional and last longer.
Tips For Accurate Cuts
Use a pencil to mark the cut lines clearly on the wood. Measure carefully using a tape measure or ruler. Double-check your measurements before cutting. Choose the right saw for your wood type and thickness. Cut slowly and steadily to avoid splinters or uneven edges. Clamp the wood securely to keep it from moving. Sand the edges after cutting for a smooth finish. Keep your workspace clean to see your markings clearly.
Safety Precautions While Cutting
Always wear safety goggles to protect your eyes from dust and splinters. Use ear protection if the saw is loud. Keep your hands away from the blade at all times. Wear a dust mask to avoid breathing in wood particles. Make sure the saw blade is sharp and in good condition. Work in a well-lit area to see clearly. Never rush the cutting process to avoid accidents.
Credit: abeautifulmess.com
Assembling The Frame
Assembling the frame is the first big step in building your open-sided bookshelf. A strong frame holds the entire structure together. It shapes the bookshelf’s look and strength.
Take your time to join the parts correctly. This helps avoid problems later. A solid frame means your shelves will hold books safely without wobbling.
Joining Side Panels To Shelves
Start by placing the side panels upright. Fit the shelves between them at the planned spots. Make sure the edges line up perfectly.
Use clamps to hold the shelves and side panels together. This keeps everything steady while you work. Check the height and position before fixing the pieces.
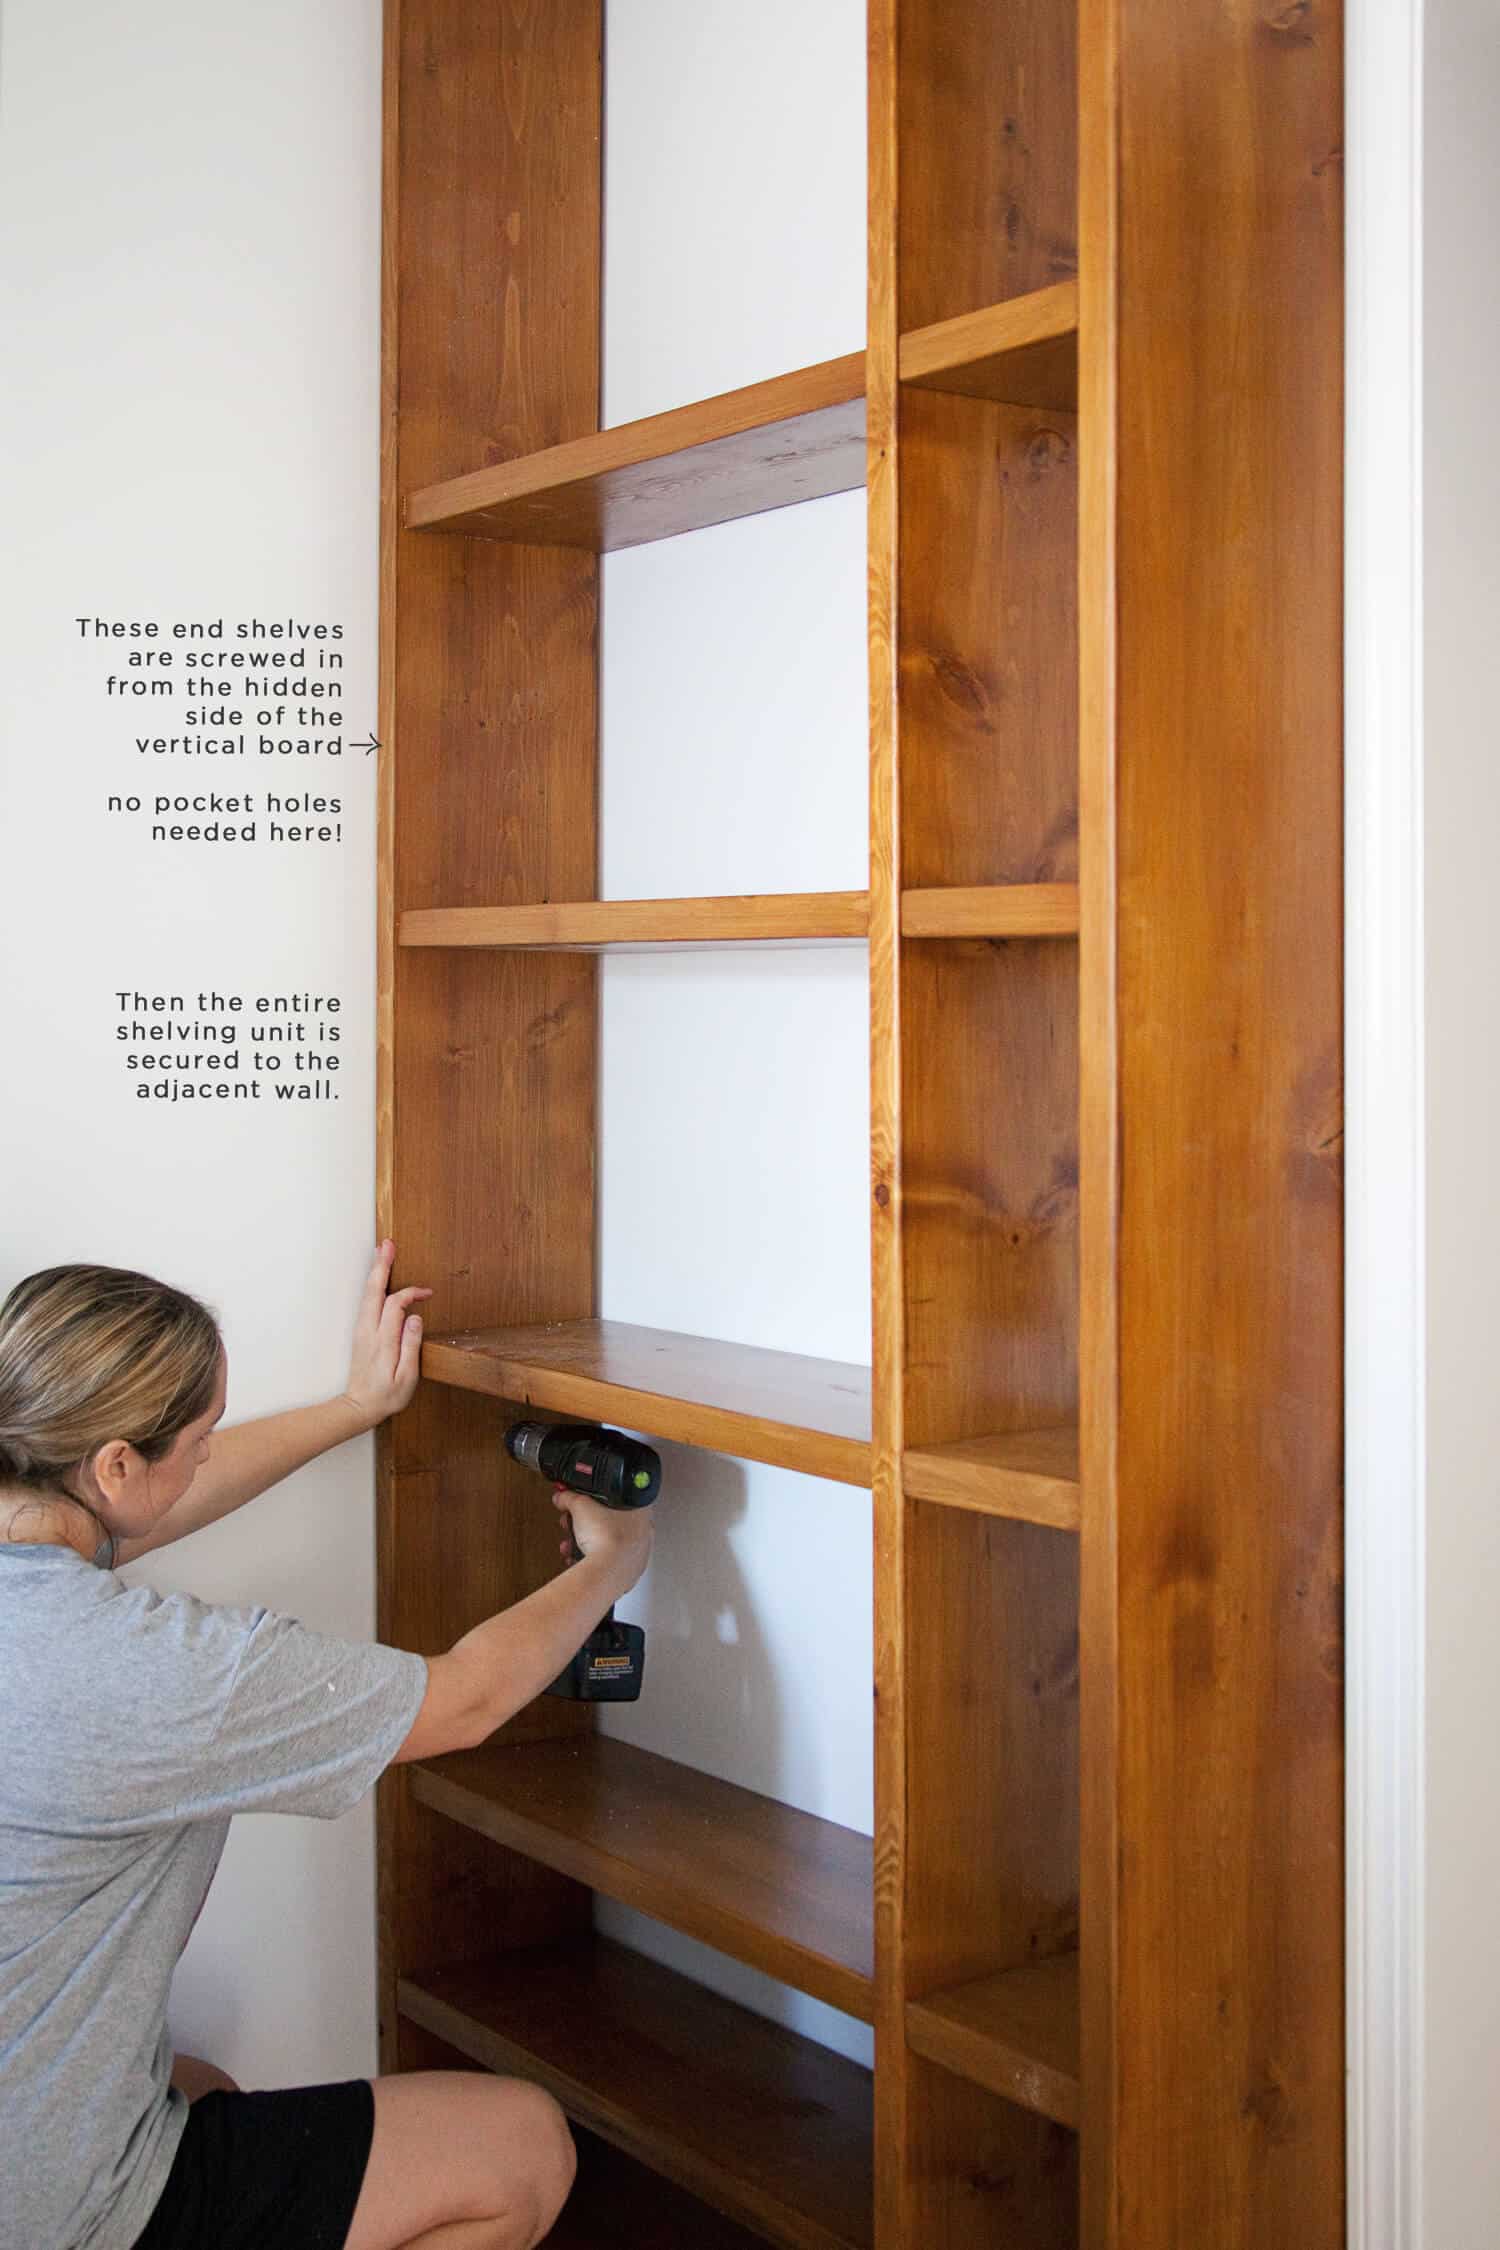
Using Screws And Wood Glue
Apply wood glue on the edges where the shelves meet the side panels. Glue adds extra strength to your joints.
Next, drill pilot holes to prevent wood from splitting. Insert screws into these holes to secure the shelves. Tighten screws just enough to hold parts firmly.
Wood glue and screws together make a durable frame. Let the glue dry fully before moving on to the next step.
Ensuring Stability And Squareness
Check the frame’s squareness using a carpenter’s square. Each corner should form a perfect 90-degree angle. Adjust clamps or screws if needed.
Stand the frame upright and gently shake it. It should feel solid without any wobbles. Tighten any loose screws to improve stability.
A square and stable frame supports books well and looks professional. Take time here to get it right before adding more shelves.
Adding Finishing Touches
Adding finishing touches to your bookshelf with open sides gives it a clean, polished look. These final steps improve its appearance and durability. Careful attention makes your project stand out and last longer.
Sanding For Smooth Edges
Start by sanding all surfaces gently. Use medium-grit sandpaper to remove rough spots. Then switch to fine-grit for a smooth finish. Sand edges and corners carefully to avoid splinters. Wipe dust off with a dry cloth before the next step.
Applying Paint Or Stain
Choose paint or stain based on your room’s style. Apply a thin, even coat using a brush or cloth. Let it dry completely before adding a second layer. Paint offers color variety while stain highlights natural wood grains. Seal with a clear finish for extra protection.
Installing Optional Supports
Check if your bookshelf needs extra support for heavy books. Add small brackets or braces inside the shelves if needed. Secure supports with screws for stability. This step prevents sagging and keeps your bookshelf strong. Optional supports improve safety and longevity.
.jpg)
Credit: www.mascheroni.it
Placing And Styling Your Bookshelf
Placing and styling your bookshelf with open sides can change the whole look of a room. It is more than just setting it against a wall. The right spot and smart styling make your bookshelf a focal point. It also helps keep your space neat and inviting.
Choosing The Perfect Spot
Pick a place with enough light to see your books easily. Near a window works well but avoid direct sunlight. It can fade the wood and books. Make sure the spot has room for walking and other furniture. Open side shelves look great in corners or as room dividers. Check the wall and floor for levelness to keep the shelf steady.
Organizing Books And Decor
Arrange books by size or color for a tidy look. Mix vertical and horizontal stacks to add interest. Use the open sides to show decorative items like plants or art. Keep some space empty to avoid clutter. Rotate items now and then to keep the style fresh. Balance heavy books with lighter objects for stability.
Maintenance Tips For Longevity
Dust your bookshelf at least once a week. Use a soft cloth to protect the wood finish. Check screws and joints every few months to keep it sturdy. Avoid placing it near heaters or damp areas. Clean spills immediately to prevent stains. Treat the wood with polish once or twice a year for a lasting shine.
Frequently Asked Questions
What Materials Do I Need For A Bookshelf With Open Sides?
You need wood planks, screws, wood glue, sandpaper, and finishing paint. Choose sturdy wood like pine or oak for durability and style.
How Do I Ensure Stability In An Open-sided Bookshelf?
Use strong joints like dowels or screws and add a back brace for extra support. Even open sides need proper reinforcement to prevent wobbling.
What Tools Are Essential For Building This Bookshelf?
Basic tools include a saw, drill, screwdriver, measuring tape, and clamps. These tools help you cut, assemble, and secure the bookshelf accurately.
Can I Customize The Shelf Size And Shape Easily?
Yes, open-sided designs are flexible. Adjust dimensions to fit your space and needs by changing plank length and width before cutting.
Conclusion
Building a bookshelf with open sides brings style and function together. It lets light pass through, making rooms feel bigger and bright. You can customize the size and shape to fit your space well. Using simple tools and clear steps makes the project easy and fun.
This kind of bookshelf also shows off your favorite books and decor nicely. Try this project to add a fresh look to your home. Enjoy crafting something useful and beautiful with your own hands.