Are you tired of cluttered spaces and searching for the perfect spot to keep your favorite books? Building your own bookshelf can be easier than you think, and it gives you exactly what you need—custom size, style, and a sense of pride.
Imagine creating a sturdy, beautiful bookshelf that fits your room perfectly and holds all your treasures. In this guide, you’ll discover simple steps to make your own bookshelf, even if you’ve never worked with wood before. Ready to turn your space into an organized haven?
Let’s get started!
Choosing The Right Materials
Choosing the right materials is key to making a strong and beautiful bookshelf. The materials affect how long the shelf lasts and how much weight it can hold. Good materials make building easier and the final product better. Spend time picking the best wood and tools before starting your project. This saves time and effort later.
Types Of Wood For Shelves
Wood type affects strength, look, and cost of your bookshelf. Pine is soft, easy to cut, and low cost. Oak is strong, hard, and has a nice grain pattern. Maple is smooth and hard, great for painting. Plywood is made of layers and is stable. It resists warping and is good for shelves. Choose wood that fits your budget and style.
Tools And Supplies Needed
Right tools make building fast and safe. You need a saw to cut wood. A drill helps make holes and drive screws. Sandpaper smooths rough edges. Screws or nails hold pieces together. A level checks your shelf is straight. Wood glue adds extra strength. Gather all tools before starting your build. This keeps work steady and easy.
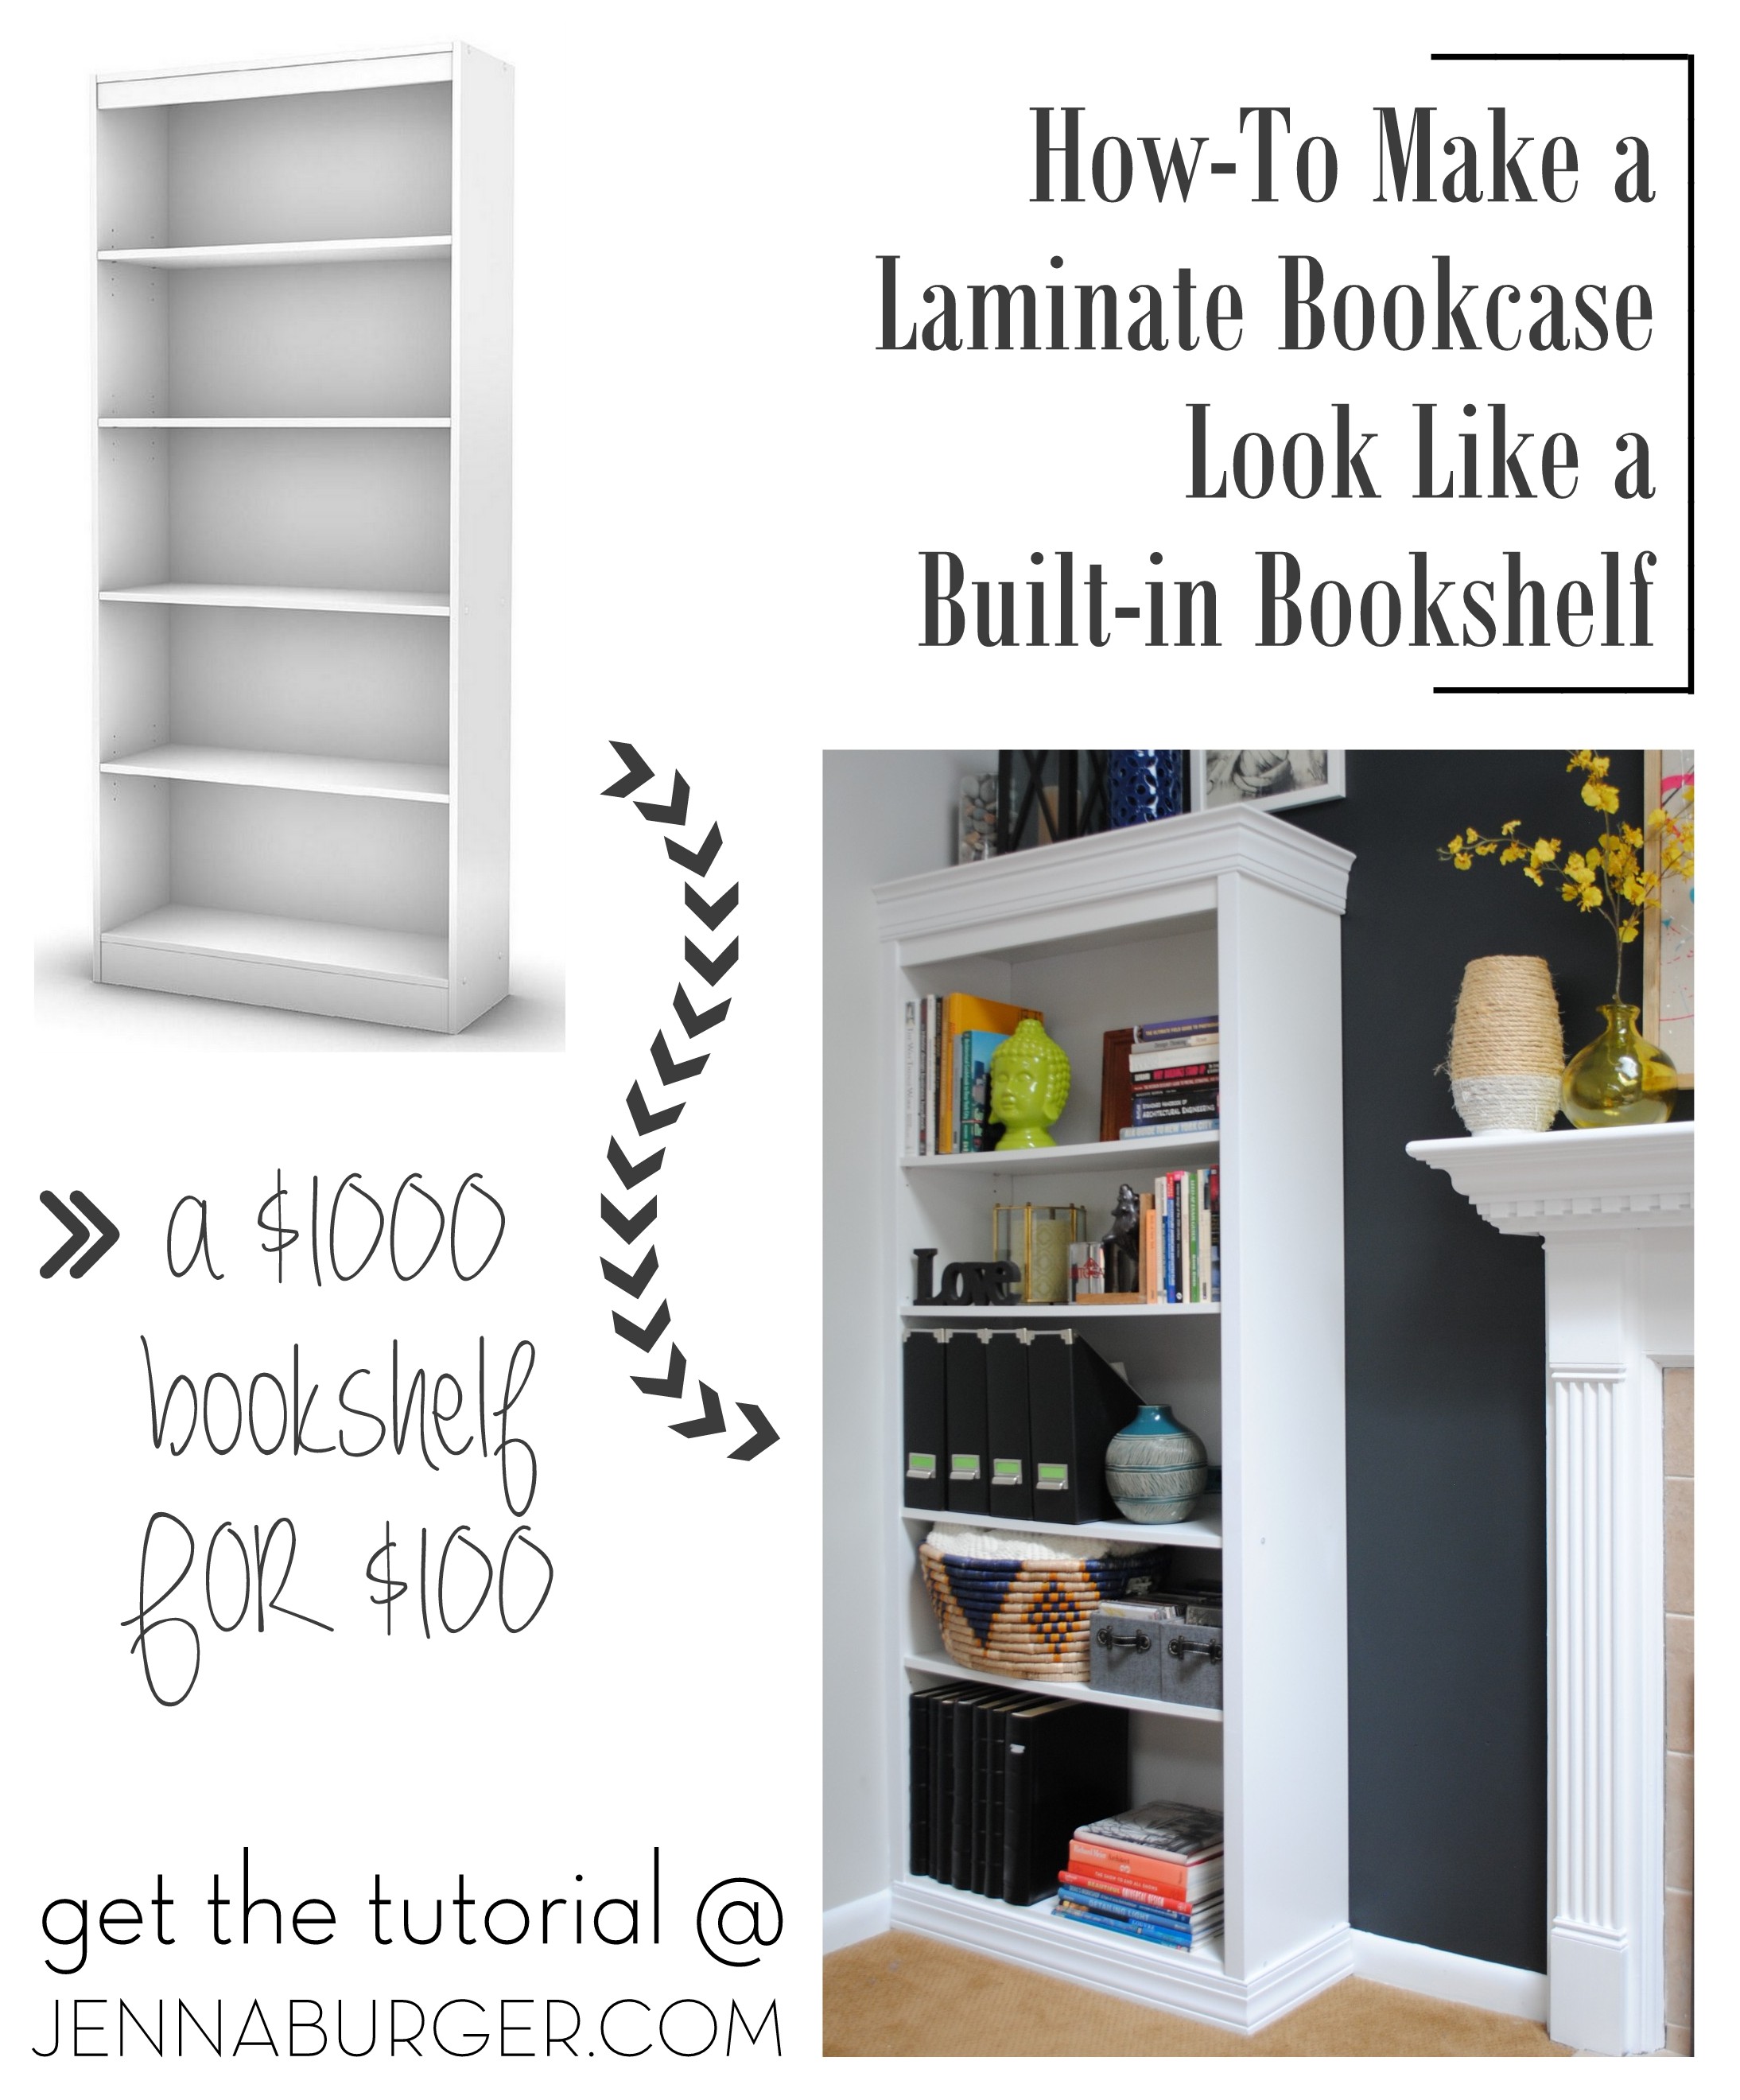
Credit: jennaburger.com
Planning Your Bookshelf Design
Planning your bookshelf design is the first step to create a perfect storage solution. It helps you use space wisely and fit your style. Careful planning avoids mistakes and extra work later. Follow simple steps to make a strong plan for your bookshelf.
Start with clear goals for size, shape, and use. Think about what you want to store and how many shelves you need. This helps you make a design that works well for your room and books.
Measuring Your Space
Measure the area where you want to place the bookshelf. Use a tape measure to get the height, width, and depth. Write down these numbers. Check for any obstacles like power outlets or vents. These details affect your design and shelf size.
Double-check your measurements before starting. Small errors can cause big problems. Accurate measuring saves time and money.
Sketching Your Shelf Layout
Draw a simple sketch of your bookshelf on paper. Include the overall shape and size. Mark the number and position of shelves. Decide on shelf heights based on your book sizes. This makes sure everything fits well.
Use a ruler to keep lines straight and clean. Sketching helps you see the final look before building. It is easier to change ideas on paper than with wood.
Cutting And Preparing Wood
Cutting and preparing wood is an important first step in making a bookshelf. The right cuts help your pieces fit perfectly. Preparing the wood well makes the final product look neat and strong.
Careful cutting and sanding create smooth edges and clean shapes. This step takes time but improves the quality of your bookshelf. Safety and precision go hand in hand during this process.
Safe Cutting Techniques
Always wear safety glasses to protect your eyes. Use ear protection if your tools are loud. Keep your hands away from the blade while cutting.
Mark your wood clearly before cutting. Use a sharp saw blade for clean cuts. Cut slowly and steadily to avoid mistakes.
Secure the wood firmly with clamps or on a stable surface. Never force the saw through the wood. Let the tool do the work.
Sanding For Smooth Edges
Start sanding with coarse sandpaper to remove rough spots. Move to finer grits to make the wood smooth. Sand along the grain to avoid scratches.
Check edges by running your fingers over them. Stop sanding once edges feel smooth and even. Clean dust off the wood before assembling.
Assembling The Frame
Assembling the frame is the key step in building a sturdy bookshelf. It creates the basic shape and support for the shelves. Take your time to fit each part correctly. A strong frame means a durable bookshelf that holds weight well.
Joining Techniques
Use screws for a solid hold. Pre-drill holes to prevent wood from splitting. Wood glue adds extra strength at joints. Nail joints can work but are less strong. Use clamps to keep parts tight while glue dries. Choose dowels for hidden, neat connections. Each method helps the frame stay firm and aligned.
Ensuring Stability
Check corners with a square tool to keep right angles. Tighten all screws and fittings firmly. Add corner braces for extra support if needed. Use thicker wood for the frame to hold more weight. Make sure the frame sits flat on the floor. A stable frame stops wobbling and makes your bookshelf safe.
Adding Shelves And Supports
Adding shelves and supports is a key step in building a strong bookshelf. Shelves hold your books and items, so they must be sturdy. Proper supports keep shelves steady and prevent sagging. Careful placement and secure fixing make your bookshelf last longer and look neat.
Spacing Shelves Evenly
Measure the height of your bookshelf first. Decide how many shelves you want to add. Divide the height by the number of shelves plus one. This gives you the space between each shelf. Mark these spots clearly on the inside of the bookshelf. Use a level to make sure marks are straight. Even spacing helps your books fit well and keeps the shelf balanced.
Securing Shelves Properly
Use strong brackets or supports under each shelf. Attach them tightly to the sides of the bookshelf. Drill pilot holes before screwing to avoid wood splitting. Check that each shelf is level before fixing it fully. For heavy books, add extra supports in the middle. Tight and steady shelves prevent wobbling and hold weight safely.

Credit: www.infarrantlycreative.net
Finishing Touches
Finishing touches bring your bookshelf to life. They protect the wood and enhance its look. Choosing the right finish can change the style and feel of your shelf. This step makes your project durable and beautiful. Let’s explore some great options for painting, staining, and protecting your bookshelf.
Painting And Staining Options
Paint gives you bright colors and a smooth finish. It covers the wood grain and offers many color choices. Use a primer first for better paint adhesion and a cleaner look. Choose water-based paint for easy cleanup and low odor.
Stain shows the wood grain and adds a natural touch. It comes in many shades, from light to dark. Apply the stain with a cloth or brush, and wipe off excess for even color. Stain soaks into the wood, keeping its texture visible.
Protective Coatings
Protective coatings shield your bookshelf from scratches and water. Polyurethane is a popular choice for strong protection. It comes in satin, gloss, or matte finishes. Apply thin layers and let each dry before the next.
Wax offers a soft shine and smooth feel but less protection. It’s easy to apply with a cloth and buff to a shine. For a natural finish, use oil like tung or linseed oil. Oils soak in and protect without forming a hard layer.
Installing Your Bookshelf
Installing your bookshelf is an important step to keep it stable and safe. Proper installation helps prevent accidents and damage. It also ensures your books and decorations stay secure. Follow simple tips to mount your bookshelf correctly and place it in a safe spot.
Wall Mounting Tips
Choose the right wall anchors for your wall type. Use screws that fit the anchors well. Find the wall studs using a stud finder for strong support. Mark the drill points clearly before drilling. Drill holes carefully and insert anchors firmly. Attach the bookshelf brackets tightly to avoid wobbling. Double-check all screws are secure before placing items on the shelf.
Positioning For Safety
Place the bookshelf on a flat, even surface. Avoid high-traffic areas to reduce risk of bumps. Keep heavy items on lower shelves to lower the center of gravity. Leave enough space between the shelf and doors or walkways. Secure tall bookshelves to the wall with straps for extra safety. Check the shelf regularly for any signs of loosening or wear.
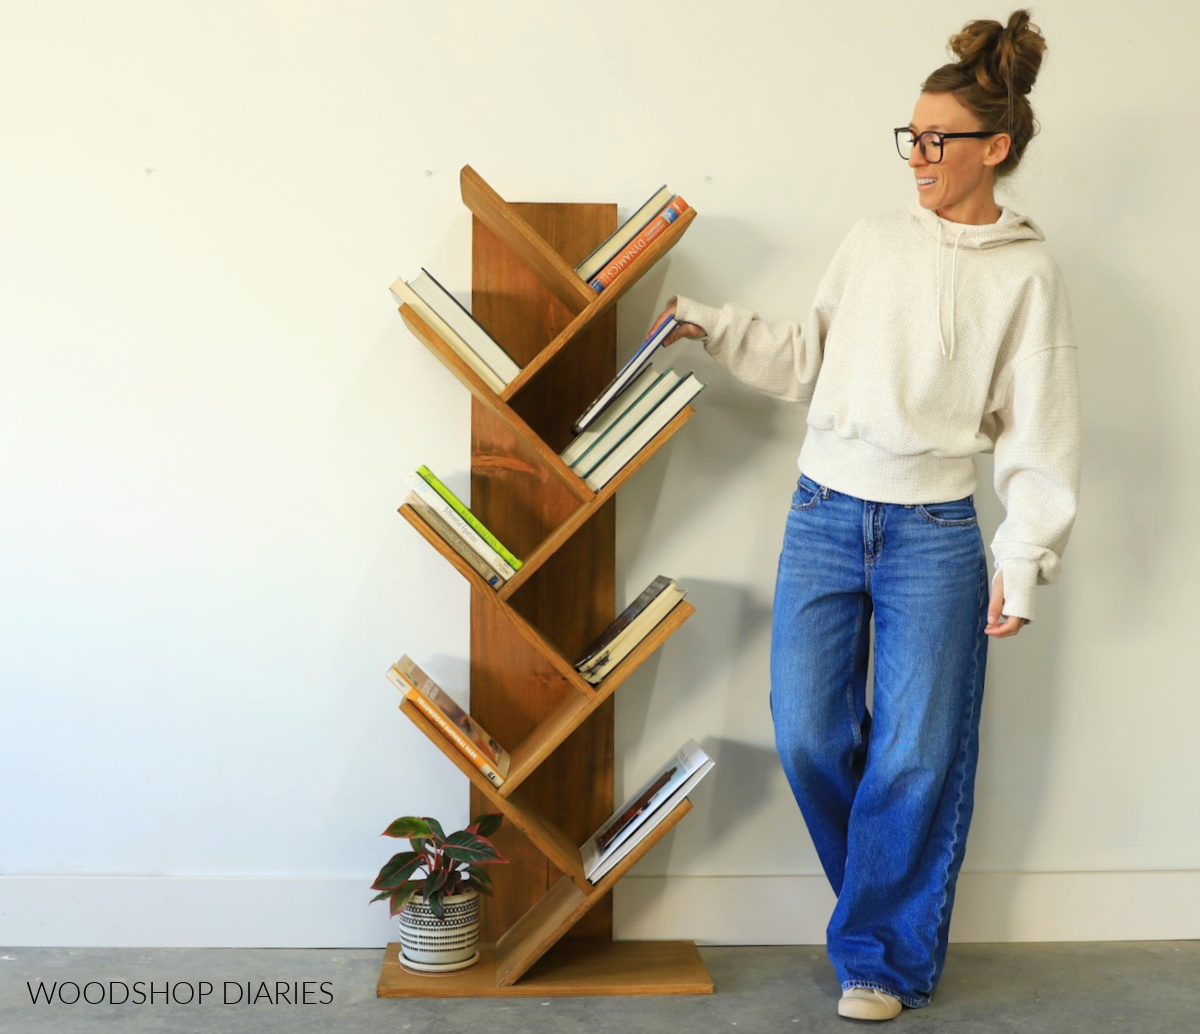
Credit: www.woodshopdiaries.com
Creative Shelf Styling
Creative shelf styling turns a simple bookshelf into a beautiful display. It balances books with decor for a fresh, inviting look. This style makes your shelf more than just storage. It shows your personality and taste.
Small changes can make a big difference. Mixing items and colors keeps the shelves interesting. Each shelf can tell a story or highlight a theme. The goal is to create a space that feels cozy and unique.
Organizing Books And Decor
Group books by color, size, or subject to create order. Place taller books at the ends for balance. Use horizontal stacks to break vertical lines and add texture. Mix in decor items like plants, frames, or vases.
Leave some empty space to avoid clutter. This space lets your eyes rest and highlights key pieces. Rotate decor items seasonally for a fresh look. Use trays or baskets to keep small items tidy.
Personalizing Your Shelves
Add items that reflect your hobbies and memories. Family photos, travel souvenirs, or handmade crafts work well. Change these items over time to keep the shelf alive. Personal touches make the shelf feel warm and inviting.
Try unique bookends or custom labels for a special touch. Use lighting to highlight favorite books or decor. This makes your shelf a focal point in any room. Your shelf tells your story, one item at a time.
Frequently Asked Questions
What Materials Are Needed To Make A Bookshelf?
To make a bookshelf, you need wood panels, screws, a drill, sandpaper, and wood glue. Optional tools include a saw and paint for finishing.
How Long Does It Take To Build A Bookshelf?
Building a simple bookshelf typically takes 2-4 hours. Complex designs may require more time for cutting, assembling, and finishing.
What Is The Best Wood Type For Bookshelves?
Pine, oak, and plywood are popular choices. Pine is affordable, oak is durable, and plywood offers a smooth finish for painting.
How Can I Make My Bookshelf Sturdy?
Use thick wood, reinforce corners with brackets, and secure shelves with screws. Proper sanding and gluing also enhance stability.
Conclusion
Building your own bookshelf can be a fun and useful project. It saves money and lets you create a design you like. Follow the steps carefully and take your time. Using the right tools makes the job easier and safer.
You will feel proud when you see your finished bookshelf. It can hold your books and decorations neatly. Try different styles to fit your space. Enjoy the process and learn new skills. Making a bookshelf is a great way to improve your home.
Give it a try and see how rewarding it can be.