Are you looking to add a unique touch to your home with a stylish bookshelf? A bull nose bookshelf is exactly what you need.
Its smooth, rounded edges give any room a warm and modern feel. Plus, making one yourself is easier than you might think. In this guide, you’ll discover simple steps to create a beautiful bull nose bookshelf that fits perfectly in your space.
Ready to transform your room and impress your guests? Keep reading, and let’s get started!

Credit: www.homedepot.com
Materials And Tools Needed
Gathering the right materials and tools is the first step to build a bull nose bookshelf. This ensures your project goes smoothly and the final product looks great. Below are the essentials you need for a sturdy and stylish bookshelf.
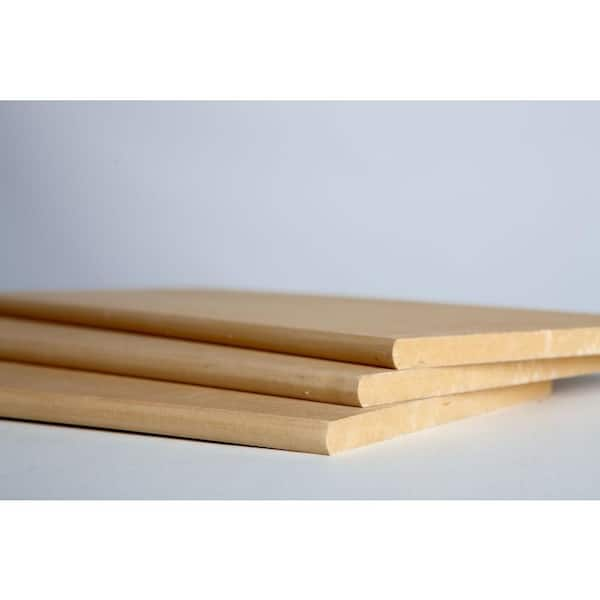
Wood Selection
Choose wood that is strong and easy to shape. Pine and oak are popular choices. Pine is soft and easier to cut, while oak is harder and more durable. Select wood with smooth grain for a neat finish. Aim for boards at least 3/4 inch thick for stability. Avoid wood with cracks or knots that could weaken the shelves.
Required Tools
Basic woodworking tools make the job easier. You will need a saw to cut the wood to size. A router is essential to create the rounded bull nose edges. Sandpaper or an electric sander smooths rough surfaces. A drill helps to make holes for screws. Use clamps to hold pieces firmly while you work. A measuring tape and pencil help with accurate cuts.
Safety Gear
Protect yourself during the project. Wear safety goggles to shield your eyes from dust and wood chips. Use ear protection to reduce noise from power tools. Gloves protect your hands from splinters and sharp edges. A dust mask prevents inhaling wood dust. Always work in a well-ventilated area to stay safe.
Design Planning
Design planning is the first step in making a bull nose bookshelf. It helps you organize your ideas clearly. Careful planning saves time and materials.
Think about where the bookshelf will go. Picture how it should look. Planning makes the building process smoother and more enjoyable.
Measuring Space
Start by measuring the wall or corner where you want the bookshelf. Use a tape measure for accuracy. Write down the width, height, and depth available.
Leave some extra space for easy installation. Check if there are any obstacles like switches or vents. These details affect your design choices.
Sketching The Layout
Draw a simple sketch of the bookshelf on paper. Mark the shelves and the bull nose edges clearly. This visual helps you see the final shape.
Try different shelf arrangements. Decide how many shelves you need. The sketch guides you while cutting and assembling parts.
Choosing Dimensions
Pick shelf heights based on the items you want to store. Books need taller shelves than small decor pieces. Keep the bull nose curve smooth and balanced.
Standard shelf depth is usually 10 to 12 inches. Adjust depth if you want a deeper or shallower shelf. Good dimensions make the bookshelf both useful and pretty.
Cutting The Wood
Cutting the wood is a key step in making a bull nose bookshelf. It shapes the wood to have smooth, curved edges. This part needs care and precision to get a nice look. Follow simple steps to cut the wood safely and accurately.
Focus on marking the edges clearly and using safe cutting methods. These help you avoid mistakes and keep your hands safe.
Marking The Bull Nose Edges
Start by measuring the wood pieces carefully. Use a pencil to draw the bull nose curve on the edges. A compass or a round object can help make smooth curves. Mark both sides to keep the shape even. Double-check the marks before cutting. Clear lines guide the saw and prevent errors.
Safe Cutting Techniques
Wear safety glasses and gloves to protect yourself. Use a sharp jigsaw or router for curved cuts. Cut slowly and follow the marked lines closely. Keep your hands away from the blade at all times. Use clamps to hold the wood steady during cutting. Take breaks if needed to avoid mistakes. Clean the edges with sandpaper for a smooth finish.

Credit: www.thecraftpatchblog.com
Shaping The Bull Nose
Shaping the bull nose is an important step in making a bookshelf. It gives the edges a soft, rounded look. This shape makes the shelf safer and more attractive. The process needs careful work to get smooth curves without rough spots. Two main ways help create this shape: using a router and sanding. Both steps work together to form a perfect bull nose edge.
Using A Router
A router is a tool that cuts wood edges smoothly. Choose a round-over bit for the bull nose shape. Move the router slowly along the wood edge. Keep the router steady to avoid uneven curves. Make sure to hold the wood firmly while routing. This step shapes the wood into a soft, curved edge quickly. It saves time and gives a clean cut.
Sanding For Smooth Curves
Sanding is important after using the router. It removes small bumps and sharp spots. Use fine-grit sandpaper for a smooth finish. Sand along the curve gently and evenly. Check the edge often to keep the shape round. Sanding makes the wood feel soft to touch. This step perfects the bull nose and prepares it for painting or staining.
Assembling The Shelf
Assembling the bull nose bookshelf is an important step. It shapes the final look and strength of your shelf. Careful joining and securing will keep your shelf sturdy and neat. Follow simple steps to put all parts together correctly.
Joining Techniques
Start by aligning the shelf pieces carefully. Use wood glue on edges to create a strong bond. Clamp the parts tightly until the glue dries. For extra support, add dowels or biscuits inside the joints. These small pieces help keep shelves steady and straight. Avoid gaps between parts for a clean look.
Securing The Pieces
After joining, secure the shelf with screws or nails. Drill pilot holes to stop wood from splitting. Drive screws evenly without over-tightening. Countersink screws to hide them under the wood surface. Fill holes with wood filler for a smooth finish. Let everything dry and check stability before use.
Finishing Touches
Finishing touches make your bull nose bookshelf look complete and polished. They protect the wood and add beauty. Taking time with these steps ensures your bookshelf lasts long and fits your style.
Careful finishing brings out the natural curves of the bull nose edges. It also helps the shelf stand out as a neat, crafted piece.
Staining Or Painting
Choose a stain or paint color that matches your room. Stain highlights the wood grain and gives a warm look. Paint covers the wood for a smooth, solid color.
Use a brush or cloth to apply stain evenly. Let it soak in, then wipe off extra. For paint, use thin coats to avoid drips. Let each coat dry well before adding another.
Applying Protective Coating
Protective coating guards the wood from scratches and moisture. Polyurethane or varnish works well for shelves. Apply with a clean brush in long, smooth strokes.
Allow the first coat to dry completely. Lightly sand the surface with fine sandpaper before adding more coats. Two to three coats give strong protection and a nice finish.
Mounting The Bookshelf
Mounting the bull nose bookshelf securely is essential for safety and durability. Proper mounting keeps the shelf steady and prevents accidents. This step ensures your bookshelf holds books without wobbling or falling. Understanding the best mounting methods helps achieve a clean and strong installation.
Wall Anchoring Options
Choose the right anchors based on your wall type. Drywall needs plastic anchors or toggle bolts for firm support. Use masonry anchors for brick or concrete walls. Wood studs allow direct screwing without extra anchors. Check wall material before selecting anchors.
Ensuring Stability
Use a level to position the shelf perfectly straight. Mark drill points carefully to avoid mistakes. Drill holes slightly smaller than anchor size for tight fitting. Tighten screws firmly but avoid over-tightening to prevent damage. Test the shelf by adding weight gradually to confirm stability.
Credit: www.homedepot.com
Maintenance Tips
Maintaining your bull nose bookshelf keeps it looking fresh and sturdy. Regular care helps avoid damage and extends its life. Simple steps make a big difference.
Cleaning Methods
Dust your bookshelf often with a soft cloth. Use a damp cloth for sticky spots. Avoid harsh cleaners that can harm the wood finish. Dry the shelf right after cleaning. This prevents water marks and warping.
Repairing Minor Damages
Small scratches can be fixed using wood filler or wax sticks. Match the filler color to your shelf’s wood. Lightly sand the area after it dries for a smooth finish. For dents, apply a damp cloth and iron briefly. This helps the wood swell back to shape.
Frequently Asked Questions
What Tools Do I Need To Make A Bull Nose Bookshelf?
You need a jigsaw, router with a round-over bit, drill, clamps, measuring tape, and sandpaper for this project. These tools help shape and assemble the shelf smoothly.
How Do I Create The Bull Nose Edge On Wood?
Use a router fitted with a round-over bit to shape the bull nose edge. Run the router along the wood edges evenly for a smooth, curved finish.
What Type Of Wood Is Best For A Bull Nose Bookshelf?
Choose hardwoods like oak, maple, or birch for durability and a smooth finish. These woods hold the rounded edges well and look attractive.
Can I Make A Bull Nose Bookshelf Without A Router?
It’s possible but challenging. You can sand the edges manually for a rounded effect, but it won’t be as smooth or precise as using a router.
Conclusion
Creating a bull nose bookshelf adds style and function to any room. The steps are simple and clear to follow. You can use basic tools and materials to build it yourself. This project lets you enjoy a unique piece made by your own hands.
Try it out and see how it fits your space. A custom bookshelf like this brings warmth and charm to your home. Enjoy the process and the final result.
