Are you looking for a creative way to store your wine collection without spending a fortune? Turning a bookshelf into a wine rack is a simple and stylish solution that you can easily do yourself.
Imagine having your favorite bottles displayed neatly, saving space, and adding a unique touch to your home. You’ll discover step-by-step tips to transform your old bookshelf into the perfect wine rack. Keep reading, and you’ll soon have a beautiful, functional piece that impresses your guests and keeps your wine organized.
Choosing The Right Bookshelf
Choosing the right bookshelf is the first step to a great wine rack. Not all bookshelves fit the needs of wine storage. The right one holds bottles safely and looks good in your space.
Materials And Size
Wood is the best choice for a wine rack. It is strong and can hold heavy bottles. Avoid particleboard; it may not last long with wine bottles. Metal shelves work but can be cold and less charming.
Size matters. Measure your space and think about how many bottles you want to store. A tall bookshelf saves floor space. A wide one holds more bottles side by side.
Shelf Spacing And Strength
Shelf height should fit wine bottles horizontally. About 4 inches between shelves works well. Some bottles are larger; plan for extra space.
Strong shelves prevent bending or breaking. Check if the shelves are thick or supported well. Reinforce weak shelves with brackets or wood planks for safety.
Tools And Supplies Needed
To turn a bookshelf into a wine rack, you need the right tools and supplies. Having these ready makes the project easier and faster. It also helps you create a safe and sturdy rack for your wine bottles. Below is a list of basic tools and extra materials needed for this project.
Basic Tools
- Measuring tape – for accurate measurements
- Pencil – to mark cutting lines
- Hand saw or jigsaw – to cut wood pieces
- Drill with drill bits – for making holes and driving screws
- Screwdriver – to tighten screws
- Sandpaper – to smooth rough edges
- Clamps – to hold pieces together while gluing or screwing
Additional Materials
- Wood glue – to strengthen joints
- Wood screws – to secure parts firmly
- Wood stain or paint – to finish and protect wood
- Wine rack supports or wooden slats – to hold bottles
- Protective gloves – to keep hands safe while working
- Drop cloth or newspaper – to protect your workspace
Preparing The Bookshelf
Preparing your bookshelf is the first step to creating a unique wine rack. A good start makes the project easier and the result better. You need to clean and adjust the shelf for wine bottles. This section explains how to get your bookshelf ready.
Cleaning And Sanding
Remove all items from the bookshelf. Use a soft cloth to dust off dirt and debris. Clean the surface with mild soap and water. Let it dry completely before moving on. Sand the wood gently to smooth rough spots. Use fine-grit sandpaper for a clean finish. Sanding helps paint or stain stick well. Wipe off dust with a clean cloth after sanding.
Removing Or Adjusting Shelves
Check the shelves inside your bookshelf. Some shelves may be fixed; others can be moved or removed. Take out shelves you do not need for wine bottles. Wine bottles need more space than books. Adjust shelf heights to fit wine bottles horizontally. Use a screwdriver or tools to remove or move shelves. Keep shelf pieces safe if you want to reuse them later.

Credit: pineandpoplar.com
Designing The Wine Rack Layout
Designing the wine rack layout is a key step in turning a bookshelf into a stylish wine holder. The right design keeps bottles safe and easy to access. It also adds charm to your space.
Think about how you want to store your wine bottles and any extras like glasses. Planning the layout helps use the space well and looks balanced.
Horizontal Vs. Vertical Storage
Horizontal storage keeps bottles lying down. This method keeps corks moist and wine fresh. It fits well in wide shelves and shows bottle labels clearly.
Vertical storage holds bottles standing up. It saves space and works for small shelves. But corks can dry out faster. Choose based on your shelf size and wine type.
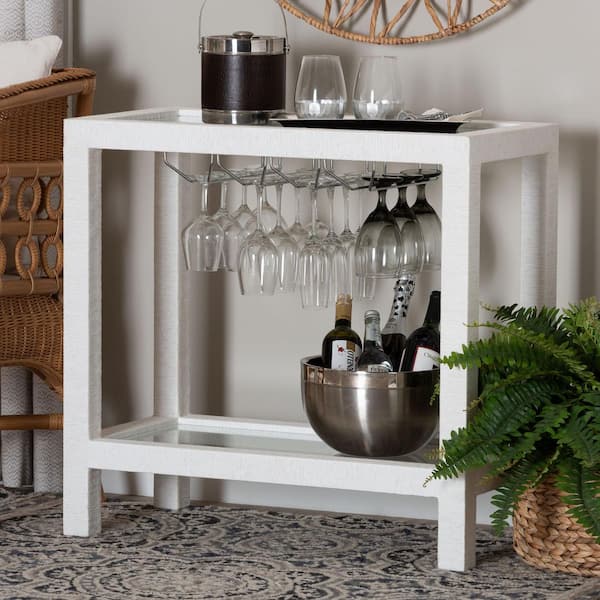
Incorporating Glass Holders
Adding glass holders makes your wine rack more useful. Holders can hang glasses upside down under a shelf. This saves space and keeps glasses clean.
Choose simple holders that fit your shelf size. Place them near the wine bottles for easy reach. This setup looks neat and organized.
Building Wine Bottle Slots
Building wine bottle slots in your bookshelf creates a stylish and functional wine rack. This process needs careful measurements and precise cuts. Proper slots keep bottles secure and easy to access.
Follow clear steps to measure and install dividers. This will help you achieve a neat, organized look for your wine collection.
Measuring For Bottle Size
Start by measuring the diameter of your wine bottles. Most bottles are about 3 inches wide. Add extra space for easy placement and removal. Around 3.5 to 4 inches per slot works well. Measure the height of the bottles too. Make sure the height fits inside the shelf without touching the top or bottom.
Cutting And Installing Dividers
Use wood or sturdy material for the dividers. Cut strips to fit the width and depth of the shelf. Mark where each slot will go according to your measurements. Secure the dividers vertically or horizontally inside the shelf. Use nails or wood glue for a strong hold. Check that each slot holds one bottle snugly but without tight pressure.
Adding Finishing Touches
Adding finishing touches gives your wine rack a polished, professional look. These steps protect the wood and enhance its beauty. A well-finished wine rack lasts longer and looks inviting in any room. Focus on painting, staining, sealing, and protecting the wood to create a durable piece.
Painting And Staining
Choose paint or stain that matches your room decor. Painting hides wood flaws and adds color. Staining shows the wood grain and gives a natural look. Apply thin, even coats for best results. Let each coat dry fully before adding the next. Use a brush or cloth to spread the stain smoothly. Sand lightly between coats for a smooth finish.
Sealing And Protecting Wood
Seal the wood to protect against spills and stains. Use a clear polyurethane or varnish for strong protection. Apply with a clean brush in thin layers. Allow each layer to dry before applying the next. Sealing also prevents moisture damage and warping. This step extends your wine rack’s life and keeps it looking fresh.
Styling And Display Tips
Styling and display play a big role in turning a bookshelf into a wine rack. The way you arrange bottles and add decor can make your rack look neat and inviting. This section offers simple tips to help you organize and decorate your wine rack beautifully.
Organizing Wine By Type
Group your wines by type for easy access and a tidy look. Keep reds, whites, and rosés in separate sections. This helps guests find their favorite bottle quickly. You can also arrange bottles by region or vintage to add a personal touch. Use labels or tags to mark each group clearly. This keeps your wine rack both useful and stylish.
Incorporating Decorative Elements
Add small decorations to enhance the look of your wine rack. Place a few wine glasses or corkscrews on the shelves. A small plant or candle can add warmth and charm. Use wooden or metal accents that match your room’s style. Keep decor simple to avoid clutter. This creates a cozy and attractive display for your wine collection.
Credit: www.homedepot.com
Maintaining Your Wine Rack
Maintaining your wine rack is important for keeping your wines safe and your rack looking good. A well-kept rack lasts longer and holds bottles securely. Regular care helps avoid damage and stains. It also keeps the wood or material in good shape. Follow simple steps to clean and check your rack often.
Cleaning Tips
Dust your wine rack often with a soft cloth. Wipe spills immediately to stop stains. Use mild soap and water for deeper cleaning. Avoid harsh chemicals that can damage the finish. Dry the rack fully after cleaning to prevent moisture damage.
Checking For Wear And Damage
Look for cracks, loose joints, or wobbly parts regularly. Tighten screws or nails that have loosened. Check the shelf edges for splinters or chips. Make repairs quickly to avoid bigger problems. Keep the rack stable to protect your wine bottles from falling.

Credit: www.amazon.com
Frequently Asked Questions
How Can I Convert A Bookshelf Into A Wine Rack?
To convert a bookshelf into a wine rack, remove some shelves for bottle slots. Add horizontal dividers or wine holders. Secure the structure for stability and style. This repurposes old furniture into a functional wine storage solution.
What Materials Do I Need For A Wine Rack Bookshelf?
You will need wood or metal dividers, screws, a drill, sandpaper, paint or stain, and wine rack holders. These materials help customize and secure the bookshelf to store wine bottles safely and attractively.
How Many Wine Bottles Fit In A Converted Bookshelf?
The capacity depends on shelf size and bottle dimensions. Typically, a standard bookshelf can hold 12 to 24 bottles. You can increase capacity by adjusting shelf height and adding horizontal supports.
Is It Safe To Store Wine In A Bookshelf Wine Rack?
Yes, if the bookshelf is sturdy and secured properly. Ensure bottles lie horizontally to keep corks moist. Avoid direct sunlight and vibrations to maintain wine quality.
Conclusion
Transforming a bookshelf into a wine rack is simple and fun. You save money by reusing old furniture. Your wine bottles stay safe and easy to reach. You also add a unique touch to your home. Just follow the steps carefully and take your time.
Enjoy your new wine rack and show it off to friends. This project fits any space and style. Try it today and enjoy your wine in a fresh way.
