Looking for a simple and stylish way to organize your books? Building a wood crate bookshelf might be exactly what you need.
It’s an easy project that lets you add a personal touch to your space, save money, and create something both functional and unique. In this guide, you’ll discover step-by-step how to turn plain wood crates into a beautiful bookshelf that fits your style perfectly.
Ready to transform your room and showcase your favorite reads? Let’s get started!
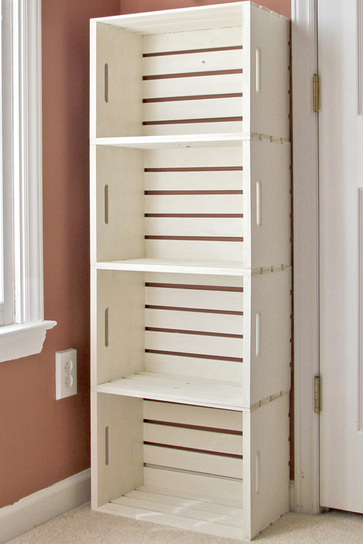
Credit: www.calmcradle.com
Materials And Tools Needed
Building a wood crate bookshelf is a simple and fun project. Having the right materials and tools makes the process smooth. This section lists what you need to gather before you start.
Types Of Wood Crates
Wood crates come in many sizes and styles. Choose crates that are sturdy and have flat sides. Pine and oak crates work well for shelves. Old fruit or wine crates can add a rustic look. Make sure the crates are clean and free of splinters.
Essential Tools List
Basic tools will help you build the bookshelf easily. A drill is necessary for making holes and screwing parts together. Sandpaper or a sanding block smooths rough edges. A screwdriver helps tighten screws securely. A measuring tape ensures your shelves are even. A pencil marks where to cut or drill.
Optional Finishing Supplies
Finishing supplies improve the look and protect the wood. Wood stain or paint adds color and style. A paintbrush or foam brush helps apply stain or paint evenly. Wood glue strengthens joints for extra durability. Clear sealant protects shelves from scratches and moisture.
Preparing Your Workspace
Preparing your workspace is the first step in building a wood crate bookshelf. A clean and well-organized area helps you work faster and safer. It also reduces mistakes and keeps your tools easy to find.
Setting up the right space makes the project more enjoyable. Take time to prepare before you start building.
Choosing A Suitable Area
Pick a space with enough room to move around. A garage, basement, or large room works well. Make sure the area is dry and flat. Good lighting is important to see details clearly. Avoid cramped or cluttered spots to prevent accidents.
Safety Precautions
Wear safety glasses to protect your eyes from dust and wood chips. Use gloves to avoid splinters. Keep a first aid kit nearby. Ensure your workspace has good ventilation. Turn off power tools when not in use. Clear the floor of any tripping hazards.
Organizing Materials
Gather all wood crates, screws, nails, and tools before starting. Arrange them neatly on a table or bench. Group similar items together for easy access. Keep your drill, hammer, and measuring tape within reach. Organizing saves time and reduces frustration.
Selecting And Preparing Crates
Selecting and preparing crates is the first step to make a sturdy wood crate bookshelf. Choosing the right crates ensures durability and a neat look. Preparing the crates properly helps them last longer and look good in your space. This section guides you through inspecting, sanding, cleaning, and adjusting crate sizes for your project.
Inspecting Crates For Quality
Check each crate carefully for cracks and damage. Avoid crates with loose or broken boards. Look for sturdy wood that can hold books without bending. Inspect nails or screws to make sure they are secure. Choose crates with even surfaces for easier stacking and joining.
Sanding And Cleaning
Sand the crates to smooth rough edges and surfaces. Use medium-grit sandpaper for the best results. Remove dust and dirt with a dry cloth after sanding. Clean crates prevent scratches on your books and give a polished look. Sanding also helps paint or stain stick better if you add color.
Customizing Sizes
Measure your space and decide the bookshelf size you want. Trim crates if necessary to fit smaller areas or create a unique shape. Use a saw to cut wood carefully and safely. Custom sizes make your bookshelf perfect for your room and style. Plan your layout before cutting to avoid mistakes.
Designing Your Bookshelf Layout
Designing your wood crate bookshelf is the first step to a useful and attractive piece. Good planning helps the shelf fit your space and hold your books well. Think about the size, shape, and where it will go. This section guides you through key design choices.
Determining Shelf Dimensions
Start by measuring the space for the bookshelf. Write down the height, width, and depth limits. Choose crate sizes that fit the available space. Typical crates vary, but aim for 12 to 18 inches deep. Decide how many shelves you want. Leave room for your tallest books.
Arranging Crates For Stability
Stack crates carefully to keep the shelf steady. Place heavier crates at the bottom. Align crates so their edges match up. Use screws or brackets to join crates securely. Avoid tall, narrow stacks that can tip over. Test the shelf’s balance before adding books.
Planning For Wall Mounting
Wall mounting adds safety and support. Find wall studs with a stud finder. Mark where you will attach brackets or screws. Use strong hardware that fits your wall type. Attach the shelf firmly to avoid wobbling. Check the level to keep the shelf straight.
Assembling The Bookshelf
Assembling the wood crate bookshelf is a simple and rewarding step. It shapes the final look and strength of your project. Careful assembly ensures the bookshelf lasts long and holds your books safely.
Joining Crates Securely
Start by lining up the crates in your desired design. Use wood screws to join the crates together. Drill pilot holes first to avoid splitting the wood. Tighten screws until crates feel firmly connected. Check alignment before final tightening.
Adding Support Brackets
Support brackets add extra strength to your bookshelf. Attach metal L-brackets inside corners where crates meet. Use screws to fix brackets tightly. This prevents shifting and adds stability. Choose brackets that fit the crate size well.
Ensuring Structural Integrity
Check the entire bookshelf for any weak spots. Press gently on different areas to test firmness. Add extra screws or brackets if needed. Sand rough edges for a smooth finish. A strong structure keeps your books safe and shelf steady.

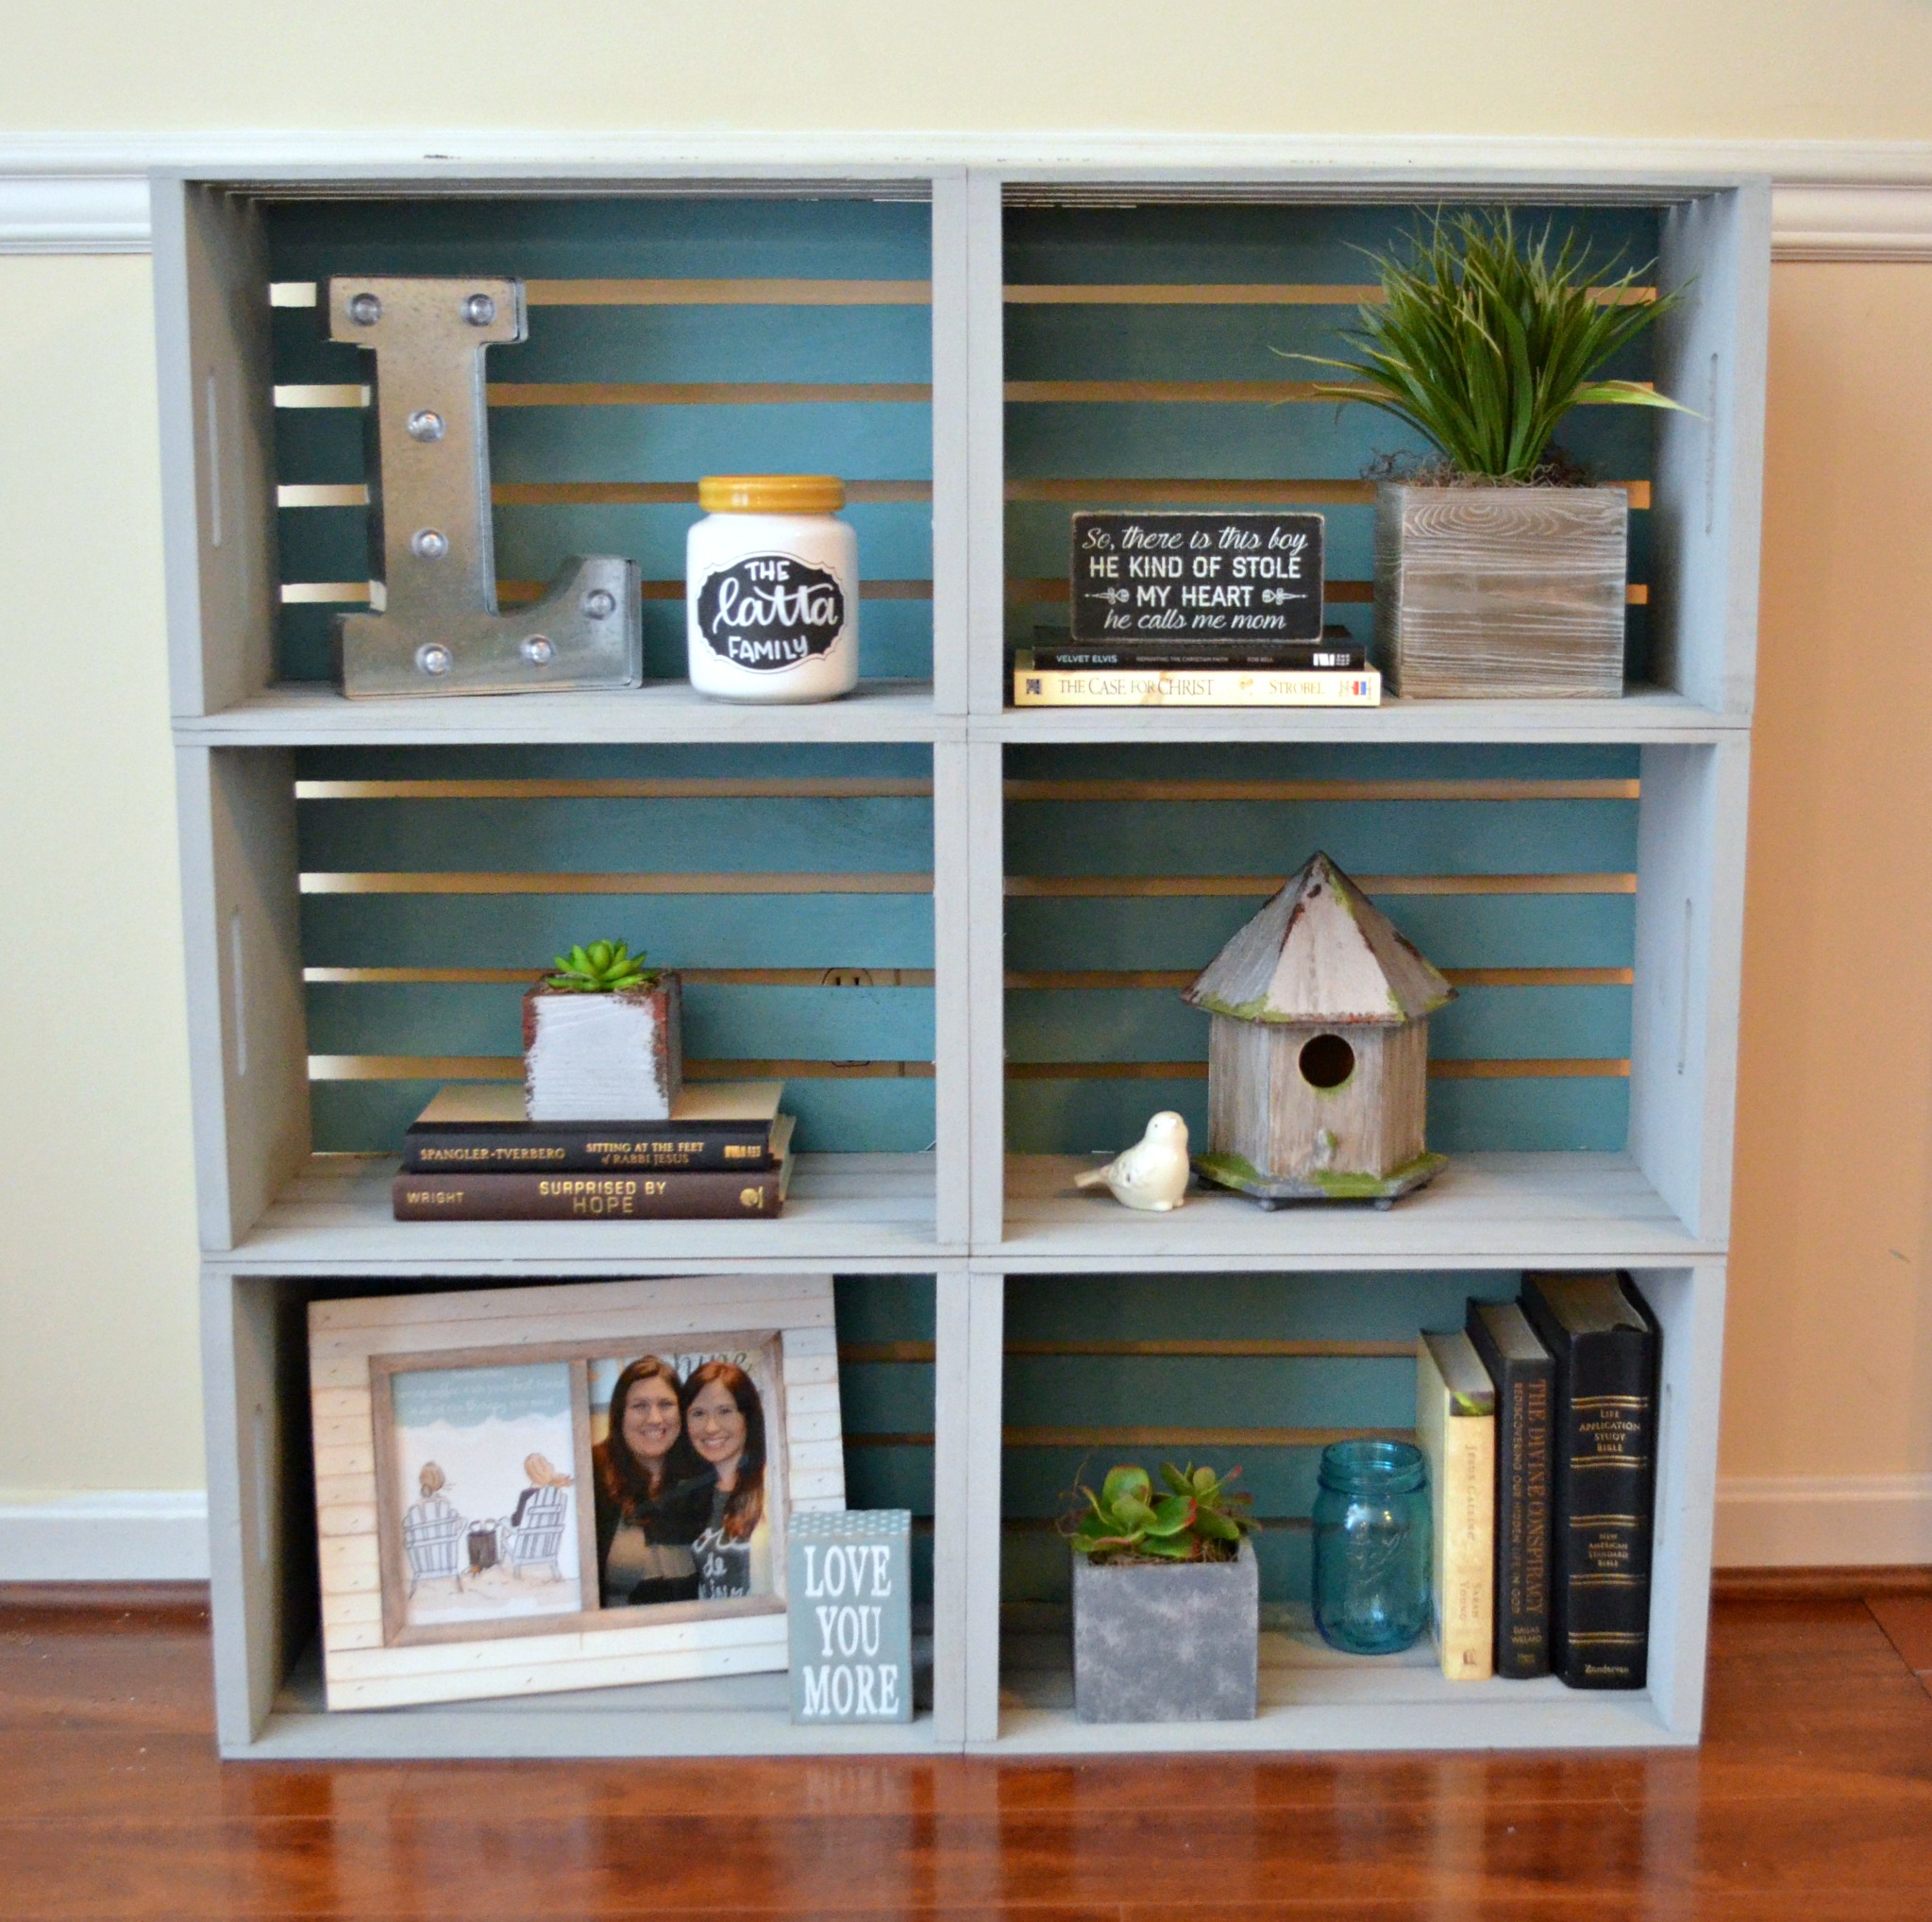
Credit: taramichellehome.com
Finishing Touches
Finishing touches make your wood crate bookshelf look complete and last longer. These final steps protect the wood and add style. Choose the right options to match your room and taste.
Painting Or Staining Options
Painting adds color and hides wood marks. Pick a paint made for wood furniture. Use light coats and let each dry well.
Staining shows the wood grain and deepens its natural color. Choose between light or dark stains to fit your decor. Apply evenly with a cloth or brush.
Sealing For Durability
Sealing protects the paint or stain from scratches and spills. Use a clear polyurethane or varnish designed for wood.
Apply two or three thin coats, allowing each to dry. Sand lightly between coats for a smooth finish.
Decorative Enhancements
Add personality with handles or labels on each crate. Use metal or leather handles for easy lifting.
Stencils or decals create patterns or words on your bookshelf. Glue fabric or paper inside crates for a soft look.
Maintaining Your Wood Crate Bookshelf
Maintaining your wood crate bookshelf keeps it strong and beautiful for years. Wood needs care to avoid damage and wear. Simple steps help protect your bookshelf from dirt, scratches, and fading. Regular upkeep also keeps it looking fresh and neat.
Cleaning Tips
Dust the bookshelf with a soft cloth every week. Avoid wet cloths that can soak into the wood. Use a dry or slightly damp cloth to wipe away dirt. For sticky spots, mix mild soap with water. Gently clean and dry the area right after.
Handling Wear And Tear
Check the bookshelf often for loose nails or screws. Tighten them to keep the crate stable. Small cracks or chips can appear over time. Sand these areas lightly with fine sandpaper. This stops damage from spreading and keeps the surface smooth.
Repainting And Repairs
Repaint the bookshelf if the color fades or peels. Sand the surface lightly before applying paint. Use paint made for wood to ensure good coverage. Fill deep cracks with wood filler before painting. Let each coat dry fully for best results.
Credit: www.amylattacreations.com
Frequently Asked Questions
What Materials Do I Need To Make A Wood Crate Bookshelf?
You need wooden crates, screws, sandpaper, paint or stain, wood glue, and brackets for stability. Choose sturdy crates for durability. These materials ensure a strong and attractive bookshelf.
How Do I Assemble A Wood Crate Bookshelf?
Stack crates in your desired arrangement. Secure them with screws and wood glue. Sand edges for smoothness. Add brackets for extra support and stability.
Can I Customize The Size Of My Bookshelf?
Yes, you can customize by choosing the number and size of crates. Arrange crates vertically or horizontally to fit your space perfectly.
How Do I Finish The Wood Crate Bookshelf?
Sand the crates to remove roughness. Apply paint or stain for color and protection. Use a clear sealant to enhance durability and give a polished look.
Conclusion
Building a wood crate bookshelf is simple and rewarding. You only need basic tools and materials. Follow the steps carefully to create a sturdy shelf. Personalize it with paint or stain to match your style. This project saves money and adds charm to any room.
Enjoy your new bookshelf filled with your favorite books. Try making one today and see how fun woodworking can be.

