Are you looking to get the best sound from your bookshelf speakers? Knowing how to mount a crossover correctly can make all the difference.
When done right, it improves audio clarity and protects your equipment. In this guide, you’ll discover simple steps to mount your crossover safely and efficiently. Whether you’re a beginner or want to fine-tune your setup, this article will help you achieve a cleaner, richer sound.
Keep reading to unlock the full potential of your speakers!
Choosing The Right Crossover
Choosing the right crossover is key for good sound in your bookshelf speakers. A crossover splits the audio signal into different frequency ranges. This helps each speaker driver play the sounds it handles best. Picking a wrong crossover can cause poor audio or even damage your speakers. Understanding types of crossovers and matching them to your speaker’s specs ensures clear and balanced sound.
Types Of Crossovers
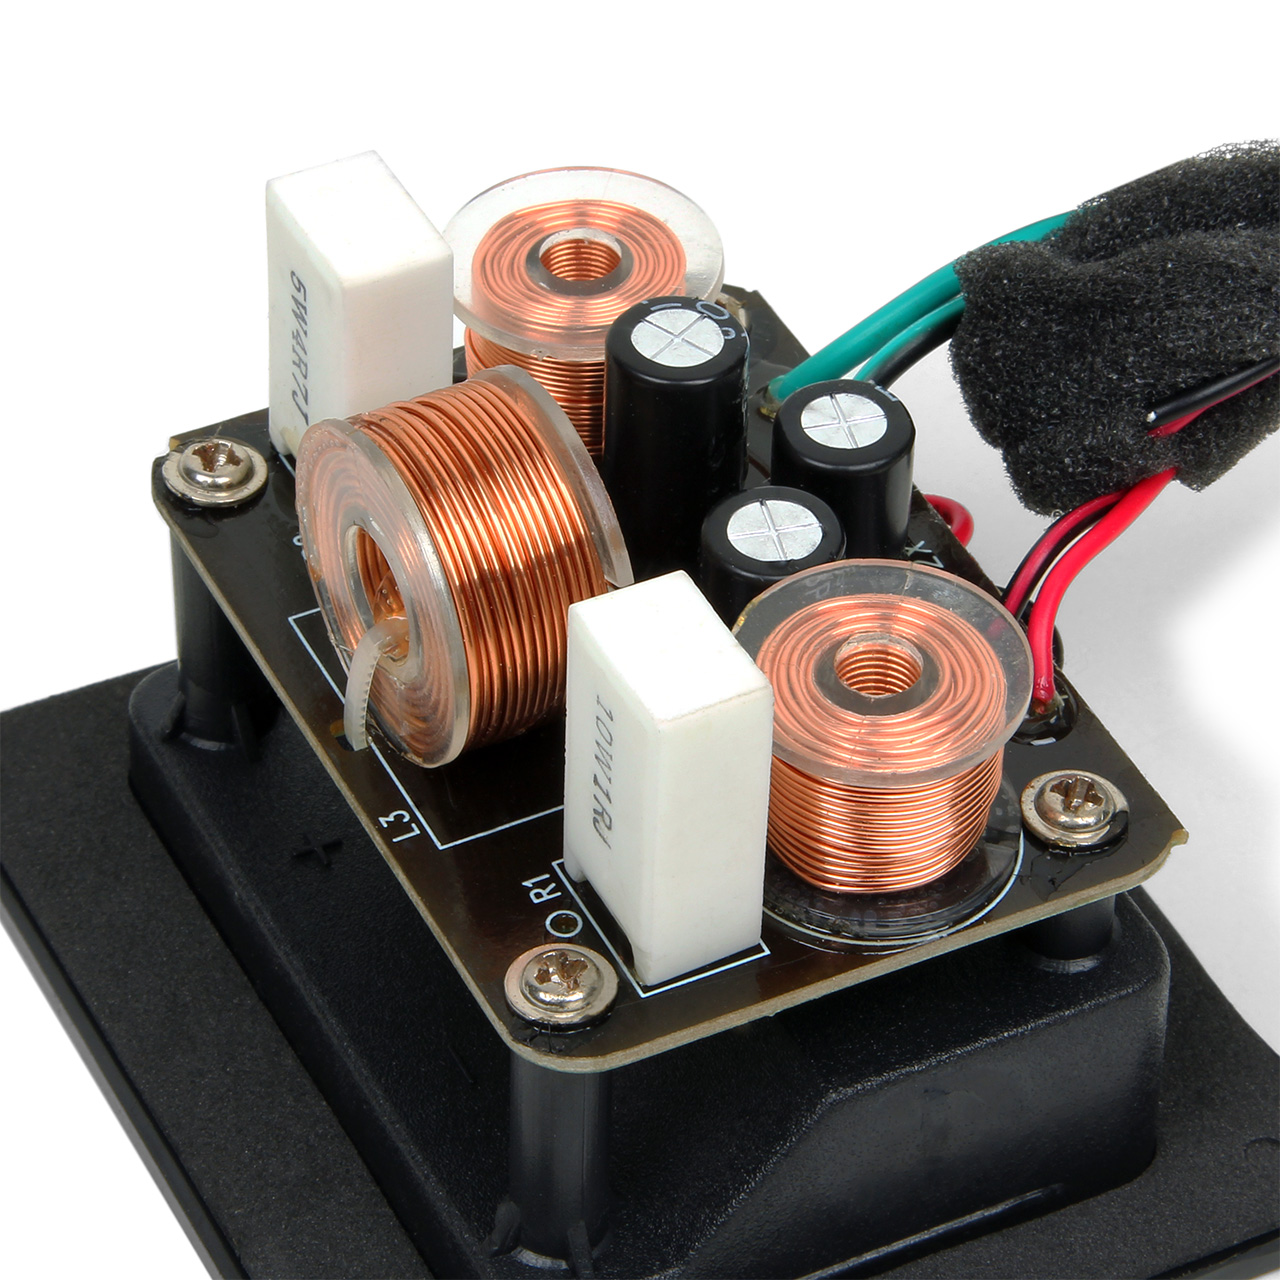
There are three main types of crossovers: passive, active, and digital. Passive crossovers use components like capacitors and coils. They do not need power and are simple to install. Active crossovers require an external power source. They offer more control over frequency settings. Digital crossovers use software to split signals. They provide the most precise tuning but need special equipment.
Matching Crossover To Speaker Specs
Check your speaker’s frequency range and impedance before choosing a crossover. The crossover point should match the speaker drivers’ capabilities. Use a crossover that handles the speaker’s power rating safely. Incorrect matching can cause distortion or damage. Choose a crossover designed for your speaker size and type for best results.

Credit: www.amazon.com
Gathering Necessary Tools
Gathering the right tools is the first step to mount a crossover in your bookshelf. Proper tools make the job easier and safer. Without them, the process can be frustrating and take longer. Below, find the essential tools and safety gear you need to start.
Basic Tools Needed
A screwdriver set is essential for mounting screws and brackets. Choose one with both flathead and Phillips heads. A drill helps make holes quickly and cleanly in the bookshelf. Use drill bits that match your screw size. A measuring tape ensures precise placement of the crossover. A pencil allows you to mark drill spots. A level helps keep the crossover straight and balanced. Finally, have some screws and mounting brackets ready for securing the crossover.
Safety Equipment
Safety glasses protect your eyes from dust and debris. Wear them during drilling and screwing. Gloves protect your hands from splinters and sharp edges. Use ear protection if your drill is loud. Keep a clean workspace to avoid trips and falls. Safety matters to avoid injuries during mounting tasks.
Preparing The Bookshelf Speaker
Preparing your bookshelf speaker is the first step before mounting the crossover. This process ensures easy access and a secure fit. Proper preparation protects the speaker and improves sound quality.
Start by handling the speaker carefully. Avoid touching the drivers or any delicate parts. Keep the speaker on a soft surface to prevent scratches or damage.
Removing The Speaker Grill
The speaker grill covers the drivers and crossover inside. Removing it gives you clear access to the mounting area. Gently pull or pry the grill off using your fingers or a flat tool.
Work slowly to avoid bending or breaking the grill. Set it aside in a safe place. This step makes it easier to see where to place the crossover.
Locating Mounting Spots
Look inside the speaker cabinet for flat, stable areas. These spots will hold the crossover securely. Avoid placing the crossover near the drivers or wires.
Use a flashlight to inspect hard-to-see areas. Mark the best locations with a pencil. Choose places with enough space to avoid cramping the components.
Wiring The Crossover
Wiring the crossover is a key step in setting up your bookshelf speakers. It controls how sound signals split between drivers. Proper wiring ensures clear sound and prevents damage. Take your time and follow each step carefully.
Focus on identifying wires and making secure connections. Both tasks affect speaker performance and durability. Correct wiring leads to better audio experience and longer speaker life.
Identifying Input And Output Wires
Start by finding the input wires that bring sound signals to the crossover. These usually come from your amplifier or receiver. Input wires often have labels or color codes. Red is for positive, black for negative. Check your speaker manual for exact details.
Next, locate the output wires. These go from the crossover to the tweeter and woofer. Tweeter wires are often thinner, woofer wires thicker. Matching these wires correctly is important. Wrong connections can cause poor sound or damage.
Connecting Wires Securely
Strip about half an inch of insulation from each wire end. Use a wire stripper for clean results. Twist the wire strands to avoid fraying. Connect the input wires to the crossover input terminals. Tighten screws or use clips for a firm hold.
Attach the output wires to the correct crossover terminals. Double-check positive and negative matches. Loose or incorrect connections cause sound issues. Secure all wires neatly to avoid shorts. Use cable ties or clips to keep wires tidy inside the speaker.
Mounting The Crossover Inside The Bookshelf
Mounting the crossover inside the bookshelf is a key step in building quality speakers. The crossover splits the audio signal to different drivers, so it must stay secure and well placed. Proper mounting prevents vibrations and keeps the sound clear. This section explains how to attach the crossover safely and where to place it for the best sound.
Using Screws Or Adhesive
Screws offer a strong hold and keep the crossover firmly in place. Choose screws that fit well and avoid damaging the crossover board. Drill small pilot holes before screwing to prevent wood splitting. Screws allow easy removal for future repairs or adjustments.
Adhesive is a simpler option. Use strong glue or double-sided tape made for electronics. Adhesive reduces risk of vibration noise from loose parts. Press the crossover firmly against the inside panel and hold until it sticks. Avoid excess glue that might touch wires or components.
Positioning For Optimal Performance
Place the crossover away from speaker drivers to avoid magnetic interference. Keep it near the back or side of the bookshelf. This positioning protects the crossover from heat and dust. Mount it flat against a solid surface to reduce vibrations.
Leave some space around the crossover for air circulation. This helps prevent overheating and extends its life. Position wires neatly and avoid tight bends or pinches. Proper placement enhances sound quality and keeps your speakers working well.
Credit: www.miccatron.com
Testing The Setup
Testing the setup is a key step after mounting the crossover in your bookshelf speakers. This process helps ensure that the sound flows correctly and the crossover works as expected. Careful testing avoids damage to your speakers and improves audio quality.
Initial Sound Check
Start with low volume to protect your speakers. Play a familiar song with clear vocals and instruments. Listen closely for any distortions or unusual noises. Check if the sound is balanced between the tweeter and woofer. This step confirms that the crossover sends the right frequencies to each driver.
Adjusting Crossover Settings
Use the crossover controls to fine-tune the sound. Adjust the frequency point to match your speaker’s specifications. Change the slope or level to smooth the transition between drivers. Make small changes and listen carefully after each adjustment. Proper tuning results in clear highs and full lows without overlap or gaps.
Maintaining Your Mounted Crossover
Maintaining your mounted crossover is key to keeping sound quality clear and consistent. Regular care helps avoid damage and performance drops. Simple checks and quick fixes keep your system running smoothly.
Regular Inspection
Check your crossover often for dust and dirt. Wipe the surface gently with a dry cloth. Look for loose wires or screws that might cause problems. Make sure the crossover stays firmly attached to the bookshelf. Inspect for any signs of wear or damage on the components. A clean and secure setup ensures better sound and longer life.
Troubleshooting Common Issues
If the sound is weak or distorted, start by checking all connections. Tighten loose wires and screws. Test the crossover with a different speaker to rule out speaker issues. Listen for buzzing or humming sounds, which may mean interference or grounding problems. Replace damaged parts if needed. Simple fixes often restore sound quickly and save you time and money.

Credit: hificentre.com
Frequently Asked Questions
How Do I Mount A Crossover In A Bookshelf Speaker?
To mount a crossover, first locate the internal mounting area. Use screws or adhesive pads to secure it firmly. Ensure all connections are insulated and organized to avoid interference and maintain sound quality.
What Tools Are Needed To Mount A Crossover In A Bookshelf?
You need a screwdriver, screws, adhesive pads, and wire cutters. A multimeter helps verify connections. These tools ensure a secure and precise installation of your crossover in the bookshelf speaker.
Can I Mount The Crossover Outside The Bookshelf Speaker?
Mounting outside is possible but not ideal. It may expose components to damage and affect aesthetics. Internal mounting protects the crossover and maintains the speaker’s sound integrity.
How To Avoid Noise When Mounting A Crossover In Bookshelf Speakers?
Secure all connections tightly and use insulated wires. Avoid loose contacts and keep wires away from speaker magnets. Proper mounting reduces noise and ensures clean sound output.
Conclusion
Mounting a crossover in a bookshelf is simpler than it seems. Follow each step carefully to avoid mistakes. Use the right tools for a secure fit. Test the sound after installation to ensure quality. Take your time and be patient during the process.
Enjoy clearer audio with properly mounted crossovers. This small task improves your speaker’s performance a lot. Keep your setup neat and organized for easy access. A well-mounted crossover brings better sound to your room.