Looking for a simple and creative way to organize your child’s books? Building a bookshelf from crates could be the perfect solution for you.
It’s easy, affordable, and adds a charming touch to any room. Imagine having a colorful, sturdy shelf that your child loves and that keeps their favorite stories within reach. You’ll discover step-by-step tips to create your own crate bookshelf—no special skills needed.
Ready to turn a few crates into a fun and functional book haven for your little one? Let’s get started!

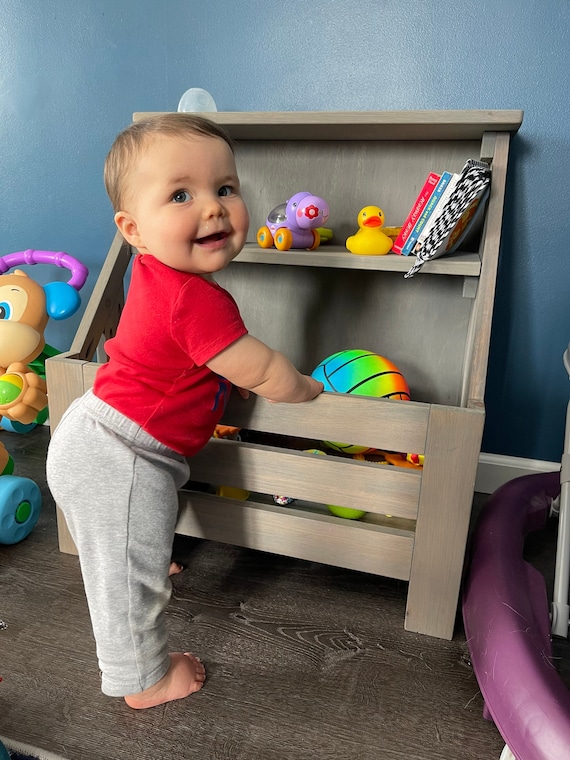
Credit: justcallmechris.blogspot.com
Choosing The Right Crates
Choosing the right crates is key to building a sturdy and attractive bookshelf for your child’s books. The right crates keep books safe and easy to reach. They also fit well in your child’s room and match your style. Think about the crate type, material, size, and weight before buying. This will help you create a bookshelf that lasts and looks great.
Types Of Crates
Wooden crates are popular for their strength and classic look. Plastic crates are lighter and easy to clean. Wire crates offer good airflow and a modern style. Each type suits different needs and rooms. Pick crates that hold books safely and fit your space well.
Material Considerations
Wood is strong and holds heavy books easily. It feels warm and natural in a child’s room. Plastic crates are durable and resist spills and stains. Wire crates allow you to see books from the side. Choose materials that are safe, smooth, and free from sharp edges.
Size And Weight Factors
Small crates fit well in tight spaces and are easy for kids to handle. Larger crates hold more books but can be heavy. Lightweight crates make moving the shelf easier. Measure your space and think about how many books you want to store. This helps you pick the right size and weight for your child’s bookshelf.
Tools And Materials Needed
Building a child’s bookshelf from crates is a fun and creative project. Having the right tools and materials makes the process easier and safer. This section lists everything needed to complete your bookshelf.
Basic Tools
Start with simple tools that help cut and join wood. A handsaw or electric saw cuts the crates. A drill creates holes for screws. Screwdrivers tighten screws securely. Sandpaper smooths rough edges for safety. A measuring tape ensures precise cuts and placement.
Additional Supplies
Gather extra items to improve your bookshelf. Screws hold the crates together firmly. Wood glue adds extra strength to joints. Paint or wood stain gives color and protects the wood. Brushes help apply paint evenly. Felt pads prevent floor scratches under the bookshelf.
Safety Gear
Safety is important during any DIY project. Wear safety goggles to protect your eyes from dust and splinters. Use gloves to avoid cuts and splinters on your hands. A dust mask helps prevent breathing sawdust. Work in a well-ventilated area to stay safe.
Preparing The Crates
Preparing the crates is the first step to building a sturdy child’s bookshelf. Proper preparation ensures the bookshelf looks good and lasts long. It also makes the crates safe for children to use. This section explains how to clean, sand, and paint the crates before assembly.
Cleaning And Sanding
Start by cleaning the crates to remove dust and dirt. Use a damp cloth or mild soap and water. Let the crates dry completely before moving on.
Next, sand the crates to smooth rough edges and splinters. Use fine-grit sandpaper for best results. Sanding also helps paint stick better. Focus on corners and surfaces that children will touch.
Painting And Finishing Options
Choose paint that is safe for children, such as non-toxic or water-based paint. Bright colors make the bookshelf fun and inviting.
You can also use wood stain or varnish for a natural look. Make sure the finish is smooth and fully covers the wood.
Drying Time
Allow enough drying time before handling the crates. Paint and finishes usually dry in a few hours.
For best results, wait 24 hours to ensure the surface is fully dry and hard. This prevents damage during assembly and use.
Assembling The Bookshelf
Assembling a child’s bookshelf from crates is a fun and simple project. It creates a personalized space for books and toys. This guide helps you build a sturdy, safe bookshelf for your child’s room. Follow each step carefully to ensure the best result.
Layout Planning
Start by deciding the bookshelf shape. Arrange crates on the floor. Test different patterns for size and style. Think about space and how many books you want to store. Mark the best layout with chalk or tape. This step helps avoid mistakes later.
Joining Crates Together
Use screws or brackets to join crates. Align crates tightly to avoid gaps. Drill pilot holes to prevent wood splitting. Attach one crate to another firmly. Check that each joint is secure before moving on. This keeps the bookshelf stable and safe.
Securing The Structure
Secure the entire bookshelf to the wall. Use wall anchors and brackets for extra safety. This prevents tipping, especially with active children. Double-check all screws and fittings are tight. Add corner braces for added strength if needed. Safety first for a worry-free bookshelf.
Customizing The Shelf
Customizing your child’s bookshelf made from crates turns a simple storage unit into a fun and useful piece. It helps keep books neat and makes reading more exciting for kids. Personal touches create a space children love and want to use every day.
Adding Labels And Decorations
Labels make it easy for kids to find their favorite books. Use colorful stickers or simple words to mark each crate. Decorations like painted patterns or small drawings add charm and personality. This makes the shelf visually appealing and welcoming.
Incorporating Kid-friendly Features
Round the edges of the crates for safety. Attach soft handles or knobs for easy pulling. Lower shelves allow kids to reach books by themselves. These features encourage independence and make the shelf more user-friendly.
Storage Bins And Accessories
Include small bins inside or beside the crates to hold toys or art supplies. Choose bright, sturdy containers that fit well in the spaces. Add hooks for backpacks or hats to keep the area tidy. These extras help organize more than just books.
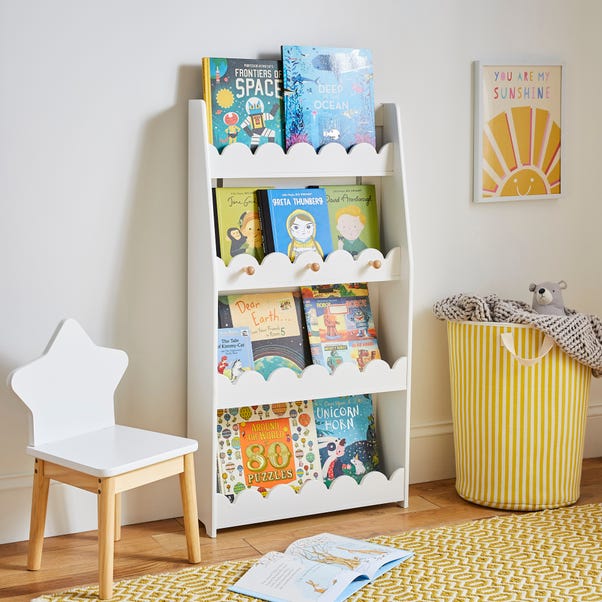
Credit: www.etsy.com
Safety Tips For Kids’ Bookshelf
Creating a safe bookshelf for children is important. It helps prevent accidents and keeps kids happy. Safety tips can guide you to build a strong and secure bookshelf from crates.
These tips focus on making the bookshelf steady, smooth, and balanced. They help keep kids safe while they enjoy their books.
Stable Installation
Place the bookshelf on a flat surface. Check that it does not wobble or lean. Secure the bookshelf to the wall with brackets or straps. This stops it from tipping over. A stable bookshelf lowers the risk of injury.
Avoiding Sharp Edges
Sand down all rough or sharp edges on the crates. Use fine sandpaper to make surfaces smooth. Cover corners with soft padding or corner guards. Smooth edges prevent cuts and scrapes. Kids can touch and play safely.
Weight Distribution
Put heavier books on the bottom shelves. Lighter items go on top shelves. This balance stops the bookshelf from tipping. Spread out books evenly across shelves. Proper weight distribution keeps the bookshelf steady and safe.
Maintaining The Bookshelf
Maintaining a child’s bookshelf made from crates keeps it safe and attractive. Simple care helps the shelf last longer and stay sturdy. Regular checks and gentle cleaning protect the wood and paint. Small fixes prevent bigger problems later.
Regular Cleaning
Dust the bookshelf often with a soft cloth. Avoid wet cloths that can damage the wood. Use a dry brush to clean corners and tight spaces. Keep the shelf free from dirt and crumbs. This keeps books safe and the shelf looking good.
Checking For Wear And Tear
Look for cracks or loose screws every month. Tighten any loose parts to keep the shelf steady. Check for splinters or rough edges that could hurt children. Replace damaged crates to ensure safety. Early repairs stop small issues from growing.
Refreshing Paint Or Finish
Repaint the shelf if the color fades or peels. Use child-safe, non-toxic paint for safety. Sand the surface lightly before repainting for better grip. A fresh coat keeps the shelf bright and protected. Seal the wood to avoid water damage and stains.
Credit: welcometogouda.com
Frequently Asked Questions
How To Choose Crates For A Child’s Bookshelf?
Select sturdy, non-toxic crates with smooth edges for safety. Opt for lightweight wood or plastic crates sized to fit your space and books. Ensure crates stack securely for stability and easy access.
What Tools Are Needed To Build A Bookshelf From Crates?
You’ll need a drill, screws, sandpaper, and paint or sealant. A measuring tape and level help ensure proper alignment. Optional: brackets for added stability.
How To Secure Crates To Make A Safe Bookshelf?
Use screws or brackets to firmly attach crates together. Anchor the unit to a wall to prevent tipping. Check stability regularly, especially if children use it.
Can I Customize Crate Bookshelves With Paint Or Decorations?
Yes, paint crates with child-safe, non-toxic paint. Add stickers or decals for personalization. Customize colors to match room decor and encourage your child’s creativity.
Conclusion
Creating a child’s bookshelf from crates is simple and fun. It helps keep books neat and easy to reach. You can paint or decorate crates to match any room. This DIY project saves money and adds a personal touch. Kids enjoy having their own special space for stories.
Try building one today and see the joy it brings. A crate bookshelf is both useful and charming. It makes reading time even better.