Have you ever looked at your table extension and wondered if it could do more? What if you could easily transform that extra piece into a stylish console table that saves space and adds charm to your home?
You’re about to discover simple, clever ways to turn your table extension into a versatile piece that fits your needs perfectly. Keep reading, and you’ll learn how to make the most out of what you already have—no expensive furniture shopping required.
Ready to unlock the hidden potential of your table extension? Let’s dive in!

Credit: www.xda-developers.com
Choosing The Right Table Extension
Choosing the right table extension is key to turning a table into a console. The extension must fit well and look good. It should also match your room’s style. Focus on three main points. Types of extensions, materials, and size.
Types Of Table Extensions
There are several types of table extensions. Drop-leaf extensions fold down for easy storage. Butterfly extensions fold inside the table. Removable leaves come out and can be stored separately. Choose the type that suits your space and use.
Materials To Consider
Table extensions come in many materials. Wood is classic and strong. Metal adds a modern touch and is durable. Glass creates a sleek, light look. Choose a material that matches your table and room decor.
Size And Shape Factors
Size matters for a good fit. The extension should not be too big or too small. Shape also plays a role. Rectangular, round, or oval extensions change the table’s look. Pick the size and shape that best fit your space and style.
Tools And Supplies Needed
Turning a table extension into a console is a fun and useful project. It needs the right tools and supplies to make the process smooth and safe. Having the right items ready will help you work faster and get better results.
Below are the tools and supplies you will need. These are split into basic tools, extra materials for finishing, and safety gear. Each group plays a key role in the project’s success.
Basic Tools Checklist
- Measuring tape for accurate dimensions
- Pencil to mark cutting lines
- Hand saw or jigsaw for cutting wood
- Electric drill for screws and holes
- Screwdriver to tighten screws
- Clamps to hold pieces in place
- Sanding block or electric sander to smooth edges
- Wood glue to join parts firmly
Additional Materials For Finishing
- Wood stain or paint for color
- Brushes or rollers for applying finish
- Clear sealant to protect the surface
- Wood filler to fix small gaps or holes
- Rags for cleaning excess stain or glue
Safety Gear Essentials
- Safety glasses to protect your eyes
- Dust mask to avoid breathing sawdust
- Work gloves to protect your hands
- Hearing protection for loud power tools
- Proper clothing that covers arms and legs
Preparing The Table Extension
Preparing the table extension is the first step to transform it into a console. This stage sets the base for a smooth and safe conversion. A well-prepared surface ensures the final product looks clean and feels sturdy. Careful preparation makes the process easier and the result more durable.
Cleaning And Sanding
Start by cleaning the table extension thoroughly. Remove dust, dirt, and any sticky residues. Use a damp cloth and mild soap for best results. After cleaning, sanding is important. Sand the surface lightly to smooth out rough patches. This helps paint or finish stick better. Use fine-grit sandpaper for a smooth finish. Wipe away dust after sanding.
Removing Unnecessary Parts
Check the table extension for any parts you do not need. Remove extra hinges, locks, or screws carefully. This step avoids bulk and unwanted features on your console. Use the right tools to prevent damage. Keep only the parts that help the extension stay functional and neat.
Ensuring Stability
Stability is key for a console table. Check if the extension feels wobbly or loose. Tighten any loose screws or bolts. Add support brackets if needed for extra strength. Test the extension by applying pressure gently. A stable base prevents accidents and improves usability.
Credit: www.timeextension.com
Designing The Console Style
Designing the console style is a key step in turning a table extension into a beautiful console. The style sets the tone and makes the piece fit well in your space. Think about the room’s look and the console’s purpose before you start designing.
Small details can change the whole look. Choosing the right legs, shape, and storage options helps create a console that looks both stylish and practical. Keep your needs and tastes in mind as you plan.
Selecting A Console Look
Pick a style that matches your room’s theme. You can choose modern, rustic, or classic designs. A simple finish works well for modern spaces. Wood tones fit cozy, traditional rooms. Paint the console to match or contrast the walls. This choice helps the console stand out or blend in.
Adding Legs Or Supports
Legs give the console height and stability. Thin metal legs create a sleek look. Wooden legs add warmth and strength. For a floating style, use wall brackets as supports. Make sure the legs or supports hold the weight firmly. Balance is important to keep the console steady.
Incorporating Storage Options
Storage makes the console more useful. Add shelves or small drawers under the tabletop. Open shelves show off books and decor. Drawers hide clutter and keep things tidy. Use baskets or boxes on shelves for extra organization. Choose storage that fits your needs and keeps the space neat.
Step-by-step Assembly Process
Transforming a table extension into a console is a practical way to reuse space. This step-by-step process helps you assemble it correctly. Follow each step carefully for a sturdy and stylish console.
Attaching Supports
Start by finding the right supports for the extension. These supports hold the table extension steady. Use screws that fit the wood type. Attach the supports evenly to avoid wobbling. Check that each support is level before tightening screws.
Securing The Extension
Place the extension on the supports gently. Align it with the edges of the base table. Use clamps to hold it in place. Drill pilot holes to prevent wood splitting. Screw the extension securely into the supports. Make sure it does not shift or move.
Final Adjustments
Check the console for balance and strength. Sand any rough edges for a smooth finish. Paint or stain the console to match your decor. Add decorative elements like handles or trims. Test the console by placing items on it. Confirm it feels solid and safe to use.
Painting And Finishing Touches
Painting and finishing touches give your table extension a fresh new look. They protect the wood and make your console stand out. These final steps help your project last longer and look polished.
Choosing Paint Or Stain
Pick paint for a bright, solid color that covers the wood grain. Stain works well to show the natural wood texture and adds warmth. Consider the room’s style before deciding. Test your color on a small area first. This helps avoid surprises after drying.
Applying Protective Coating
Use a clear protective finish to guard your surface. Polyurethane or varnish works well for durability. Apply thin, even coats with a brush or cloth. Let each coat dry before adding another. This keeps your console safe from scratches and spills.
Decorative Elements
Add details to make your console unique. Use stencils, decals, or hand-painted designs. Small hardware like knobs or handles can add charm. Consider adding a small shelf or hooks for extra function. These touches make the piece truly yours.
Placement And Styling Ideas
Turning a table extension into a console is a smart way to use space. Placement and styling are key to making it look good and work well. The right spot can highlight the console’s charm. Styling helps it blend with your room’s look.
Best Spots For Your Console
Place the console in a hallway to greet guests with style. Near the entryway, it can hold keys and mail. Against a living room wall, it adds extra surface space. In a dining room, use it to serve or display decor. Keep it where it won’t block walking paths.
Decor Tips
Use a mix of items on the console for balance. A small lamp brings warmth and light. Add a mirror or artwork above to create height. Place a vase with fresh flowers for color. Keep some books or trays for neatness. Avoid clutter to keep it inviting.
Functional Uses
The console can store daily essentials out of sight. Use baskets or boxes underneath for extra storage. It works well as a charging station for devices. Display family photos to make it personal. Use it as a mini bar for drinks and glasses. The console adds both style and function.
Troubleshooting Common Issues
Turning a table extension into a console is a clever way to save space. Small problems may come up during this process. Knowing how to fix these common issues helps keep your console sturdy and attractive.
Wobbling Problems
Wobbling makes the console unstable and unsafe. Check if all legs touch the floor evenly. Tighten loose screws or bolts. Use furniture pads to balance uneven legs. Adding corner braces can improve stability.
Surface Imperfections
Surface marks or scratches reduce the console’s appeal. Lightly sand the area with fine-grit sandpaper. Use wood filler for deeper dents or holes. Apply a matching stain or paint for a smooth finish. A clear sealant protects the surface from future damage.
Space Constraints
Limited space can make placement hard. Measure your room before setting up. Choose a narrow spot near a wall or hallway. Keep the console close to other furniture for flow. Use vertical storage above the console to save floor space.
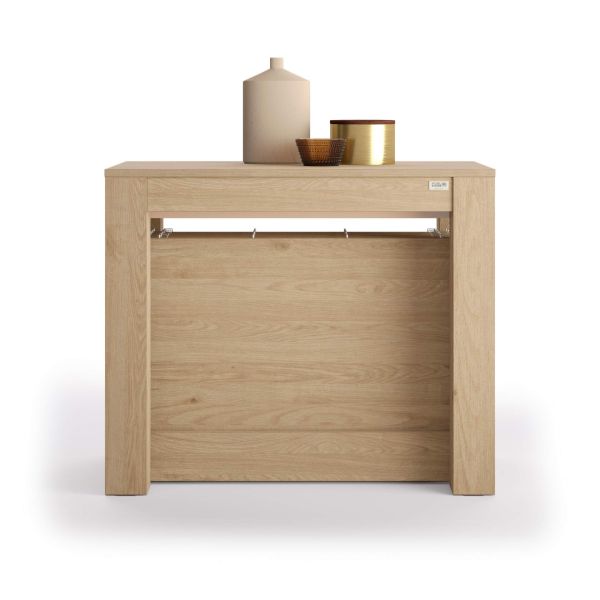
Credit: www.mobilifiver.com
Frequently Asked Questions
How Can I Convert A Table Extension Into A Console?
To convert a table extension into a console, fold the extension inside or remove extra leaves. Add decorative elements to enhance style. Ensure the table height suits console use for practicality and aesthetics.
What Tools Do I Need For Table Extension Conversion?
Basic tools include a screwdriver, measuring tape, sandpaper, and paint or stain. These help disassemble, smooth surfaces, and refinish the table for a console look.
Is A Table Extension Sturdy Enough As A Console?
Yes, most table extensions are sturdy. Ensure the extension locks securely and the base supports weight evenly for safe console use.
Can I Customize The Console After Conversion?
Absolutely. You can paint, stain, or add decorative hardware. Customize to match your room’s style and enhance the console’s appeal.
Conclusion
Transforming a table extension into a console is simple and practical. It saves space and adds style to your room. You only need a few tools and some creativity. This project fits well in small homes or apartments. It also gives old furniture a fresh look.
Try it yourself and enjoy a new piece that suits your needs. Small changes can make a big difference in your living space. Give it a try and see the results.