Are you looking to give your console table a fresh, stylish look without spending a fortune? Whitewashing is a simple, effective way to brighten up your furniture and add a touch of charm to any room.
Whether your table is old and worn or just needs a new finish, you can easily transform it with a few basic steps. In this guide, you’ll discover how to whitewash your console table like a pro, even if you’ve never tried it before.
Ready to refresh your space and impress your guests? Let’s get started!

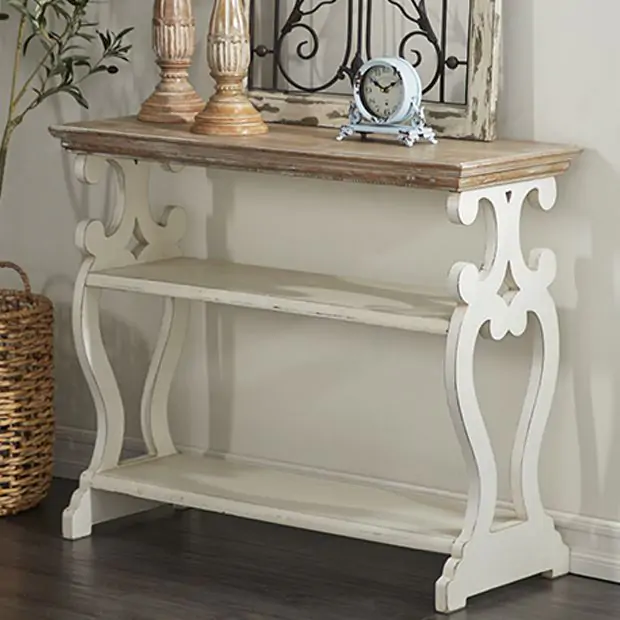
Credit: store.lilysliving.com
Materials Needed
To whitewash a console table, gather the right materials first. Using proper supplies makes the project easier and results better. Below are the key items needed to start whitewashing your console table.
Choosing The Right Paint
Select a whitewash paint or make your own by mixing white paint with water. Use water-based paint for easy cleanup and smooth finish. Pick a paint that is thin enough to let wood grain show through. Avoid thick paint that covers the natural look of wood.
Essential Tools
Use a paintbrush with soft bristles for even application. A foam brush works well for smooth strokes. Have a clean cloth or rag ready to wipe off extra paint. Sandpaper helps prepare the surface and smooth rough spots. A small bucket or container is needed for mixing paint and water.
Preparation Supplies
Clean the table with mild soap and water before painting. Remove dirt and grease for better paint adhesion. Use painter’s tape to protect areas you don’t want to paint. Have drop cloths or newspapers to cover your workspace and catch drips. Gloves keep your hands clean and protected.
Preparing The Console Table
Preparing the console table is an important step before whitewashing. It helps the paint stick better and creates a smooth finish. A well-prepared surface makes the final result look clean and fresh. Take your time with this phase to get the best outcome.
Cleaning The Surface
Start by removing dust and dirt from the table. Use a soft cloth and mild soap with water. Wipe the surface gently to avoid damage. Let the table dry completely before moving to the next step.
Sanding Techniques
Sanding removes old paint and smooths rough spots. Use fine-grit sandpaper for best results. Sand in the direction of the wood grain. This prevents scratches and helps the whitewash absorb evenly.
Repairing Imperfections
Check the table for cracks or holes. Fill any gaps with wood filler using a putty knife. Let the filler dry, then sand the surface again. Fixing imperfections creates a smooth base for whitewashing.
Mixing The Whitewash
Mixing the whitewash is a key step in giving your console table a fresh, bright look. The right mix creates a soft, see-through layer of paint. This allows the wood grain to show through. It also adds charm and character to your furniture.
The mix must be just right. Too thick, and it hides the wood. Too thin, and it won’t cover well. Let’s explore how to get the perfect balance for your whitewash.
Selecting Paint And Water Ratio
Choose a flat or matte white paint for whitewashing. These finishes look natural on wood surfaces. Avoid glossy paints, which can look shiny and fake.
Mix the paint with water to thin it. A good start is one part paint to one part water. Stir well to combine. Adjust the ratio if needed. More water makes the whitewash lighter and more transparent. More paint makes it stronger and more solid.
Testing The Mixture
Test your mix on a piece of scrap wood or a hidden area. Apply a small amount with a brush or cloth. Let it dry to see the effect.
Look at how much wood grain shows through. If the whitewash covers too much, add more water. If it is too light, add more paint. Keep testing until you get the look you want.

Credit: www.asianbarnnyc.com
Applying The Whitewash
Applying the whitewash to your console table is a key step in achieving a soft, vintage look. This process requires care and attention to detail. The right technique brings out the wood’s natural beauty while adding a light, airy finish.
Start with clean, dry wood. Use a brush designed for whitewashing to get even coverage. The brush choice and how you use it affect the final look. Layering the whitewash creates depth and texture. Each layer changes the tone and opacity. Allowing proper drying time helps prevent streaks and uneven patches.
Brushing Techniques
Use a wide, soft-bristle brush to apply the whitewash. Brush along the wood grain for a natural effect. Avoid heavy pressure to keep the finish light. Use long, smooth strokes to spread the whitewash evenly. Work in small sections to maintain control. Dab the brush lightly to blend edges and soften harsh lines.
Layering For Desired Effect
Apply thin layers of whitewash rather than one thick coat. Let each layer dry before adding the next. More layers create a whiter, more opaque look. Fewer layers allow the wood grain to show through. Test on a hidden area to see how many layers you need. Adjust layering to suit your style and the table’s wood type.
Drying Times
Allow at least 30 minutes for each whitewash layer to dry. Drying time depends on temperature and humidity. Avoid rushing to prevent smudges and uneven spots. Check that the surface feels dry and not tacky. Full curing may take several hours. Patience ensures a smooth, lasting finish.
Finishing Touches
Finishing touches bring your whitewashed console table to life. These final steps protect your work and add character. They ensure your table lasts longer and looks great. Focus on sealing and distressing for a perfect finish.
Sealing The Surface
Sealing protects the whitewash from damage and stains. Use a clear, water-based sealer for a smooth finish. Apply with a brush or cloth in thin layers. Let each coat dry fully before adding the next. This step keeps your table easy to clean and maintain.
Adding Distressed Details
Distressing adds charm and a rustic feel. Lightly sand edges and corners with fine-grit sandpaper. Focus on areas that would naturally wear over time. Avoid over-sanding to keep the whitewashed look. This technique gives your table a unique, vintage style.
Maintaining Your Whitewashed Table
Maintaining your whitewashed console table keeps it looking fresh and beautiful. Proper care prevents damage and extends its life. Simple habits help preserve the soft, light finish you worked hard to create.
Cleaning Tips
Use a soft, dry cloth to dust your table often. Avoid wet or harsh cleaners that can damage the whitewash. For sticky spots, dampen the cloth slightly and wipe gently. Dry the surface right away to stop moisture from soaking in.
Handling Wear And Tear
Protect your table from scratches by using coasters and placemats. Move objects carefully to avoid scraping the surface. Fix small chips with a matching whitewash touch-up pen or light sandpaper. Regularly check for spots that need gentle repair to keep the finish smooth.
Credit: www.antiquefarmhouse.com
Frequently Asked Questions
What Materials Do I Need To Whitewash A Console Table?
You need white paint, water, a brush, sandpaper, and a clean cloth. Mix paint with water for a thin wash. Prepare the table by sanding it lightly. Apply the mixture and wipe off excess for a rustic look.
How Long Does Whitewashing A Console Table Take?
Whitewashing usually takes 1 to 2 hours. This includes sanding, painting, and drying time. Drying can vary based on paint type and room temperature. Multiple coats may require additional time for best results.
Can I Whitewash Any Type Of Wood Console Table?
Yes, whitewashing works on most wood types. Porous woods absorb paint better, creating a distinct effect. Hardwoods may need extra sanding for paint adhesion. Always test a small area first for desired results.
How Do I Maintain A Whitewashed Console Table?
Clean with a soft, damp cloth regularly. Avoid harsh chemicals that can damage the finish. Reapply a light whitewash or sealant annually to keep the look fresh. Handle with care to prevent scratches.
Conclusion
Whitewashing a console table refreshes its look with a soft, light finish. The process is simple and does not require special skills. Use the right tools and follow steps carefully. This technique brightens wood while keeping its natural texture visible.
It fits many home styles, from rustic to modern. Try it yourself to add charm to any room. Small changes can make a big difference. Enjoy the new look of your console table!