Imagine stepping outside to a cozy spot you built yourself—your own outdoor furniture that fits your style perfectly. You don’t need to spend a fortune or hire someone else to do it.
Building your own outdoor furniture is easier than you think, and it gives you a unique space to relax, entertain, and enjoy the fresh air. In this guide, you’ll discover simple steps and tips that make the process fun and rewarding.
Ready to create something amazing with your own hands? Let’s get started!

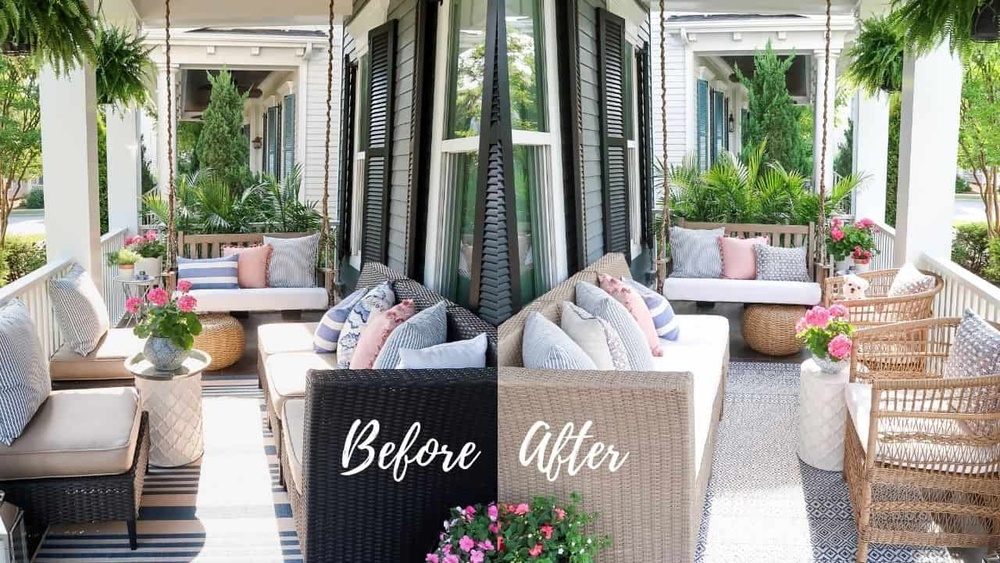
Credit: www.reddit.com
Choosing The Right Materials
Choosing the right materials is a key step in building outdoor furniture. The materials affect how long the furniture lasts and how it looks. Outdoor furniture must resist weather changes, moisture, and sun. Picking strong, weatherproof materials helps create furniture that stays beautiful and functional for years.
Wood Types For Durability
Wood is a popular choice for outdoor furniture. Some woods last longer outside. Teak is very strong and resists water well. Cedar is light and naturally stops insects. Redwood also resists moisture and decay. Pine is cheaper but needs treatment to last. Always pick wood that can handle rain and sun.
Metal And Plastic Options
Metal gives a modern look and is very sturdy. Aluminum is light and does not rust. Steel is strong but needs paint to stop rust. Plastic furniture is easy to clean and cheap. Look for heavy-duty plastic that does not crack in sun. Mixing metal and plastic can create nice, lasting furniture.
Tools You’ll Need
Good tools make building easier and faster. You will need a saw to cut wood or metal. A drill helps make holes and fix screws. Sandpaper smooths rough edges for safety and looks. A measuring tape keeps sizes correct. Gloves protect your hands while working. Having the right tools saves time and effort.

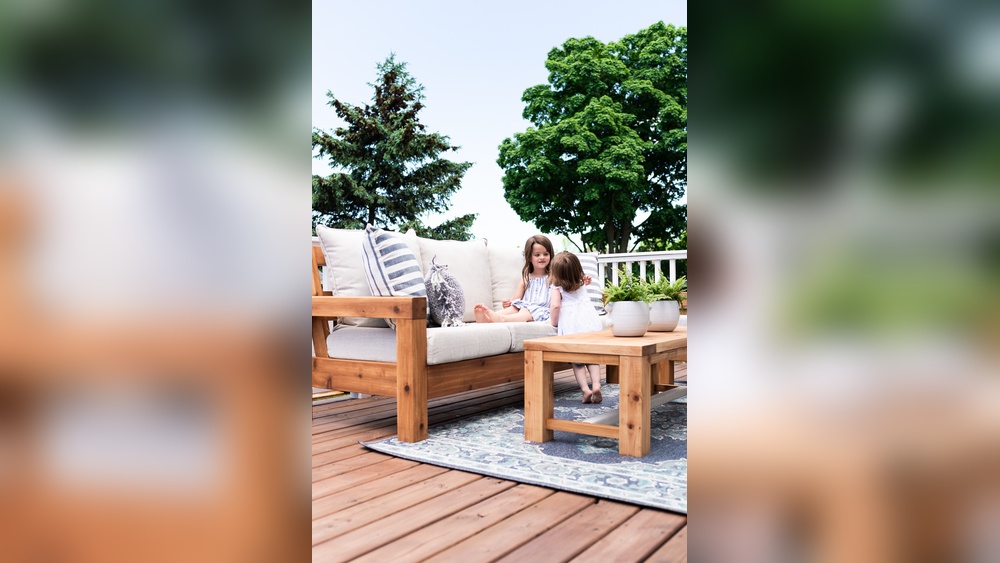
Credit: www.youtube.com
Planning Your Furniture Design
Planning your furniture design is the first step to creating great outdoor pieces. It helps you make smart choices about style, size, and materials. Good planning saves time and money. It also ensures your furniture fits well in your space and looks nice.
Start by thinking about what you want. Do you need a table, chairs, or a bench? Think about how you will use the furniture. Will it be for dining, relaxing, or both? Clear planning leads to better results.
Selecting Furniture Styles
Choose a style that matches your outdoor area. Simple and modern styles work well for small spaces. Classic or rustic styles suit bigger yards. Think about the colors and materials that fit your home. Wood, metal, and plastic all have different looks and care needs.
Pick a style that feels comfortable to you. Your furniture should invite people to sit and stay. Avoid styles that are too complex or hard to build. Simple designs often look the best and are easier to make.
Measuring Your Space
Measure the area where you want your furniture. Note the length, width, and height available. Leave space for walking and moving around furniture. Measure doorways and paths to bring pieces outside.
Write down all measurements clearly. Accurate numbers prevent mistakes during building. Check measurements twice to avoid errors. Proper measuring helps your furniture fit perfectly.
Sketching Your Design
Draw a rough sketch of your furniture ideas. It does not have to be perfect. Use simple shapes to show how pieces fit together. Include measurements on your sketch.
Sketching helps you see your design before building. It shows if any changes are needed. Use your sketch as a guide during construction. This step makes building easier and faster.
Preparing Your Workspace
Preparing your workspace is the first step in building outdoor furniture. A clean and organized area helps you work safely and efficiently. It keeps tools within reach and reduces mistakes. This section explains how to set up a safe space and organize your tools and materials.
Setting Up A Safe Area
Choose a flat, open space with good light. Avoid crowded or slippery areas. Make sure there is enough room to move around freely. Clear away any obstacles or debris. Safety is key to avoid accidents and injuries. Keep a first aid kit nearby just in case. Wear protective gear like gloves and goggles. This simple step protects your hands and eyes from harm.
Organizing Tools And Materials
Gather all the tools needed for your project. Place them on a table or workbench for easy access. Sort materials by type and size. Keep screws, nails, and small parts in containers. Label each container for quick identification. Organizing this way saves time and frustration. Check that all tools are in good condition. A sharp saw and working drill make the job easier. Clean your workspace regularly to maintain order and safety.
Building Basic Outdoor Furniture
Building basic outdoor furniture is a great way to add charm and function to your garden or patio. It saves money and lets you customize pieces to fit your space perfectly. Simple designs often work best for beginners. They require fewer tools and materials but still look nice and last long.
Start with sturdy wood like cedar or pine. These woods resist weather well and are easy to work with. Use screws instead of nails for stronger joints. Sand all surfaces smooth to avoid splinters. Finish with outdoor paint or sealant to protect your furniture.
Constructing A Simple Bench
Cut four legs to the same length for stability. Attach two long planks on top for the seat. Use cross supports below the seat to hold the legs firmly. Drill pilot holes before screwing parts together. Sand the entire bench well and paint or stain it. This bench fits well near gardens or walkways.
Making A Sturdy Table
Choose a flat, wide plank for the tabletop. Cut four legs to the same height. Secure legs to the tabletop corners with strong brackets. Add support beams between legs to keep the table steady. Sand all edges smooth to avoid injuries. Finish with waterproof paint to protect from rain and sun.
Creating Comfortable Chairs
Start by building a simple frame with four legs and armrests. Attach a wide plank for the seat and one for the backrest. Angle the backrest slightly for comfort. Add extra supports under the seat to hold weight. Sand all parts smooth to prevent rough spots. Use outdoor varnish for a long-lasting finish.
Finishing Touches
Finishing touches bring your outdoor furniture to life. They protect it and make it comfortable. These steps improve the look and the feel of your pieces. Pay close attention to these final details to enjoy your furniture longer.
Sanding And Smoothing Surfaces
Sanding removes rough edges and splinters. Use medium-grit sandpaper first, then fine-grit for smoothness. Always sand in the direction of the wood grain. This prevents scratches and helps finishes stick better. Smooth surfaces feel nicer to touch and look clean.
Applying Weatherproof Finishes
Weatherproof finishes protect wood from rain and sun. Choose products like outdoor varnish or sealant. Apply thin, even coats with a brush or cloth. Let each coat dry fully before adding the next. This keeps your furniture strong and prevents warping or cracking.
Adding Cushions And Accessories
Cushions add comfort and style to outdoor furniture. Pick cushions made from water-resistant fabric for durability. Match colors to your outdoor space for a fresh look. Accessories like throw pillows or blankets create a cozy feel. These small touches invite relaxation outdoors.

Credit: eastcoastcreativeblog.com
Maintaining Your Furniture
Maintaining your outdoor furniture keeps it looking fresh and lasting longer. Regular care protects it from weather damage and daily wear. Simple steps help your furniture stay strong and beautiful year after year.
Cleaning Tips
Clean your furniture often to remove dirt and dust. Use a soft brush or cloth to avoid scratches. Mild soap and water work well for most materials. Rinse with clean water and dry with a towel. Avoid harsh chemicals that can damage finishes.
Seasonal Care Advice
Store furniture indoors during harsh weather or cover it with waterproof covers. Treat wooden pieces with oil or sealant before winter. Move metal furniture to a dry place to stop rust. Check cushions for mold and keep them dry. Proper care helps furniture survive all seasons.
Repairing Common Issues
Fix loose screws and bolts quickly to keep furniture stable. Sand rough spots on wood to prevent splinters. Use rust remover on metal parts and repaint if needed. Replace torn cushions or fabric for comfort and look. Small repairs prevent bigger problems later on.
Frequently Asked Questions
What Materials Are Best For Diy Outdoor Furniture?
Wood like cedar and teak are durable and weather-resistant. Metal and recycled plastic also work well. Choose materials based on climate and style preference.
How Do I Protect Outdoor Furniture From Weather Damage?
Apply sealant or outdoor paint to prevent moisture damage. Use covers when not in use. Regular cleaning also extends furniture life.
What Basic Tools Are Needed To Build Outdoor Furniture?
You’ll need a saw, drill, screwdriver, measuring tape, and clamps. Sandpaper and safety gear like gloves and goggles are essential too.
How Long Does It Take To Build Outdoor Furniture?
Simple projects can take a few hours. More complex builds may require several days. Time depends on skill level and design complexity.
Conclusion
Building your own outdoor furniture brings pride and style to your space. You save money and get exactly what you want. The process can be fun and teach new skills. Start small, choose good materials, and follow safety steps. Soon, you will enjoy a unique place made by your hands.
Give it a try and see how rewarding it feels. Your outdoor area will look great and feel personal. Crafting furniture yourself makes your garden or patio special.