Are you looking to add a touch of charm and functionality to your space? Building a pine bookshelf might be just what you need.
Imagine having a sturdy, beautiful shelf made by your own hands—perfect for organizing your favorite books and displaying your treasures. In this guide, you’ll discover simple, step-by-step instructions that anyone can follow, even if you’re new to woodworking. By the end, you’ll have the skills and confidence to create a pine bookshelf that fits your style and space perfectly.
Ready to transform your room and enjoy a rewarding project? Let’s get started!
Choosing The Right Pine Wood
Choosing the right pine wood is key to building a strong and attractive bookshelf. Pine is popular for its light color and smooth grain. It is easy to work with and fits many budgets. Different types of pine offer different looks and strengths. Picking good quality wood ensures your bookshelf lasts long and holds heavy books safely.
Types Of Pine For Bookshelves
There are several pine types to pick from. Eastern White Pine is soft and has a fine grain. It is light in color and easy to sand. Ponderosa Pine is a bit harder and has more knots, giving a rustic look. Sugar Pine is known for its straight grain and fewer knots. Choose pine based on the style and strength you want for your shelf.
Selecting Quality Wood
Look for wood that is straight and free of cracks. Avoid boards with too many knots, as they may weaken the shelf. Check for moisture content; dry wood works best. Pick boards with smooth surfaces to reduce sanding work. Good quality pine will make your bookshelf sturdy and beautiful.
Tools And Materials Needed
Building a pine bookshelf is a rewarding project. Having the right tools and materials makes the process smoother. Preparing everything beforehand saves time and effort. This section lists the essential tools and materials for your bookshelf.
Essential Tools
- Measuring tape – for accurate measurements.
- Hand saw or circular saw – to cut pine wood.
- Power drill – to make holes and drive screws.
- Screwdriver – for tightening screws manually.
- Clamps – to hold pieces firmly while gluing or screwing.
- Sandpaper or electric sander – to smooth rough edges.
- Carpenter’s square – to check right angles.
- Pencil – for marking measurements.
- Level – to ensure shelves are straight and even.
Materials And Supplies
- Pine wood boards – main material for shelves and sides.
- Wood screws – to fasten pieces securely.
- Wood glue – for extra strength at joints.
- Wood filler – to hide screw holes and imperfections.
- Wood stain or paint – for finishing and protecting wood.
- Sandpaper sheets – for final smoothing before finishing.
- Protective finish (varnish or sealant) – to protect the wood surface.
Designing Your Bookshelf
Designing your pine bookshelf is the first step to a great project. A clear design helps avoid mistakes. It saves time and wood. Planning carefully makes building easier and more fun.
Think about where the bookshelf will go. Consider the size of the space and how much storage you need. Choose a style that fits your room and taste.
Measuring And Planning
Start by measuring the wall or area for your bookshelf. Note the height, width, and depth available. Decide how many shelves you want. Think about the size of books or items you will store.
Write down all measurements on paper. Double-check them to avoid errors. Plan shelf spacing to fit large and small books. Leave extra room for easy access and air circulation.
Sketching Your Design
Draw a simple sketch of your bookshelf on paper. Include all measurements and shelf positions. Use straight lines to keep the design clear. Mark where you will cut and join the wood.
Sketching helps visualize the final product. It shows how the bookshelf will look in your space. Make changes on the sketch before cutting any wood. This step saves wood and money.
Cutting The Pine Wood
Cutting pine wood is the first step in building a sturdy bookshelf. Accurate cuts ensure the pieces fit well. Careful measurement and safe cutting protect both the wood and yourself. Follow clear steps to cut your pine wood perfectly.
Marking The Pieces
Start by measuring each piece of wood precisely. Use a tape measure for accuracy. Mark the cut lines clearly with a pencil. Draw straight lines using a square tool. Double-check measurements before cutting. Clear marks help guide your saw for clean cuts.
Safe Cutting Techniques
Wear safety goggles and gloves before cutting. Use a stable surface to place the wood. Secure the wood with clamps to stop movement. Cut slowly along the marked lines. Keep your hands away from the blade. Use a push stick for small pieces. Stop and check progress often to avoid mistakes.
Assembling The Frame
Assembling the frame of a pine bookshelf sets the base for its strength and shape. This step needs care and attention. A solid frame ensures the bookshelf holds weight and lasts a long time. Follow clear steps to join the sides and secure the shelves properly.
Joining The Sides
Start by placing the two side panels upright. Align them with the top and bottom pieces. Use wood glue on the edges for a strong bond. Clamp the pieces together to hold them tight. Drill pilot holes to avoid splitting the wood. Screw the pieces firmly with wood screws. Check that the frame is square before the glue dries. This keeps your bookshelf balanced and stable.
Securing Shelves
Measure and mark the shelf positions on the inside of the frame. Use a level to keep shelves even. Attach small wooden cleats or shelf supports to the sides. Secure each cleat with screws. Slide the shelves onto the supports carefully. For extra strength, screw the shelves into the cleats from underneath. This prevents movement and adds durability. Double-check each shelf is level and sturdy before moving on.

Credit: www.youtube.com
Sanding And Finishing
Sanding and finishing give your pine bookshelf a smooth, clean look. These steps protect the wood and help it last longer. Taking time to sand and finish makes your project look more professional.
Smoothing The Surfaces
Start sanding with medium-grit sandpaper to remove rough spots. Sand along the grain to avoid scratches. Change to fine-grit sandpaper to smooth the wood further. Wipe off dust with a clean cloth after sanding. Smooth surfaces help the stain or paint stick better.
Applying Stain Or Paint
Choose a stain or paint that fits your style. Stir the stain or paint well before using. Apply evenly with a brush or cloth, following the wood grain. Let the first coat dry completely. Add a second coat for deeper color and better protection. Finish with a clear sealant for durability if desired.
Adding Final Touches
Adding final touches to your pine bookshelf gives it a polished and sturdy look. These last steps make your project complete and ready to use. Small details can improve both function and style.
Installing Back Panel
The back panel adds stability to the bookshelf. Choose a thin plywood or hardboard sheet for this part. Cut it to fit the back frame precisely. Attach it using small nails or screws along the edges. Make sure it sits flush without gaps. This step prevents the bookshelf from wobbling and keeps shelves aligned.
Adding Decorative Elements
Decorative touches create a unique style for your bookshelf. Consider adding molding or trim around the edges. Sand these details smooth before attaching. Use wood glue and small nails for a secure fit. Painting or staining these elements can highlight the wood grain. Simple designs bring charm without extra cost or effort.
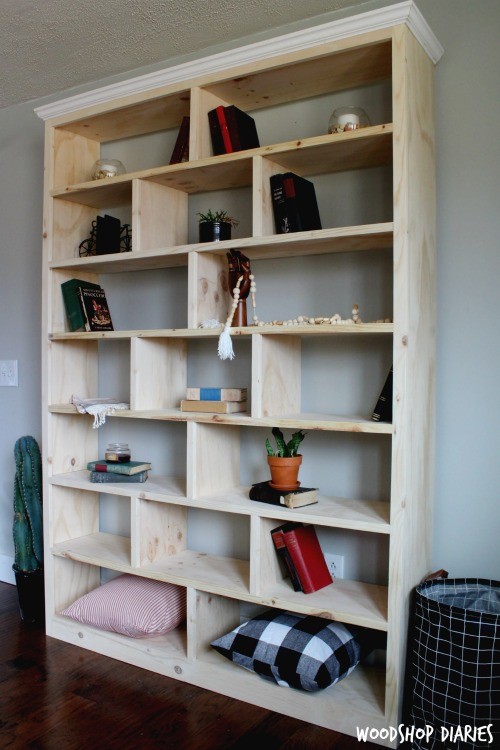
Credit: www.woodshopdiaries.com
Maintenance Tips
Maintaining your pine bookshelf keeps it looking fresh and strong for years. Regular care stops wear and tear and protects the wood from damage. Simple steps help preserve its natural beauty and function.
Cleaning Your Bookshelf
Dust your bookshelf often using a soft cloth or duster. Avoid wet cloths as water can damage pine wood. Use a dry microfiber cloth to catch fine dust particles. For sticky spots, dampen the cloth slightly with water, then dry immediately. Avoid harsh chemicals; they may strip the finish or harm the wood. Gentle cleaning keeps the wood healthy and looking new.
Preventing Damage
Keep your bookshelf away from direct sunlight to prevent fading and drying. Use coasters or pads under heavy objects to stop dents or scratches. Avoid placing your bookshelf near heat sources like radiators. Pine wood can expand or crack with extreme temperature changes. Check shelves regularly and tighten screws to keep the structure safe and steady. Small fixes help avoid bigger problems later.

Credit: www.reddit.com
Frequently Asked Questions
What Tools Are Needed To Build A Pine Bookshelf?
Essential tools include a saw, drill, measuring tape, screwdriver, clamps, and sandpaper. These help with precise cuts, assembly, and finishing for a sturdy bookshelf.
How Do I Choose The Right Pine Wood?
Select pine wood that is straight, knot-free, and smooth. Quality wood ensures durability and a clean finish for your bookshelf project.
What Finish Works Best For Pine Bookshelves?
Use clear varnish or polyurethane to protect and enhance pine’s natural look. These finishes resist scratches and moisture, keeping your bookshelf attractive longer.
How Long Does It Take To Build A Pine Bookshelf?
Building a pine bookshelf typically takes 4 to 6 hours, depending on skill level. This includes cutting, assembling, sanding, and finishing the wood.
Conclusion
Building a pine bookshelf is easier than it seems. Follow each step carefully and take your time. Use the right tools and measure twice before cutting. Enjoy the process of creating something useful and beautiful. A handmade bookshelf adds charm to any room.
Keep practicing to improve your woodworking skills. Soon, you will build even bigger and better projects. Remember, patience and care make all the difference. Start your project today and watch your bookshelf take shape.