Are you looking to add a sleek and modern touch to your room without taking up floor space? Building a floating bookshelf might be the perfect project for you.
Imagine having a stylish place to display your favorite books and decor, all while keeping your space neat and open. In this guide, you’ll discover simple steps to create your own floating bookshelf, even if you’ve never built anything before.
Ready to transform your walls and impress your guests? Let’s dive in and make your vision a reality.

Credit: www.uglyducklinghouse.com
Materials And Tools Needed
Building a floating bookshelf needs the right materials and tools. Quality wood and proper tools make the project smooth and strong. Prepare all items before starting. This saves time and avoids frustration.
Choosing The Right Wood
Pick wood that is sturdy and looks good. Pine, oak, or maple work well. Pine is affordable and easy to cut. Oak is very strong but costs more. Maple has a smooth finish and lasts long. Make sure the wood is dry and free from cracks. Choose the right thickness for holding books without bending.
Essential Tools For The Project
Gather these tools to build your shelf easily. A drill helps make holes for screws. Use a level to keep the shelf straight. A saw is needed to cut the wood to size. Screwdrivers secure the screws tightly. Sandpaper smooths rough edges for a clean look. A tape measure measures wood and wall space correctly.
Optional Supplies For Finishing Touches
Use paint or stain to protect and style the wood. Clear varnish adds shine and guards against damage. Wood filler fixes small holes or cracks. Painter’s tape helps create sharp lines during painting. A brush or cloth applies finishes evenly. These supplies make your shelf last longer and look better.

Credit: www.freeandunfettered.com
Planning Your Bookshelf
Planning your floating bookshelf is the first step to a great project. This stage helps you avoid mistakes and ensures a perfect fit for your space. Careful planning saves time and makes the building process smooth. Focus on three key areas: measuring, designing, and choosing how to mount the shelf.
Measuring Your Space
Start by measuring the wall where the shelf will hang. Use a tape measure to get the width and height. Check for any obstacles like switches or vents. Note the wall material—drywall, brick, or wood. Write down all measurements clearly. Accurate numbers help you create a shelf that fits perfectly.
Designing The Shelf Dimensions
Decide how wide and deep the shelf should be. Think about the books or items you want to place. Make sure the shelf can hold the weight safely. Choose a style that matches your room’s look. Draw a simple sketch with your chosen dimensions. This plan guides you during cutting and assembly.
Selecting The Mounting Method
Pick a mounting method that suits your wall type and shelf size. Common options include brackets, cleats, or hidden anchors. Strong mounts keep the shelf secure and stable. Consider the tools you have and your skill level. Choose a method that balances strength and ease of installation.
Preparing The Wood
Preparing the wood is a key step in building a floating bookshelf. It ensures the wood looks good and lasts long. Careful preparation gives your shelf a clean, professional appearance. This process includes cutting, sanding, and finishing the wood.
Cutting The Wood To Size
Start by measuring the wood pieces carefully. Use a saw to cut the wood to the right size. Make straight cuts for a neat fit on the wall. Double-check your measurements before cutting. This prevents mistakes and saves time.
Sanding For A Smooth Finish
Sanding removes rough spots and splinters from the wood. Use medium-grit sandpaper first to smooth big bumps. Then use fine-grit sandpaper for a soft surface. Sand along the grain to avoid scratches. A smooth finish helps the paint or stain stick well.
Applying Stain Or Paint
Choose stain or paint based on your style. Stain shows the wood’s natural grain. Paint adds color and hides imperfections. Apply a thin, even coat with a brush or cloth. Let it dry completely before adding more coats. This step protects the wood and improves its look.
Installing The Brackets
Installing the brackets is a key step in building a floating bookshelf. These brackets hold the shelf securely on the wall. Proper installation ensures the shelf stays strong and safe to use. Follow these steps carefully for best results.
Locating Wall Studs
Find the wall studs first. Studs provide the support your shelf needs. Use a stud finder tool to locate them. Move the tool slowly across the wall. Mark the spots where the studs are found. Avoid placing brackets only on drywall.
Marking And Drilling Holes
Measure and mark the bracket positions on the wall. Align the marks with the studs for strong support. Use a level to keep marks straight. Drill pilot holes on each mark. Use a drill bit slightly smaller than the screws.
Securing The Brackets
Place the brackets over the drilled holes. Insert screws through the bracket holes into the wall. Tighten screws firmly using a screwdriver or drill. Check that brackets are flush and steady. Loose brackets can cause the shelf to fall.
Mounting The Shelf
Mounting the shelf is a key step in building a floating bookshelf. It holds the shelf firmly on the wall. Proper mounting keeps the shelf safe and prevents it from falling. Follow these steps to mount the shelf with care and precision.
Aligning The Shelf With Brackets
Start by placing the brackets on the wall. Use a level to make sure they are straight. Mark the spots for screws with a pencil. Align the shelf with the brackets carefully. Check the fit before fixing anything permanently.
Attaching The Shelf Securely
Use screws to attach the shelf to the brackets. Choose screws that are strong enough for your shelf and wall type. Drill pilot holes to avoid wood splitting. Tighten the screws but do not overdo it. A firm hold is important for safety.
Checking For Stability
After attaching, test the shelf by pressing gently. Look for any movement or wobbling. If it feels loose, tighten the screws again. Make sure the shelf holds weight evenly. Stability ensures your books and items stay safe.
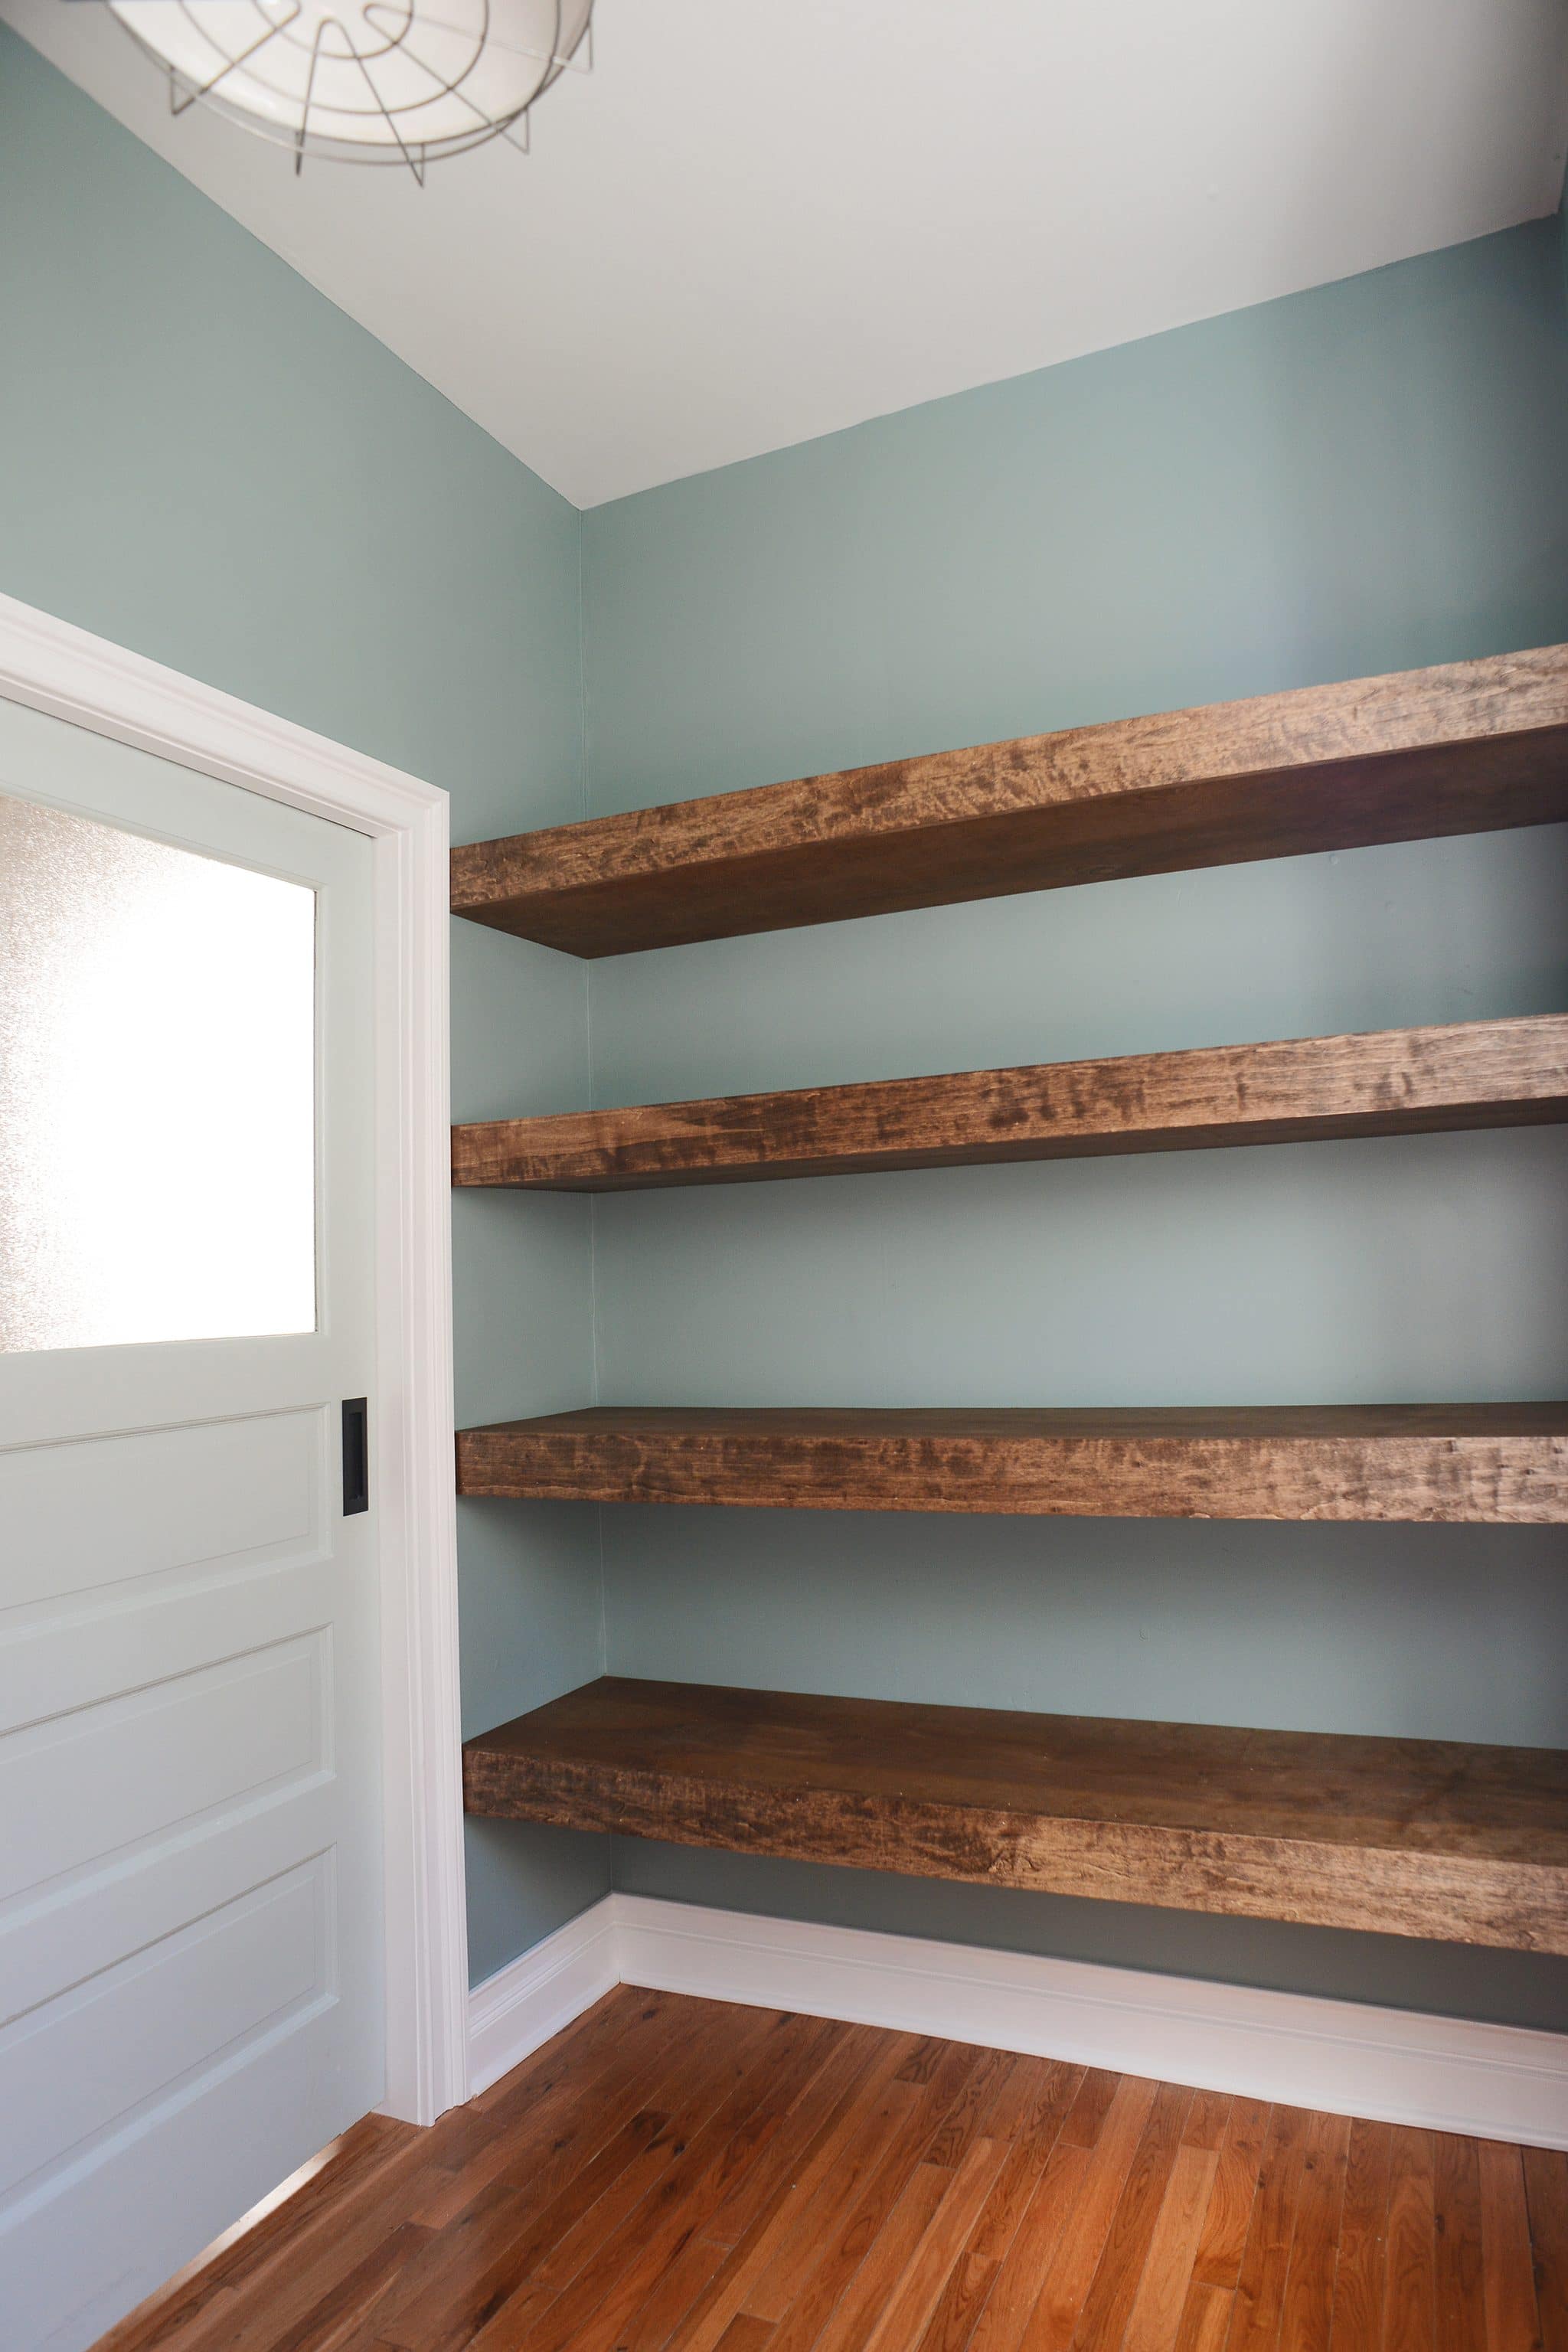
Credit: yellowbrickhome.com
Styling Your Floating Bookshelf
Styling your floating bookshelf can turn a simple shelf into a focal point. It is not just about placing books. It is about creating a look that reflects your personality and space.
With the right arrangement, you can make your shelf both useful and beautiful. Let’s explore easy ways to style your floating bookshelf.
Arranging Books Creatively
Place books both vertically and horizontally to create visual interest. Stack some books flat and use them as a base for small objects. Mix colors and sizes for a dynamic look. Keep the most used books within easy reach. Leave some space empty for a clean, airy feel.
Adding Decorative Items
Use small plants to add a touch of green and life. Place candles or small sculptures to bring warmth and charm. Frames with photos or art can personalize your shelf. Mix items of different heights to avoid a flat look. Keep decorations balanced so the shelf does not look crowded.
Maintaining The Shelf Over Time
Dust your floating shelf regularly to keep it fresh. Check the shelf’s stability and tighten screws if needed. Rotate books and decor seasonally to keep the look new. Remove items that no longer fit your style. Keep the shelf neat to maintain its beauty and function.
Frequently Asked Questions
What Materials Do I Need To Build A Floating Bookshelf?
You need wood boards, wall brackets, screws, a drill, level, measuring tape, and wall anchors for sturdy support. Choose quality wood for durability and style.
How Do I Ensure The Floating Bookshelf Is Securely Mounted?
Use proper wall anchors and studs for strong support. Always measure and level carefully before drilling holes. Secure brackets tightly to prevent wobbling.
Can I Customize The Size Of My Floating Bookshelf?
Yes, you can cut wood to any length and width. Customize shelves based on your wall space and storage needs.
How Much Weight Can A Floating Bookshelf Hold?
Weight capacity depends on wood type, bracket strength, and wall anchors. Proper installation can support 20-50 pounds or more per shelf.
Conclusion
Building a floating bookshelf adds style and space to any room. You only need a few tools and some patience. Follow the steps carefully to make it strong and neat. This project suits beginners and helps improve your DIY skills.
Enjoy your new shelf filled with books or decorations. Try different sizes to fit your walls perfectly. Keep practicing to create more useful home items. Simple projects like this bring satisfaction and a personal touch to your home.
