Are you ready to transform your space and create something truly unique? Building your own loft bunk bed is easier than you think, and it can save you money while giving you exactly what you want.
Imagine having more room to play, study, or relax—all under a sturdy, stylish bed you built yourself. In this guide, you’ll discover simple steps and expert tips to make your dream loft bunk bed a reality. Keep reading, and soon you’ll have a custom piece that’s both practical and impressive.
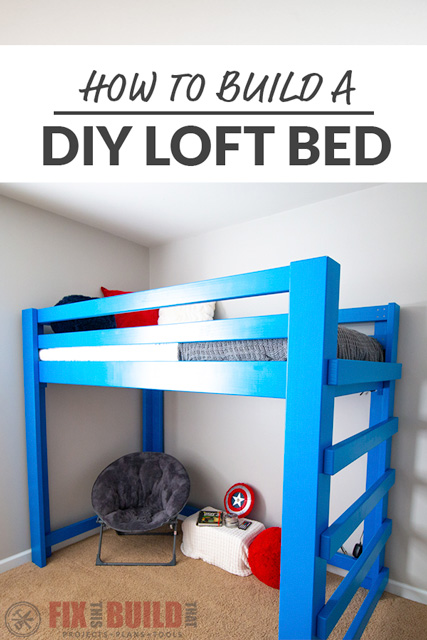
Credit: fixthisbuildthat.com
Planning Your Loft Bunk Bed
Planning your loft bunk bed is the first step to a safe and useful build. It helps you avoid mistakes and saves time and money. Careful planning makes the project easier and ensures the bed fits your space perfectly.
Good planning starts with clear ideas and detailed measurements. Knowing what you want and the space available guides all decisions. Choosing the right materials and tools also affects the build’s success.
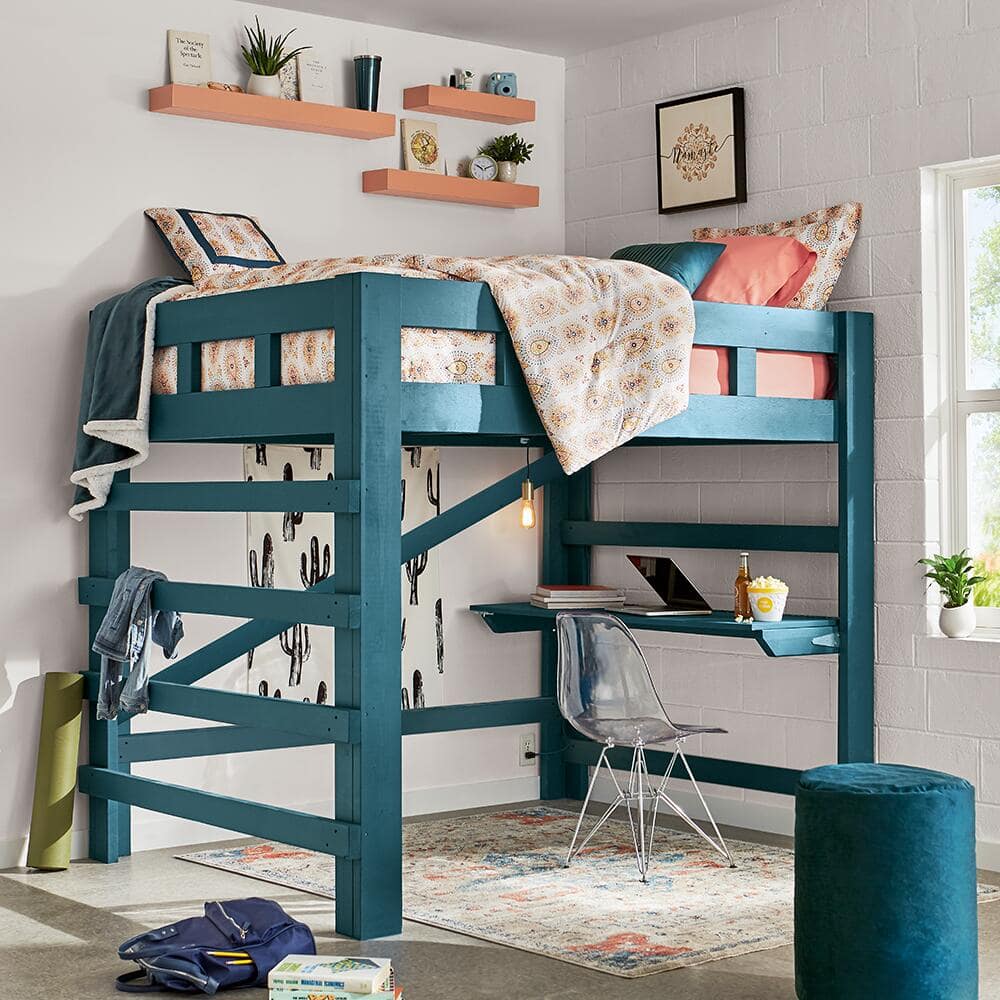
Choosing The Right Design
Pick a design that fits your needs and room style. Think about who will use the bed and how much space you have. Simple designs often work best for beginners. Consider safety features like guardrails and sturdy ladders. Look for plans with clear instructions and good reviews.
Measuring Your Space
Measure the room carefully before starting. Check ceiling height, wall length, and floor space. Leave room for walking and other furniture. Measure twice to avoid errors. Note any obstacles like windows or doors. Proper measurements help the bed fit well and stay safe.
Selecting Materials And Tools
Choose strong, durable wood like pine or oak. Avoid cheap or soft wood that can break easily. Get screws, bolts, and brackets for strong joints. Use a saw, drill, screwdriver, and measuring tape. Pick tools that you know how to use safely. Good materials and tools make the bed sturdy and long-lasting.
Credit: www.homedepot.com
Preparing The Workspace
Preparing your workspace is the first step to building a loft bunk bed. A clean and organized area helps you work faster and safer. It also makes the whole project more enjoyable. This part guides you through clearing the area, organizing materials, and following safety rules.
Clearing The Area
Start by choosing a room with enough space for your bed. Remove furniture and objects that might block your work. Clear the floor so you can move easily. This prevents accidents and gives you room to lay out parts.
Organizing Materials
Gather all tools and wood pieces before you begin. Sort the materials by size and type. Place screws and nails in small containers. Keep your tools within reach. This saves time and avoids frustration during assembly.
Safety Precautions
Wear safety glasses to protect your eyes from dust and wood chips. Use gloves to avoid splinters. Keep a first aid kit nearby. Check that your workspace has good lighting and ventilation. Always follow instructions carefully to prevent injuries.
Building The Frame
Building the frame is the key step in making your own loft bunk bed. This part gives the bed its shape and strength. A strong frame keeps the bed safe and steady for use. Follow clear steps to create a solid frame that lasts long.
Cutting The Lumber
Start by measuring the wood pieces you need. Use a tape measure for exact sizes. Mark the wood with a pencil before cutting. Cut each piece carefully with a saw. Smooth the edges with sandpaper to avoid splinters. Accurate cuts help the frame fit well together.
Assembling The Base
Lay out the cut wood pieces on a flat surface. Join the side rails to the end pieces. Use wood screws and a drill for strong joints. Check the corners to make sure they are square. Tighten all screws securely to hold the base firm. The base supports the mattress and must be steady.
Constructing Support Beams
Cut support beams to fit under the mattress area. Attach them evenly across the base frame. Use screws to fix beams tightly in place. These beams carry the weight and stop the bed from sagging. Double-check the frame for any loose parts. Strong support beams keep the bed safe and durable.
Adding The Ladder And Guardrails
Adding the ladder and guardrails is a key step in building your loft bunk bed. These parts make the bed safe and easy to use. A well-designed ladder helps climbing up and down. Strong guardrails stop falls during sleep. Both must be sturdy and secure. Follow clear steps to install them correctly.
Designing A Safe Ladder
Choose a ladder design that fits your bed size. The ladder should be wide enough for easy climbing. Use smooth wood or metal to avoid splinters. Space the steps evenly, about 10 to 12 inches apart. Attach the ladder at a slight angle. This angle makes climbing safer and more comfortable. Test the ladder for stability before final mounting.
Installing Guardrails
Guardrails must cover the entire side of the loft bed. Use thick wood or metal bars for strength. Fix the rails tightly to the bed frame. The height should be at least 5 inches above the mattress. Check for any gaps where a child could slip through. Sand all edges to avoid sharp corners. Test the rails by applying pressure to ensure safety.
Finishing Touches
The finishing touches make your loft bunk bed safe and beautiful. These steps protect the wood and give your bed a smooth look. Small details make a big difference in comfort and style.
Focus on sanding, painting or staining, and securing the mattress. These tasks ensure the bed is ready for use and looks great in any room.
Sanding And Smoothing Edges
Use fine-grit sandpaper to smooth all wood surfaces. Pay special attention to edges and corners. This removes splinters and rough spots that can hurt skin. Sand lightly in one direction for a clean finish. Wipe off dust with a damp cloth after sanding.
Applying Paint Or Stain
Choose paint or stain that suits your room’s style. Apply a thin, even coat with a brush or roller. Let the first coat dry completely before adding more. Paint adds color and protects wood from wear. Stain highlights the natural grain and keeps a wood look. Use non-toxic products for safety, especially in children’s rooms.
Securing The Mattress
Place the mattress firmly on the bed frame. Use straps or brackets to hold it in place. This prevents slipping during sleep or play. Make sure the mattress fits the frame exactly. Check that the securing method is strong but easy to remove. A safe mattress keeps the bed secure and comfortable.

Credit: www.amazon.com
Maintenance Tips
Maintaining your loft bunk bed ensures it stays safe and strong. Regular care helps avoid accidents and keeps the bed looking good. Simple steps can make a big difference in its lifespan.
Regular Inspections
Check your loft bunk bed every few weeks. Look for cracks in the wood or metal parts. See if any parts are worn out or damaged. Early spotting of problems prevents bigger issues later. Keep a close eye on the ladder and guardrails. These parts face the most stress and need extra care.
Tightening Loose Screws
Loose screws can make the bed unstable. Use a screwdriver to tighten all screws and bolts. Do this at least once a month. Make sure no screws are missing. Tight connections keep the bed sturdy and safe for use.
Cleaning And Care
Dust the bed regularly with a soft cloth. Avoid using harsh chemicals that may damage the finish. Wipe spills immediately to prevent stains. For wooden beds, apply a light wood polish once in a while. This keeps the wood smooth and shiny. Keep the bed dry to avoid mold and rust.
Frequently Asked Questions
What Materials Are Needed To Build A Loft Bunk Bed?
You need sturdy wood, screws, bolts, a saw, drill, measuring tape, and safety gear. Choose quality lumber for stability and safety.
How Long Does It Take To Build A Loft Bunk Bed?
Building typically takes 1-2 days depending on skill level and complexity. Allow extra time for finishing and safety checks.
Is It Safe To Build A Loft Bunk Bed At Home?
Yes, if you follow instructions carefully and use quality materials. Always check stability and secure guardrails for safety.
What Tools Are Essential For Loft Bunk Bed Construction?
Key tools include a saw, drill, screwdriver, measuring tape, and sander. These ensure precise cuts and strong assembly.
Conclusion
Building your own loft bunk bed saves money and adds style. You control the design and size. It fits your space perfectly. Take your time to follow each step carefully. Use the right tools and materials for safety. The effort you put in will be worth it.
Enjoy your new, unique bed with pride. Creating something by yourself feels great. Start your project today and see the results. Simple plans can lead to big rewards. Keep your space organized and cozy with a loft bed.