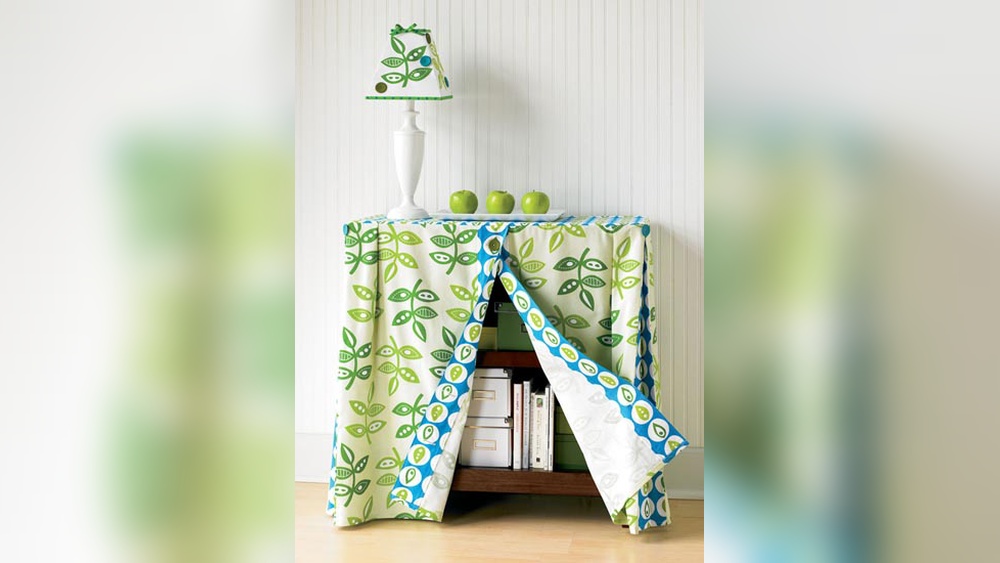
Are you tired of looking at a plain, boring bookshelf? What if you could transform it into a stylish, cozy corner with just a little fabric?
Covering your bookshelf with fabric is a simple, affordable way to add color, texture, and personality to your space. Plus, it’s easier than you might think. You’ll discover step-by-step tips to cover your bookshelf beautifully, even if you’ve never tried a DIY project before.
Ready to give your bookshelf a fresh new look that everyone will notice? Let’s get started!
Credit: www.shelterness.com
Choose The Right Fabric
Choosing the right fabric is key to a beautiful bookshelf cover. The fabric sets the style and feel of your space. It affects durability and ease of cleaning too. Picking fabric well ensures your bookshelf looks great for a long time.
Consider Fabric Types
Choose fabric that feels strong and lasts long. Cotton and linen offer a natural look and breath well. Polyester resists stains and dries quickly. Canvas is thick and tough, perfect for heavy use. Avoid fabrics that wrinkle or tear easily.
Pick Patterns And Colors
Patterns add personality to your bookshelf. Stripes create a classic look. Florals bring softness and charm. Solid colors keep it simple and clean. Match fabric colors with your room’s style. Light colors brighten a room. Dark colors hide dirt well.
Measure Fabric Requirements
Measure your bookshelf carefully before buying fabric. Add extra length for folding and tucking. Check shelf depth, height, and width. Calculate how many panels you need. Buy a little more fabric than measured. This prevents running short during work.
Prepare Your Bookshelf
Preparing your bookshelf is the first step to covering it with fabric. This step ensures the fabric sticks well and looks neat. A clean, smooth surface helps the fabric lay flat without bumps or wrinkles. Taking time here will make your project easier and better.
Clean The Surface
Remove all dust and dirt from the bookshelf. Use a damp cloth to wipe every corner and edge. Let it dry completely before moving on. A clean surface helps the fabric glue stick firmly.
Remove Shelves If Needed
Check if your shelves can be taken out easily. Removing them makes covering the inside easier. It also prevents fabric from tearing when you work. Keep the screws and parts safe for later.
Sand Rough Edges
Feel the edges of the bookshelf carefully. Use fine sandpaper to smooth any rough spots. This step stops the fabric from snagging or ripping. Wipe away dust after sanding to keep it clean.
Gather Tools And Supplies
Gathering the right tools and supplies is the first step to cover a bookshelf with fabric. Having everything ready makes the project smooth and stress-free. It saves time and helps avoid interruptions. Prepare your workspace for easy access to all materials.
Choose quality items that suit your bookshelf size and fabric type. Think about the style you want. Some supplies are necessary, while others add a decorative touch. Organizing these items ensures a neat and tidy process.
List Essential Tools
- Measuring tape to get exact fabric size
- Scissors sharp enough to cut fabric cleanly
- Staple gun or fabric glue for attaching fabric
- Pencil or fabric chalk to mark cutting lines
- Iron to smooth wrinkles on fabric
- Ruler or straight edge for precise measurements
Select Adhesives
Choose between fabric glue or a staple gun. Fabric glue works well for delicate surfaces. It creates a clean, invisible hold. A staple gun is faster and more secure. Use heavy-duty staples for thick fabric. Pick an adhesive that fits your skill and project needs.
Optional Decorative Items
Add trims, ribbons, or buttons for a unique look. Decorative nails or tacks can add style. Consider fabric paint for patterns or designs. Choose elements that match your room decor. These extras personalize your bookshelf and make it stand out.
Cut And Attach Fabric
Covering a bookshelf with fabric gives it a fresh, unique look. The process starts by cutting and attaching the fabric carefully. This step ensures the fabric fits well and stays in place. Follow simple methods for the best results.
Cut Fabric To Size
Measure the bookshelf precisely. Add a few extra inches on each side. This extra fabric helps cover edges and allows for adjustments. Use sharp scissors or a rotary cutter for clean cuts. Cut the fabric on a flat surface for accuracy.
Apply Adhesive Correctly
Choose a strong fabric adhesive or spray glue. Apply the glue evenly on the bookshelf surface. Avoid putting too much glue to prevent messes. Press the fabric gently onto the glued area. Work in small sections for better control.
Smooth Out Wrinkles
After attaching the fabric, smooth it with your hands. Start from the center and move outward. This action removes air bubbles and wrinkles. Use a flat tool like a ruler for stubborn creases. Let the fabric dry completely before use.
Cover Interior And Exterior
Covering the interior and exterior of a bookshelf with fabric can transform its look completely. Fabric adds color, texture, and personality to plain shelves. It also protects the surfaces from scratches and dust. This section explains how to cover different parts of your bookshelf with fabric for a neat and stylish finish.
Fabric For Shelves
Choose a durable fabric for the shelves. Cotton or canvas works well because they are strong and easy to clean. Measure each shelf carefully before cutting the fabric. Leave extra fabric on all sides to fold over the edges. Use spray adhesive or double-sided tape to stick the fabric smoothly. Smooth out wrinkles for a clean look. Covering shelves inside makes the space feel warm and inviting.
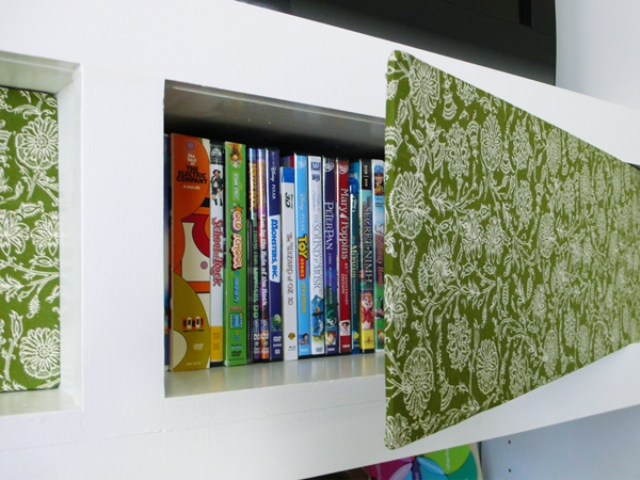
Covering Back Panels
Back panels often show through open shelves. Cover them to add color and hide marks. Cut fabric to fit the panel size. Attach the fabric with spray glue or a staple gun. Make sure the fabric is tight and even. This step brightens the whole bookshelf and creates a nice background for your books and items.
Wrapping Side Panels
Wrapping side panels gives a polished look to your bookshelf. Cut fabric strips longer than the panel height. Wrap fabric around the panel edges carefully. Secure the fabric with glue or staples on the inside where it won’t be seen. This method hides rough edges and adds a smooth, finished touch to the bookshelf.

Credit: www.shelterness.com
Finishing Touches
Finishing touches make your fabric-covered bookshelf look neat and complete. These final steps protect the fabric and add style. They also help the fabric fit perfectly and last longer.
Trim Excess Fabric
Cut any extra fabric close to the edges. Use sharp scissors for a clean cut. This prevents wrinkles and bunching. Trim slowly to avoid cutting too much. Neat edges improve the shelf’s overall look.
Add Protective Coating
Apply a clear spray or fabric sealant. It keeps the fabric clean and stain-free. Choose a coating that dries fast and is safe for fabric. Spray evenly and let it dry fully. This step helps your fabric last longer.
Decorate With Accents
Add small decorations like ribbons or buttons on corners. Use fabric glue or stitches to attach them. These accents make your shelf unique and stylish. Keep decorations simple to avoid clutter. They add a nice personal touch.
Maintenance Tips
Maintaining fabric-covered bookshelves keeps them looking fresh and neat. Regular care helps protect the fabric and extends its life. Simple steps make a big difference in keeping the fabric clean and vibrant. Follow these tips to keep your bookshelf fabric in great shape.
Cleaning Fabric-covered Surfaces
Dust the fabric regularly using a soft brush or vacuum cleaner. Use a low suction setting on the vacuum to avoid damage. For stains, dab gently with a damp cloth and mild soap. Avoid rubbing hard; it can wear the fabric. Let the fabric air dry completely before placing items back.
Repairing Minor Damage
Small tears or loose threads need quick attention. Use fabric glue or a needle and thread to fix them. Match the thread color to the fabric for a clean look. Handle repairs gently to prevent larger damage. Keep scissors and glue handy for quick fixes.
Refreshing The Look
Change the fabric cover if it looks dull or worn. Choose easy-to-remove fabric for simple updates. Use iron-on fabric or Velcro for quick changes. Adding a new pattern or color can brighten the room. Regular refreshing keeps your bookshelf looking stylish and new.

Credit: www.youtube.com
Frequently Asked Questions
What Materials Do I Need To Cover A Bookshelf With Fabric?
You need fabric, scissors, measuring tape, spray adhesive or fabric glue, and a staple gun. Optional items include a ruler and pins for accuracy. Choose fabric that complements your room decor and is easy to handle.
How Do I Measure Fabric For Covering A Bookshelf?
Measure the bookshelf’s height, width, and depth carefully. Add extra inches for folding and securing fabric edges. Accurate measurements ensure a neat, wrinkle-free finish when covering your bookshelf with fabric.
Can I Use Any Fabric Type For Covering A Bookshelf?
Yes, but choose durable, non-stretch fabrics like cotton, canvas, or upholstery fabric. Avoid slippery or delicate fabrics, as they may not adhere well or wear out quickly.
How Do I Attach Fabric Smoothly To A Bookshelf?
Use spray adhesive or fabric glue for a smooth, wrinkle-free application. Stretch fabric gently while securing edges with a staple gun or tacks. Work slowly to avoid bubbles and creases.
Conclusion
Covering a bookshelf with fabric adds style and protects the wood. Choose a fabric that matches your room’s look and feel. Measure carefully to avoid mistakes and ensure a good fit. Use simple tools like glue or staples to attach the fabric securely.
This project is quick, affordable, and changes the space easily. Try different patterns or colors for a fresh look. Your bookshelf will look new and cozy with this simple touch. Give it a try and enjoy your updated shelf today.
