Is your outdoor wood furniture looking a little too new and shiny? Sometimes, a bit of wear and character can make your pieces feel more inviting and charming.
But how do you achieve that perfect distressed look without damaging your furniture? You’re about to discover simple, effective ways to give your outdoor wood furniture a stylish, weathered finish that tells a story. Keep reading, and you’ll learn easy steps that anyone can follow to transform your space and make your furniture stand out.

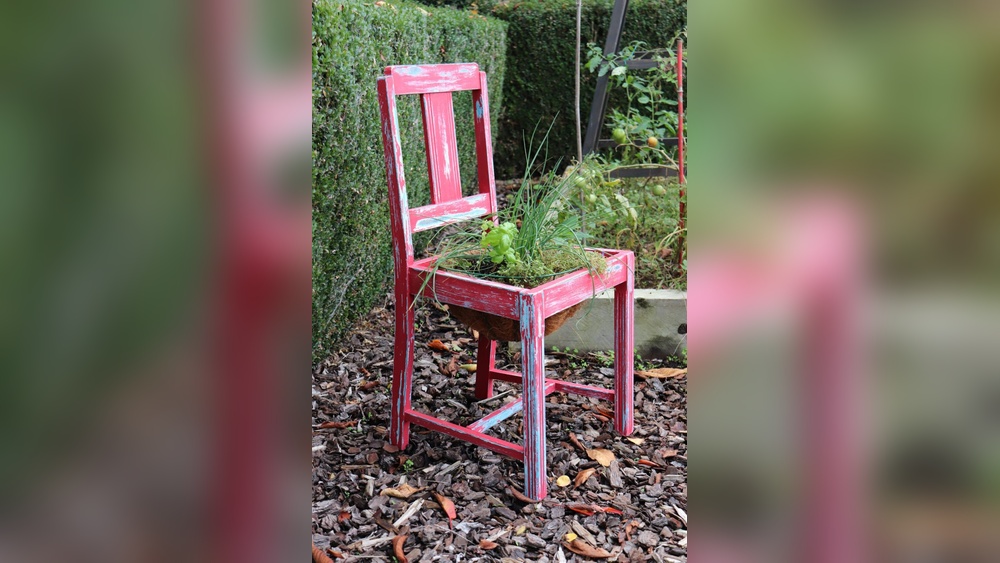
Credit: www.apieceofrainbow.com
Choosing The Right Wood Furniture
Choosing the right wood furniture is the first step in distressing outdoor pieces. Not all wood types handle distressing well. Picking the right wood ensures your project looks authentic and lasts long. Consider the wood’s durability and texture before starting.
Types Of Wood Suitable For Distressing
Softwoods like pine and cedar work well for distressing. They dent and scratch easily, creating a natural worn look. Hardwoods such as oak and maple are tougher but can still be distressed with effort. Teak is popular for outdoor use due to its weather resistance. Choose wood that fits your style and weather conditions.
Assessing Furniture Condition
Check your furniture for cracks, rot, or loose joints before distressing. Good condition wood holds distressing effects better. Old paint or finish may need removal for best results. Repair any damage to keep furniture stable during the process. Solid furniture ensures a smooth and lasting finish.
Gathering Essential Tools And Materials
Before starting to distress outdoor wood furniture, gather all tools and materials. Having everything ready makes the process smooth and enjoyable. Use simple tools to get a natural distressed look. Some supplies help add extra character to your furniture.
Basic Tools Needed
Start with basic tools. Sandpaper works well for softening edges and removing paint. A hammer or chain can create dents and marks. Use a wire brush to add texture. Screwdrivers or nails help make small holes. Gloves protect your hands during work.
Optional Decorative Supplies
Optional supplies add more style to your furniture. Paint or stain helps create color variations. Whitewash adds a faded, vintage look. A cloth or rag works for wiping or rubbing finishes. Wax or sealant protects the wood after distressing. Small brushes help with detailed work.
Preparing The Furniture Surface
Preparing the furniture surface is the first step to distressing outdoor wood furniture. It ensures the wood is ready for aging effects. Proper preparation helps the distressing process last longer and look natural.
Start by cleaning the wood to remove dirt and grime. Then, remove old finishes to expose fresh wood underneath. These steps create the perfect base for distressing.
Cleaning And Drying
Use a soft brush or cloth to clean the furniture. Remove dust, dirt, and spider webs carefully. For tougher stains, mix mild soap with water and scrub gently. Rinse with clean water to wash off soap.
Let the wood dry completely. Drying can take from a few hours to a full day. Dry wood absorbs paint and stains better. Moisture in the wood can cause problems later.
Removing Existing Finishes
Old paint or varnish can block distressing effects. Use sandpaper or a chemical stripper to remove these finishes. Sand with medium grit paper to avoid deep scratches. Always sand in the direction of the wood grain.
For chemical strippers, follow the instructions carefully. Wear gloves and work in a well-ventilated area. After stripping, clean the surface again to remove residue. Let the wood dry fully before moving on.

Credit: satoridesignforliving.com
Techniques For Distressing Wood
Distressing outdoor wood furniture adds charm and character. It makes new wood look aged and worn naturally. Several techniques help create this weathered effect. Each method brings unique texture and color to the wood. Choose the right technique based on your style and tools available.
Creating Natural Wear And Tear
Focus on areas that get the most use. Gently sand edges and corners to mimic natural wear. Use coarse sandpaper for rough spots and fine sandpaper for smooth areas. Lightly hit the wood with a hammer or chain to create dents. These marks simulate years of use and exposure.
Using Tools To Add Texture
Use wire brushes to add wood grain texture. Scrape the surface with a metal comb for grooves. Small chisels can create tiny cuts and scratches. These tools help imitate the roughness of old wood. Work slowly and check your progress often.
Applying Paint And Stain Layers
Start with a base coat of paint or stain. Let it dry completely. Lightly sand parts of the surface to reveal the layer underneath. Apply a second color or stain over the first coat. Use a rag to wipe off excess paint for a faded look. This layering gives depth and a worn appearance.
Enhancing Rustic Appeal
Enhancing the rustic appeal of outdoor wood furniture gives it charm and character. Distressing the wood makes it look natural and aged. This style fits well in gardens and patios. It brings warmth and a cozy feel to your outdoor space.
Sanding For Softened Edges
Sanding is key to achieving a rustic look. Use medium-grit sandpaper to smooth rough spots. Focus on edges and corners to soften sharp lines. Sand lightly to avoid removing too much wood. This process creates a worn, weathered effect that feels natural.
Pay attention to areas that get touched often. These spots should look more worn than others. Sanding adds texture and depth to your furniture. It helps the wood look like it has aged over time.
Adding Wax Or Sealant
After sanding, protect the wood with wax or sealant. Choose a clear wax or matte sealant for a natural finish. These products prevent damage from weather and moisture. They also enhance the wood’s grain and color.
Apply wax or sealant with a soft cloth or brush. Spread it evenly across all surfaces. Let it dry completely before using the furniture. This step keeps your rustic look lasting longer outdoors.
Maintaining Distressed Outdoor Furniture
Maintaining distressed outdoor furniture keeps it beautiful and long-lasting. This style shows wear and charm but still needs care. Dirt, moisture, and sun can harm wood over time. Taking simple steps preserves the look and strength of the furniture.
Regular Cleaning Tips
Dust and dirt can build up quickly on outdoor wood. Use a soft brush or cloth to remove loose dirt. Clean the furniture with mild soap and water. Avoid harsh chemicals that might damage the wood’s finish. Rinse well and dry with a clean towel. Clean at least once a month for the best results.
Seasonal Care Advice
Season changes affect outdoor wood differently. In spring, check for cracks or peeling paint. Sand and touch up areas as needed. During summer, protect furniture from strong sunlight. Use covers or move pieces to shaded spots. In fall, clear leaves and debris regularly. Winter needs extra protection against moisture and cold. Store furniture indoors or cover tightly to prevent damage.

Credit: furnitureroots.com
Frequently Asked Questions
How Do I Start Distressing Outdoor Wood Furniture?
Begin by cleaning the wood thoroughly to remove dirt and grime. Sand the surface lightly to create texture. Use tools like wire brushes or chains to add marks. Always work in a well-ventilated area and wear safety gear.
What Materials Are Best For Distressing Wood Furniture?
Common materials include sandpaper, steel wool, wire brushes, and chains. These tools help create scratches, dents, and worn edges. Choose materials based on the desired distress level and wood type for best results.
Can I Distress Wood Furniture Without Damaging It?
Yes, by sanding gently and using light tools, you control the effect. Test on a small area first to avoid over-distressing. Take your time to maintain the furniture’s structural integrity and appearance.
How Can I Protect Distressed Outdoor Wood Furniture?
Apply a weather-resistant sealant or outdoor varnish after distressing. This protects wood from moisture, UV rays, and insects. Reapply the protective finish regularly to prolong furniture life and maintain the distressed look.
Conclusion
Distressing outdoor wood furniture adds charm and character. It hides scratches and wear from weather. You can use simple tools and techniques to achieve this look. Take your time and work carefully for best results. This process also helps protect your furniture longer.
Enjoy your unique, rustic outdoor space with confidence. Try distressing to refresh old pieces easily. It’s a fun way to give your furniture new life.


