Are you tired of cluttered spaces and looking for a way to showcase your favorite books in style? Creating a bookshelf wall might be exactly what your room needs.
Imagine having a stunning display that not only organizes your collection but also becomes the centerpiece of your space. In this guide, you’ll discover simple steps to build a bookshelf wall that fits your style and needs. Whether you’re a beginner or just looking for fresh ideas, this article will help you transform your walls into a beautiful, practical storage solution you’ll love.
Ready to make your space more inviting and uniquely yours? Let’s get started!
:max_bytes(150000):strip_icc()/dominiquegebruinsta-35b11dd4f037417980649e06e17c4027.jpg)
Credit: www.thespruce.com
Choosing The Right Wall
Choosing the right wall is the first step in creating a beautiful bookshelf wall. The wall you select affects the look and strength of your shelves. It also decides how much space you have for books and decorations.
Think about walls that are visible and easy to access. A good wall makes your bookshelf a central part of the room. It should also support the weight of shelves and books safely.
Assessing Wall Space
Check the wall space carefully. Look for a spot that has enough room for the size of your bookshelf. The wall should not be cluttered with other furniture or decorations. Choose a space where your bookshelf can stand out and be useful.
Considering Wall Material
Identify the wall material before you start. Drywall, brick, or concrete all need different tools and anchors. Knowing the material helps you pick the right screws and supports. Solid walls hold heavy shelves better than thin or hollow ones.
Measuring Dimensions
Measure the width and height of the wall precisely. Use a tape measure to get exact numbers. Write down the measurements to plan shelf sizes. Remember to leave space for walking and other furniture nearby. Accurate measurements ensure your bookshelf fits perfectly.
Selecting Bookshelf Style
Selecting the right bookshelf style shapes the entire look of your wall. It sets the tone for your space. The style must fit your room and your needs. Size, shape, and function all matter. Consider how much space you have and what you want to store or display. The right choice can make your room feel bigger and more organized.
Floating Shelves
Floating shelves offer a clean, modern look. They attach directly to the wall with no visible supports. This style works well in small rooms. It saves floor space and makes the room feel open. Floating shelves are perfect for showing off books and decor. You can arrange them in many patterns. They are easy to install and update.
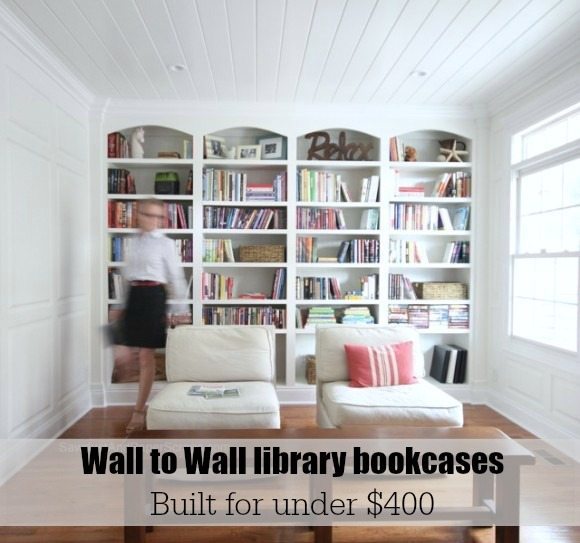
Built-in Shelves
Built-in shelves blend seamlessly with your walls. They create a custom, polished appearance. This style fits perfectly in any nook or corner. Built-ins add value to your home. They hold many books and larger items. You can paint or stain them to match your room. Built-in shelves often become a room’s focal point.
Modular Units
Modular units are flexible and easy to change. They come in separate pieces you can arrange as needed. This style adapts to different spaces and styles. Modular shelves are great for renters or those who move often. You can mix sizes and shapes for a unique look. They also provide storage for books and other items.
Gathering Materials And Tools
Building a bookshelf wall starts with gathering the right materials and tools. This step sets the foundation for a smooth project. Having everything ready saves time and avoids interruptions. Knowing what you need helps you work safely and efficiently.
Essential Tools
Basic tools include a drill, screwdriver, and a level. A tape measure helps you get precise measurements. A stud finder locates wall studs for secure mounting. Sandpaper smooths rough edges on wood. A saw is necessary to cut shelves to size. Clamps hold pieces together while you work.
Recommended Materials
Choose sturdy wood like pine, oak, or plywood for shelves. Use wood screws and wall anchors for strong support. Wood glue adds extra strength to joints. Paint or stain finishes protect wood and improve looks. Brackets or cleats hold shelves firmly in place.
Safety Gear
Wear safety glasses to protect your eyes from dust and debris. Use ear protection if using loud power tools. Gloves protect your hands from splinters and sharp edges. A dust mask keeps you safe from inhaling wood particles. Dress in comfortable clothes that cover your skin.
Credit: sawdustgirl.com
Preparing The Wall
Preparing the wall is the first step in creating a beautiful bookshelf wall. This step ensures your shelves will be strong and safe. Taking time here saves problems later. Follow these simple tasks for a smooth start.
Cleaning Surface
Start by cleaning the wall surface. Dust and dirt can stop shelves from sticking properly. Use a damp cloth to wipe down the wall. Let it dry fully before moving on. A clean wall helps paint or primer stick well.
Marking Layout
Plan where each shelf will go. Use a pencil to mark lines on the wall. Measure carefully for equal spaces between shelves. Mark the height and width for each shelf. This step guides you when installing brackets or supports.
Finding Studs
Studs are wooden beams behind the drywall. Shelves need to attach to studs for strength. Use a stud finder tool to locate them. Mark the stud positions with a pencil. Avoid placing shelves only on drywall or plaster. Studs keep shelves safe from falling.
Installing The Shelves
Installing the shelves is the key step in creating a sturdy bookshelf wall. This part needs care and accuracy. Proper installation ensures your shelves hold books safely and look great.
Follow clear steps for a strong and level setup. Use good tools and materials for best results. Let’s explore how to install the shelves step by step.
Mounting Brackets
Start by choosing the right mounting brackets. Brackets support the shelves and carry the weight of your books. Pick strong brackets that fit your shelf size. Attach brackets to the wall studs for stability. Use a drill and screws to secure them tightly. Space brackets evenly along the wall for balance.
Securing Shelves
Place the shelf boards on the mounted brackets. Make sure they fit snugly without gaps. Secure shelves to brackets with screws or nails. This prevents the shelves from moving or falling. Check that screws are flush with the shelf surface. This step keeps the shelf steady and safe for heavy books.
Ensuring Level Alignment
Use a level tool to check shelf alignment. Hold the level on top of each shelf. Adjust shelves until the bubble is centered. This ensures books do not slide or tilt. Re-check after securing shelves to brackets. Proper leveling gives your bookshelf a neat and professional look.
Finishing Touches
Finishing touches bring your bookshelf wall to life. They improve its look and make it last longer. Focus on smooth surfaces, color, and style. Small details help the bookshelf fit your room perfectly. Organizing books and items completes the whole project.
Sanding And Painting
Start by sanding all surfaces with fine-grit sandpaper. Smooth edges and corners prevent splinters. Wipe dust away with a clean cloth. Choose paint or stain that matches your room’s color. Apply thin, even coats for the best finish. Let each coat dry fully before the next. Paint adds protection and style to the wood.
Adding Decorative Elements
Decorative touches give your wall personality. Add trim or molding for a classic look. Use wallpaper or decals on the back panel for color. Attach small hooks to hang plants or keys. Lighting strips or spotlights highlight your books. Keep decorations simple to avoid clutter.
Organizing Books And Items
Sort books by size, color, or topic. Mix books with decorative objects for balance. Use baskets or boxes to hide small items. Leave some empty space for an airy feel. Rotate books and decorations to keep the wall fresh. A well-organized shelf looks neat and inviting.
Maintenance Tips
Maintaining your bookshelf wall keeps it looking great and safe for use. Simple care steps help your bookshelf last longer. Regular attention stops small problems from growing.
Regular Cleaning
Dust your bookshelf often. Use a soft cloth or duster. Cleaning removes dust that can damage wood over time. Avoid wet cloths that may harm the finish. Keep books and objects clean too.
Checking Stability
Check the bookshelf for loose screws or nails. Make sure shelves are level and strong. Tighten any loose parts to prevent accidents. Stability checks protect your books and walls.
Refreshing Paint
Paint can fade or chip with time. Touch up spots to keep your shelf fresh. Use paint that matches the original color. A fresh coat also protects the wood from damage.
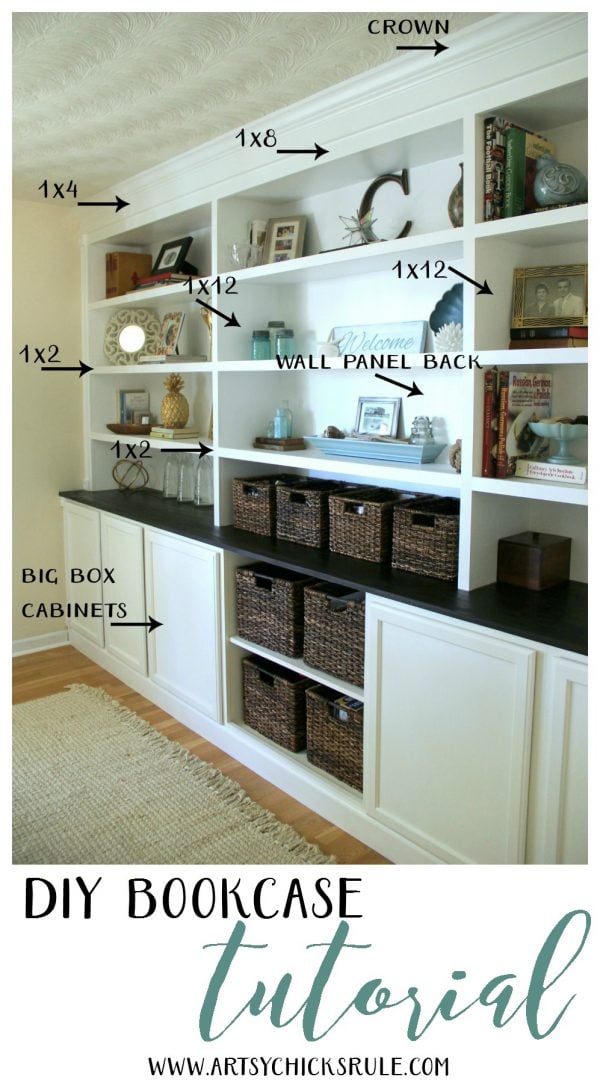
Credit: www.artsychicksrule.com
Frequently Asked Questions
What Materials Do I Need For A Bookshelf Wall?
You need wood boards, brackets, screws, a drill, level, measuring tape, and wall anchors. Choose sturdy wood for durability and brackets that support the weight of your books.
How Do I Measure For A Bookshelf Wall?
Measure the wall’s width and height accurately. Plan shelf spacing based on book sizes. Mark stud locations for secure bracket installation to ensure stability and safety.
Can I Install A Bookshelf Wall Myself?
Yes, with basic DIY skills and proper tools, you can install a bookshelf wall. Follow step-by-step instructions carefully and ensure shelves are level and securely anchored.
How Much Weight Can A Bookshelf Wall Hold?
Weight capacity depends on wood type, bracket strength, and wall anchors used. Proper installation on studs can support heavy books safely, usually up to 50 pounds per shelf.
Conclusion
Creating a bookshelf wall adds charm and space to any room. You can organize books, photos, and decorations with ease. Measuring and planning carefully saves time and effort. Using the right tools makes the project smoother. Enjoy the process and take pride in your work.
A bookshelf wall brings personality and function together. Start your project today and watch your room transform. Simple steps lead to great results. Your new wall will be both useful and beautiful.