Are you looking for a sturdy, space-saving bed that stands up to everyday wear and tear? A military bunk bed might be exactly what you need.
Whether you want to create a practical sleeping area for your kids, guests, or even a small living space, building your own military bunk bed can save you money and give you a strong, reliable piece of furniture. In this guide, you’ll discover simple steps and useful tips to make your own bunk bed that looks great and lasts long.
Ready to turn your space into something smart and functional? Keep reading, and you’ll have your very own military bunk bed before you know it.

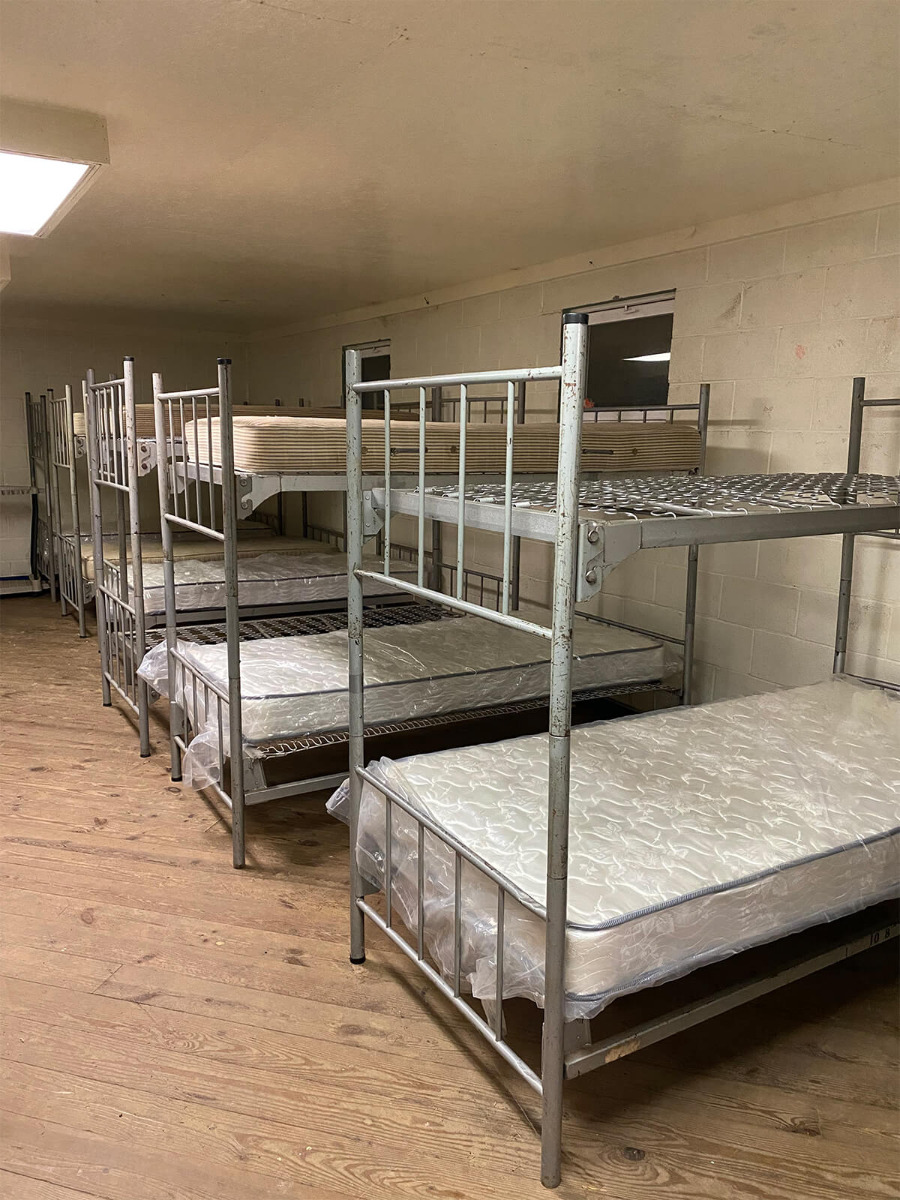
Credit: colemans.com
Materials And Tools Needed
Building a military bunk bed needs the right materials and tools. This section explains what you need to start your project. Choosing good wood, the right hardware, and proper tools helps create a strong and safe bunk bed.
Wood Selection
Use solid wood for a strong frame. Pine, oak, or maple work well. Pine is affordable and easy to cut. Oak and maple are harder and last longer. Choose wood that is smooth and free of cracks. Avoid wood with knots or splits. This keeps the bunk bed safe and sturdy.
Hardware Essentials
Strong hardware holds the bed parts together. Use wood screws that are long and thick. Metal brackets add extra support to corners. Use bolts and nuts for the main joints. Sandpaper helps smooth rough edges. Don’t forget wood glue for extra strength.
Required Tools
Tools make building easier and safer. A saw cuts wood to size. A drill makes holes for screws and bolts. A screwdriver tightens hardware securely. A measuring tape helps get exact sizes. A level checks if parts are straight. Clamps hold wood pieces while you work.
Designing The Bunk Bed
Designing a military bunk bed requires careful thought and planning. This step sets the foundation for a strong, practical, and safe bed. A well-designed bunk bed fits the space and meets user needs. It also ensures comfort and durability. Focus on three key areas: dimensions, frame structure, and safety features.
Each part works together to create a bunk bed that lasts and serves well. Starting with the right size helps the bed fit perfectly. A sturdy frame supports weight and use. Safety keeps everyone secure while using the bed.
Choosing Dimensions
Start by measuring the room where the bunk bed will go. Standard military bunk beds usually fit twin-size mattresses. These measure about 39 inches wide and 75 inches long. Decide on the height, keeping enough space between bunks. Leave room for the top bunk to sit comfortably without hitting the ceiling. Make sure the bed fits well without crowding the room. Consider extra space for a ladder and easy access.
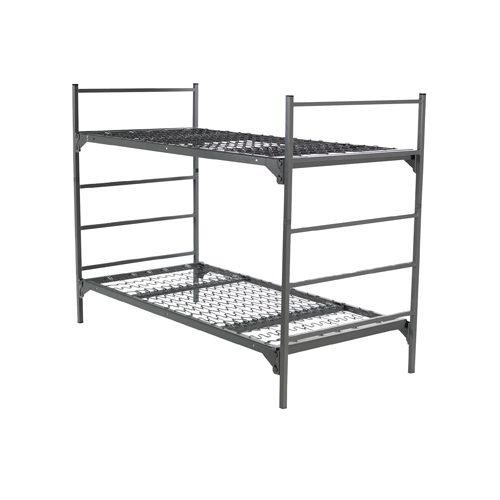
Planning The Frame
The frame must be strong and stable. Use solid wood or metal for durability. Wood types like pine or oak work well. Metal frames add a modern, sturdy touch. Plan for thick support beams to hold weight safely. Design crossbars and slats to support the mattress evenly. Include a ladder that is easy to climb and secure. Think about how to join parts firmly using screws or bolts. Avoid nails that can loosen over time.
Safety Considerations
Safety is the top priority in bunk bed design. Add guardrails on the top bunk to prevent falls. Make sure the rails are high enough and strong. Check that spaces between rails are narrow to stop slipping through. Use smooth edges and rounded corners to avoid injuries. Ensure the ladder is steady and attached well. Test the bed to hold weight without wobbling. Finally, keep the space under the bed clear to avoid accidents.
Cutting The Wood
Cutting the wood is a crucial step in building a military bunk bed. Accurate cuts ensure the bed fits together well and stays strong. Taking time here saves effort later. Wood must be cut to exact sizes for safety and stability. Follow clear steps to measure and cut with confidence.
Measuring Accurately
Measure twice, cut once. Use a tape measure for precise lengths. Mark the wood with a pencil at the right points. Double-check all measurements before cutting. Measure each piece carefully, including side rails and slats. Accurate marking helps avoid mistakes and wasted wood.
Cutting Techniques
Use a saw suitable for the wood thickness. A circular saw works well for straight cuts. Hold the wood steady with clamps or a helper. Cut slowly and follow the marked lines closely. Smooth rough edges with sandpaper after cutting. Clean, straight cuts make assembly easier and safer.
Credit: colemans.com
Assembling The Frame
Assembling the frame is a key step in making a military bunk bed. The frame holds the entire bed together. It must be strong and stable to support the mattress and sleepers. Follow these steps carefully to build a solid base for your bunk bed.
Building The Bed Posts
Start by preparing four sturdy bed posts. Use solid wood or metal for strength. Cut each post to the same height. Sand the edges smooth to avoid splinters. Drill holes for screws or bolts as per your design. These posts will hold the entire structure upright and steady.
Attaching Side Rails
Next, connect the side rails to the bed posts. The rails run lengthwise along the bed. Position them at the desired height for the mattress. Use screws or bolts to secure the rails tightly. Check that the rails are level and flush with the posts. This creates the frame’s outline and supports the mattress sides.
Securing The Slats
Lay the slats across the side rails. Slats hold the mattress and distribute weight evenly. Space the slats evenly to prevent mattress sagging. Attach each slat with screws or nails for a firm fit. Double-check all connections for safety. Proper slat placement ensures the bed frame is strong and durable.
Adding The Ladder And Guardrails
Adding the ladder and guardrails makes the bunk bed safe and easy to use. The ladder lets you climb up and down without trouble. Guardrails keep the sleeper secure and prevent falls. Both parts need careful building and strong materials. Follow simple steps for a sturdy, reliable setup.
Ladder Construction
Start by cutting two long wooden boards for the ladder sides. Make sure they fit the bunk bed height. Cut several shorter boards for the steps. Space the steps evenly along the ladder sides. Attach the steps with screws for strong support. Sand all edges to avoid splinters. Check the ladder angle for easy climbing. Paint or seal the wood to protect it.
Installing Guardrails
Measure the length of the bed’s top bunk. Cut two long boards for the guardrails. Cut shorter boards as vertical supports. Attach the vertical supports evenly along the guardrails. Fix the guardrails to the bunk bed frame using screws. Make sure the guardrails are high enough to stop falls. Sand all edges for safety. Check the guardrails are firm and stable before use.
Finishing Touches
Finishing touches make your military bunk bed both safe and attractive. This stage ensures the bed is smooth, strong, and ready for use. Spend time on these last steps to improve durability and comfort.
Sanding And Smoothing
Use sandpaper to smooth all wood surfaces. Focus on edges and corners to avoid splinters. Sand until the wood feels soft and even. Clean off dust with a dry cloth before the next step.
Applying Paint Or Stain
Choose paint or stain to protect the wood. Use a brush to apply thin, even layers. Let each coat dry fully before adding another. This protects the bed from moisture and wear.
Final Safety Checks
Check all screws and bolts for tightness. Make sure the bed frame is stable and solid. Look for sharp points or rough spots. Fix any problems before using the bunk bed.
Maintenance Tips
Keeping your military bunk bed in good shape is key for safety and comfort. Regular care helps the bed last longer and stay sturdy. Follow these simple maintenance tips to keep your bunk bed strong and clean.
Regular Inspections
Check the bunk bed often for any signs of damage. Look for cracks, bent parts, or worn-out sections. Make sure the bed frame stays stable and does not wobble. Catching problems early stops bigger issues later.
Tightening Loose Screws
Loose screws make the bunk bed unsafe. Use a screwdriver to tighten all screws regularly. Pay special attention to joints and connection points. Tight screws keep the bed firm and prevent accidents.
Cleaning Advice
Dust and dirt can wear down the bed’s finish. Clean the bunk bed with a soft cloth and mild soap. Avoid using harsh chemicals that may damage the surface. Keeping the bed clean helps it look new and last longer.
Credit: medmattress.com
Frequently Asked Questions
What Materials Are Needed For A Military Bunk Bed?
You need sturdy wood or metal, screws, bolts, a drill, measuring tape, and sandpaper. Quality materials ensure durability and safety.
How Long Does It Take To Build A Military Bunk Bed?
Building usually takes 4 to 6 hours, depending on your skill level and tools. Planning beforehand speeds up the process.
Is Building A Military Bunk Bed Safe For Beginners?
Yes, with clear instructions and basic tools, beginners can build safely. Follow guidelines carefully and double-check measurements.
Can I Customize The Size Of The Military Bunk Bed?
Absolutely. Adjust dimensions to fit your space while keeping structural integrity intact. Custom sizes enhance comfort and usability.
Conclusion
Building a military bunk bed can be simple and rewarding. Follow the steps carefully for a strong, safe bed. Choose the right materials and tools before starting. Take your time to measure and cut each piece. Secure all parts tightly to avoid any accidents.
A well-made bunk bed saves space and looks great. Enjoy your new bed and the extra room it creates. Keep safety in mind at every step. You now have the skills to build a sturdy military bunk bed.