Imagine having a stunning wall-sized bookshelf that not only holds all your favorite books but also becomes the centerpiece of your room. You might think building one is too hard or expensive, but what if you could create it yourself, step by step?
In this guide, you’ll discover simple, clear instructions that make the process easy and rewarding. By the end, you’ll have a beautiful, custom bookshelf that fits your space perfectly—and you’ll feel proud every time you look at it. Ready to transform your wall and your home?
Let’s get started!
Planning Your Bookshelf
Planning your wall-sized bookshelf is the first step to a great project. Careful planning saves time and money. It helps avoid mistakes and ensures the shelf fits perfectly. This section guides you through the planning process. Follow each step to create a strong and beautiful bookshelf.
Choosing The Right Wall
Pick a wall that fits the bookshelf size. Look for a wall without doors or windows. Avoid walls with pipes or electric wires inside. A solid wall, like one made of wood or brick, holds the shelf better. Check the wall’s condition. Fix cracks or holes before building.
Measuring Space Accurately
Measure the height, width, and depth of the wall space. Use a tape measure for exact numbers. Write down all measurements clearly. Measure twice to avoid errors. Consider space for baseboards or moldings. Leave extra room for ventilation if needed.
Selecting Materials
Choose wood types that are strong and easy to work with. Plywood, pine, or MDF are good options. Pick screws and brackets that match the weight of books. Use paint or stain for a nice finish. Buy enough materials to cover your bookshelf size. Quality materials increase shelf life and safety.

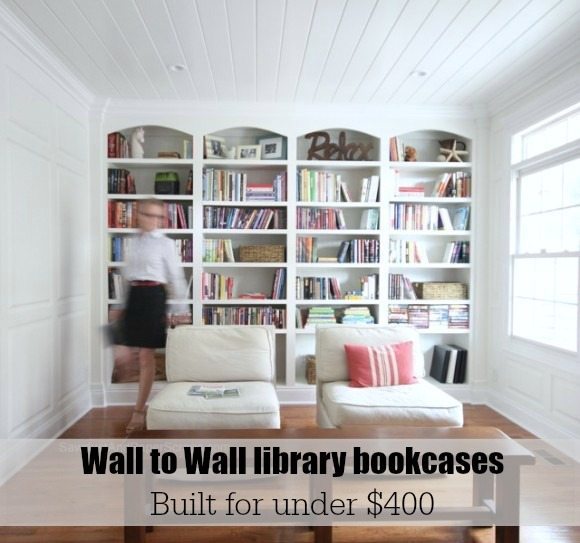
Credit: www.amazon.com
Designing The Bookshelf
Designing a wall-sized bookshelf takes careful planning. It is important to think about how the shelves will fit your space and needs. The design should balance function and style. This helps create a bookshelf that looks good and holds everything you want.
Start by deciding the shelf layout. Think about how many shelves you want. Then, consider the height and width of each shelf. This helps make sure your books and items fit well. Next, plan for storage needs. Some shelves can hold books. Others can store boxes or decorations. Finally, think about the style. Choose colors and shapes that match your room. A good design makes your bookshelf a great part of your space.
Deciding On Shelf Layout
First, measure the wall where the bookshelf will go. Decide how many shelves you want vertically and horizontally. Mix tall and short shelves for different book sizes. Leave space for larger items like photo frames or plants. Make sure shelves are strong enough for heavy books. A good layout uses all the available space well.
Incorporating Storage Needs
Think about what you need to store. Books need strong, level shelves. Boxes or baskets can hold small items. Add closed cabinets for items you want hidden. Open shelves show off decorations and photos. Mix open and closed storage for a neat look. Plan shelves by item size and frequency of use.
Considering Aesthetic Styles
Match the bookshelf style to your room decor. Use wood for a warm, classic look. Metal or glass gives a modern feel. Paint the shelves in colors that fit your theme. Choose simple shapes for a clean look. Add decorative trim for a traditional style. The right style makes your bookshelf stand out and feel part of your room.
Gathering Tools And Supplies
Building a wall-sized bookshelf needs careful planning and the right tools. Gathering tools and supplies before starting saves time and avoids interruptions. This step sets the foundation for a smooth building process. Focus on quality tools and materials for safety and durability.
Essential Tools List
Prepare a list of necessary tools for the project. You will need a tape measure to get exact dimensions. A saw is required to cut wood pieces to size. Use a drill for screws and fasteners. A level ensures shelves are straight and even. Sandpaper smooths rough edges. A hammer helps with nails. Safety gear such as gloves and goggles protects you during work.
Material Preparation Tips
Choose sturdy wood like plywood or hardwood for shelves. Measure and mark all pieces before cutting. Cut wood on a stable surface for safety and accuracy. Sand edges to avoid splinters. Sort screws and nails by size to save time during assembly. Keep materials organized and within reach for efficiency. Proper preparation prevents mistakes and speeds up the building process.
Credit: sawdustgirl.com
Building The Frame
Building the frame is the first big step in making a wall-sized bookshelf. This step creates the strong base that holds all shelves and books. A well-built frame makes the whole bookshelf safe and steady. It also helps the bookshelf look neat and professional.
Cutting Lumber Precisely
Start by measuring the space for your bookshelf. Cut lumber pieces to the exact length needed. Use a sharp saw to make clean, straight cuts. Accurate cuts help parts fit together well. Mark each piece clearly to avoid confusion later.
Assembling The Structure
Arrange the cut lumber on a flat surface. Join vertical and horizontal pieces to form the frame. Use wood glue and screws for a strong bond. Check that corners are square using a carpenter’s square. Work slowly to keep the frame even and balanced.
Ensuring Stability
Add extra support by attaching braces at the corners. These braces stop wobbling and keep the frame steady. Tighten all screws firmly, but avoid splitting the wood. Place the frame against the wall to check its fit. Adjust if needed before moving to the next step.
Installing Shelves
Installing shelves on a wall-sized bookshelf is a key step. It shapes how your books and items will sit. Careful placement and strong support keep your shelves steady and safe. Follow these simple steps to install your shelves correctly.
Marking Shelf Positions
Start by measuring the space for each shelf. Use a pencil to mark where the brackets will go. Keep marks level to avoid tilted shelves. Double-check measurements before drilling holes.
Securing Shelves Firmly
Attach brackets or supports to the wall with screws. Use a drill to make strong holes in studs. Make sure shelves fit tightly on the brackets. Avoid loose or wobbly shelves for safety.
Adjusting For Weight Capacity
Choose thicker shelves for heavy books. Space brackets closer together for better support. Test shelves by placing weight gently. Adjust support if shelves bend or feel weak.
Finishing Touches
The finishing touches make your wall-sized bookshelf look complete. These steps protect the wood and improve its appearance. Taking time here ensures a smooth, attractive, and durable shelf that fits your space well.
Sanding And Smoothing
Start by sanding all surfaces with medium-grit sandpaper. This removes rough spots and splinters. Next, use fine-grit sandpaper for a smooth finish. Always sand in the direction of the wood grain. Wipe away dust with a clean cloth before moving to the next step.
Applying Paint Or Stain
Choose paint or stain based on your desired look. Use a brush or roller for even coverage. Apply thin coats to avoid drips and uneven color. Let each coat dry completely before adding another. Paint gives a solid color, while stain highlights the wood’s natural texture.
Adding Decorative Elements
Decorative touches personalize your bookshelf. Add trim or molding around edges for a classic style. Attach metal brackets or corner protectors for a modern feel. Consider wallpaper or decals on the back panel for a pop of color. Small details make your bookshelf unique and stylish.
Maintaining Your Bookshelf
Maintaining your wall-sized bookshelf keeps it looking good and lasting long. Regular care stops dust and damage from building up. Simple steps help your bookshelf stay strong and neat. Small upgrades can improve its look and function over time.
Regular Cleaning Tips
Dust your bookshelf often using a soft cloth. Wipe shelves gently to avoid scratches. Use a vacuum with a brush tool for corners. Clean books by dusting their covers too. Avoid wet cloths that can damage wood or paint.
Preventing Damage
Keep the bookshelf away from direct sunlight to stop fading. Avoid placing heavy items on weak shelves. Use coasters for drinks near the bookshelf. Fix loose screws or nails right away. Protect the bookshelf from moisture and spills.
Upgrading Over Time
Add new shelves if you need more space. Paint or stain the bookshelf to refresh its look. Install small lights to highlight your books. Use decorative brackets for extra support and style. Replace worn parts to keep the bookshelf safe.
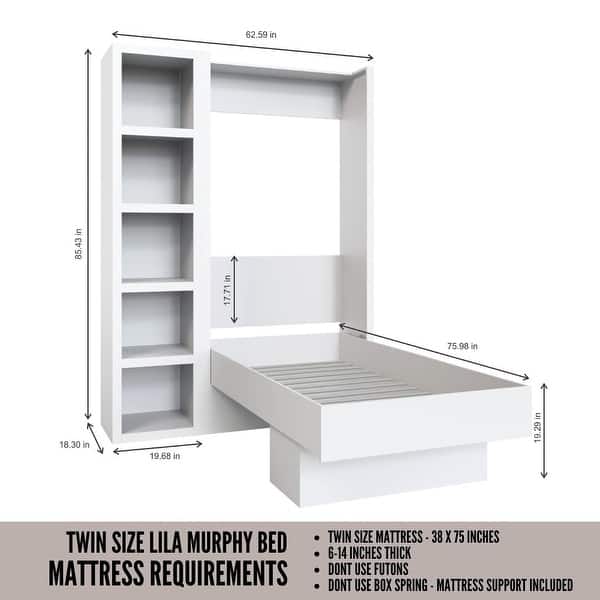
Credit: www.bedbathandbeyond.com
Frequently Asked Questions
What Materials Are Needed To Build A Wall-sized Bookshelf?
You need plywood or MDF boards, wood screws, brackets, wood glue, sandpaper, paint or stain, and wall anchors. These materials ensure durability and stability for your large bookshelf project.
How Do I Measure Space For A Wall-sized Bookshelf?
Measure the wall’s width, height, and depth carefully. Account for baseboards and outlets. Accurate measurements prevent fitting issues and ensure the bookshelf complements the room.
What Tools Are Required For Constructing A Large Bookshelf?
Essential tools include a saw, drill, screwdriver, level, measuring tape, and clamps. These tools help you cut, assemble, and secure the bookshelf safely and precisely.
How To Ensure The Bookshelf Is Securely Mounted To The Wall?
Use heavy-duty wall anchors and studs to mount the bookshelf. Secure brackets at multiple points. This prevents tipping and enhances safety for your wall-sized bookshelf.
Conclusion
Building a wall-sized bookshelf takes time and care. Measure your space well before starting. Choose strong materials that fit your budget. Take it step by step and stay patient. This project brings both style and storage to your room. Enjoy placing your favorite books and decorations on it.
A big bookshelf can change how your room feels. Try this project and see the difference it makes.