Looking for a simple way to add charm and function to your home? Making a wood peg coat rack is easier than you think, and it’s a project you’ll be proud of.
Imagine having a stylish spot to hang your coats, bags, or keys—right by your door. In this guide, you’ll discover step-by-step instructions that anyone can follow. You don’t need fancy tools or expert skills, just a bit of time and a few materials.
Ready to create something useful and beautiful? Let’s get started!
Materials And Tools
Creating a wood peg coat rack starts with gathering the right materials and tools. Choosing good wood and pegs affects how strong and nice your rack will look. Having the right tools makes the work easier and safer. This section helps you pick what you need to start building your coat rack.
Wood Selection
Pick wood that is strong and smooth. Pine and oak are popular choices. Pine is soft and easy to cut. Oak is harder and lasts longer. Avoid wood with many knots or cracks. These can make the rack weak. Sand the wood well to make it smooth to touch.
Types Of Pegs
Wooden pegs come in different shapes and sizes. Round pegs are classic and easy to find. Flat pegs offer a modern look. Choose pegs that match the wood color for a neat finish. Make sure the pegs are strong to hold coats and bags. The length should be enough to hang items without falling.
Necessary Tools
Basic tools help you build your rack easily. A saw cuts the wood to size. A drill makes holes for the pegs. Sandpaper smooths rough edges. A measuring tape ensures correct sizes. Use screws and a screwdriver to fix parts together. Safety glasses protect your eyes while working.

Credit: www.youtube.com
Design Planning
Design planning is the first step to make a wood peg coat rack. It helps you create a rack that fits your space and style. Good planning saves time and materials. It also ensures the rack is strong and useful.
Think about the size, layout, and style before you start building. Each part matters to make a great coat rack.
Choosing The Size
Decide where the rack will hang. Measure the wall space carefully. Choose a length that fits the area without crowding it. Think about how many coats or bags you want to hang. This helps pick the right number of pegs. Also, consider the height for easy reach. A good size makes the rack both useful and neat.
Layout And Spacing
Plan the peg layout to fit your needs. Space pegs evenly for a balanced look. Leave enough room between pegs to hang coats without overlap. Too close pegs make it hard to use. A simple straight line works well. Or try a staggered pattern for style. Mark the spots before drilling to avoid mistakes.
Style Inspiration
Choose a style that matches your room. Rustic wood looks warm and cozy. Smooth painted wood adds a clean, modern touch. Round or square pegs change the rack’s feel. Think about adding hooks or shelves for extra use. Look at photos online or in magazines. Pick ideas that fit your taste and skill.
Cutting And Preparing Wood
Cutting and preparing wood is a key step in making a wood peg coat rack. It shapes the wood pieces that hold your coats. Taking time here ensures the rack looks good and lasts long. Proper cutting and smoothing make assembly easier and the final product safe to use. Follow these steps to get your wood ready.
Measuring And Marking
Start by measuring the wood carefully. Use a tape measure or ruler for accuracy. Mark the cutting lines with a pencil. Double-check each mark before cutting. Clear marks guide your cuts and prevent mistakes. Mark all pieces needed for your coat rack clearly.
Cutting Techniques
Use a saw suitable for your wood type. A handsaw or a power saw both work well. Cut slowly along the pencil lines for clean edges. Keep your hands steady to avoid slips. Cut each piece one at a time. Proper cuts reduce the need for extra sanding later.
Sanding And Smoothing
Sand each cut edge to remove rough spots. Use medium-grit sandpaper to start. Then switch to fine-grit for a smooth finish. Smooth edges prevent splinters and make the rack safe. Sand all surfaces you will touch or see. Wipe off dust after sanding before assembly.
Attaching Pegs
Attaching the pegs is a key step in making a wood peg coat rack. This part holds the pegs firmly in place. It also sets the style and function of the rack. Properly attached pegs ensure the rack is strong and stable. Follow these steps carefully for the best results.
Drilling Peg Holes
Mark the spots where you want to place the pegs. Use a ruler to measure even distances. Drill holes that match the peg size. Drill slowly to avoid splitting the wood. Clean out any sawdust from the holes.
Fixing Pegs Securely
Use wood glue for a strong hold inside the holes. Insert each peg fully into its hole. Wipe off any extra glue that squeezes out. For extra strength, add small screws from behind the board. Let the glue dry completely before using the rack.
Ensuring Even Placement
Check the spacing between pegs carefully. Use a measuring tape to keep distances equal. Align pegs in a straight line for a neat look. Step back and view the rack from a distance. Adjust any pegs that look uneven before the glue dries.
Finishing Touches
Finishing touches make your wood peg coat rack both beautiful and strong. These steps protect the wood and prepare it for use. Each small detail improves the rack’s look and life. Let’s explore how to paint, seal, and mount your rack perfectly.
Painting Or Staining
Choose paint or stain to change the wood’s color. Paint covers the wood fully and offers many color options. Stain shows the wood’s natural grain and adds warmth. Use a brush or cloth for even coverage. Let it dry completely before moving on.
Sealing For Durability
Seal the rack to protect it from water and dirt. A clear varnish or polyurethane works well. Apply thin coats with a clean brush. Allow each coat to dry before adding the next. Sealing keeps the wood strong and looking new longer.
Adding Mounting Hardware
Choose sturdy hooks or brackets to hang your rack. Measure carefully to place hardware evenly. Attach screws firmly to hold the rack’s weight. Test the rack by hanging something heavy. Proper mounting ensures the rack stays safe and steady.
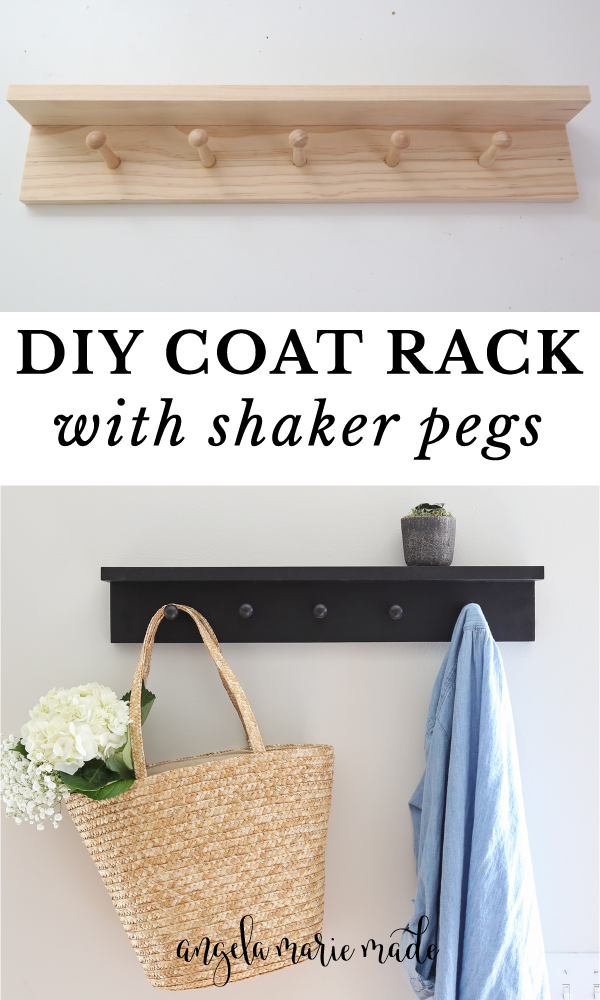
Credit: angelamariemade.com
Mounting The Rack
Mounting the wood peg coat rack correctly is important. It keeps the rack strong and safe to use. This step also makes the rack look neat on the wall. Follow the tips below for a secure and straight installation.
Choosing The Location
Pick a spot where the rack is easy to reach. Near the door or in a hallway works well. Avoid places with too much moisture or direct sunlight. Ensure the wall space fits the rack size perfectly. Measure the height so coats hang freely without touching the floor.
Wall Anchors And Screws
Use wall anchors for extra support on drywall. They stop the rack from pulling out under weight. Choose screws that fit the rack holes and anchors tightly. Metal anchors work best for heavy coats. Insert anchors before screwing in to keep the rack secure.
Leveling Tips
Use a level tool to keep the rack straight. Mark the screw holes lightly with a pencil first. Check the level again after marking. Drill pilot holes to guide screws and avoid wall damage. Tighten screws evenly to hold the rack flat against the wall.
Creative Variations
Creative variations make your wood peg coat rack unique and personal. Small changes can add style and function. Experiment with colors, materials, and shapes. This section shows simple ways to customize your rack.
Decorative Pegs
Choose pegs with fun shapes or patterns. Round, square, or star-shaped pegs add character. Paint pegs in bright or pastel colors. Use stencils to create designs on pegs. These details make your rack stand out.
Mixed Materials
Combine wood with metal or rope for contrast. Metal hooks mixed with wooden pegs add strength. Wrap peg ends with colorful rope for texture. Use reclaimed wood with smooth new pegs. Mixing materials brings a fresh look to the rack.
Personalized Designs
Add names or words to pegs with paint or engraving. Use stickers or decals for easy personalization. Attach small photo frames near pegs for memories. Customize sizes of pegs to hold different items. Personal touches make the rack truly yours.

Credit: www.spec-school.org
Maintenance Tips
Keeping your wood peg coat rack in good condition helps it last longer. Simple care and small fixes protect its beauty and strength. Follow these easy maintenance tips to enjoy your coat rack for years.
Cleaning Advice
Dust your coat rack regularly with a soft cloth. Use a damp cloth for sticky spots. Avoid harsh chemicals that can damage the wood finish. Dry the rack completely after cleaning to stop moisture damage.
Repairing Damages
Check for loose or broken pegs often. Tighten screws or glue pegs back in place. Fill small cracks or holes with wood filler. Sand the area smooth and touch up with matching paint or stain.
Extending Lifespan
Keep the rack away from direct sunlight to prevent fading. Avoid placing it in very humid or dry areas. Use wood polish or oil once in a while to nourish the wood. This keeps the rack looking fresh and strong.
Frequently Asked Questions
What Materials Are Needed For A Wood Peg Coat Rack?
You need wood planks, wooden pegs, screws, a drill, sandpaper, and wood finish. These basic materials are affordable and easy to find.
How Do You Attach Pegs Securely To Wood?
Drill pilot holes first, then insert screws through pegs into the wood. This ensures a sturdy and long-lasting hold.
Can I Customize The Size Of The Coat Rack?
Yes, you can cut the wood plank to any desired length. Adjust peg spacing to fit your space and needs.
What Type Of Wood Is Best For A Peg Coat Rack?
Hardwoods like oak, maple, or pine are durable and attractive. Choose a wood that matches your room’s decor.
Conclusion
Building a wood peg coat rack is simple and fun. You only need basic tools and some wood. Follow the steps carefully and take your time. This project adds charm and helps keep your space tidy. You can customize the rack to fit your style.
Try different wood types or paint colors. Enjoy the satisfaction of making something useful by yourself. Your home will feel more organized and cozy with this rack. Give it a try and see the difference it makes.