Are you ready to give your homemade outdoor furniture a beautiful, long-lasting finish? Staining and sealing your pieces not only enhances their natural beauty but also protects them from sun, rain, and wear.
If you want your furniture to look great season after season, knowing how to stain and seal properly is a must. In this guide, you’ll discover simple, step-by-step tips that make the process easy and effective—even if you’re new to woodworking.
Keep reading to learn how to turn your homemade creations into stunning, weatherproof treasures you’ll enjoy for years.
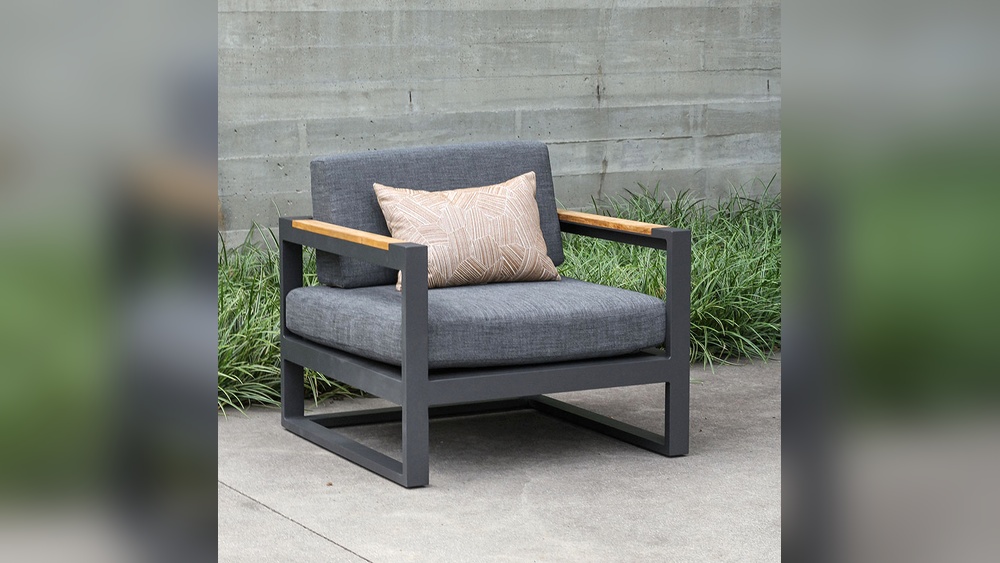
Credit: www.reddit.com
Choosing The Right Wood
Choosing the right wood is key to making strong and lasting outdoor furniture. Wood must resist weather and insects well. It should also look good and hold stain evenly. Selecting good wood saves time and effort in the long run. It helps your furniture stay beautiful for years. Learn about the best woods and how to prepare them before staining.
Best Wood Types For Outdoor Furniture
Cedar is a popular choice. It resists rot and bugs naturally. It has a nice smell and looks warm. Redwood also works well. It is strong and holds up in rain. Teak is very durable. It stays smooth and resists water. Pine can be used if treated well. It is cheaper but needs good sealing. Choose wood that fits your budget and style.
Wood Preparation Tips
Start by sanding the wood surface smooth. Remove any dirt or old paint. Clean the wood with a damp cloth. Let it dry completely before staining. Check for cracks or knots. Fill them with wood filler if needed. Sand again lightly for a smooth finish. Proper prep helps the stain soak in better. It also prevents peeling and flaking later.
Selecting Stain And Sealant
Selecting the right stain and sealant is key to protecting your outdoor furniture. These products keep wood safe from sun, rain, and dirt. They also improve the wood’s look and help it last longer.
Choose stain and sealant based on your wood type and outdoor conditions. The color and finish you want also matter. Knowing the options helps you pick the best one for your project.
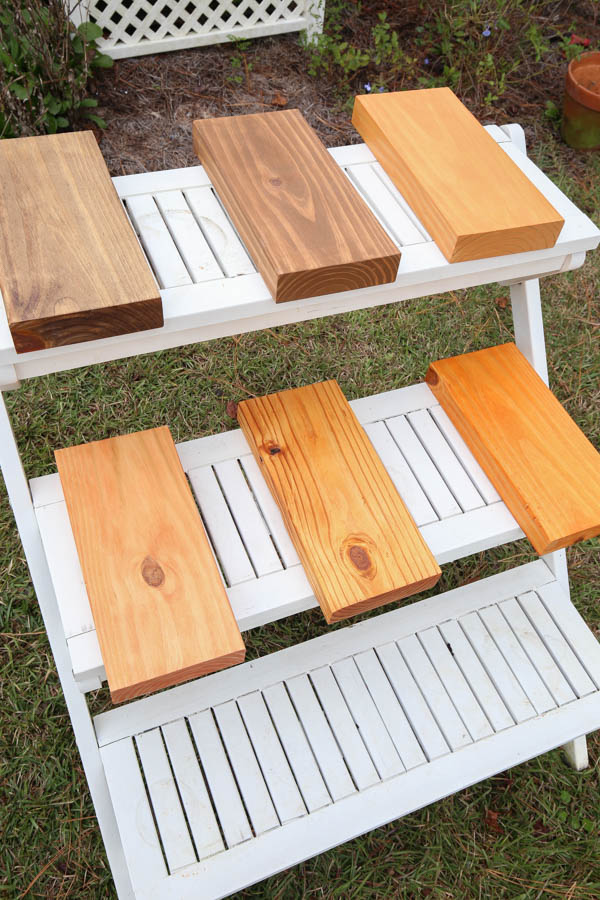
Types Of Stains For Outdoor Use
Oil-based stains soak deep into wood. They give strong protection and last a long time. These stains are good for rough or hard woods. They also help prevent cracking and peeling.
Water-based stains dry faster and clean up easily. They keep wood colors bright and do not have strong smells. These stains are safer for the environment. They work well on soft woods and new furniture.
Semi-transparent stains show the wood grain. They add color but still let the wood’s texture show. Solid stains cover the wood fully like paint. They hide imperfections but hide the wood grain.
Sealant Options And Benefits
Clear sealants protect wood without changing its color. They keep wood safe from water and sun damage. Use clear sealants if you want a natural wood look.
Polyurethane sealants create a hard, shiny layer. They resist scratches and stains well. These are best for heavy-use furniture.
Water repellents stop water from soaking into wood. They reduce swelling and warping. Use water repellents if your furniture faces a lot of rain.
Choose a sealant that matches your stain. This keeps your furniture strong and beautiful for years.
Preparing The Furniture
Preparing your homemade outdoor furniture is the first step before staining and sealing. This step ensures the wood surface is ready to absorb the stain evenly and the sealant will protect it well. Proper preparation extends the life of your furniture and keeps it looking great.
Cleaning And Sanding
Start by cleaning the furniture thoroughly. Remove dirt, dust, and old paint or stain. Use a mild soap and water solution or a wood cleaner. Let the furniture dry completely before moving on.
Sanding smooths the wood and opens the grain to hold stain better. Use medium-grit sandpaper first, then finish with fine-grit paper. Sand in the direction of the wood grain to avoid scratches. Wipe off dust with a clean cloth after sanding.
Repairing Imperfections
Check the furniture for cracks, holes, or rough spots. Fill small holes and cracks with wood filler. Let it dry fully, then sand the area smooth.
Loose joints or wobbly parts need tightening or gluing. Secure screws or nails to make the furniture sturdy. Fixing these issues now prevents damage later.
Credit: angelamariemade.com
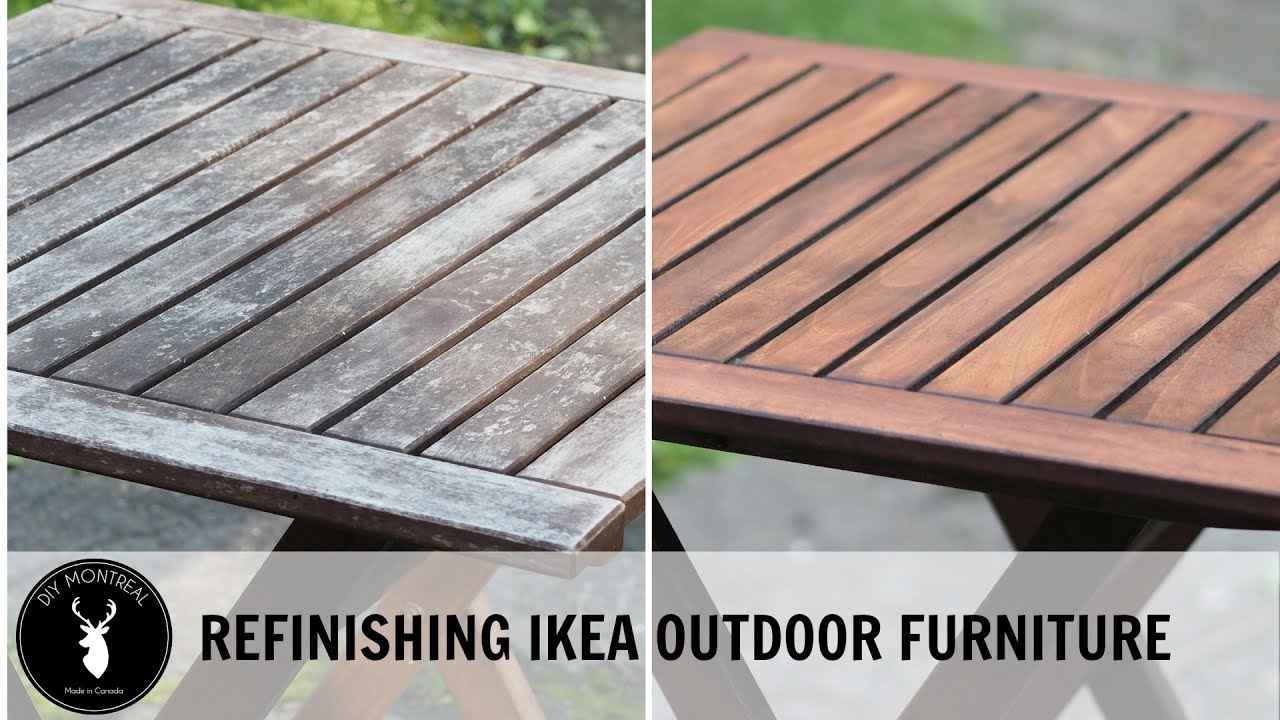
Applying The Stain
Applying stain to your homemade outdoor furniture protects the wood and enhances its natural beauty. This step gives your furniture a rich color and guards it from weather damage. Proper staining also helps the wood last longer and look better over time.
Tools And Materials Needed
- Wood stain (oil-based or water-based)
- Brush or foam applicator
- Clean cloths or rags
- Sandpaper (120-220 grit)
- Protective gloves
- Drop cloth or newspaper
- Paint tray or container
Step-by-step Staining Process
Start by sanding the furniture with fine-grit sandpaper. Sanding opens the wood grain for better stain absorption. Wipe off dust with a clean cloth. Pour stain into a tray or container. Use a brush or foam applicator to apply the stain evenly. Follow the wood grain to avoid streaks. Apply a thin coat for the best results. Let the stain soak in for 5 to 15 minutes. Wipe off excess stain with a clean cloth to prevent blotches. Add a second coat if a darker color is needed. Always test the stain on a hidden spot first.
Drying Time And Tips
Let the stain dry completely before sealing. Drying usually takes 24 to 48 hours. Keep furniture in a dry, shaded area while drying. Avoid touching or moving the furniture during this time. Check the manufacturer’s instructions for exact drying times. Proper drying ensures a smooth and lasting finish. Patience here improves the final look and protection.
Sealing The Furniture
Sealing homemade outdoor furniture protects it from rain, sun, and dirt. It keeps the wood strong and looking good for years. A good sealant stops water from soaking into the wood. It also prevents cracks and fading from sunlight.
Choosing The Right Sealant
Select a sealant made for outdoor wood. Look for water-resistant and UV-protective features. Clear sealants keep the wood’s natural color. Tinted sealants add a slight color and extra sun protection. Choose a product that matches your stain type.
Application
Apply sealant with a clean brush or cloth. Work in the direction of the wood grain. Cover every surface evenly, including edges and corners. Avoid thick layers that can drip or peel. Thin coats dry faster and last longer.
Applying Sealant Coats
Apply at least two coats of sealant for best protection. Let the first coat dry completely before the next. Lightly sand the wood with fine sandpaper between coats. This helps the second coat stick better. Clean off dust before applying the next coat.
Curing And Final Touches
Allow the sealant to cure fully before using the furniture. Curing time depends on the product and weather, usually 24 to 48 hours. Keep furniture in a dry, shaded place during curing. After curing, check for missed spots and touch up if needed.
Credit: www.youtube.com
Maintenance For Longevity
Maintaining your homemade outdoor furniture is key to keeping it strong and beautiful. Proper care helps the wood resist weather damage and wear. Regular upkeep protects your investment and extends its life.
Follow simple steps to keep the stain and sealant working well. This keeps the wood from drying out, cracking, or fading. A little attention now saves big repairs later.
Cleaning Tips
Clean your furniture regularly to remove dirt and grime. Use a soft brush or cloth with mild soap and water. Avoid harsh chemicals that can damage the finish.
Rinse thoroughly and let the furniture dry completely. Clean at least twice a year or more in dusty areas. This prevents buildup that can wear down the stain and sealant.
When To Reapply Stain And Sealant
Check your furniture for signs of wear every year. Look for fading, peeling, or water soaking into the wood. These signs mean it is time to reapply stain and sealant.
Apply a new coat before the wood looks dry or cracked. This keeps the surface smooth and water-resistant. Re-staining and sealing protect the wood from sun and rain damage.
Frequently Asked Questions
How Do I Prepare Wood For Staining Outdoor Furniture?
Clean the wood thoroughly and sand it smooth to remove rough spots. Remove dust using a tack cloth. Proper preparation ensures even stain absorption and a smooth finish.
What Type Of Stain Is Best For Outdoor Furniture?
Use a high-quality exterior wood stain with UV protection. Oil-based stains penetrate deeply and provide long-lasting protection against weather elements.
How Long Should I Wait Before Sealing Stained Furniture?
Allow the stain to dry completely, usually 24 to 48 hours. Sealing too soon can cause peeling or uneven finish. Check manufacturer’s instructions for exact drying times.
Can I Use The Same Sealer For All Wood Types?
No, choose a sealer compatible with your wood type and stain. Some sealers are designed for hardwoods, while others work better on softwoods. Always check product labels.
Conclusion
Staining and sealing your outdoor furniture protects it from weather damage. It keeps the wood looking fresh and lasts longer. Regular care helps maintain its beauty year after year. Choose the right products and follow each step carefully. Enjoy your homemade furniture with confidence and pride.
A little effort now saves time and money later. Your outdoor space will feel cozy and inviting. Simple steps can make a big difference. Keep your furniture safe and beautiful through every season.