Your outdoor wood furniture can transform your patio or garden into a cozy retreat. But over time, weather and wear can leave it looking dull and worn out.
You might think it’s time to replace it, but what if you could bring it back to life with just a little effort? Learning how to sand and paint your outdoor wood furniture is easier than you think—and the results can be stunning.
Imagine sitting on a beautifully refreshed chair or table that looks brand new. Keep reading, and you’ll discover simple, step-by-step tips to make your furniture shine again, protect it from the elements, and enjoy your outdoor space even more.
Choosing The Right Tools
Choosing the right tools makes sanding and painting outdoor wood furniture easier. Good tools help you finish the job faster. They also improve the final look of your furniture.
Using the correct sandpaper, paintbrushes, and safety gear keeps your work safe and neat. It also protects your wood from damage. This section explains the tools you need for a smooth sanding and painting process.
Types Of Sandpaper
Sanding is key for a smooth finish. Start with coarse sandpaper to remove old paint and rough spots. Use 60 to 80 grit sandpaper for this.
Next, switch to medium grit, like 120 to 150, to smooth the surface. Finish with fine grit, 220 or higher, for a soft touch. Choose sandpaper made for wood for best results.
Essential Painting Supplies
Good paint brushes or rollers help apply paint evenly. Use brushes with natural bristles for oil-based paint. Synthetic bristles work well with water-based paint.
Keep a paint tray and stir sticks handy. Use painter’s tape to protect areas you don’t want to paint. Have a drop cloth to catch spills and drips.
Safety Gear
Wear a mask to avoid breathing dust and paint fumes. Use gloves to protect your hands from chemicals and splinters.
Safety glasses keep dust and paint out of your eyes. Choose comfortable clothes that cover your skin during work.
Credit: lovegrowswild.com
Preparing The Wood Surface
Preparing the wood surface is the first step to a beautiful finish on outdoor furniture. It helps paint stick well and last longer. This process needs care and attention to detail. Clean, smooth, and repair the wood before painting.
Good preparation stops peeling and flaking. It also brings out the wood’s natural beauty. Follow these steps to get the best results.
Cleaning The Furniture
Start by removing dirt and grime from the wood. Use a soft brush or cloth and warm soapy water. Scrub gently to avoid damage. Rinse with clean water and let it dry completely. Dirt can stop paint from sticking properly.
Removing Old Paint And Finish
Old paint or varnish can ruin your new paint job. Use sandpaper or a paint stripper to remove them. Sanding creates a smooth surface and opens the wood grain. Work in small sections and wear a mask. Clear all dust before painting.
Repairing Damages
Check the wood for cracks, holes, or rot. Fill small holes with wood filler and let it dry. Sand the filler smooth to blend with the wood. Replace rotten wood parts if needed. Strong, healthy wood holds paint better and lasts longer.
Sanding Techniques
Sanding is a key step in preparing outdoor wood furniture for painting. It smooths the surface and helps paint stick better. Using the right sanding techniques ensures a clean and even finish. This section explains how to sand wood furniture properly.
Sanding By Hand Vs. Power Sander
Sanding by hand gives more control on small areas. It works best for delicate or detailed parts. Hand sanding uses sandpaper wrapped around a block. It takes more time but reduces the risk of damage.
Power sanders save time on large, flat surfaces. They provide a consistent sanding pattern. Use a medium grit sandpaper first, then a finer grit for smoothness. Keep the sander moving to avoid uneven spots.
Sanding With The Grain
Always sand in the direction of the wood grain. This prevents scratches and marks on the wood. Sanding against the grain can cause rough patches. Smooth strokes along the grain give the best results.
Start with coarse sandpaper to remove old paint or roughness. Follow with finer grit to create a smooth surface. This method helps paint adhere better and last longer.
Sanding Corners And Crevices
Corners and crevices need special attention during sanding. Use a sanding sponge or folded sandpaper for tight spots. Small files or detail sanders also work well here.
Take your time to reach all edges and curves. Proper sanding in these areas prevents peeling paint later. A smooth finish in corners improves the overall look of your furniture.
Choosing Paint For Outdoor Furniture
Choosing the right paint for outdoor wood furniture is important. It protects the wood and gives it a fresh look. The paint must handle sun, rain, and wind. It should last long and keep the wood safe. This guide helps pick the best paint for your outdoor furniture.
Types Of Paints
Latex paint is water-based and easy to clean. It dries fast and resists cracking. Oil-based paint sticks well and lasts longer. It handles rough weather better. Chalk paint gives a matte finish and a vintage look. It may need a topcoat for protection outdoors.
Selecting The Right Color
Choose colors that match your outdoor space. Light colors reflect heat and stay cool. Dark colors hide dirt but absorb heat. Bright colors make furniture stand out. Neutral colors blend with nature. Think about the style and mood you want.
Weather-resistant Options
Pick paints made for outdoor use. Look for labels that say “weather-resistant” or “exterior.” These paints stop water from soaking in. They protect wood from sun damage. Some have UV blockers to prevent fading. These features keep furniture looking good longer.
Priming The Surface
Priming the surface is a key step in sanding and painting outdoor wood furniture. It creates a smooth base that helps paint stick better. Priming also protects the wood from moisture and weather damage. This step improves paint durability and keeps your furniture looking fresh longer.
Benefits Of Priming
Priming stops paint from peeling and cracking over time. It blocks stains and tannins from coming through the paint. The primer fills small cracks and rough spots on the wood. This makes the surface smooth and ready for paint. Priming also reduces the number of paint coats needed.
Choosing A Primer
Pick a primer made for outdoor wood furniture. Look for one that resists moisture and mildew. Oil-based primers work well for tough wood and old finishes. Water-based primers dry faster and clean up easily. Make sure the primer matches your paint type.
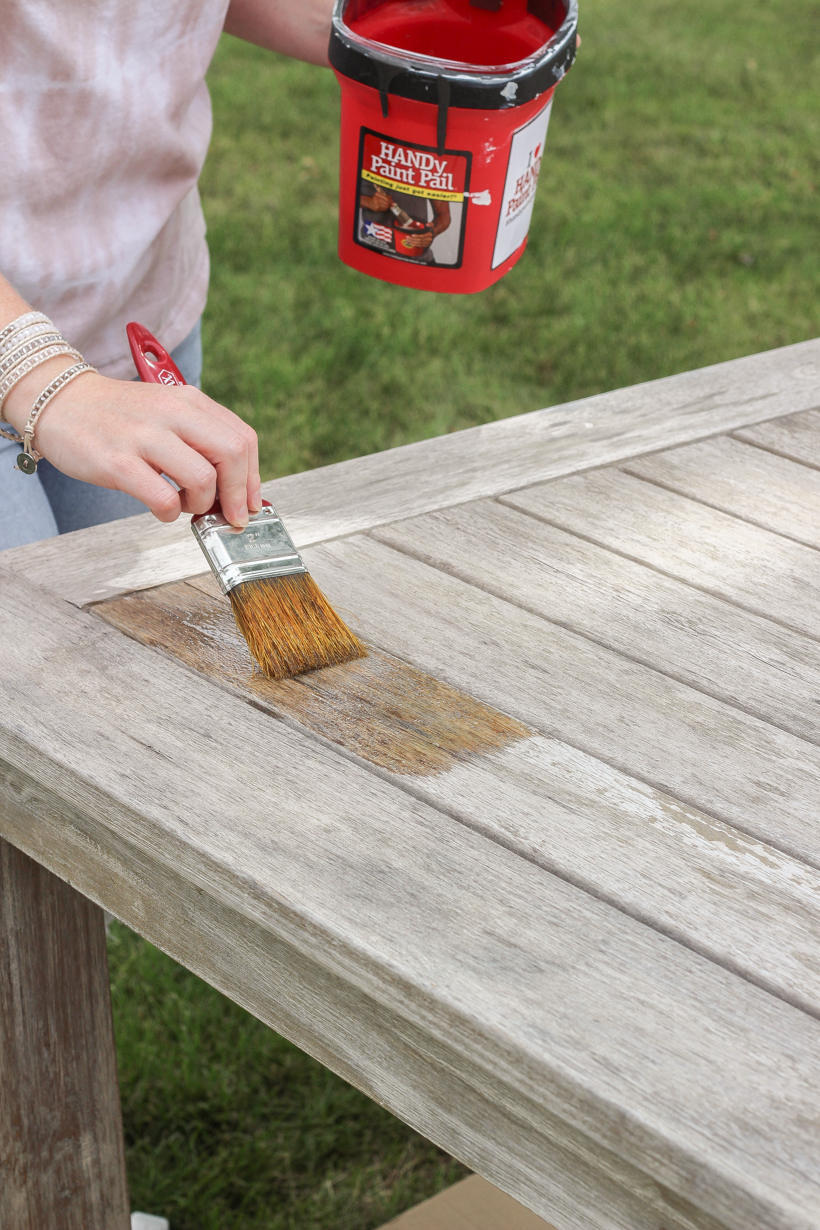
Applying Primer Correctly
Start with clean, dry wood before priming. Use a brush or roller to apply a thin, even coat. Cover all surfaces, including edges and corners. Let the primer dry completely before sanding lightly. Remove dust before applying the paint. Two coats of primer may be needed for best results.
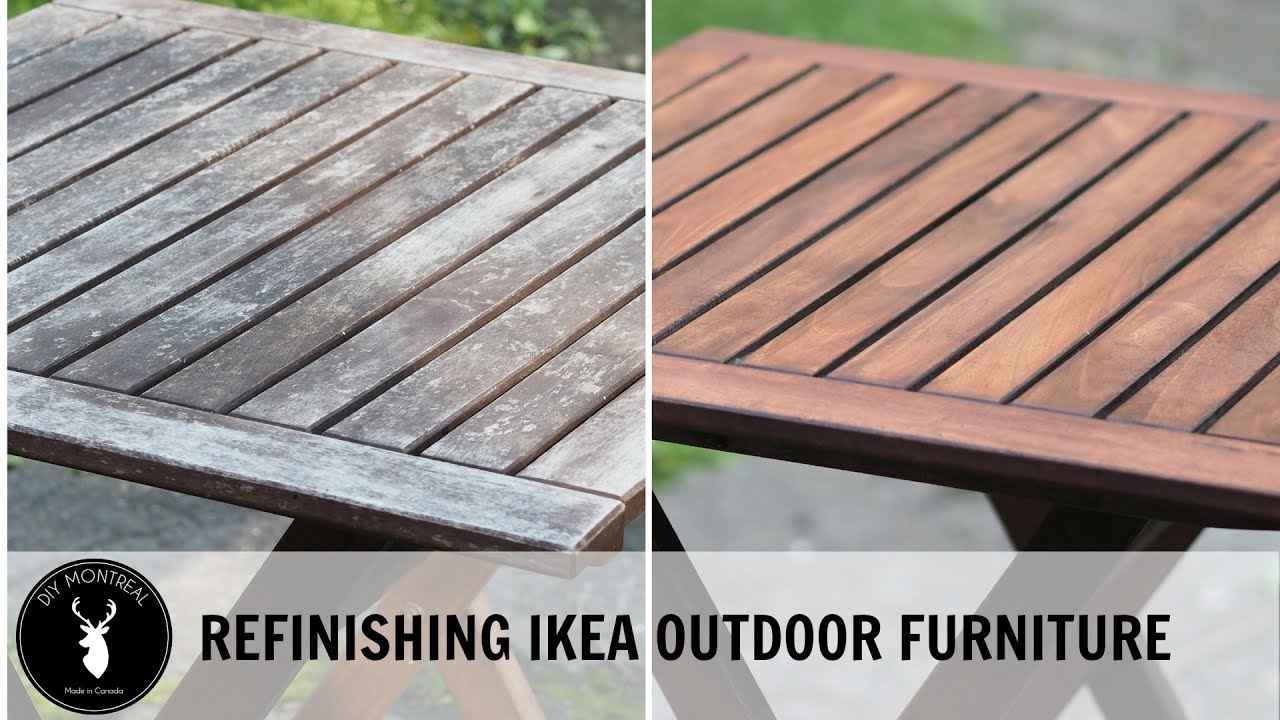
Credit: www.youtube.com
Painting Tips And Techniques
Painting outdoor wood furniture needs care and the right methods. Proper painting protects the wood from weather. It also improves the furniture’s look and life. Follow these painting tips and techniques to get smooth, lasting results.
Brush Vs. Spray Painting
Brush painting gives good control on detailed parts. It works well for corners and small areas. Brushes can leave brush marks but drying slows them down.
Spray painting covers large surfaces fast and evenly. It creates a smooth finish without brush strokes. Spraying needs a well-ventilated space and protection for nearby areas.
Choose brush painting for precision. Use spray painting for speed and smoothness.
Applying Multiple Coats
Thin coats dry better than thick ones. Apply several light coats for even coverage. Let each coat dry fully before the next.
Multiple coats build a stronger paint layer. This helps the furniture resist cracks and chips. Patience improves the final look and protection.
Avoiding Drips And Streaks
Use a quality brush or spray equipment. Avoid overloading with paint to stop drips. Move the brush or sprayer steadily and evenly.
Check your work under light for drips or streaks. Smooth them out immediately with a dry brush. Keep the paint surface clean and dust-free.
Sealing And Protecting
Sealing and protecting outdoor wood furniture is key to making it last longer. Wood faces sun, rain, and changing weather every day. Without protection, wood can crack, fade, or rot quickly. A good sealant keeps moisture out and preserves the paint underneath. It also helps the wood stay strong and look fresh. Taking time to seal your furniture is a smart step after sanding and painting.
Types Of Sealants
Choose a sealant based on your wood type and climate. Clear sealants keep the natural wood look. They protect against water and UV rays. Polyurethane is tough and great for heavy use. Spar varnish works well for outdoor furniture. It stretches and moves with the wood. Oil-based sealants soak into the wood and add deep protection. Water-based sealants dry fast and have low odor.
Applying Sealant For Longevity
Apply sealant in thin, even coats. Use a clean brush or cloth for smooth coverage. Let each coat dry fully before adding another. Sand lightly between coats for better grip. Cover all surfaces, including edges and undersides. Avoid sealing in dirt or moisture. Work in a shaded, dust-free area. Follow the sealant’s instructions for best results.
Maintenance Tips
Check your furniture regularly for signs of wear. Clean dirt and debris with a soft brush or cloth. Reapply sealant every year or after heavy weather. Fix cracks or chips quickly to stop damage. Store furniture under cover during winter months. Use furniture covers for extra protection. Proper care keeps your wood looking great and strong.

Credit: www.rustoleum.com
Troubleshooting Common Issues
Troubleshooting common problems in sanding and painting outdoor wood furniture helps save time and effort. Fixing these issues keeps your furniture looking great longer. Small mistakes can cause big problems. Knowing solutions prevents frustration and wasted paint.
Paint Peeling
Paint peeling happens when the surface is dirty or wet. Old paint not removed well causes peeling too. Use a scraper or sandpaper to clean the surface fully. Let the wood dry before painting. Apply a primer designed for outdoor wood. Thin, even paint layers reduce peeling risk. Avoid painting in direct sunlight or on humid days.
Uneven Finish
An uneven finish comes from poor sanding or too much paint. Sand the wood evenly with fine-grit sandpaper. Remove all dust with a brush or cloth. Apply thin coats of paint and let each dry completely. Use smooth, steady strokes to avoid streaks. Lightly sanding between coats helps create a smooth surface.
Sanding Mistakes
Common sanding mistakes include using the wrong grit or sanding too hard. Start with medium-grit sandpaper, then finish with fine grit. Sand along the grain, not against it. Pressing too hard can damage the wood. Check the surface often to avoid over-sanding. Clean the dust before painting to ensure good paint adhesion.
Frequently Asked Questions
How Do I Prepare Outdoor Wood Furniture For Sanding?
First, clean the furniture to remove dirt and debris. Use mild soap and water, then let it dry completely. Remove any old paint or finish with a chemical stripper if needed before sanding. This ensures a smooth surface for better paint adhesion.
What Grit Sandpaper Is Best For Outdoor Wood Furniture?
Start with medium grit sandpaper (around 80-120 grit) to remove old finish. Then, use finer grit (150-220 grit) to smooth the surface. This combination provides a clean, even texture that helps paint stick well and creates a professional finish.
Which Type Of Paint Is Ideal For Outdoor Wood Furniture?
Use exterior-grade paint, such as acrylic latex or oil-based paint. These paints resist weather, UV rays, and moisture. They provide durability and long-lasting protection to your wood furniture against outdoor elements.
How Many Coats Of Paint Should I Apply Outdoors?
Apply at least two to three coats for optimal coverage and protection. Allow each coat to dry fully before applying the next. Multiple coats enhance durability and ensure a smooth, even finish on your outdoor wood furniture.
Conclusion
Sanding and painting outdoor wood furniture can refresh any space. Clean, smooth surfaces help paint stick better and last longer. Choose the right paint for weather protection and color. Take your time and work carefully for the best results. Enjoy the fresh look and extra life for your furniture.
Small effort brings big changes. Give your outdoor space a new charm today.