Are you looking to add a personal touch to your bookshelf? Making doors for your bookshelf is a simple way to protect your books, keep dust away, and give your space a fresh, stylish look.
Imagine opening a set of custom doors that perfectly match your room’s decor, creating a cozy and organized feel. In this guide, you’ll discover easy steps and practical tips to craft your own bookshelf doors, even if you’ve never worked with wood before.
Ready to transform your bookshelf into a beautiful centerpiece? Let’s get started!

Credit: www.youtube.com
Choosing Door Styles
Choosing the right door style can change the look and feel of your bookshelf. Doors protect your books from dust and give a neat finish. The style you pick affects how you use your shelf and the room’s style. Consider your space and needs before deciding.
Sliding Vs Hinged
Sliding doors save space. They move sideways on a track. Great for small rooms or tight spots. Hinged doors open out like regular doors. They need room to swing open. Hinged doors give easy access to all shelves at once.
Glass Vs Solid Panels
Glass panels show your books and decorations. They add light and make the shelf feel open. Solid panels hide clutter and protect books better. They create a classic, clean look. Choose based on whether you want display or privacy.
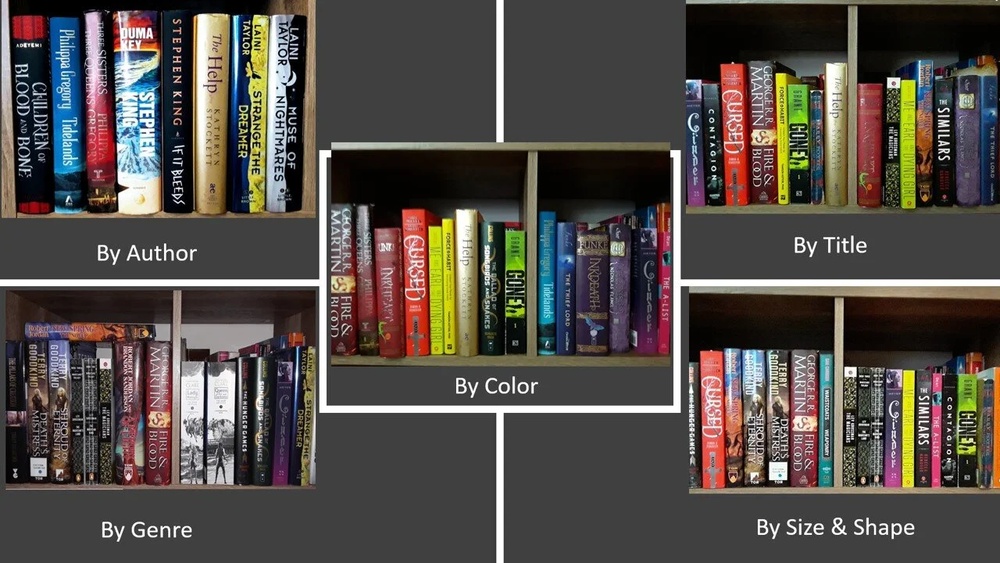
Design Inspirations
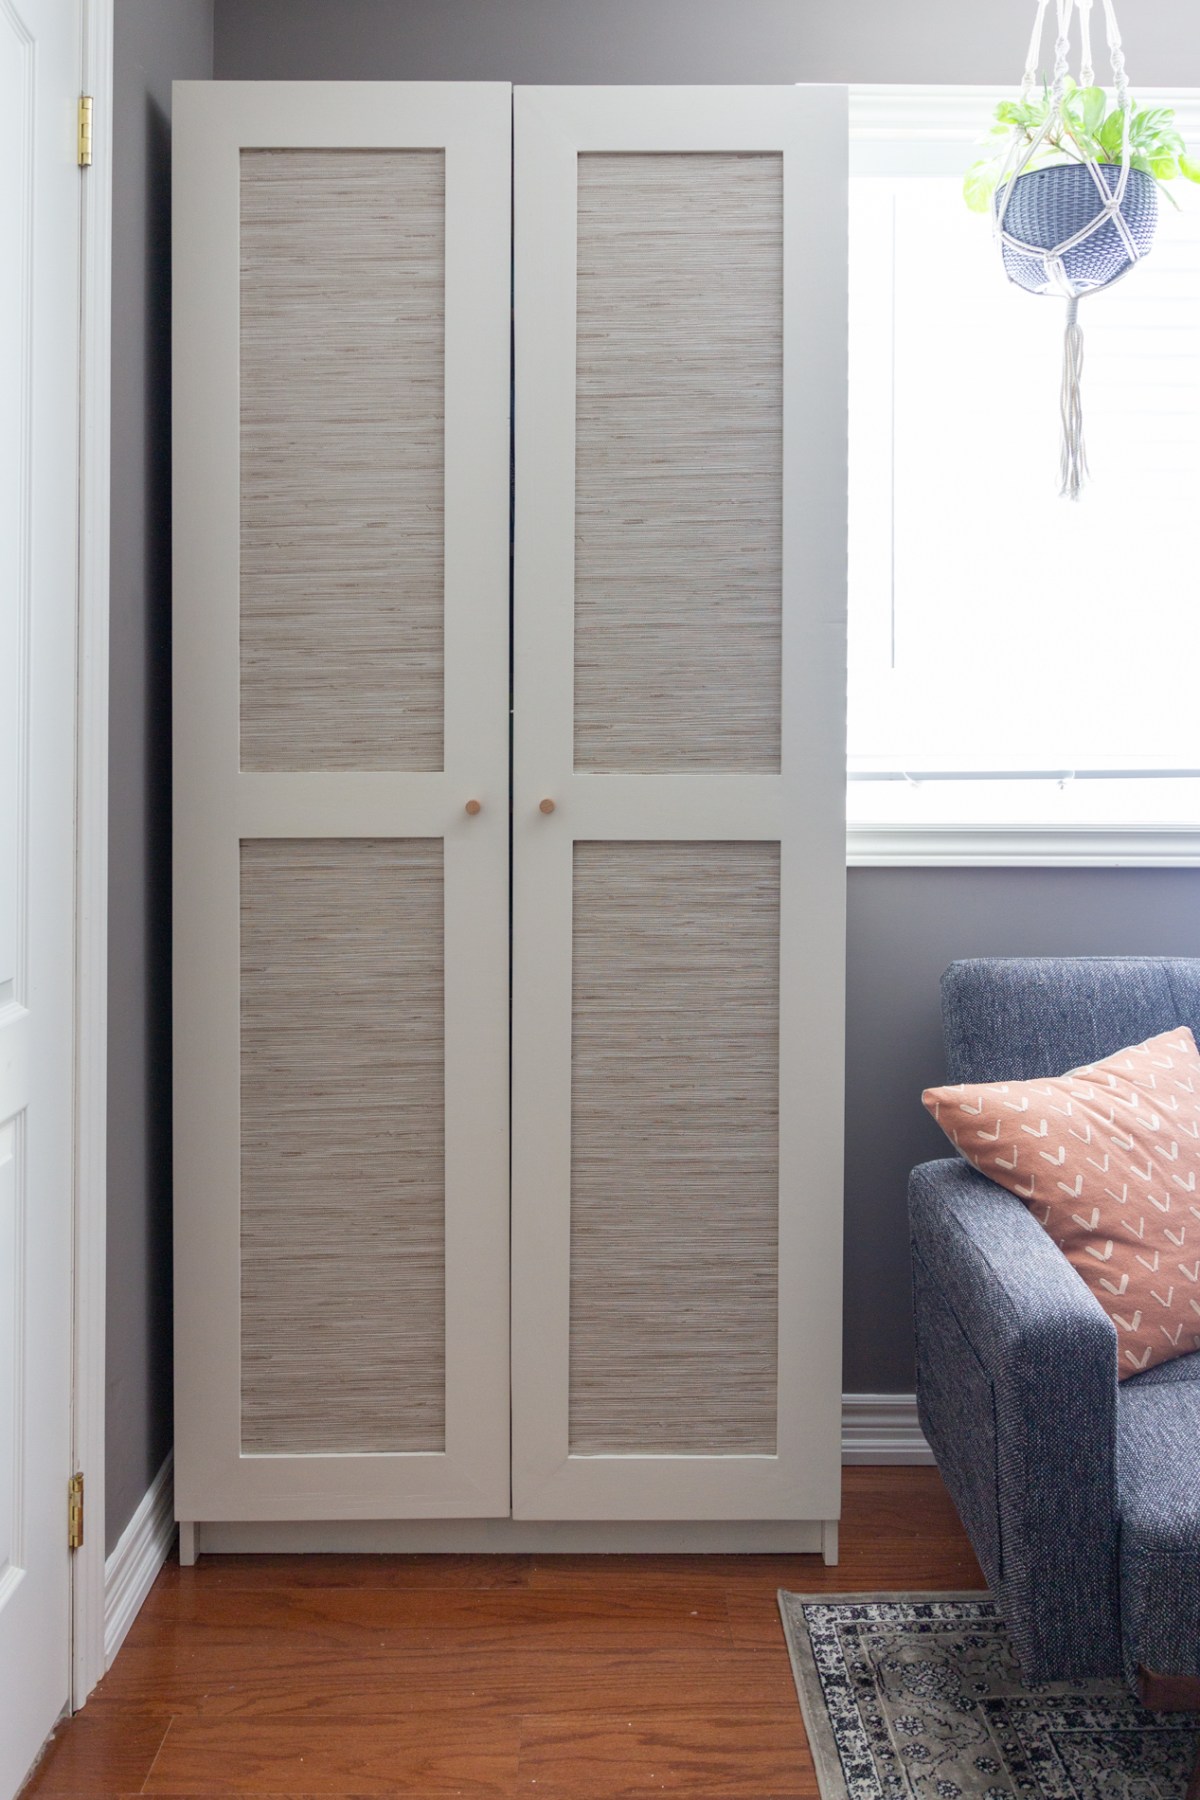
Rustic wood doors add warmth and a natural touch. Modern styles use clean lines and minimal details. Painted doors add color and brighten the room. Consider patterns or cut-outs for a unique look. Match door style to your room’s decor.
Credit: www.housebythebaydesign.com
Gathering Materials
Gathering the right materials is the first step to making sturdy bookshelf doors. Choose quality items to ensure your doors last long and look great. Prepare all parts before you start building.
Wood Selection
Pick wood that fits your bookshelf style and strength needs. Pine is affordable and easy to cut. Oak or maple offer durability and a nice finish. Avoid soft woods that can dent easily. Measure your bookshelf opening to get the right size wood panels.
Hardware Essentials
Doors need hinges to open and close smoothly. Choose sturdy hinges that match your door size and weight. Add handles or knobs for easy grip. Magnetic catches help keep doors closed tight. Screws must fit your wood thickness for secure fixing.
Tools Checklist
Gather tools before starting to save time. A saw is needed to cut wood to size. Use a drill for making holes and fixing screws. Sandpaper smooths wood edges for a clean look. A screwdriver helps attach hardware firmly. A measuring tape keeps your work accurate.
Measuring And Planning
Measuring and planning are the first steps to making doors for a bookshelf. Precise measurements ensure the doors fit well and work smoothly. Poor planning can cause gaps or misalignment. Take your time and be exact with numbers. This stage sets the foundation for the entire project.
Accurate Door Dimensions
Measure the height and width of the bookshelf opening carefully. Use a tape measure and write down the numbers. Measure at several points to check for any differences. Subtract a small gap for door movement, about 1/8 inch on each side. Double-check your measurements before cutting wood. Accuracy here saves frustration later.
Marking Cut Lines
Mark the wood pieces clearly with a pencil. Use a square tool to draw straight lines. This keeps the cuts clean and precise. Label each piece to avoid confusion during assembly. Mark both sides of the wood for better guidance. Clear lines help you cut smoothly and correctly.
Planning Door Placement
Decide where the doors will sit on the bookshelf. Plan if the doors will cover the entire opening or just part of it. Think about the hinges and handles placement. Allow space for door swings and clearance. Visualize how the doors will look once installed. Good planning makes installation easier and more attractive.
Cutting The Doors
Cutting the doors for a bookshelf is a key step. It sets the shape and size for your project. Precise cuts ensure the doors fit well and look good. This process needs focus and care to avoid mistakes.
Safe Cutting Techniques
Always wear safety goggles and gloves before starting. Use a sharp saw for clean cuts. Secure the wood firmly on a stable surface. Cut slowly and follow marked lines carefully. Keep fingers away from the blade at all times. Stop and check your progress often to avoid errors.
Sanding Edges Smooth
After cutting, edges may feel rough or sharp. Use medium-grit sandpaper to smooth all edges. Sand in one direction for even surfaces. Check for splinters and remove them completely. Smooth edges improve the door’s look and prevent damage. Clean dust off before moving to the next step.
Preparing Panels
Panels need to be ready before assembly. Check door panels for correct size and shape. Trim any uneven parts or excess wood. Apply a wood conditioner if you plan to paint or stain. This helps the finish stick better. Make sure panels are dry and clean before attaching hinges.
Assembling Door Frames
Assembling door frames is a key step in making doors for a bookshelf. It creates the structure that holds the door together. A strong frame keeps the door sturdy and neat. Follow these steps to build solid door frames that fit well and last long.
Joining Wood Pieces
Start by cutting wood pieces to the right size. Use wood glue on the edges to join them. Clamp the pieces tightly and let the glue dry. For extra strength, add small nails or screws at the joints. Make sure the corners form perfect right angles. This ensures the frame fits squarely on the bookshelf.
Securing Panels
Next, place the door panel inside the frame. The panel can be plywood or solid wood. Fit it snugly without forcing it. Use thin nails or small screws to fix the panel to the frame. Space the nails evenly around the edges. This keeps the panel from moving or warping over time.
Reinforcing Corners
Reinforce the corners with metal brackets or wood blocks. Attach them inside each corner with screws. This adds extra strength and prevents the frame from loosening. Check that the frame stays square after adding reinforcements. Strong corners make the door frame last longer and work better.

Credit: www.housebythebaydesign.com
Installing Hinges And Hardware
Installing hinges and hardware is a key step in making bookshelf doors. This part makes the doors open and close smoothly. It also gives the bookshelf a finished look. Choosing the right parts and placing them carefully matters a lot.
Choosing The Right Hinges
Pick hinges that fit the door size and style. For light doors, small hinges work well. Heavy doors need strong, durable hinges. Concealed hinges hide inside the door for a clean look. Butt hinges show on the outside and are easier to install.
Attaching Handles And Knobs
Handles and knobs let you open doors easily. Measure and mark where to place them on the door edge. Use screws that fit the handle or knob size. Tighten screws firmly but do not crack the wood. Choose hardware that matches your bookshelf’s style.
Aligning Doors Properly
Proper door alignment stops doors from rubbing or hanging unevenly. Use a level to check if doors are straight. Adjust hinges by loosening screws slightly and moving doors. Test opening and closing several times. Tighten screws once doors fit well and move smoothly.
Finishing Touches
Finishing touches bring your bookshelf doors to life. They protect the wood and add style. These steps make your project look complete and last longer. Focus on painting, sealing, and adding decorative elements. Each step improves the door’s appearance and function.
Painting And Staining
Choose paint or stain to match your room’s style. Paint offers many colors and hides wood grain. Stain shows the natural beauty of wood. Apply thin, even coats for a smooth finish. Allow each coat to dry fully before adding another. Use a brush or cloth for staining. Sand lightly between coats to keep the surface smooth.
Sealing For Durability
Seal the doors to protect from scratches and moisture. Use clear polyurethane or varnish for a tough finish. Apply with a brush in long, even strokes. Let the sealant dry completely before using the doors. This layer helps the doors stay strong and look good longer. It also makes cleaning easier.
Adding Decorative Elements
Add knobs, handles, or hinges for a polished look. Choose styles that match your décor and door design. You can add trim or molding for extra detail. Use small nails or glue to attach decorations securely. These elements make your doors unique and functional. They also give a professional touch to your work.
Mounting Doors On Bookshelf
Mounting doors on a bookshelf changes its look and use. Doors protect your books from dust. They also give a clean, finished look. Proper mounting makes sure the doors work well. It keeps them straight and easy to open. Follow simple steps to mount doors right.
Positioning And Leveling
Place the doors in the right spot first. Use clamps to hold them steady. Check the top and bottom edges. Use a level tool to make sure they are straight. Measure gaps between the door and shelf sides. Keep spaces even for smooth closing. Adjust the doors until they sit perfectly.
Securing Doors Firmly
Attach hinges to the door and shelf firmly. Use screws that fit well and do not strip. Screw slowly to avoid damage. Tighten all screws but do not over-tighten. The doors must hold steady without wobbling. Check the strength by gently shaking the door. Secure any loose parts immediately.
Testing Door Movement
Open and close the doors several times. They should move smoothly without sticking. Listen for any rubbing or grinding sounds. Adjust the hinges if doors do not close right. Make sure doors stay closed on their own. Test for even gaps around the edges. Fix issues before finishing the project.
Maintaining Your Bookshelf Doors
Maintaining your bookshelf doors keeps them looking good and working well. Regular care helps prevent damage and extends their life. Simple steps protect your investment and keep your bookshelf neat.
Cleaning Tips
Use a soft cloth to dust the doors often. Avoid harsh chemicals that can damage the finish. A mix of mild soap and water works well for sticky spots. Dry the doors with a clean towel to stop water marks. Clean glass panels gently with a glass cleaner and soft cloth.
Fixing Common Issues
Check hinges regularly for loose screws and tighten them. If doors stick or do not close properly, adjust the hinges. Sand rough edges lightly to avoid splinters. Small scratches can be covered with a matching wood marker or filler. Replace broken glass panels carefully to keep safety intact.
Upgrading Hardware
Change old handles or knobs to refresh the look. Choose hardware that matches your room style and door material. Soft-close hinges make doors quieter and easier to use. Installing magnetic catches helps keep doors firmly closed. Small hardware upgrades improve door function and appearance.
Frequently Asked Questions
How Do I Measure For Bookshelf Doors?
Measure the bookshelf’s height, width, and depth accurately. Ensure to account for door clearance and hinge space. Precise measurements prevent fitting issues and help in cutting the doors properly.
What Materials Are Best For Bookshelf Doors?
Wood, plywood, and MDF are popular for bookshelf doors. Choose based on durability, style, and budget. Wood offers a classic look, while MDF is cost-effective and easy to paint.
Which Hinges Work Best For Bookshelf Doors?
Concealed hinges provide a clean look and smooth operation. Butt hinges are simple and sturdy but visible. Choose hinges compatible with door thickness and weight for durability.
How Do I Install Bookshelf Doors Properly?
Align the doors with the bookshelf frame and mark hinge positions. Pre-drill holes to avoid wood splitting. Attach hinges securely and check door swing and alignment.
Conclusion
Making doors for a bookshelf adds style and function. You can protect books from dust and damage. Choose materials and tools that suit your skills and shelf size. Take your time to measure and cut carefully. Attach hinges and handles so doors open smoothly.
This project helps you learn and improve woodworking skills. Enjoy the satisfaction of creating something useful and beautiful. Now, your bookshelf looks neat and organized with doors. Give your books a cozy home behind crafted doors.