Are you looking for a creative way to organize your books without spending a fortune? Making a pallet bookshelf could be the perfect project for you.
It’s simple, budget-friendly, and adds a unique touch to your space. Imagine turning old wooden pallets into something both useful and stylish—something that holds your favorite reads while catching everyone’s eye. In this guide, you’ll discover easy steps to build your own pallet bookshelf, even if you’re new to DIY.
Ready to transform your room and impress your friends? Let’s get started!

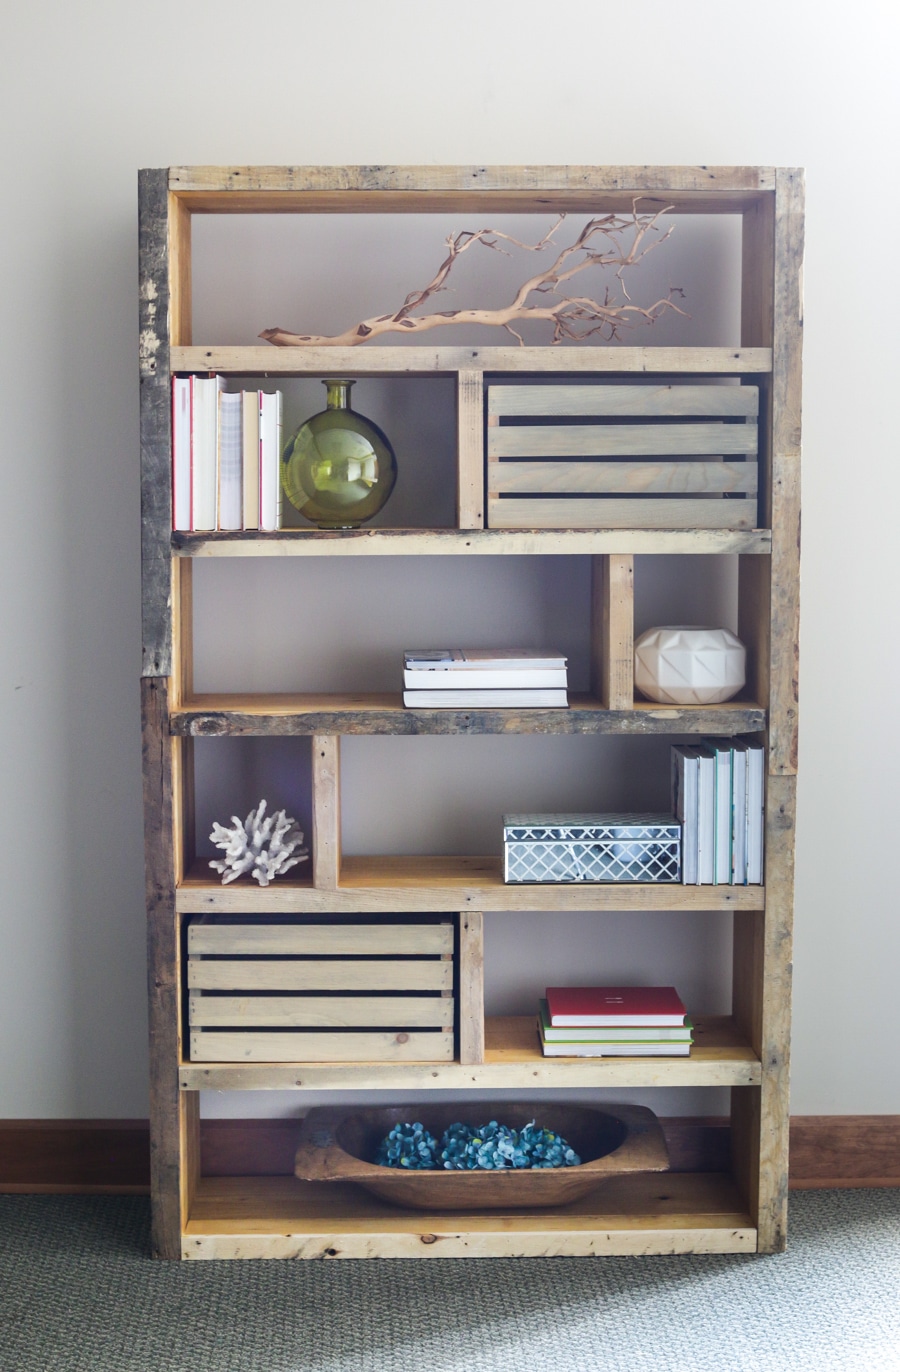
Credit: madewithlovetcbf.blogspot.com
Materials And Tools Needed
Building a pallet bookshelf needs specific materials and tools. Using the right items makes the project easier and safer. This section lists everything required for a smooth building process.
Choosing The Right Pallets
Pick pallets that are sturdy and in good shape. Avoid pallets with cracks or rot. Look for wood that is smooth and free of chemicals. Heat-treated pallets are safer than chemically treated ones. Make sure the size fits your bookshelf design.
Essential Tools For The Project
Start with a hammer and crowbar to take apart pallets. A saw helps to cut wood to the right size. Use a drill to make holes and drive screws. Sandpaper or an electric sander smooths rough edges. A tape measure and pencil help with accurate marks.
Additional Supplies
Buy wood screws or nails to hold parts together. Wood glue adds extra strength to joints. Use wood stain or paint for finishing touches. Gloves protect your hands while working. Safety glasses keep your eyes safe from dust and debris.
Preparing The Pallets
Preparing the pallets is the first step to building a sturdy bookshelf. Pallets often come rough and dirty. They need cleaning and smoothing to be safe for indoor use. This process also helps the wood look better and last longer.
Sometimes pallets need to be taken apart. This allows more flexibility in design. It also helps remove damaged or weak boards. Proper preparation ensures a strong and attractive bookshelf.
Cleaning And Sanding
Start by removing dirt, dust, and debris from the pallets. Use a stiff brush or a pressure washer for deep cleaning. Let the wood dry completely before moving to sanding. Sanding smooths rough spots and splinters. Use medium-grit sandpaper first, then fine-grit for a soft finish. Sand all surfaces that will be visible or touched.
Disassembling Pallets If Needed
Check if your bookshelf design needs separate boards. Carefully remove nails or screws holding pallets together. Use a pry bar or hammer to take boards apart without breaking them. Keep the wood flat and even. Remove any damaged or rotten boards. This step gives you more control over the shape and size of your bookshelf.
Designing Your Bookshelf
Designing your pallet bookshelf is the first important step. It helps you see what the finished product will look like. Good design makes building easier and faster.
Think about where you want to place your bookshelf. Consider the size of the space and the number of books you want to store. This way, you create a bookshelf that fits well and meets your needs.
Measuring And Planning Dimensions
Start by measuring the wall or area for your bookshelf. Use a tape measure and note the height, width, and depth. These numbers guide your pallet selection and cuts.
Decide how many shelves you want. Think about the size of your books and items. Plan enough space between shelves for tall books or decorations.
Keep your measurements simple and clear. Write down every number to avoid mistakes. This step saves time and materials.
Sketching The Layout
Draw a simple sketch of your bookshelf design. Use pencil and paper or a digital tool. Sketch the front view and side view to understand the shape.
Mark the shelves, supports, and spaces. Include the dimensions you measured earlier. This helps you visualize the final product.
Check your sketch for balance and stability. Make sure the shelves look even and strong. This reduces the risk of a wobbly bookshelf.
Building The Frame
Building the frame is the first step in making a pallet bookshelf. This part creates the basic shape and strength. A solid frame keeps the shelf stable and ready for use.
Start with careful measuring and cutting. Then, join the pieces to form a strong base. The frame sets the stage for all other parts.
Cutting Pallet Wood
Choose pallets with good, clean wood. Remove any nails or staples carefully. Use a saw to cut the wood into boards.
Cut pieces to the right length for your bookshelf. Smooth rough edges with sandpaper. This makes the wood safe and neat.
Assembling The Base Structure
Lay out the cut pieces on a flat surface. Arrange them into the shape of your bookshelf frame. Use screws or nails to join the pieces firmly.
Check that corners are square and edges line up. Add extra support with wood braces if needed. This step ensures your frame is strong and steady.
Adding Shelves And Supports
Adding shelves and supports is a key step in building a sturdy pallet bookshelf. Proper shelf placement and strong supports help hold your books safely. This part needs care and attention to avoid any wobble or sagging over time.
Attaching Shelves Securely
Start by measuring the space inside the pallet frame. Cut shelves to fit snugly within this space. Use screws or nails to fix each shelf to the pallet sides. Make sure screws go deep into the wood for a strong hold. Check that shelves are level before fully tightening the screws.
Reinforcing For Stability
To keep the bookshelf steady, add extra supports under each shelf. Small wooden blocks or metal brackets work well for this. Attach these supports firmly to both the shelf and the pallet frame. This reinforcement prevents shelves from bowing under weight. Test each shelf by pressing down gently to confirm it holds firm.

Credit: notinggrace.com
Finishing Touches
Finishing touches give your pallet bookshelf a polished look. These steps protect the wood and make the shelf last longer. Taking time here makes a big difference in the final product.
Sanding For Smoothness
Start by sanding the entire bookshelf. Use medium-grit sandpaper to remove rough spots and splinters. Then, switch to fine-grit sandpaper for a smooth finish. Sanding helps paint or stain stick better. It also makes the shelf safe to touch.
Painting Or Staining Options
Choose paint or stain based on your style. Paint offers bright colors and full coverage. Stain shows the wood grain and adds warmth. Apply thin, even coats with a brush or cloth. Let each coat dry completely before adding another. This step improves your shelf’s appearance.
Sealing For Durability
Apply a clear sealant to protect the wood. Sealants guard against moisture, dust, and scratches. Use a brush or spray to cover all surfaces. Allow the sealant to dry well before use. This final layer keeps your bookshelf looking new for years.
Tips For Styling And Placement
Styling and placing your pallet bookshelf well makes it stand out and fit your room. Thoughtful arrangement and spot choice help the shelf look neat and inviting. This section shares simple tips for styling and placement. You will learn how to arrange books and decor and pick the best place for your shelf.
Arranging Books And Decor
Mix books with decor items to create balance. Place books both vertically and horizontally. Stack a few books flat to add layers. Use small plants, candles, or photo frames to add interest. Keep items spaced so the shelf does not look crowded. Group similar colors or themes for a tidy look. Change items seasonally to keep the shelf fresh.
Choosing The Perfect Spot
Find a spot that suits your room’s flow and light. Place the bookshelf near a reading chair or desk. Avoid dark corners where items can look dull. Make sure the shelf does not block windows or doors. A wall with space around it helps the shelf stand out. Check that the shelf is stable and won’t tip over easily. Use the shelf to fill empty wall space and add warmth.
Safety And Maintenance
Building a pallet bookshelf is a fun project. Safety and maintenance keep it strong and lasting. Proper care stops damage and keeps your shelf looking good. Follow simple steps to ensure your bookshelf stays safe and neat.
Ensuring Structural Safety
Check the wood for cracks or weak spots before use. Use screws instead of nails for better strength. Secure the shelf to the wall to prevent tipping. Avoid overloading with heavy books or objects. Regularly inspect joints and tighten loose screws. Sand rough edges to prevent splinters or injuries.
Cleaning And Care Tips
Dust the shelf often with a soft cloth. Use a damp cloth for sticky spots but avoid soaking the wood. Dry the shelf completely after cleaning to stop mold. Apply wood oil or sealant yearly to protect from moisture. Keep the shelf away from direct sunlight to avoid fading. Handle with care to avoid scratches or dents.
Credit: jenwoodhouse.com
Frequently Asked Questions
What Materials Are Needed To Make A Pallet Bookshelf?
You need wooden pallets, screws, sandpaper, wood glue, a saw, drill, and paint or varnish. These basics help create a sturdy, attractive bookshelf from pallets.
How Do You Prepare Pallets For A Bookshelf?
First, inspect pallets for damage or nails. Sand the wood smoothly to avoid splinters. Clean the surface to ensure paint or stain adheres well.
Can I Customize The Size Of My Pallet Bookshelf?
Yes, you can cut pallets to any size. Customize width, height, and shelf spacing to fit your space and storage needs perfectly.
Is It Safe To Use Pallets For Indoor Furniture?
Only use heat-treated pallets, not chemically treated ones. Heat treatment ensures pallets are safe and free from harmful chemicals for indoor use.
Conclusion
Building a pallet bookshelf is simple and fun. You only need a few tools and some wood pallets. This project saves money and adds style to any room. You can paint or stain the wood to match your decor. It also helps recycle old materials, which is good for the environment.
Try this project to enjoy a unique and useful bookshelf. Keep practicing, and your skills will improve with every build. Start today and create something special for your home.