Are you tired of searching for the perfect vanity cabinet that fits your style and space? What if you could create one yourself, tailored exactly to your needs?
Building your own vanity cabinet isn’t as hard as it sounds. With a few simple steps and the right guidance, you can design a piece that adds charm and functionality to your bathroom. Keep reading, and you’ll discover how easy it is to turn your vision into reality—saving money and gaining a sense of pride along the way.
Your dream vanity cabinet is just a few steps away!

Credit: www.youtube.com
Choosing The Right Materials
Choosing the right materials is key to building a strong and beautiful vanity cabinet. The materials affect the cabinet’s look, durability, and cost. Picking quality wood, hardware, and tools makes the project easier. It also ensures the cabinet lasts for years. This section helps you find the best materials for your DIY vanity cabinet.
Types Of Wood For Vanity Cabinets
Wood choice impacts the cabinet’s strength and style. Common woods include oak, maple, and pine. Oak is hard and lasts long. Maple has a smooth texture and looks clean. Pine is soft but cheaper and easy to work with. Avoid woods that warp or absorb too much moisture. Choose wood that matches your bathroom style and budget.
Selecting Hardware And Fixtures
Hardware adds function and style to your vanity. Choose handles, knobs, and hinges that fit your design. Metal finishes like chrome, brushed nickel, or bronze work well. Make sure hardware is strong and rust-resistant. Good hardware makes doors and drawers open smoothly. Pick fixtures that suit the cabinet size and your personal taste.
Tools Needed For The Project
Having the right tools makes building easier and safer. Essential tools include a saw, drill, screwdriver, measuring tape, and level. A sander helps smooth rough wood surfaces. Clamps hold pieces in place while you work. Choose tools that fit your skill level and project size. Prepare all tools before starting to avoid delays.
Planning Your Vanity Cabinet
Planning your vanity cabinet is the first step to a successful build. It helps you avoid mistakes and saves time. Careful planning ensures the cabinet fits perfectly and looks great in your space.
Take your time with measurements and layout ideas. Think about storage needs and style. A clear plan gives you confidence during the building process.
Measuring Your Space
Start by measuring the area where the vanity will go. Measure the width, height, and depth carefully. Write down all measurements. Include space for plumbing and doors. Double-check your numbers to avoid errors.
Designing The Cabinet Layout
Sketch your cabinet design on paper. Decide how many drawers and shelves you want. Plan for the sink and faucet placement. Think about the cabinet’s style and finish. Keep the layout simple and functional.
Creating A Cut List
Make a list of all wood pieces you need. Include sizes and quantities for each part. Organize the list by cabinet sections. This helps you buy the right materials. A cut list saves time during assembly.
Cutting And Preparing Wood
Cutting and preparing wood is a crucial step in building your own vanity cabinet. Precise cuts ensure the pieces fit perfectly. Proper preparation helps the wood last longer and look better. Taking your time with these steps leads to a stronger, cleaner finished product.
Safety Tips For Cutting Wood
Wear safety glasses to protect your eyes from dust and wood chips. Use ear protection to guard against loud saw noises. Keep your hands away from the blade at all times. Work in a clean, well-lit area to avoid accidents. Always follow the tool’s instructions carefully.
Cutting Panels And Pieces
Measure the wood carefully before cutting. Mark the lines clearly with a pencil. Use a saw that fits the type of cut needed. Cut slowly and steadily for smooth edges. Check each piece after cutting to ensure accuracy. Keep the pieces organized for easy assembly.
Sanding And Preparing Surfaces
Sand all cut edges to remove splinters and rough spots. Start with coarse sandpaper and finish with fine grit. Wipe away dust with a clean cloth after sanding. Smooth surfaces help paint or stain stick better. Proper preparation makes your cabinet look professional and neat.
Credit: thriftdiving.com
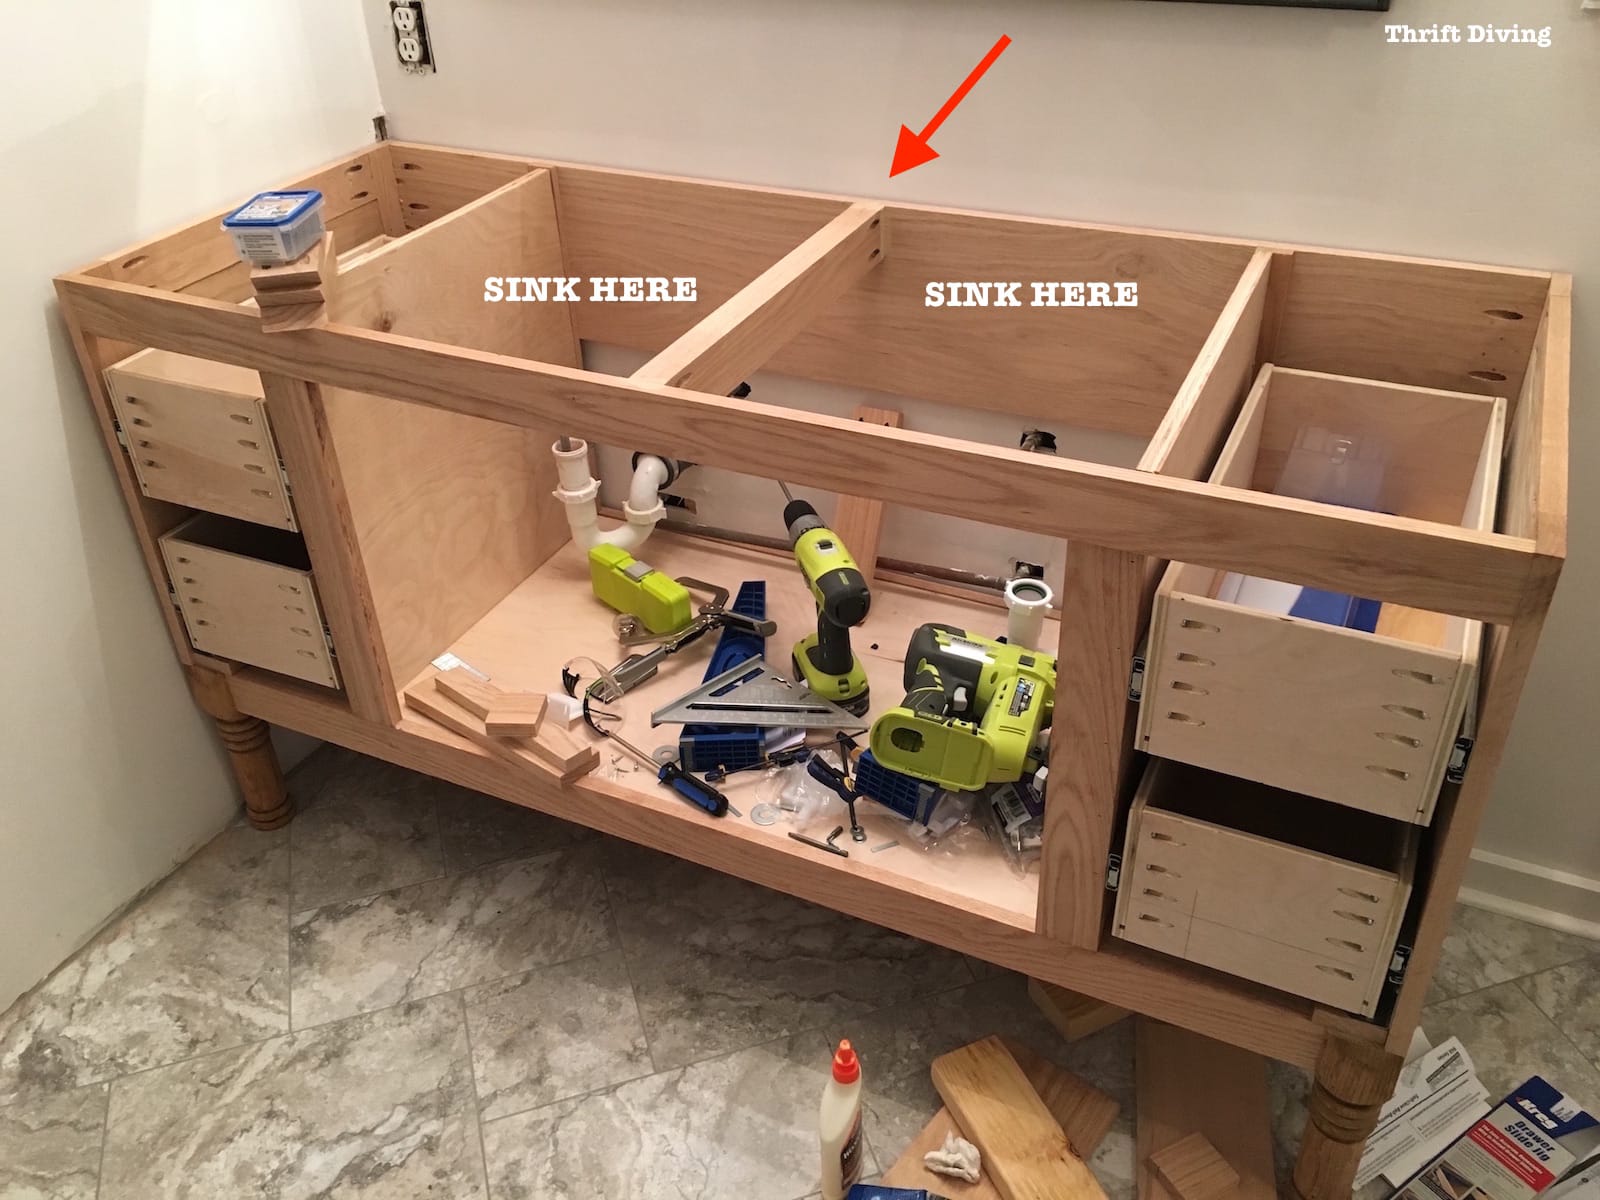
Assembling The Cabinet Frame
Assembling the cabinet frame is a crucial step in building your own vanity cabinet. This stage shapes the structure and ensures the cabinet will hold together firmly. Taking time to assemble carefully helps create a strong and lasting piece. Follow each step closely for best results.
Joining Techniques
Start by choosing the right joining method for your wood pieces. Common options include screws, nails, and wood glue. Screws offer strong hold and are easy to remove if needed. Wood glue adds extra strength when combined with screws. Avoid using only nails, as they can loosen over time. Drill pilot holes to prevent wood from splitting. Secure joints firmly but do not overtighten screws.
Installing Supports And Braces
Supports and braces add stability to the cabinet frame. Attach horizontal braces between vertical sides. Use corner braces inside each corner for extra strength. Place supports where shelves or drawers will rest. This prevents sagging and keeps the cabinet square. Make sure braces fit tightly and are flush with frame edges. Secure braces with screws and glue for best hold.
Ensuring Square And Level Assembly
Check that the frame is square before tightening all fasteners. Use a carpenter’s square or measure diagonals; they should be equal. Adjust corners slightly if needed. Place the frame on a flat surface to check if it sits level. Shim any uneven spots with small wood pieces. Keeping the frame square and level ensures doors and drawers fit properly later. Take your time to get this right.
Adding Doors And Drawers
Adding doors and drawers completes your vanity cabinet. They give your cabinet style and storage. This step takes your project from basic to beautiful. It also makes your cabinet practical for everyday use. This section explains how to build drawer boxes, hang cabinet doors, and install hardware.
Building Drawer Boxes
Start by measuring the space for each drawer. Cut plywood or solid wood to size. Use wood glue and nails to join the sides. Make sure corners are square. Sand edges smooth for easy opening. Attach the drawer bottom with glue and nails. Check that the drawer slides fit well inside the cabinet. Test the drawer movement before moving on.
Hanging Cabinet Doors
Choose hinges that match your door style. Mark hinge locations on both the door and cabinet frame. Drill pilot holes for screws to avoid wood splitting. Attach hinges to the door first. Then, hold the door in place and screw hinges to the cabinet. Adjust door alignment for even gaps. Doors should open and close smoothly without rubbing.
Installing Hardware
Select knobs or pulls that match your cabinet finish. Measure and mark hardware placement on doors and drawers. Drill small holes for screws carefully. Attach hardware firmly but avoid overtightening. Test all doors and drawers to ensure hardware feels secure. Hardware adds the final touch and improves function.
Finishing Touches
Finishing touches make your vanity cabinet look complete and last longer. These final steps protect the wood and add style. Simple care now saves time and effort later.
Applying Paint Or Stain
Choose paint or stain that suits your bathroom style. Paint hides wood grain and offers many colors. Stain shows natural wood texture and adds warmth. Use a brush or cloth for smooth, even coats. Let each coat dry fully before adding another. Light sanding between coats helps the finish stick better.
Sealing For Moisture Protection
Bathrooms have high moisture, so seal the wood well. Use a water-resistant sealer to stop water damage. Apply sealer with a clean brush in thin layers. Cover all surfaces, including edges and corners. Allow the sealer to dry completely before use. This step extends the cabinet’s life and keeps it looking new.
Mounting The Vanity Cabinet
Find the right spot on your bathroom wall. Use a level to keep the cabinet straight. Mark the wall for drilling holes. Secure the cabinet with strong screws and anchors. Check stability by gently pushing the cabinet. Proper mounting prevents accidents and ensures easy use.
Tips For Maintenance And Care
Taking care of your vanity cabinet is important. Proper maintenance keeps it looking good and working well. Small efforts make a big difference. Follow these tips to keep your cabinet in top shape.
Cleaning And Upkeep
Clean your cabinet regularly using a soft cloth. Avoid harsh chemicals that can damage the finish. Use mild soap mixed with water for stains. Wipe spills quickly to prevent water damage. Dust shelves and corners to stop dirt buildup.
Handling Repairs
Fix small problems early to avoid bigger damage. Tighten loose screws and hinges gently. Replace broken handles or knobs right away. Use wood filler for small scratches or holes. Sand lightly and repaint if needed to match the original look.
Extending Cabinet Lifespan
Keep the cabinet away from direct sunlight and moisture. Use mats or coasters to protect surfaces from water and heat. Avoid placing heavy items on shelves. Open doors and drawers carefully to prevent wear. Regular checks help spot issues before they grow.
:strip_icc()/open-simple-blue-vanity-32366fec-cedb074f8ff9499fa7e993416f2d9eb8.jpg)
Credit: www.bhg.com
Frequently Asked Questions
How Do I Choose The Right Materials For A Vanity Cabinet?
Select durable, water-resistant materials like plywood or MDF for your vanity cabinet. Use waterproof paint or sealant to protect against moisture. Quality materials ensure longevity and maintain the cabinet’s appearance in a bathroom environment.
What Tools Are Essential For Building A Vanity Cabinet?
Basic tools include a saw, drill, screwdriver, measuring tape, and clamps. You may also need sandpaper and a level. These tools help cut, assemble, and finish your vanity cabinet accurately and efficiently.
How Can I Maximize Storage In A Vanity Cabinet?
Incorporate shelves, drawers, and organizers inside the cabinet. Use vertical space by adding multiple shelves. Custom compartments help keep toiletries neat and accessible, making the most of limited bathroom space.
What Finish Should I Apply To A Vanity Cabinet?
Use waterproof paint, varnish, or polyurethane for a bathroom-friendly finish. This protects wood from moisture and daily wear. Choose a finish that complements your bathroom decor and enhances durability.
Conclusion
Building your own vanity cabinet takes time and care. Start with a clear plan and the right tools. Measure carefully and follow each step closely. Choose materials that fit your style and budget. Take your time to assemble parts correctly.
Enjoy the sense of pride when your cabinet is finished. This project adds value and charm to your bathroom. A simple effort can make a big difference. You can create a piece that suits your needs perfectly. Give it a try and see the results yourself.