Are you ready to transform your bathroom with a stylish vanity cabinet but feeling unsure about how to put it together? Don’t worry—you’re in the right place.
Assembling a vanity cabinet might seem tricky at first, but with the right steps, you can do it yourself quickly and confidently. In this guide, you’ll discover simple, clear instructions that make the process smooth and even enjoyable. By the end, you’ll have a beautiful, sturdy vanity cabinet that fits perfectly in your space.
Let’s get started and make your bathroom upgrade easy and satisfying!

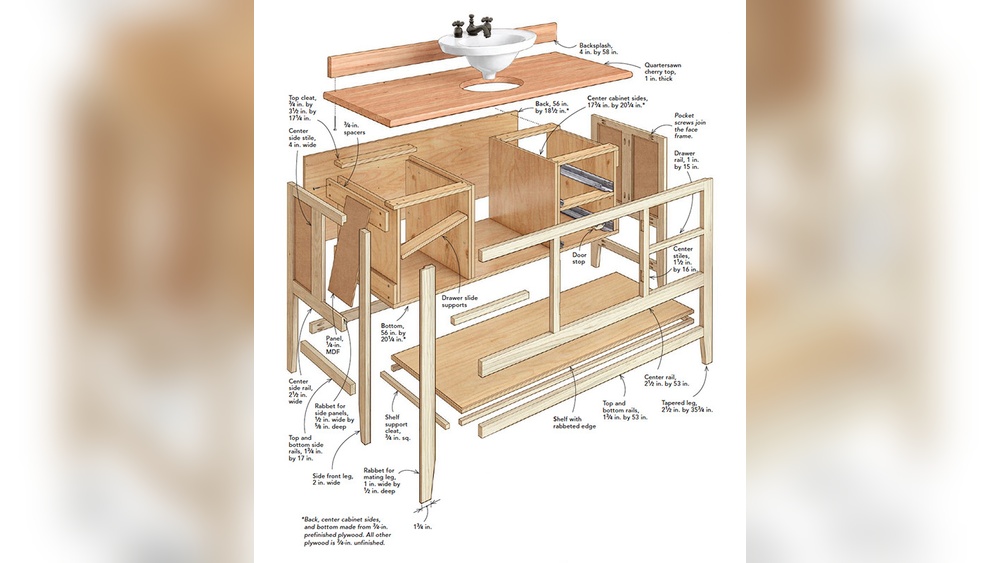
Credit: www.cabinetjoint.com
Gather Tools And Materials
Gathering the right tools and materials is the first step in assembling a vanity cabinet. Having everything ready keeps the process smooth and efficient. It saves time and prevents frustration during assembly.
Prepare a clean workspace with enough room to spread out all parts. This makes it easier to find and handle pieces. Organize items before starting to avoid constant searching.
Essential Tools For Assembly
Basic tools include a screwdriver, hammer, and measuring tape. A power drill can speed up the process but is not required. Keep a level handy to ensure the cabinet sits straight. Pliers and an Allen wrench set are useful for tightening bolts and screws.
Materials Included In The Vanity Kit
The vanity kit usually contains panels, shelves, and hardware like screws and hinges. Check the package list to confirm all parts are included. Missing pieces can delay your project. Keep small hardware in a container to avoid losing them.
Additional Supplies You May Need
Wood glue helps secure joints firmly. Sandpaper smooths rough edges for a better finish. Painter’s tape can protect surfaces during assembly. A soft cloth cleans dust and debris before installation.
Prepare The Vanity Cabinet
Preparing the vanity cabinet is the first step to a smooth assembly process. It saves time and reduces mistakes. Take your time to get everything ready. This helps avoid frustration and ensures a better final result.
Organizing your workspace and tools is also part of preparation. A clean, clear area makes assembly easier and safer. Keep all parts and instructions close by for quick access.
Check All Parts
Open the box carefully. Lay out all parts on a flat surface. Count each piece and compare it with the parts list. Look for screws, panels, handles, and fittings.
Check parts for damage or defects. Small cracks or missing pieces cause problems later. Report any issues to the seller before starting assembly.
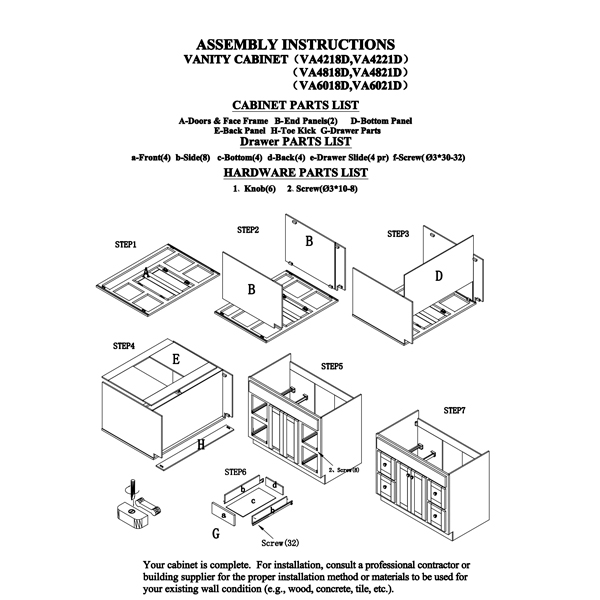
Read Assembly Instructions
Read the instructions fully before you begin. Understand each step clearly. Pictures and diagrams help explain how parts fit together.
Follow the order suggested by the manual. Skipping steps can lead to mistakes. Keep the instructions nearby for reference during assembly.
Assemble The Cabinet Frame
Assembling the cabinet frame is the first big step in building your vanity cabinet. It creates the base structure that holds everything together. Follow each step carefully to ensure a strong and stable cabinet.
Attach Side Panels
Start by placing the side panels upright. Line up the pre-drilled holes on each panel. Use screws or cam locks to connect the side panels to the bottom panel. Make sure the edges are flush and straight. Tighten the screws firmly but avoid overtightening. This keeps the panels from splitting or warping.
Secure Bottom And Back Panels
Next, fit the bottom panel between the side panels. Check that it fits snugly. Attach it with screws through the side panels. Then, slide the back panel into the grooves on the sides and bottom. Use nails or screws to fix the back panel in place. This adds extra strength and prevents wobbling. Double-check all corners to keep the frame square and stable.
Credit: heebys.com
Install Shelves And Drawers
Installing shelves and drawers is a key step in assembling a vanity cabinet. Shelves help organize items, while drawers provide extra storage. Both parts must fit perfectly to work well and look good.
Position Shelves
Start by checking the shelf supports inside the cabinet. Place the shelves on the supports carefully. Make sure the shelves are level and stable. Adjust the supports if the shelves wobble or tilt. Double-check the height to match your storage needs.
Assemble And Insert Drawers
Follow the instructions to build each drawer. Attach the sides, back, and bottom securely. Slide the drawer front into place and fasten it tightly. Test each drawer on its rails before final assembly. Insert drawers into the cabinet, ensuring smooth movement. Adjust the rails if drawers stick or slide unevenly.
Attach Cabinet Doors
Attaching cabinet doors is a key step in assembling your vanity cabinet. This step gives your cabinet a finished look and allows easy access to storage. Properly attaching doors ensures they open and close smoothly. It also helps avoid damage over time.
Focus on aligning the hinges first. Then, adjust the door fit for a perfect finish. Follow each step carefully for the best results.
Align Hinges
Start by positioning the hinges on the cabinet frame. Use the screws provided to fix them in place. Make sure the hinges are straight and level. Check the distance between the hinge and the edge of the door. This spacing should be equal on both sides. Proper alignment prevents the door from hanging crooked. Tighten the screws firmly but avoid over-tightening. Over-tightening can strip the screw holes.
Adjust Door Fit
After attaching the doors, check how they fit. Open and close each door slowly. Look for any gaps or uneven spaces around the edges. Use the hinge adjustment screws to move the door. Adjust horizontally and vertically until the door fits well. The door should close flush with the cabinet frame. Make small movements and test repeatedly. This ensures smooth operation and a neat appearance.
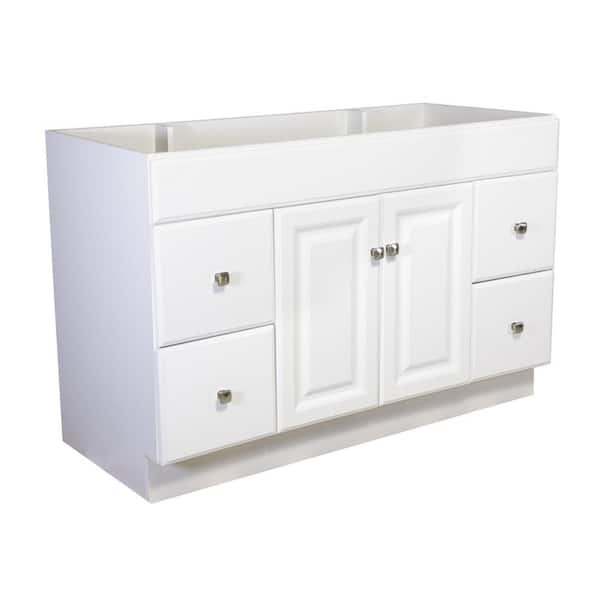
Credit: www.homedepot.com
Mount Vanity Top
Mounting the vanity top is a key step in assembling your vanity cabinet. It ensures the countertop sits firmly and looks great. Proper mounting prevents leaks and keeps the vanity durable.
Follow the steps carefully to secure the vanity top and create a strong, lasting bond.
Apply Sealant
Start by applying a bead of sealant around the top edge of the vanity cabinet. Use a waterproof silicone sealant for best results. This creates a tight seal between the cabinet and countertop.
Apply the sealant evenly to avoid gaps. Too little sealant can cause leaks. Too much can create a mess.
Secure Countertop
Place the vanity top gently on the cabinet. Align it carefully to fit perfectly. Press down firmly to spread the sealant evenly.
Use clamps or weights to hold the countertop in place. Let the sealant cure for the time recommended on the package. This step ensures a strong bond and prevents movement.
Final Adjustments And Checks
Final adjustments and checks are important steps after assembling your vanity cabinet. They ensure the cabinet looks good and works properly. Taking time to level and tighten your cabinet makes it last longer. It also keeps everything safe and stable. These small tasks help avoid problems later.
Level The Cabinet
Start by checking if the cabinet is level. Use a spirit level tool for accuracy. Place the level on top and sides of the cabinet. Adjust the feet or shims under the cabinet to fix any tilt. A level cabinet prevents doors from swinging open or closing by themselves. It also helps drawers slide smoothly. Take your time to get it just right.
Tighten All Screws
Next, tighten all screws securely. Loose screws can cause the cabinet to wobble. Use a screwdriver or drill with the right bit size. Check screws on the frame, doors, and drawers. Tighten until firm but avoid over-tightening. Over-tightening can damage the wood or strip the screw holes. Double-check each screw for a solid fit. This keeps your vanity cabinet sturdy and safe to use.
Frequently Asked Questions
What Tools Do I Need To Assemble A Vanity Cabinet?
You need a screwdriver, drill, hammer, level, tape measure, and clamps. These tools help ensure precise and secure assembly of your vanity cabinet.
How Long Does It Take To Assemble A Vanity Cabinet?
Assembly typically takes 1 to 3 hours. The duration depends on cabinet complexity and your experience with DIY projects.
Can I Assemble A Vanity Cabinet Alone?
Yes, many cabinets can be assembled solo. However, having a helper makes lifting and aligning parts easier and safer.
What Is The First Step In Vanity Cabinet Assembly?
Begin by unpacking and organizing all parts. Check the instruction manual thoroughly before starting the assembly process.
Conclusion
Assembling a vanity cabinet can be simple and clear. Follow the steps carefully, one by one. Take your time to fit each piece right. Use the right tools for a strong build. Check your work often to avoid mistakes. A well-assembled vanity cabinet looks neat and lasts long.
Enjoy the new look it brings to your space. With patience and care, you can do it yourself. No need to rush. This project adds value and style to your room.