
Are you ready to create a stunning queen size bunk bed that fits perfectly in your space? Building your own bunk bed might sound tricky, but with the right steps, you can make it sturdy, stylish, and exactly how you want it.
Imagine having extra room for guests or family without sacrificing comfort. In this guide, you’ll discover simple instructions and helpful tips that make the process easy and even fun. Keep reading, and by the end, you’ll have the confidence to build a beautiful queen size bunk bed that everyone will admire.
Materials And Tools Needed
Building a queen size bunk bed requires the right materials and tools. Having these ready makes the project easier and safer. It also helps you avoid delays and mistakes. This section explains what wood, hardware, and tools you need.
Wood Types And Dimensions
Choose strong wood for durability and safety. Pine, oak, and maple are good options. Pine is affordable and easy to work with. Oak and maple are harder and last longer. Use 2×6 or 2×8 boards for the bed frame. For slats, 1×4 or 1×6 boards work well. Make sure all wood pieces are smooth and free of cracks.
Hardware And Fasteners
Select sturdy screws and bolts to hold the bed together. Use 3-inch wood screws for the main frame. Lag bolts provide extra strength for joints. Include washers and nuts for secure fittings. Use corner brackets for added support. Sandpaper and wood glue help with assembly and finish.
Essential Tools
Gather basic woodworking tools before starting. A saw is needed to cut wood to size. A drill makes holes and drives screws. A screwdriver helps tighten screws. Use a tape measure for accurate measurements. A level ensures the bed is even. Sandpaper smooths rough edges. Clamps hold pieces in place during assembly.
Planning Your Bunk Bed
Planning your queen size bunk bed is the first step to a successful build. This stage helps you avoid mistakes and saves time. Careful planning ensures the bed fits well and is safe to use.
Start by thinking about the design, size, and safety. These points guide your project from the beginning. A well-planned bunk bed meets your needs and lasts for years.
Choosing The Right Design
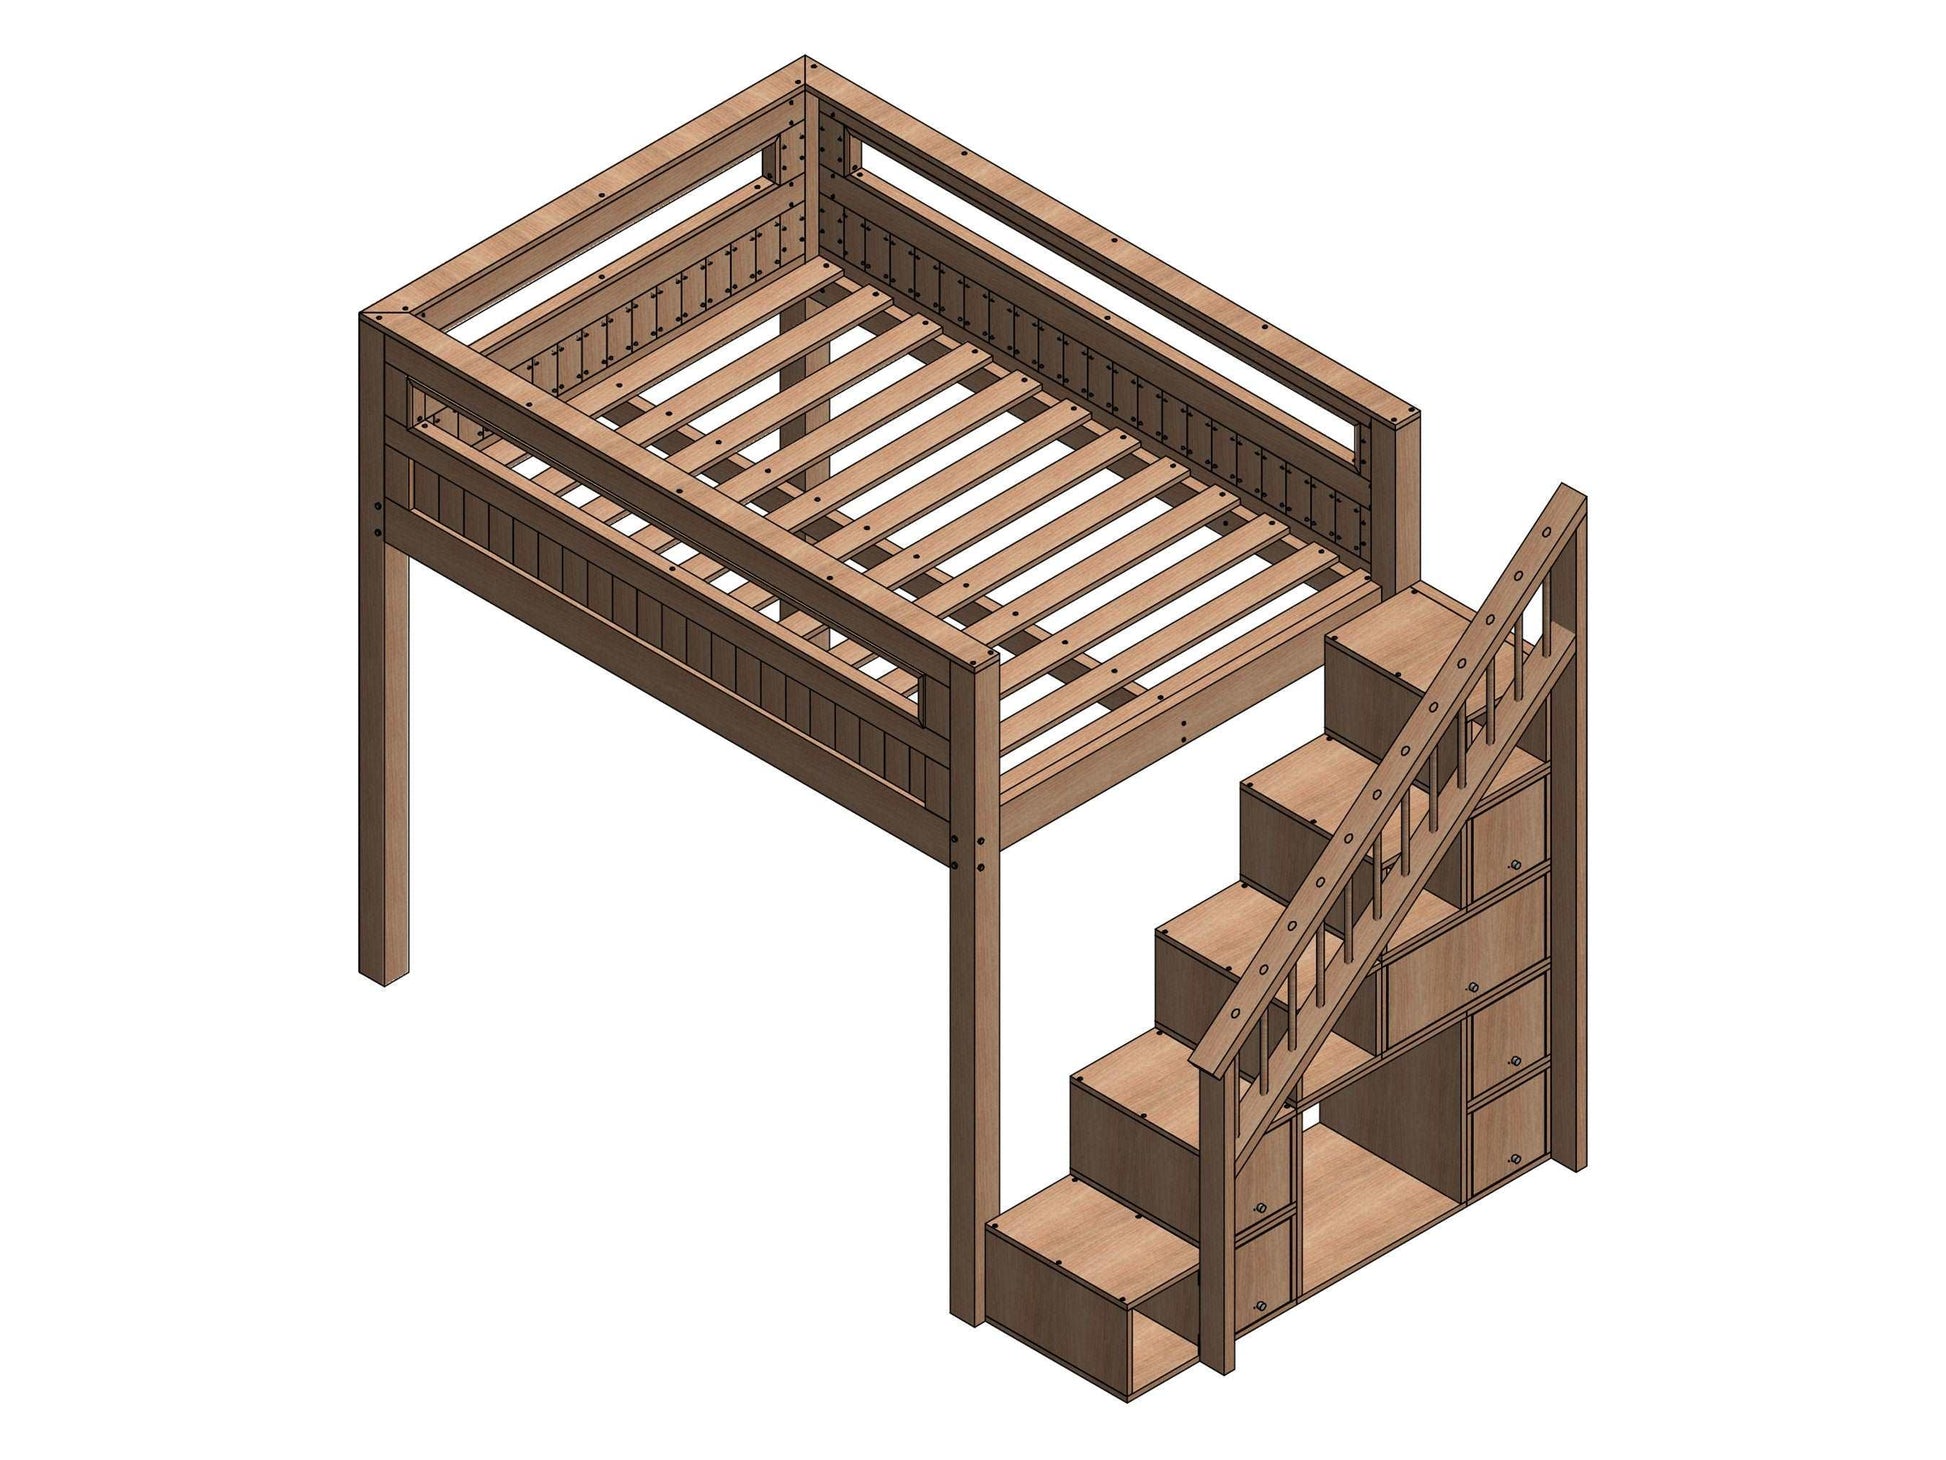
Select a design that fits your style and space. Some designs have stairs, others use ladders. Think about the room’s look and who will use the bed. Simple designs are easier to build and maintain. Choose strong materials for better durability and comfort.
Measuring Your Space
Measure the room carefully before building. Check the length, width, and height available. Leave space for walking and other furniture. Make sure the bunk bed does not block windows or doors. Accurate measurements help create a bed that fits perfectly.
Safety Considerations
Safety is very important for bunk beds. Use sturdy materials and strong joints. Add guardrails on the top bunk to prevent falls. Ensure the ladder is secure and easy to climb. Avoid sharp edges and small gaps to protect children. Follow safety rules to keep the bed safe and secure.
Cutting And Preparing Wood
Cutting and preparing wood is a key step in building a queen size bunk bed. It ensures all pieces fit well and stay strong. Proper preparation helps avoid mistakes and saves time later. Take care in this phase to create a solid and safe bed structure.
Marking Measurements
Start by measuring each wood piece carefully. Use a tape measure for accuracy. Mark the cutting lines clearly with a pencil. Double-check all measurements before cutting. Precise marks help keep the pieces even and balanced.
Cutting Techniques
Use a saw suitable for your wood type. Cut along the marked lines slowly and steadily. Keep the saw straight to avoid uneven edges. Use clamps to hold wood steady if needed. Clean cuts make assembly easier and safer.
Sanding And Smoothing
After cutting, sand all edges and surfaces. Use medium-grit sandpaper first, then fine grit. Smooth wood prevents splinters and improves the bed’s look. Check each piece for rough spots and sand again if needed. Proper sanding adds to the bed’s durability.

Credit: www.thedesignconfidential.com
Assembling The Frame
Assembling the frame is the first major step in building a queen size bunk bed. This part creates the bed’s main structure. It must be strong and square. A solid frame keeps the bed safe and steady. Follow clear steps to build each part carefully. Use the right tools and check your work often.
Building The Bed Rails
Start with the bed rails. These long wooden boards hold the mattress. Cut the rails to the right length for a queen size bed. Sand the edges smooth to avoid splinters. Attach metal brackets or drill pilot holes. This prevents wood from cracking. Make sure the rails are straight and even. Proper rails support the mattress and prevent sagging.
Constructing The Headboard And Footboard
Next, build the headboard and footboard. These pieces form the bed’s ends. Use thick wood to make them strong. Cut the boards to match the bed’s width. Join vertical and horizontal pieces with screws. Check that the corners form perfect right angles. Sand all surfaces smooth. These parts add style and stability to the bunk bed.
Joining The Frame Components
Now join the rails, headboard, and footboard. Use bolts and screws for a secure fit. Tighten all fasteners but do not over-tighten. Double-check that the frame is square. Use a carpenter’s square for accuracy. Attach support slats across the rails for mattress support. The frame should feel solid with no wobbles. This ensures safety and durability for the bunk bed.
Building The Ladder And Guardrails
Building the ladder and guardrails is a key part of your queen size bunk bed project. These parts make the bed safe and easy to use. The ladder lets you climb up and down. Guardrails keep you from falling while you sleep. Follow these steps to build strong and safe ladder and guardrails.
Designing A Safe Ladder
Start by choosing sturdy wood for the ladder. Measure the height from the floor to the top bunk. Make sure the ladder is wide enough for easy climbing. Space the steps evenly, about 10 to 12 inches apart. Use flat steps to give your feet good support. Sand the edges to prevent splinters. A well-designed ladder feels safe and steady.
Installing Guardrails
Guardrails must cover at least half the length of the bed. Use thick wood pieces that are strong and smooth. Attach the guardrails to the top bunk frame securely. Leave no gaps where a child could slip through. The rails should be high enough to stop rolling off. Check the height meets safety guidelines for bunk beds.
Securing All Attachments
Use strong screws or bolts to attach ladder and guardrails. Avoid nails because they can loosen over time. Double-check every connection to ensure tightness. Test the ladder and rails by gently shaking them. Tighten any loose parts immediately. A secure bed keeps everyone safe and comfortable.
Credit: shop.doityourselfplanner.com
Finishing Touches
Finishing touches make your queen size bunk bed look great and last long. These steps protect the wood and ensure the bed is safe and sturdy. Take time with each step to get the best results.
Applying Paint Or Stain
Choose paint or stain based on your room’s style. Paint covers wood fully and adds color. Stain shows the wood grain and gives a natural look. Use a brush or roller for smooth coverage. Let the first coat dry completely before adding a second. Apply thin layers to avoid drips and uneven spots. Seal the surface with a clear finish to protect the paint or stain.
Adding Mattress Support
Strong mattress support keeps the bed safe and comfortable. Use sturdy slats or a solid board under the mattress. Space the slats evenly for good weight distribution. Screw the supports securely to the frame. Check that the mattress fits well and does not slide. Proper support helps the mattress last longer and prevents sagging.
Final Safety Checks
Safety is the most important part. Tighten all screws and bolts firmly. Check for any sharp edges or splinters and sand them smooth. Make sure the ladder is stable and easy to climb. Test the bed by pressing on all sides to confirm strength. Add guardrails on the top bunk to prevent falls. These checks keep everyone safe and happy.
Tips For Maintenance And Longevity
Maintaining your queen size bunk bed ensures safety and extends its life. Regular care keeps the bed sturdy and looking good. These tips help you protect your investment and enjoy comfort for years.
Regular Inspections
Check the bed frame often for cracks or damage. Look at the joints and slats carefully. Early spotting of problems can prevent accidents and costly repairs. Make inspections part of your routine every few months.
Tightening Loose Parts
Loose screws and bolts cause wobbling and weaken the bed. Use a screwdriver or wrench to tighten all fittings. Check under the bed and on the ladder. Tightening keeps the bed stable and safe for use.
Cleaning And Care
Dust the bed regularly to stop dirt buildup. Use a soft cloth and mild cleaner for wooden or metal surfaces. Avoid harsh chemicals that damage finishes. Clean beds stay fresh and last longer with less wear.

Credit: thediyplan.com
Frequently Asked Questions
What Materials Do I Need To Build A Queen Size Bunk Bed?
You will need quality wood like pine or oak, screws, bolts, wood glue, sandpaper, and paint or stain for finishing. Proper tools include a saw, drill, measuring tape, and screwdriver. Choosing sturdy materials ensures the bed is safe and durable.
How Much Time Does Building A Queen Size Bunk Bed Take?
Building a queen size bunk bed typically takes 1 to 3 days. Time depends on your experience, tools, and complexity of the design. Allow extra time for drying paint or stain to ensure a polished, long-lasting finish.
What Safety Features Are Essential For Bunk Beds?
Include guardrails on the top bunk and secure ladders for safe climbing. Ensure all joints are tight and the bed frame is stable. Use non-toxic finishes and avoid sharp edges to prevent injuries.
Can I Customize The Design Of A Queen Size Bunk Bed?
Yes, you can customize the height, ladder style, and storage options. Adding drawers or shelves maximizes space. Customize colors and finishes to match your room decor and personal taste.
Conclusion
Building a queen size bunk bed takes patience and care. Follow each step clearly and use the right tools. Double-check all measurements for safety and comfort. A sturdy bed can save space and add style. Enjoy the process and create a cozy spot.
Your effort will bring pride and joy. Now, you have a strong, beautiful bunk bed. Time to relax and enjoy your new furniture!