Are you looking to give your bathroom a fresh new look without spending a fortune? Turning a cabinet into a vanity is a smart, budget-friendly way to create a stylish and functional space.
Imagine having a custom vanity that fits perfectly in your room and matches your style—without the high cost of buying one new. In this guide, you’ll discover simple steps to transform an ordinary cabinet into a beautiful vanity that you’ll love using every day.
Ready to unlock the secret to a stunning bathroom upgrade? Let’s dive in.

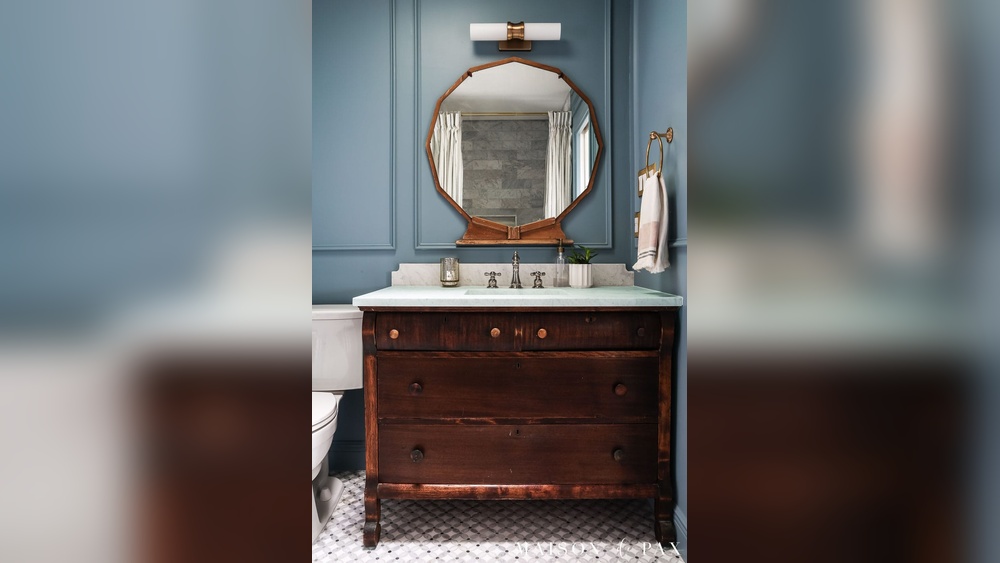
Credit: francoisetmoi.com
Choosing The Right Cabinet
Choosing the right cabinet is the first step in turning it into a beautiful vanity. The cabinet will hold the sink and storage, so it must fit the space and style of your bathroom. Picking the right size and material ensures the vanity lasts a long time and looks good.
Size And Style Considerations
Measure the space where the vanity will go. Make sure the cabinet fits well without blocking doors or drawers. Choose a style that matches your bathroom’s look. Simple, modern cabinets work well for clean designs. Traditional cabinets add warmth and charm. Think about the cabinet height too. It should be comfortable to use while standing at the sink.
Material And Durability
Select a cabinet made from materials that resist water and humidity. Solid wood is strong but may need extra care to avoid damage. Plywood is a good choice and holds up well in moist areas. Avoid particleboard, as it can swell when wet. Check the cabinet finish. A smooth, sealed surface helps protect against water stains and warping. Durable materials help your vanity last for years.
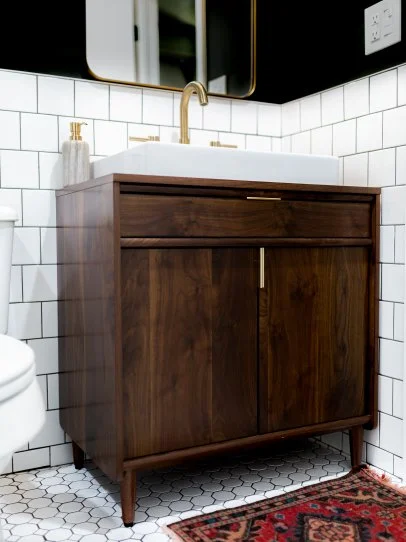
Credit: www.hgtv.com
Gathering Tools And Materials
Before starting to turn a cabinet into a vanity, gather all needed tools and materials. This step helps the project go smoothly and saves time. Having everything ready avoids interruptions. It also ensures a better final result.
Essential Tools For The Project
Basic tools include a drill, screwdriver, and measuring tape. A saw will help cut parts to size. Sandpaper smooths rough edges for a clean look. Wrenches and pliers assist with plumbing connections. A level keeps the vanity even and balanced. Safety gear like gloves and goggles protects you during work.
Selecting Vanity-specific Accessories
Choose a sink that fits the cabinet size. Pick a faucet that matches your style and plumbing. A drain kit is necessary for water flow. Consider handles or knobs for cabinet doors. Look for water-resistant sealants to prevent damage. These items make the cabinet functional as a vanity.
Preparing The Cabinet
Preparing the cabinet is the first step to create a beautiful vanity. This stage sets a strong base for all other changes. Taking time to clean and adjust the cabinet will make the project easier and more successful.
Cleaning And Sanding
Start by cleaning the cabinet thoroughly. Remove dirt, grease, and dust using a mild cleaner and a soft cloth. Clean surfaces help paint or stain stick better.
Next, sand the cabinet to smooth rough spots. Use medium-grit sandpaper to remove old finishes. Then, use fine-grit sandpaper for a smooth surface. Sanding improves paint or stain adhesion and gives a polished look.
Removing Or Modifying Doors And Drawers
Decide which doors or drawers to keep or remove. Some vanities work better with open space or fewer doors. Removing parts can create room for sinks or storage.
If you keep doors or drawers, adjust them to fit your vanity design. You might cut holes for plumbing or change handles. Proper modification ensures function and style.
Installing The Sink
Installing the sink is an important step in turning a cabinet into a vanity. This process shapes the look and function of your new vanity. Careful planning helps avoid mistakes and extra work. Follow clear steps to make the sink fit perfectly and work well.
Choosing The Right Sink Type
Pick a sink that fits your space and style. Vessel sinks sit on top of the counter for a modern look. Undermount sinks install below the counter for easy cleaning. Drop-in sinks fit into a hole cut in the counter. Consider the size and shape to match your cabinet.
Cutting The Countertop For The Sink
Measure the sink’s opening carefully before cutting. Mark the cut line on the countertop with a pencil. Use a jigsaw to cut along the mark slowly and steadily. Wear safety goggles and work in a clean area. Smooth edges with sandpaper to prevent damage or injury.
Plumbing Setup Basics
Connect water supply lines to the faucet carefully. Use plumber’s tape on threaded connections to stop leaks. Attach the drain pipe to the sink’s bottom drain hole. Check all connections for tightness but avoid overtightening. Test water flow and drain function before finishing installation.
Adding A Countertop
Adding a countertop is a key step in turning a cabinet into a vanity. It creates a flat surface for your sink and daily items. Choosing the right countertop and fitting it properly is important. This section guides you through material choices, measuring, cutting, and securing the countertop.
Material Options
Countertops come in many materials. Popular choices include wood, laminate, stone, and solid surface. Wood offers warmth and can be sealed to resist water. Laminate is affordable and comes in many styles. Stone like granite or marble looks elegant but can be costly. Solid surface materials are durable and easy to clean. Choose a material that fits your style, budget, and bathroom use.
Measuring And Cutting Tips
Measure the cabinet top carefully before buying your countertop material. Measure width and depth twice to avoid mistakes. Mark the measurements on your countertop with a pencil. Use a straight edge to guide your cut. Use a saw suitable for the material you have. For wood, a circular saw works well. For stone or solid surface, consider professional cutting. Always wear safety gear and cut slowly for accuracy.
Securing The Countertop
Place the countertop on the cabinet to check the fit. Adjust edges if needed for a perfect fit. Use construction adhesive to attach the countertop firmly. Apply the adhesive evenly on the cabinet top. Press the countertop down and wipe any excess glue. Use clamps to hold the countertop in place while drying. For extra support, add screws from inside the cabinet. Seal edges with silicone to prevent water damage.
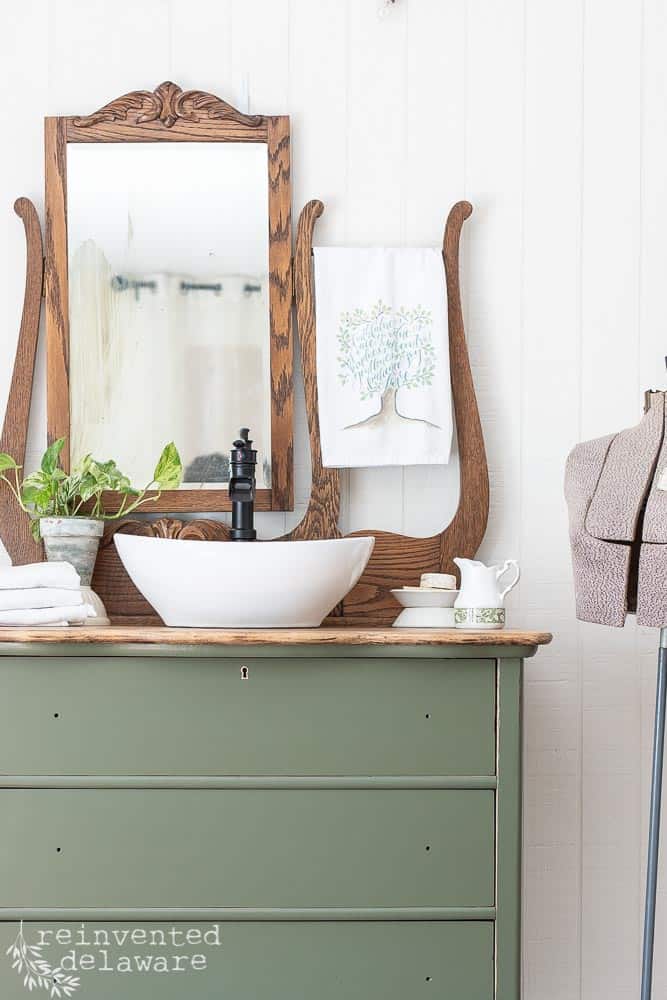
Credit: www.reinventeddelaware.com
Painting And Finishing Touches
Painting and finishing touches make your cabinet-turned-vanity look polished and new. They protect the wood and add style. These final steps help your project last longer and shine in your bathroom.
Selecting Paint Or Stain
Choose paint or stain that fits your bathroom style. Paint gives solid color and hides imperfections. Stain shows the wood grain and feels natural. Pick water-resistant paint or stain to handle moisture. Light colors can make small bathrooms feel bigger. Dark colors add drama and depth.
Applying Protective Coating
Seal your paint or stain with a clear protective coat. Use polyurethane or a similar waterproof finish. This layer guards against scratches and water damage. Apply thin, even coats for best results. Let each coat dry fully before adding the next. This step keeps your vanity looking fresh for years.
Adding Hardware And Fixtures
Pick hardware that matches your bathroom’s look. Handles, knobs, and faucets make a big difference. Choose rust-proof materials for durability. Install hardware carefully to avoid damaging your finish. Small details like these bring your vanity to life and add function.
Maximizing Storage And Functionality
Maximizing storage and functionality transforms a simple cabinet into a practical vanity. It helps keep your space tidy and easy to use. Thoughtful organization and smart additions make a big difference.
Organizing Drawers And Shelves
Use drawer dividers to separate small items like makeup and brushes. Clear containers work well to keep things visible and neat. Shelves can hold towels and larger items. Adjust shelf height to fit different sizes. Label containers to find things quickly.
Incorporating Lighting
Good lighting improves the vanity’s usability. Install LED strips inside the cabinet for soft, even light. Add a small lamp or lighted mirror on top for better face illumination. Choose warm light to create a cozy feel. Battery-powered lights offer easy installation without wires.
Adding Mirrors And Accessories
A mirror is essential for any vanity. Attach a large mirror to the cabinet door or wall. Consider a swivel mirror for close-up views. Hooks and small trays keep jewelry and hair tools organized. Use a small plant or decorative item to add charm without clutter.
Common Mistakes To Avoid
Turning a cabinet into a vanity can be a fun project. Avoiding common mistakes saves time and money. Many beginners face issues that could be prevented with careful planning. Read these tips to make your vanity look great and work well.
Improper Measurements
Measuring incorrectly is the biggest mistake. Cabinets and sinks must fit perfectly. Measure the space twice before cutting or drilling. Small errors cause big problems later. Check the height, width, and depth carefully.
Ignoring Plumbing Requirements
Plumbing needs careful attention. Make sure pipes fit through the cabinet space. Avoid blocking water flow or access to valves. Plan for drain and water supply connections. Poor plumbing setup leads to leaks and damage.
Using Incompatible Materials
Some materials do not work well in bathrooms. Avoid wood that swells or warps with moisture. Choose water-resistant or sealed surfaces. Use hardware that resists rust and corrosion. Right materials keep your vanity durable and beautiful.
Frequently Asked Questions
How Do I Convert A Cabinet Into A Bathroom Vanity?
To convert a cabinet into a vanity, remove doors and add a sink cutout. Install plumbing fixtures and secure the countertop. Paint or refinish the cabinet for a fresh look. Ensure proper waterproofing to protect from moisture damage.
What Tools Are Needed To Turn A Cabinet Into A Vanity?
Basic tools include a jigsaw for sink cutouts, drill, screwdriver, measuring tape, and sanding tools. You may also need plumbing wrenches and sealant for fixture installation. Having a level helps ensure proper alignment during assembly.
Can Any Cabinet Be Used As A Vanity?
Most sturdy cabinets can be converted, but depth and height matter. Choose a cabinet with enough space for plumbing and comfortable use. Avoid cabinets made of particleboard as they may not withstand bathroom moisture well.
How Much Does It Cost To Make A Cabinet Vanity?
Costs vary by materials and tools, generally between $100 and $300. Using a pre-owned cabinet reduces expenses. Additional costs include plumbing parts, paint, and a sink. DIY saves money compared to buying a ready-made vanity.
Conclusion
Transforming a cabinet into a vanity can save money and add style. Choose the right cabinet and tools before starting. Measure carefully to ensure a perfect fit. Take your time with each step for best results. Personal touches make your vanity unique and practical.
Enjoy the satisfaction of your new bathroom piece. This project fits many skill levels and budgets. Try it yourself and refresh your space today.
