Are you tired of your coats piling up on chairs or cluttering the floor? Attaching a coat rack to your wall is a simple way to keep your space neat and organized.
But if you’re not sure how to do it right, it can feel tricky and frustrating. Don’t worry—this guide will walk you through each step clearly and easily. By the end, you’ll have a sturdy coat rack ready to hold your jackets, bags, and hats without damaging your walls.
Let’s get started and transform your entryway or room into a tidy, welcoming space!

Credit: www.spryinterior.com
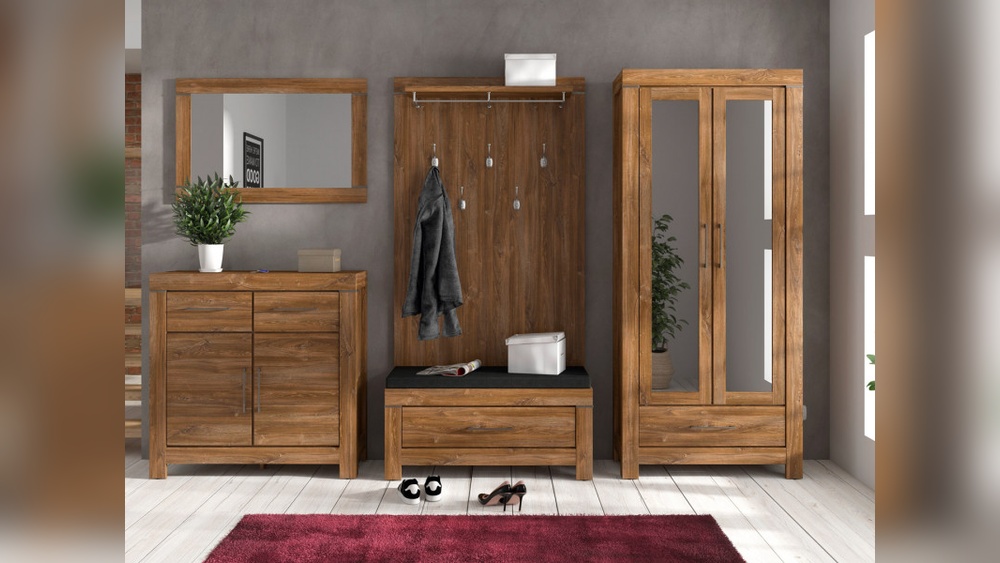
Choose The Right Coat Rack
Choosing the right coat rack is important for a neat and functional space. The right rack holds your coats well and fits your room style. It makes your wall look tidy and saves space. Think about your needs before buying. This helps you pick a rack that lasts and looks good.
Types Of Coat Racks
Wall-mounted racks save floor space and suit small rooms. They come with hooks or bars. Standing racks are free on the floor. They hold many coats but need more space. Over-the-door racks hang on doors. They are easy to move and install. Choose a type that fits your space and use.
Material Considerations
Wood racks add warmth and classic style. They are strong and last long. Metal racks are modern and sturdy. They hold heavy coats without bending. Plastic racks are light and cheap. Good for light coats and kids’ rooms. Pick materials that match your room and weight needs.
Size And Weight Capacity
Measure your wall space before buying a rack. Choose a size that fits well without crowding. Check the rack’s weight limit. Heavy coats need racks that hold more weight. Small racks can only hold light items. Right size and strength keep your coats safe and your wall neat.
Pick The Perfect Spot
Picking the perfect spot for your coat rack is key. The right place makes it easy to hang coats and keeps your space tidy. Think about the wall, height, and any obstacles around.
Consider Wall Material
Check the wall type before attaching the coat rack. Drywall may need anchors for support. Wood walls hold screws well. Concrete or brick walls require special drill bits and plugs. Knowing the wall material helps you choose the right tools.
Height And Accessibility
Place the coat rack at a good height. It should be easy for everyone to reach. Around 5 to 6 feet off the ground works well. Keep it low enough for kids if needed. Avoid putting it too high or too low.
Avoiding Obstacles
Look for any obstacles near the wall. Avoid doors, windows, or light switches. Make sure the rack does not block walkways. Leave enough space for coats to hang freely. This keeps the area safe and neat.
Gather Essential Tools
Gathering the right tools is the first step to attach a coat rack to the wall. Preparing everything before starting makes the job easier and faster. Missing tools can cause delays or mistakes. This guide lists all tools you need to have on hand.
Required Hardware
Start with the hardware that holds the coat rack in place. Screws are essential for mounting the rack securely. Use wall anchors if you attach the rack to drywall. Anchors keep the screws tight and prevent damage. Make sure the screws and anchors match the rack’s holes and weight.
Power Tools And Safety Gear
A power drill is the best tool to make holes in the wall. It saves time and effort. Use drill bits that fit the screws and anchors. A screwdriver may work but is slower. Wear safety glasses to protect your eyes from dust. Gloves can protect your hands during drilling. Have a level to ensure the rack is straight. These tools keep you safe and help the job go smoothly.
Mark And Measure Accurately
Marking and measuring accurately is key to a strong, straight coat rack installation. It ensures the rack fits well and holds weight safely. Small mistakes here lead to crooked racks or loose hooks. Take your time to get these steps right.
Use A Level
A level helps keep your coat rack straight on the wall. Hold the level on the rack’s top edge. Adjust the rack until the bubble is centered. This step prevents slanting that spoils the look and function. Check the level twice to be sure.
Measure Spacing For Hooks
Measure evenly between hooks for a balanced appearance. Use a tape measure to mark where each hook will go. Keep spacing consistent for neatness and strength. Mark points with a pencil for easy drilling. Accurate spacing avoids crowded or uneven hooks.
Prepare The Wall Surface
Preparing the wall surface is an important step before attaching a coat rack. It helps ensure the rack stays secure and holds weight safely. Take time to check the wall and make it ready for mounting.
Locate Studs Or Use Anchors
Find the studs inside the wall for the strongest support. Use a stud finder tool to locate them easily. If no studs are available, choose wall anchors that fit your wall type. Anchors help hold the screws tightly in drywall or plaster.
Drill Pilot Holes
Mark where the screws will go based on stud or anchor locations. Use a drill bit slightly smaller than the screws. Drill pilot holes carefully to avoid cracking the wall. Pilot holes guide screws and make installation smoother.

Credit: www.amazon.com
Attach The Coat Rack Securely
Attaching a coat rack securely to the wall is important for safety and durability. A loosely fixed rack can fall and cause damage. It is essential to use the right tools and techniques. This ensures the rack holds heavy coats without slipping.
Follow simple steps to fix the rack firmly. Check the wall type before starting. Drywall, plaster, or wood walls need different anchors or screws. Proper installation keeps the rack stable and reliable.
Screw Installation Tips
Use screws that match the wall material. For drywall, use wall anchors to hold screws tight. Pre-drill holes to avoid cracking the wall. Tighten screws just enough to hold the rack firmly. Do not overtighten, which can strip the holes. Use a level to keep the rack straight during installation. Measure twice, drill once.
Checking Stability
After installation, test the rack’s strength by applying light pressure. Hang a few coats and check if it holds well. Shake the rack gently to see if it moves. If it feels loose, tighten the screws again. Make sure the rack does not wobble or tilt. A steady rack means a secure install.
Test And Adjust
After attaching your coat rack to the wall, testing and adjusting is essential. This step ensures the rack holds items securely and stays in place. Small tweaks can prevent future damage to the wall and keep your rack functional.
Weight Test
Start by gently hanging a few coats or bags on the rack. Check if it feels stable and does not move. Press lightly on different parts of the rack to see if it wobbles. If the rack stays firm, it means the installation is strong enough. If it shifts or feels loose, more support is needed.
Make Necessary Adjustments
Use a screwdriver to tighten any screws that seem loose. Add wall anchors if the rack pulls away from the wall. Adjust the position slightly if the rack is uneven. Double-check the level to keep the rack straight. These small changes improve safety and appearance.

Credit: yourpghlawyer.com
Maintenance Tips
Maintaining your coat rack after installation keeps it safe and looking good. Regular care prevents damage and extends its life. Simple steps can save you time and money later.
Regular Tightening
Check the screws and bolts often. Over time, they can loosen from use. Tighten them with a screwdriver or wrench. This keeps the rack stable and prevents accidents. A loose rack can fall and cause damage.
Cleaning And Care
Dust the coat rack regularly to keep it clean. Use a soft cloth or duster to avoid scratches. For wooden racks, use mild soap and water. Dry the surface well to stop water damage. Metal racks may need a light polish to stop rust. Avoid harsh chemicals that can harm the finish.
Frequently Asked Questions
How Do You Securely Attach A Coat Rack To Drywall?
Use wall anchors or toggle bolts for drywall installation. Locate studs with a stud finder for extra support. Always use a level to ensure the rack is straight. Secure screws firmly without overtightening to avoid damage.
What Tools Are Needed To Mount A Coat Rack?
You need a drill, screwdriver, level, tape measure, pencil, and anchors. A stud finder helps locate wall studs for better support. These tools make the installation process easier and more precise.
Can I Attach A Coat Rack To Plaster Walls?
Yes, but use anchors designed for plaster. Avoid heavy loads without studs. Drill carefully to prevent cracking. Anchors provide the necessary support to hold the rack securely.
How High Should I Mount A Coat Rack?
Mount the coat rack about 5 to 6 feet from the floor. This height suits most users and provides easy access. Adjust height for children or specific needs if necessary.
Conclusion
Attaching a coat rack to the wall is simple with the right steps. Use a stud finder to find strong spots for screws. Measure and mark carefully to keep the rack level. Choose proper screws and anchors to hold the weight well.
Take your time and double-check each step. This will help your coat rack stay secure and last longer. Enjoy a neat, organized space where coats hang safely. Now, you can easily add a coat rack to any room.